An introduction to shallow depth of field.
Explore how shallow depth of field can add dimension to your photographs.
Stunning photography is all about narrative — the story your image is telling. And whether it’s your subject matter, your artistic approach, or a technical choice, there are countless ways to help a photograph tell a story. Shallow depth of field (sometimes known as shallow DOF) is one such technique.
What is shallow depth of field?
Shooting with a shallow depth of field is “having a plane that’s in focus, and everything else is out of focus,” explains experienced photographer Jeff Carlson. It’s a technical choice, influenced by the aperture on your lens. “If you have a wide aperture, the lens is letting in more light,” says Carlson. “The more light that gets in, the more you get that shallow depth of field effect.”

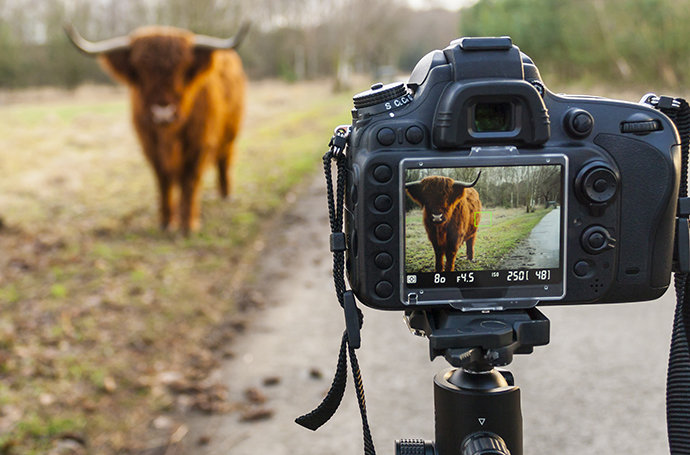
Shallow depth of field is achieved by shooting photographs with a low f-number, or f-stop — from 1.4 to about 5.6 — to let in more light. This puts your plane of focus between a few inches and a few feet. Depending on your subject and area of focus point, you can blur the foreground or background of your image. With a smaller f-stop number — a wider aperture — more light enters your camera. This means your shutter speed should be fast enough to avoid overexposure or blowing out the whites in your photograph. Understanding the relationship between all your settings on a DSLR camera — aperture, shutter speed, focal length, and ISO — is crucial to successful shallow depth of field. For example, the longer your focal length, the shallower your depth of field.
Another method of getting a shallow depth of field is to increase the distance between the camera, your subject, and your background. Even if you don’t own a lens that is capable of very wide apertures such as f/1.4, you can get a nice effect by moving away from the subject and zooming in on them, or making sure they’re separated from the background. A person standing 20 feet from a group of trees will create a softer background than if the person is leaning against one of the trees, or a solid wall.
Successful shallow depth of field.
“As a new photographer, if you want to highlight a subject, shallow depth of field is one of the easiest ways to do it,” says photographer Derek Boyd. It’s a wonderful tool that helps direct your viewer to what’s important in the image. By highlighting one point, and softly blurring the rest of the composition, you can add significance to your photograph. You can also use it to “defocus something to pique someone’s interest, and make them wonder more about it,” says photographer Stephen Klise — making the subject softly blurred can add depth and intrigue to an image.
Photographer Hannah Concannon makes a similar point: “Using a shallow depth of field, you can really highlight an interesting part of your image,” she says. “I did a photo shoot a few months ago where I had a bunch of flowers, and then I found these little black plastic houseflies. I would just put one in there and see if I could focus, and make the shallow depth of field only center on the housefly.” Shallow depth of field can draw a viewer’s focus and highlight something unexpected.
Artist Cheryl Medow uses shallow depth of field to great effect when photographing birds in their natural habitats. By shooting with a shallow depth of field, the birds are in focus while their backgrounds are completely blurred. This allows her to easily cut out the subject’s surroundings and create stunning composite pieces, adding an element of surrealism to her work.
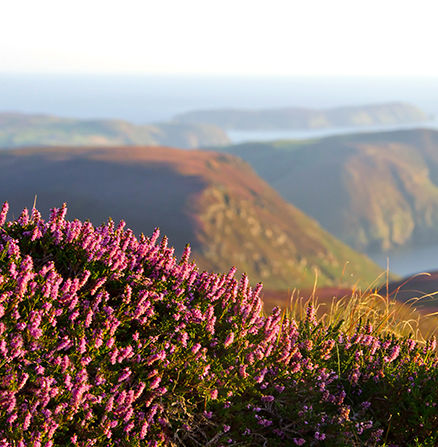

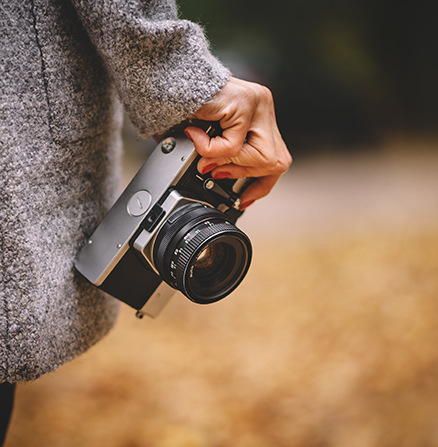
But composite pieces aren’t the only use for blurred backgrounds. Carlson shares this anecdote: “You’re out shooting and something catches your eye: a flower, a person, or a landmark. The way our eyes work, we focus on that and think it would be a good shot. So you take a picture and you’re happy, and then you move on. Later, you look at your shot and realize you didn’t do a good job of surveying the scene. And so you may have that flower, but then there could be an overflowing trash bin in the background that you didn’t notice because you were focused on that thing that caught your eye.”
That’s where shallow depth of field can be helpful. It lets you focus on what matters, blurring out the unnecessary imperfections to elevate your composition.
Depth of field in portraiture.
“People talk a lot about using shallow depth of field when you’re doing portraiture,” Klise says. Portraiture is often about highlighting features on someone’s face. Getting a shallow focus on the subject’s eyes can be important when, for example, you want the viewer to connect directly with the subject in the photo. Shallow depth of field can also help eliminate distracting details in the background. But “there’s a huge amount of hit or miss” when using shallow depth of field in portraiture, Klise adds: if the depth of field is shallow, but the focus is only on the subject’s nose, you’ve missed the mark, and obscured the viewer’s connection to your subject.
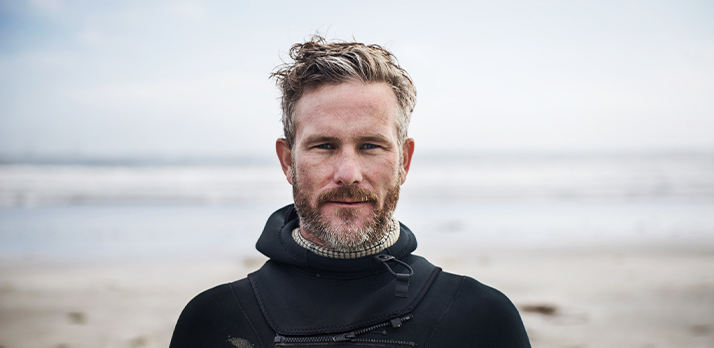
If you’re shooting a portrait in a dim environment, you may need to open your aperture to f/1.4 to get enough ambient light to make a good exposure. But this leads to a shallow depth of field, which could make your subject blurry. You can combat this unintentional shallow depth of field by opening up to an aperture of f/5.6 or f/8 to ensure you get the person entirely in focus. But at this aperture, you’ll probably need additional, artificial lighting to get an adequate exposure. Art director and photographer Alex Tan suggests that beginners “understand and learn the artificial modification of lighting, like strobes and continuous light.” Don’t be overwhelmed by the world of artificial lighting; it’s just an opportunity to learn. And having the correct lighting tools at your disposal helps you compose the best shot and get the shallow or deep depth of field you’re looking for.
Challenges with shallow depth of field.
In addition to making your depth of field too shallow, a difficulty with shallow depth of field, Boyd adds, is that “sometimes, people can overdo it.” Don’t abuse it, and don’t let this tool become a crutch that you rely on too much. If all your photographs are shot in one style, you lose the opportunity to push your creative boundaries. Don’t make your images uninteresting by leading the viewer too much. If there’s only one thing to look at, your photograph may lack narrative development.
Another main challenge with shallow depth of field is ensuring that your field of focus is wide enough, and in the right place. Boyd explains, “I suggest bracketing: Shoot a few shots, one at an f-stop of 1.2, one at f/1.8, and one at f/2.0, and so on. Hopefully one of those three shots has everything you want in focus and everything you don’t want out of focus.” Bracketing is especially useful in portrait photography and can help guarantee you get someone’s entire face in focus.
“When you really want to know what you’re getting when you’re using shallow depth of field, then manually focus your camera and zoom in,” Boyd says. Most cameras are made to focus on faces and can get distracted by high-contrast areas of your image. Putting your DSLR camera in manual mode gives you total control of where you want that shallow depth of field to be.
“When you really want to know what you’re getting when you’re using shallow depth of field, then manually focus your camera and zoom in.”
Avoid using a wide-angle lens when shooting shallow depth of field images. Wide angle lenses are better suited to deep depth of field, allowing you to get your entire scene in focus. Landscape photography is one area in which sharp focus and deep depth of field are desirable. Don’t set yourself up for failure, and instead use a longer focal length.
How to improve your focus.
Experience is the best teacher. If you’re looking to master the technical side of shallow depth of field, go out and shoot. Carlson suggests “shooting either in manual mode or aperture priority mode.” He advises beginners to choose a simple subject and experiment with focus bracketing. When you’ve taken the same photo with different apertures, go back and examine the differences. See what level of detail you get with each image, and learn the range of each depth of field.
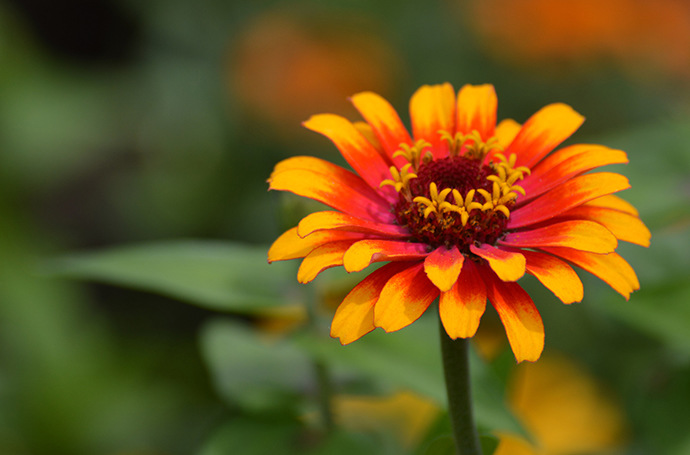
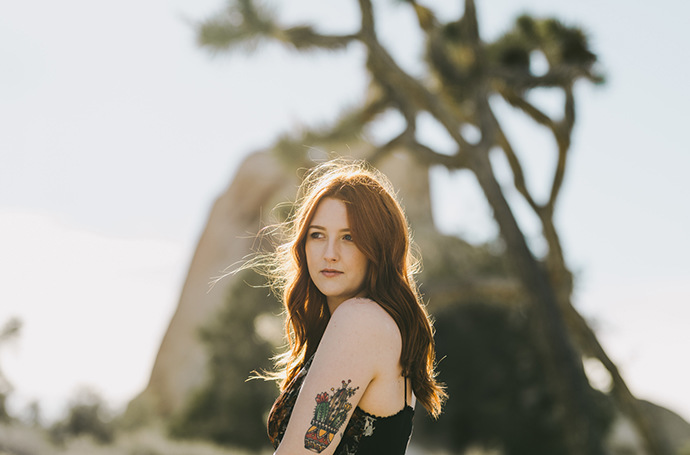
Another way to improve your shallow depth of field is to focus on the narrative in your photograph. Is one object essential to the story your image is telling? Experiment with both shallow and deep depth of field, and see how they change that narrative. After all, photography is all about storytelling, and techniques like shallow depth of field are choices an artist can make to prioritize and amplify that narrative. If you didn’t nail your depth of field while shooting, you can always tweak some of that blur in post processing. To get started, check out this tutorial for selecting an area of focus in your image in Photoshop. Building up your foundational understanding of these simple tools can help you adjust the blur and depth of field in your photographs.
Now that you know the ins and outs of using shallow depth of field, how will you apply it to your own photos? Remember, this is a technical choice that can help convey your artistic vision. It’s an essential tool for photographers to understand and master. But don’t let it become your go-to camera or aperture setting, as it’s easy for unintentional movement to take your subject out of that shallow plane of focus. If you want to explore more uses of shallow depth of field, dive into macro photography, as close-up images inherently have a very shallow depth of field. Otherwise, be intentional with your focal point, and try your hand at this technique.
Contributors
Do more with Adobe Photoshop Lightroom.
Edit photos easily with Lightroom presets, Super Resolution, easily share photos from any device and access your projects anywhere with cloud photo storage management.
You might also be interested in…
Discover how adjusting shutter speed can help you capture clean shots or motion-filled moments.
Discover ways to select the ideal focal length for any and every photo.
Building a great landscape photo.
Explore ways to artistically capture scenic views with tips on landscape photography.
Night Photography.
Low light doesn’t have to equal low quality with these tips for successful nighttime photos.


