PHOTOGRAPHY
Bring images to life with the Adobe Photoshop animated GIF maker.
Movement has a way of catching the eye, especially on the web.
Adobe Photoshop makes it easy to create moving images of your own with high-quality GIFs that can tell more complex stories than a static image ever could.
Watch Kendall Plant’s GIF-creation process in this quick one-minute video. The steps are written out below.

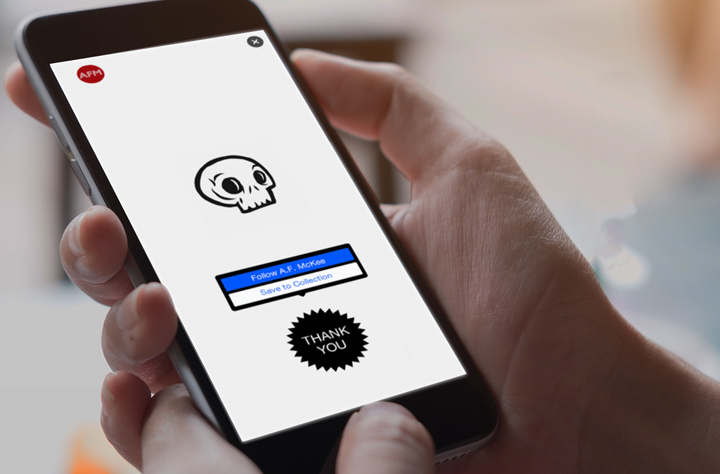
With work that incorporates nature, street photography, and even skulls, Kendall Plant is a designer, art director, and who brings a unique approach to her work at Adobe as an associate creative director.
Fill your GIF with avatars, emojis, webcam footage, and more. Flexibility coupled with ease — you couldn’t ask for more. Watch Plant create an animated GIF in the video below.
How to make an animated GIF in Photoshop.
Follow along with Plant step-by-step to make your very own GIF.
Before you start.
Use these sample sketches or practice with your own.
1. Sketch it out
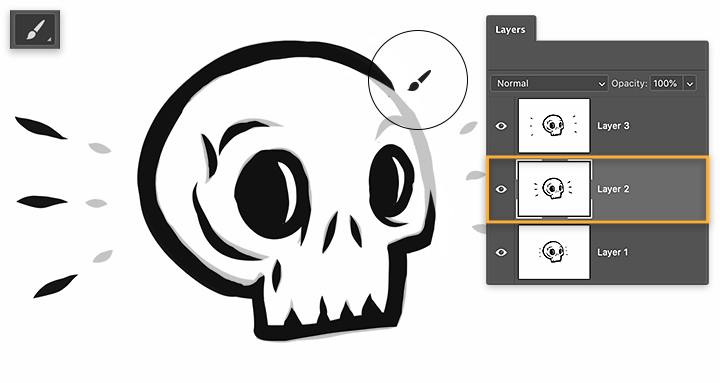
Plant starts by creating variations of her initial drawing to show different states of motion, then saves each variation as a separate file. With her files prepped and ready to go, she opens the first sketch in Photoshop and drags the remaining files from her computer into the document, pressing return (or enter) to place each file onto its own layer. Next, she clicks on the Lock icon to unlock the original layer.
2. Bring it to life
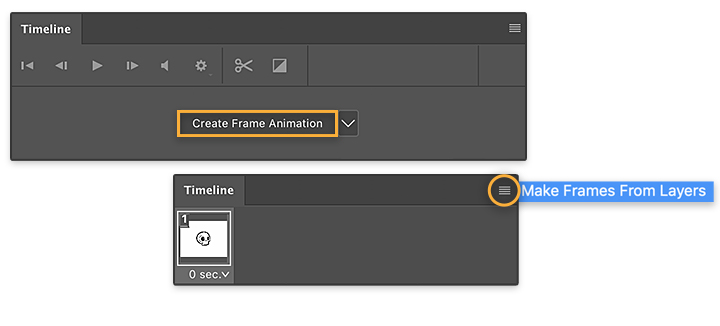
Ready to animate her sketches, Plant opens the Timeline (Window > Timeline), selects Create Frame Animation from the dropdown menu, and chooses Make Frames From Layers from the flyout menu. If you have used the Timeline before, it may populate with empty frames by default. If this happens, click on the first frame and hold the shift key while clicking on the last one. Choose Delete Frames from the flyout menu. Then you can choose Make Frames From Layers.
3. Pace your animation
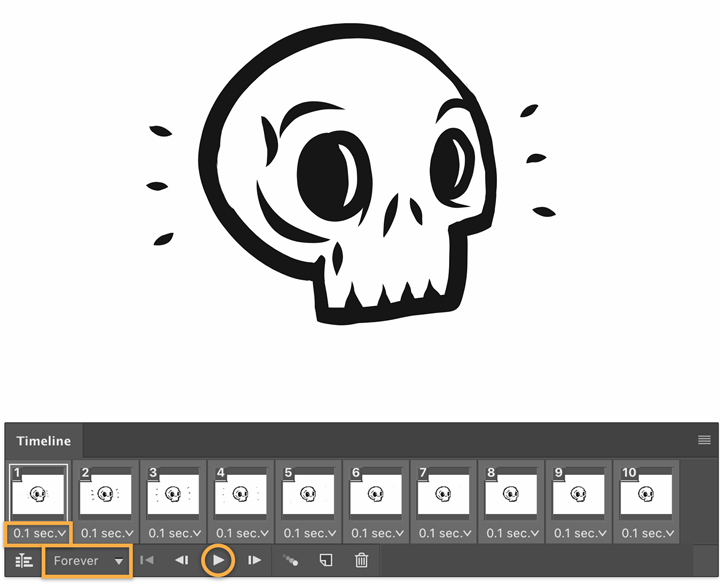
To give each frame the same timing, Plant clicks on the first and last frame in the Timeline while holding the shift key. You can click on the down arrow in one frame and set the interval to 0.1 seconds — this will update all the selected frames. Next, Plant chooses Forever from the dropdown menu below the Timeline to make the animation loop continuously. You can preview the timing of your animation by clicking on Play.
4. Export to GIF
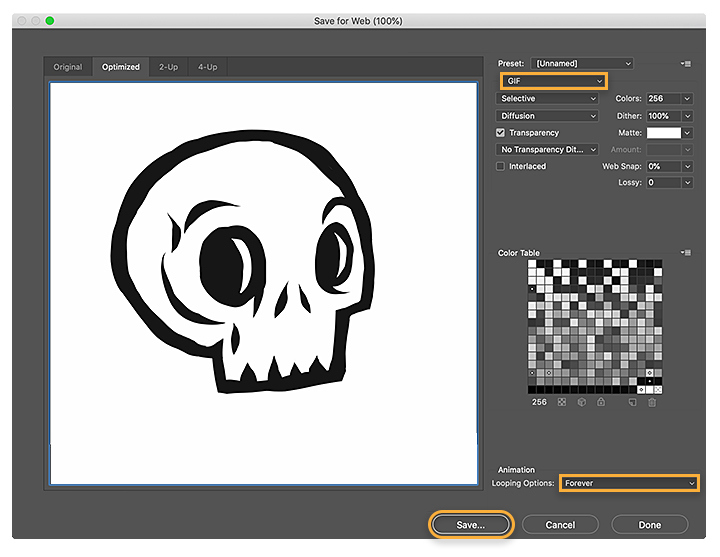
Choose File > Export Save for Web (Legacy). Set GIF as the Export Format and Forever as the Looping Option.
5. Share your animated GIF.
Once you've made your own GIF, share it on your favorite social platform or with friends. And keep the creativity moving.
Note: Project files included with this tutorial are for practice purposes only.
Tips for creating the perfect GIF.
When you’re learning how to make an animated GIF, think of the Timeline in Photoshop as your own personal animated GIF maker. Keep these tips in mind to make the most out of every GIF.
Choose or create your images.
You can make a GIF out of any series of images, whether you draw them yourself or use stills from a video. Don’t be afraid to try drawing your own — Photoshop has tons of tools you can use to make simple or complex illustrations.
Resize as needed.
If you're using different-sized images but want a seamless look, you can easily resize them in Photoshop. Try cropping your images to a standard size or using the Transform tool to get the dimensions just right.
Experiment with filters and effects.
Depending on what look you’re going for, you might want to edit or retouch your GIF images by adding appealing filters and effects. Editing your photos can also create continuity or let you juxtapose different images to fit your story.
Pick the right animation speed.
Choose your GIF animation speed by making frame rate adjustments in the Timeline panel. Keep in mind that a GIF that moves too fast might be hard for onlookers to digest. But a GIF that moves too slow might not keep viewers engaged.
Add text to tell your story.
Add a clever saying or any message of your choice by layering text over your animation. You can find tons of options in Adobe Fonts, or choose the best TruType or OpenType SVG from your favorite font provider.
Work with any file type.
You can create GIF files from BMP, JPEG, PNG, and other image file types as well as video files such as AVI, FLV, and MP4.
Are GIFs videos or animations?
Even though some GIFs may look like videos, they’re actually considered to be animations. If you’ve ever made a flipbook where you drew a character moving frame by frame, you know that the flipping action brings the motion to life. It’s similar to how both animation and video work, but GIFs are ideal for shorter creations, usually around 15 seconds or less. And, because GIFs only offer a limited color range, they they’re small enough to be easy to share online.
Get going with GIFs.
Once you learn how to make an animated GIF, the possibilities are endless. Try using your own drawings, photos, and video clips first to make a unique animation that nobody’s ever seen before. Or have fun with existing images and put a new spin on an old topic. GIFs are an amazing way to communicate ideas that might be hard to express with words or still images alone — start playing with ideas now so you’ll have just the right GIF for the moment, whenever you need it.
Share this article