How to remove audio from video using Adobe Premiere Rush.
Capturing perfect footage and perfect audio in one take is a challenge. After all, your best footage might be marred with distracting noise, or you might have captured amazing audio which needs to be paired with another part of the video. Don’t settle for the sound you’ve got – learn how to separate audio from video and reassemble it your way in the editing stage, whatever platform you’re working with.
What you’ll learn:
- Benefits of removing audio from video
- How to remove audio from video on Mac
- How to remove audio from video on Windows
- How to remove audio from video on iPhone
- How to remove audio from video on Android
- How to remove audio from video using Adobe Premiere Pro
Benefits of removing audio from video.

There are many reasons why you may want to tinker with the combination of audio and visual in a video. You’ll need to separate audio from video so you can move onto the next phase in your edit.
Perhaps you’re creating a documentary and want to add voice-over to a sequence before posting the video online. Removing audio from the footage you’ve captured allows you to recap events using a narrator, giving you a firmer editorial grasp on the flow of your narrative.

Or maybe you’ve shot a music video and need to tighten up the edit so you can more closely match the lip-sync.
Your initial footage might contain a sample of copyrighted material – for example, if you’re filming a sequence inside a nightclub where the DJ is playing music which you can’t get clearance to broadcast. You’ll need to remove the music from the video before you can dub in a suitable replacement dancefloor-filler, along with new background pick-up.
Boost your creative options by learning how to remove sound from your video. It’s relatively straightforward no matter what platform you’re working from – even on mobile. We’ll show you how.
How to remove audio from video on Mac.
You can easily remove audio from a file on your Mac using QuickTime Player. Then you’ll have the foundation of your next edit to hand. Here’s how it’s done.
- Open QuickTime Player on your Mac.
- Open the movie file you want to remove sound from.
- From the Edit menu, select Remove Audio.
How to remove audio from video on Windows.
If you’re using a PC with Windows Movie Maker to cut your videos, you can save a version of the video that contains no audio. Here’s how.
- Open Windows Movie Maker.
- Import and open the video you want to edit.
- From the Video Tools ribbon, select Edit.
- Under Video Volume, on the left-hand side of the menu bar, drag the slider fully to the left to mute the audio.
- Save this video as a new file.
How to remove audio from video on iPhone.
You can use the Photos app on your iPhone to remove the audio track on a video before you send it to your editing software of choice.
- Open the video by tapping on the thumbnail.
- Tap Edit in the top right of your screen.
- A yellow speaker will appear in the top-left corner, above your video preview. Tap it to remove the audio track. This will strike out and grey out the speaker.
- Tap Done in the bottom-right corner to save your changes.
How to remove audio from video on Android.
Google Photos contains a feature that will let you create and save a silent copy of a video to the cloud.
- Open the video by tapping on the thumbnail.
- Select Edit from the menu at the bottom of the screen.
- Tap the speaker on the bottom-left. It will turn blue and appear crossed-out.
- Click Save Copy in the bottom-right corner to save a new, silent version of the video.
How to remove audio from video using Adobe Premiere Pro.
With Premiere Pro you can make adjustments to footage as soon as it’s been imported to your device. Just follow these simple instructions to separate tracks and remove audio from video files.
- Import your clips into a new project by dragging them into the dashboard.
- Drag the clips across from the dashboard into the timeline.
- Right-click on each clip and select Unlink. This separates the audio and video elements.
- Select each element of audio you want to delete, and press Delete.
Discover more ways to extract audio from video with Premiere Pro.
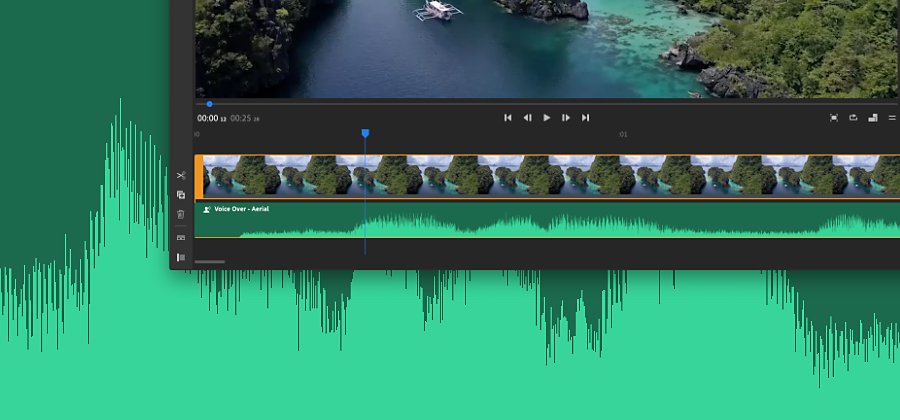
Remove audio from video using Adobe Premiere Rush.
In Premiere Rush, you can mute your video clips, remove audio from video entirely, or creatively align audio and video tracks in your timeline. And you can do it all by video editing on your iPhone or mobile device.
You can separate the audio from the video clip by removing it from the video file. Premiere Rush gives you the editing flexibility to separate audio that is a part of any video clip. Separating audio lets you edit the audio track independently from the video, allowing you to layer audio clips one over the other, swap audio clips around and more.
To separate an audio clip from a video clip, use one of these methods:.
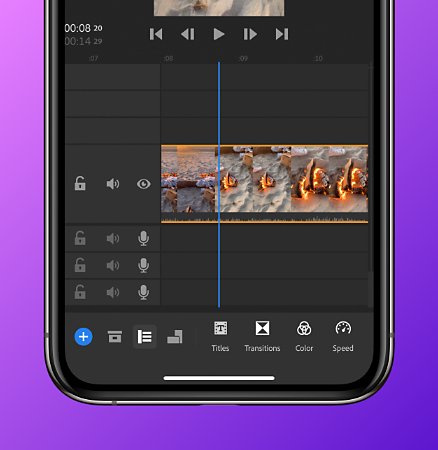


- On mobile: Long press on the clip in the timeline and select Separate Audio from the menu that pops up.
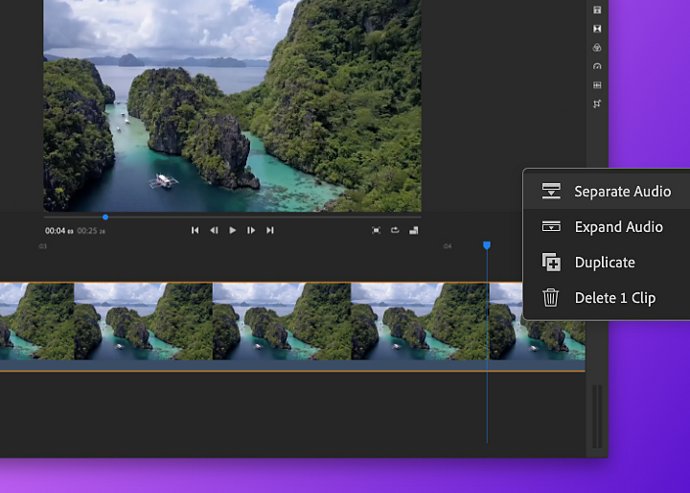
- On desktop: Right-click on the clip in the timeline and select Separate Audio from the menu that pops up. You can also use the keyboard shortcut E.
With the Separate Audio feature, you have two options: muting or moving the audio. By removing the audio, you can mute video clips. Or, you can use the original audio from the video and drop it into the first available audio track. If no audio tracks are free, the separated audio is placed on the A3 track. If you change your mind, you can always unmute the audio from the original clip.
Editing your audio and video.
You can edit these new audio clips just like any other clip in your timeline: Adjust the volume of your audio clips or place them in new locations in the timeline. Need some new audio? You can even replace the removed background noise with one of the 33 soundtracks in Premiere Rush or add your own music by tapping the plus (+) icon and adding media files to the project. Remove, trim, relocate, and recombine audio and video tracks to get the exact look, sound, and feel you want — all done right in the mobile app.
When you finish editing, export your video to your device. Then upload videos to share on Instagram, YouTube, Facebook, or TikTok. It’s just the beginning of what you can do in Premiere Rush — learn more about video filters and changing video speed to take your online videos even further.
You might also be interested in…

Find the right aspect ratio for your video.
Discover how to match aspect ratio to the substance and style of your project.

Edit videos on your phone.
Use Adobe Premiere Rush to edit video clips and merge them into one video file for web or social.

How to rotate video in Adobe Premiere Rush.
Tilt your video’s orientation a few degrees or rotate completely — and do it on your phone.

Learn to use editing software to achieve realistic color and subtly shift mood and tone.