Take a minute. We'll help you figure it out.
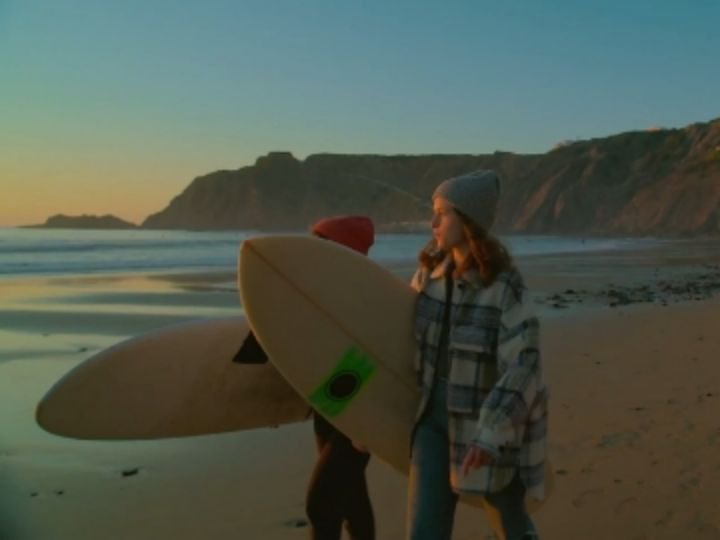
VIDEO
How to add video filters in Adobe Premiere Pro.
Instantly transform your video with preset video filters.
What are video filters?
Video filters (known as presets in Premiere Pro) are overlays that brighten, darken, or unify video clips. Premiere Pro features many color correction and adjustment presets that you can edit and apply to your movies. It’s a simple and fast way to enhance certain color highlights or add effects like a sepia tone before you share videos.
Find the right look fast with preset video filters.
Because presets are preprogrammed, you can apply them quickly to any video clip. You can use them to correct color to make your footage look better and match other footage in your project. Or you can make extreme changes, like turning a daytime scene into a night scene, adding glitch effects, or turning your full-color film into black and white.
Too much adjustment can distract viewers from the story you’re telling, so professional video editors and colorists recommend using a light touch with color filters. You can use a preset to lower the exposure a little to bring out highlight details and to make a single color stand out.
If you intend for your video to be broadcast on TV, presented on a DVD, or viewed in HDR, you can apply a preset to ensure your saturation and brightness levels stay within a safe range for broadcast. This way they won’t be flagged by the distributor’s quality assurance team.
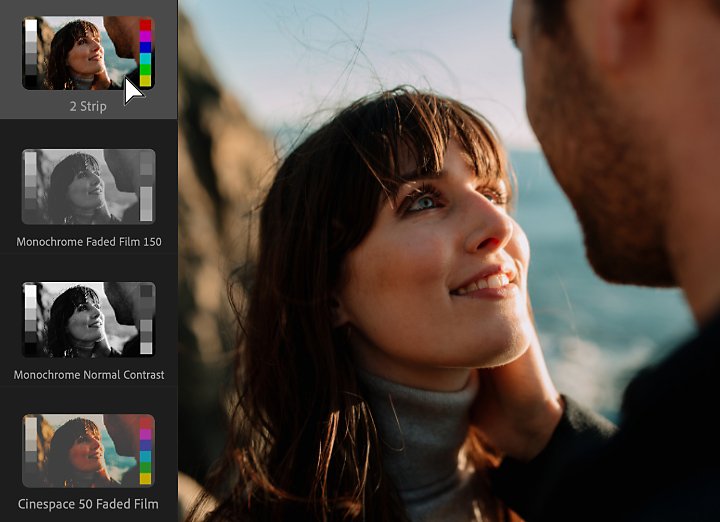
Explore the effects presets included in Premiere Pro.
To find several free video filters, open the Effects panel and then open the Lumetri Presets folder. You’ll find five category folders:
1. Cinematic:
These presets make a video look like a movie.
2. Filmstocks:
Simulate different color and black-and-white still photographic film stocks, motion picture films stocks, and historical photographic processes with these presets.
3. Monochrome:
These apply different black-and-white video effects.
4. SpeedLooks:
No matter what camera you’ve used to capture your footage, apply these presets to achieve the looks of particular film cameras.
5. Technical:
These presets can help you color grade while remaining safe to broadcast.
Click on an effect to see a preview thumbnail with color bars.
How to add video filters in Premiere Pro.
1. Open your project.
Import your video file — Premiere Pro supports most video formats. Add the video clip you want to edit to your timeline and move the playhead to the clip you want to edit.
2. Create an adjustment layer.
By applying your look to an adjustment layer, you’ll leave your source footage unedited so you can go back and make different changes later. Just right-click in the Project panel and select New Item › Adjustment Layer, and drag and drop the adjustment layer into your timeline above the clip you want to edit.
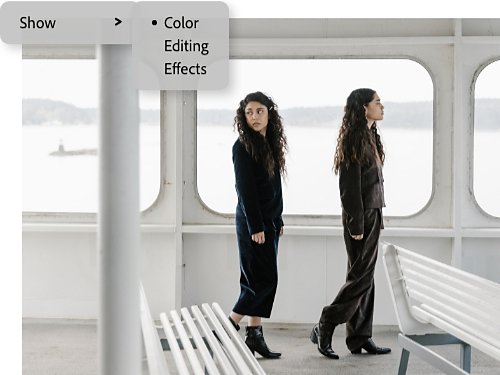
3. Open the Effects panel.
If you don’t see it in your workspace, select Window › Effects in the top menu to open it.
4. Explore different filters.
In the Effects panel, open the Lumetri Presets folder. Click on a folder to browse the possibilities.
5. Drag and drop.
Drag the filter onto your clip on the timeline, and it will appear on your clip in the Preview box. If you need to undo it, press Command+Z on Mac or or Ctrl+Z on Windows. Some filters will have little or no effect on certain clips, so be sure to explore a few.
6. Adjust to fine-tune.
Once you’ve added your preset, you can make adjustments in the Lumetri Color panel. Move the Intensity slider to increase or lessen the effect. You can also make other adjustments to the fade of the film, sharpening, vibrance, and saturation. To bring out certain colors in the shadows and highlights, click inside the color wheels toward the hue you want to target.
7. Render.
To get an accurate sense of how your preset will look on output, you need to render it, which will apply the effects to the video instead of just showing you a preview. With the effects applied, the playback should be smooth and you should get a good sense of how the filter looks. After you add the preset to your clip, select Sequence › Render Selection. To render the whole sequence, select Sequence › Render In and Out. (This can take a while.)
How to create, save, and apply your own presets.
Create your own custom color correction and save it to apply to other clips or other projects.
1. Open the Lumetri Color workspace.
Select Window › Workspace › Color to open the color workspace.
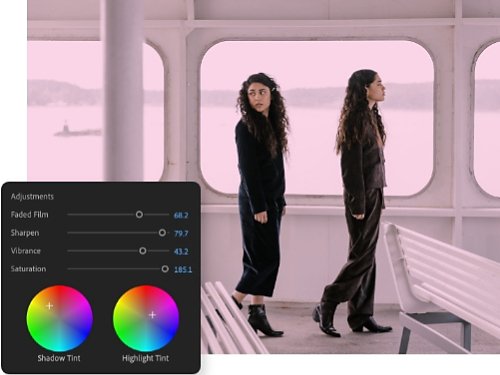
2. Make adjustments.
Select your clip and experiment with adjustments to the sliders and the color wheels for Shadow Tint and Highlight Tint.
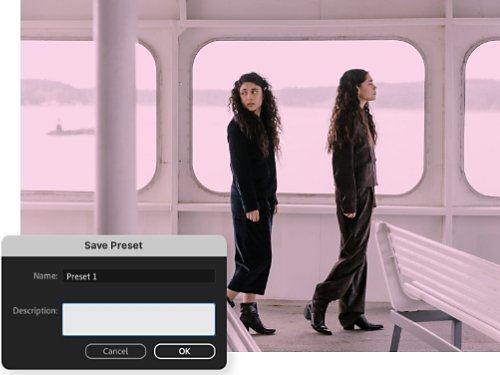
3. Save as a preset.
Once you have a look you like, you can save it to apply to other clips. Click the panel menu (the three horizontal bars at the top of the Lumetri Color panel) and select Save Preset. Give it a name and add a description.
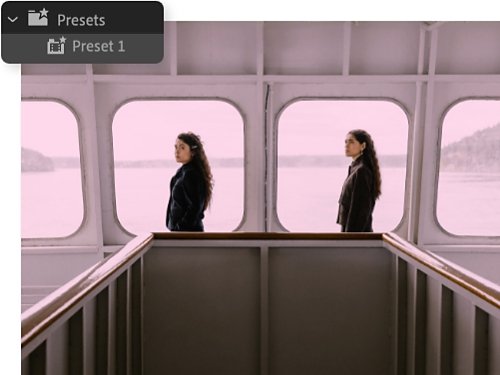
4. Apply your preset to another clip.
Open the Effects panel and find your custom preset in the Presets bin. To apply to a different clip, just drag and drop to the clip in your timeline.

How to import presets.
In addition to the free presets in Premiere Pro, you can import video filters other Premiere Pro users have made available online. These should be in the .prfpset file format.
1. Get your preset.
Download the preset file to your computer.
2. Click the Effects panel menu.
In the drop-down menu, select Import Presets.
3. Locate and select the file on your computer.
Open the file and find it in your Presets folder. To create a new bin, right-click on the Presets bin and select New Presets Bin.
Perfect your videos with pro-level editing features.
Speed up your color correction with Auto Color, powered by Adobe Sensei AI. Auto Color gives you a head start by intelligently adjusting video clips. Just open the Lumetri Color panel and click the Auto button. You can fine-tune the adjustments in the slider controls at the top of the Lumetri panel or use the Intensity slider to increase or decrease the overall effect.
Whether you make videos on an iPhone or Steadicam, whether you’re editing to share on TikTok or at a film festival, go beyond basic video editing software. Give your videos a signature look, play with genre, or rethink the format in ways you can’t with most other video editing apps.
Don’t stop at video filters. You can use other video editing tools in Premiere Pro to turn your video into a work of art. Create zippy title sequences with free motion graphics templates, add subtitles exactly how you want them, use stylish transitions (star wipe, anyone? Anyone?), and go to the Essential Sound panel to find audio effects and music. You might start out with a YouTube channel and end up at Cannes.