How to master reflection photography: settings, lighting and inspiration.
Reflection photography is a creative way of taking and editing photos by using the natural reflections that occur in mirrored surfaces. Whether it’s water, glass, or a mirror itself, reflective photography requires a handful of specific shooting and editing techniques to achieve a stunning image – celebrating both the subject and its reflection.
Create beautiful photos that use reflection to create artistic, creative images with our guide.
What you’ll learn:
- What is reflection photography?
- How reflection photography can make your images stand out
- Settings, subjects and preparation
- Inspiration and examples
What is reflection photography?
Reflection photography – or mirror photography – uses reflective surfaces that occur in nature or man-made objects to create interesting compositions. For example, a still and perfect lake, or the shiny surface of a city-centre office.
With this type of photography, you can create an image that uses the shadow, silhouette or mirror image of your subject. But whether you’re lakeside or in the city – where, when and how you shoot is vital to achieving a stunning landscape or captivating close-up.
How reflection photography can make your images stand out.
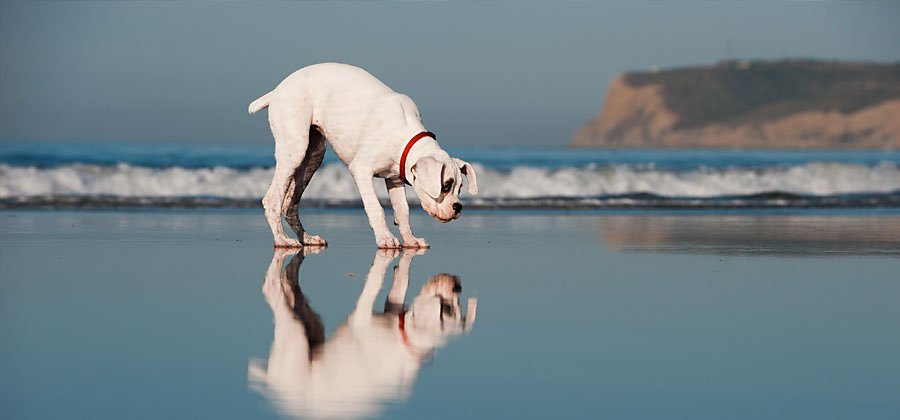
You may wonder whether this photographic technique is worth the thoughtful shooting and painstaking editing. But shooting in this way can give your photos an original edge. For example, if you’re a wildlife photographer, the reflection of a swan within a lake could make an elegant composition.
Try using reflection photography on your next shoot to experiment with new angles and perspectives. It’s worth the challenge to create truly original work, whatever your style.
How to photograph reflections: settings, subjects and preparation.

An important part of reflection photography is how you take the photo. Reflections occur naturally in everyday life, but using them to achieve an impactful image can be tricky.
You’ll need to consider:
Finding the right camera settings.
How your digital camera is set up will have a big impact on your ability to take good reflective photos. You’ll need to consider aperture, shutter speed and the lens you use.
Aperture.
Aperture is how much light is let in when you take a photograph. This is important when taking reflective photography, as you’ll want to capture both the background and its reflection clearly. An aperture of f/8 or smaller is ideal when taking reflective photos to ensure you bring everything into sharp focus.
Shutter speed.
Shutter speed is another consideration when shooting reflective photos. You’ll want to give your image enough sharpness to capture the reflection clearly. To achieve this, try to use a shutter speed of 1/250.
Faster shutter speeds can help you to avoid issues like ripples or waves in still water. Try taking photos using both a long and short shutter speed – you may be able to edit these together later to achieve the desired effect.
Lenses.
You can use any lens for this type of photography, but some may be better suited than others. A wide-angle lens may pack more into your photo, for example if you’re trying to capture a beautiful landscape reflected on a lake. A zoom lens will work well for close-up scenes, like an animal or insect near a river or puddle.
What can I photograph?
If you’re itching to get outside and try reflection photography, there are lots of places you can try to achieve difference effects.
Water.
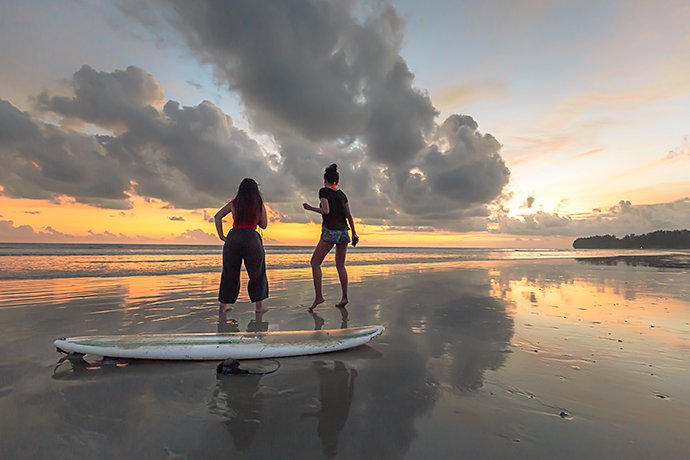
Water is perhaps the most common way of practising refection photography – and with good reason. It’s a perfect medium to capture the reflection of a landscape in a river, the shoreline against the sea or even a figure within a puddle.
A still body of water can help you to produce the best results. Try scouting a location, then you can return when the light and weather conditions are perfect.
Mirrors.

For mirror photography, using a mirror is an obvious choice. The angle you shoot from when taking mirror photography will depend on whether you want to be in the image or not.
If you’re trying to capture a photo where the viewer can see a different perspective through a mirror, position yourself so you’re not caught in the mirror’s reflection.
Glass.

Glass – whether it’s a window at home or the side of a skyscraper – can offer interesting photography options in urban settings. A clear, sunny day is key to achieving the best results when taking reflective photos that use a window, so plan your shoot for a bright day.
Tiles.
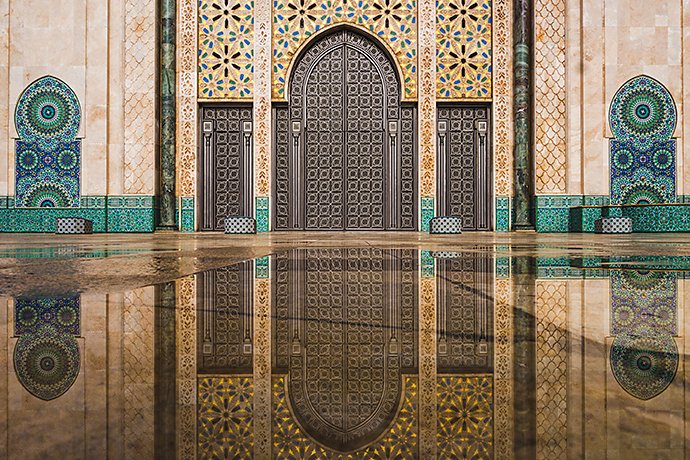
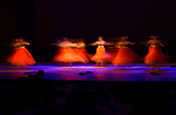
Immaculately polished tiles can offer captivating photography opportunities. You’ll need to pick the right location for this kind of photo, ideally one like the example above, which combines a pristine tiled floor with eye-catching décor.
How to prepare for a reflection photography shoot.
The old adage of ‘fail to prepare, prepare to fail’ rings true when you’re carrying out this technique. Careful planning will make it easier to capture a powerful reflection shot and achieve the desired mood and tone. Consider these points:
Choosing a location.
Always the most important part of a shoot, picking a location that will offer a powerful shot can take time. Think about places that will create clear, sharp reflections.
When picking a location, your imagination is your guide – envision the effect you want to create, or just experiment. Take a day to photograph different reflective surfaces and see which you enjoy most.
Time of day.
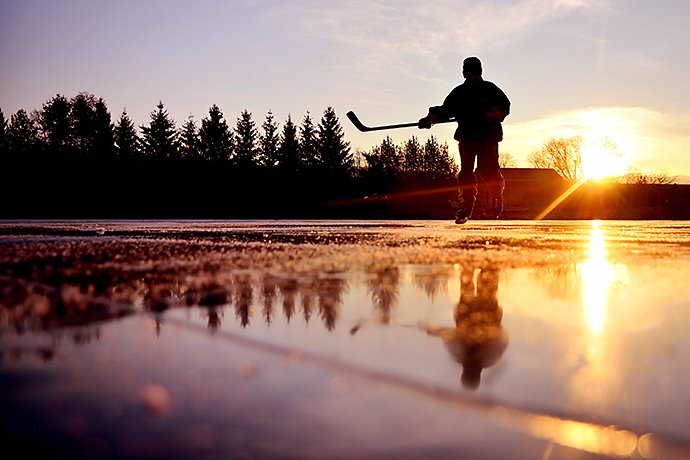
Whether it’s a still lake or a structure with gleaming windows, try visiting your location at different times of day.
This way, you can get an idea about the lighting and how the reflections react to different light. A sunny afternoon might bring the best results, while sunset may create a spectacular effect.
Getting the right angle.
Position yourself to ensure your own reflection isn’t in the shot – unless that’s the effect you want. Experiment with taking photos from different heights and different angles to avoid snapping yourself within the scene you want to capture.
This can take some practice, but don’t worry if you end up in the photo a little – you may be able to edit yourself out later using Photoshop.
Checking the weather.
The weather can make or break a reflective photography shoot. Wind is the biggest issue when you’re dealing with bodies of water, as it can create ripples and distort the reflection.
For an abstract effect, this can work well. But if you’re looking for a mirror-like reflection, shooting early in the morning while the wind is less strong is advised.
Rain can either be a help or a hinderance. If you’re looking to shoot reflections in puddles, it is ideal. But if you’re trying to capture the same effect on a window, it may not work as well.
Rules of composition in reflective photography.
Symmetry and balance are two of the most important factors in the composition of reflection photography. Instead of focusing on your subject, with reflection photography you’ll need to balance this with how much of the reflection you want to capture.
You may want to balance the image, so the reflection is the same dimensions as the subject. For example, making the trees on a landscape reflected in a lake the same height could make a captivating image.
Try to remember the rule of thirds when taking a photo. Think about your camera’s viewfinder as split into three equal sections. When framing a composition, try to place the subject of your photo in one of these thirds, leaving the others free. This is a tried-and-tested photography technique that can create compelling shots.
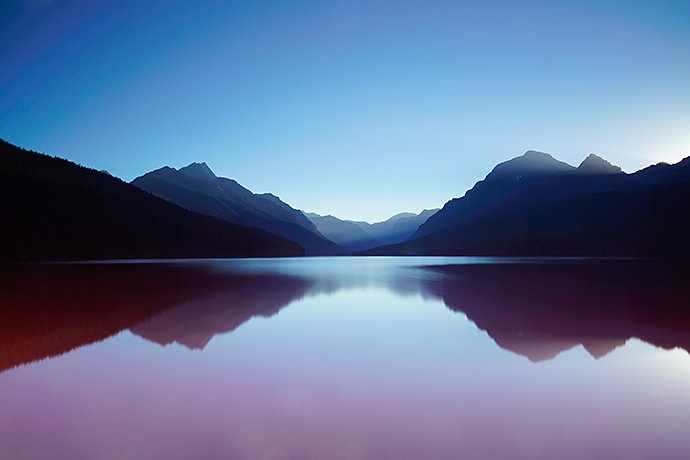
Reflective photography inspiration and examples.
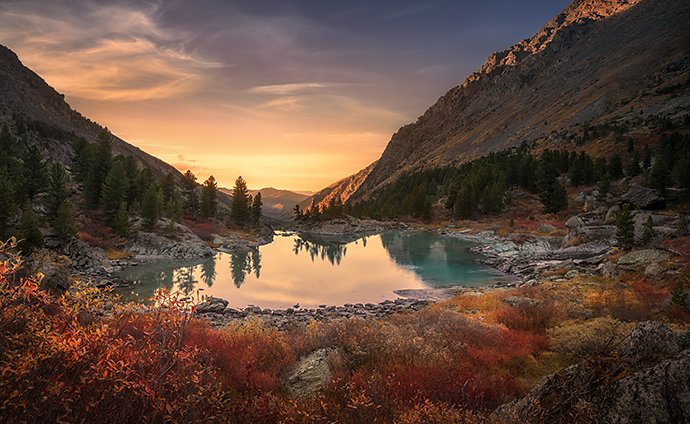
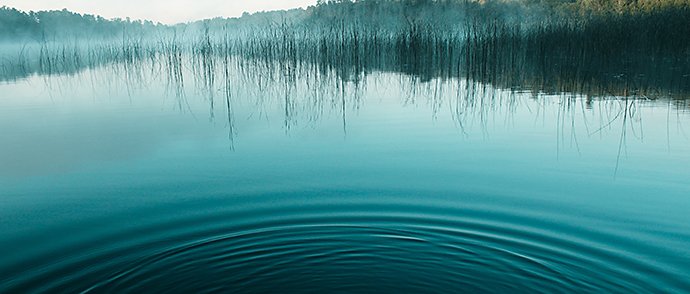
Landscape photography can become really special when reflections are introduced. Just like the above image, trees across a perfectly still lake, under a sunset, is a spectacular composition.

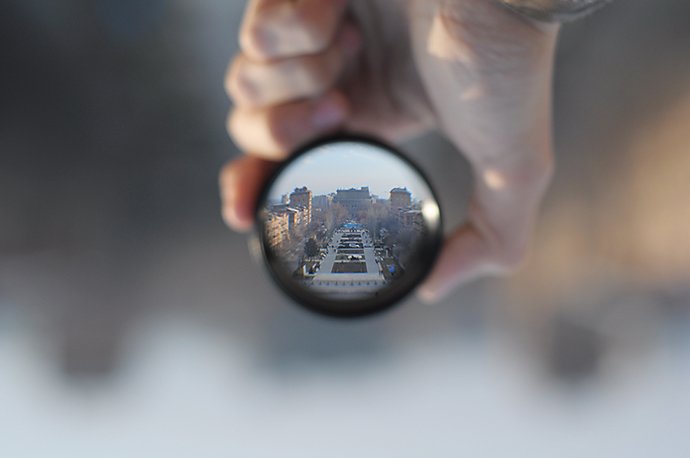
This photo is a great example of using props within your reflection photography. By using a blurred background, this idea uses the reflection within a glass ball to form a compelling shot.
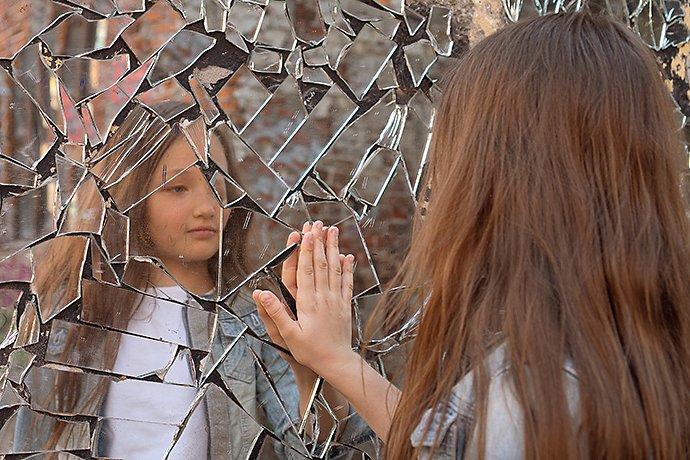
Even the home presents opportunities for reflection photography. The mirror gives this portrait a more candid, dramatic feel – combining a simple prop with powerful, contrasting lighting.
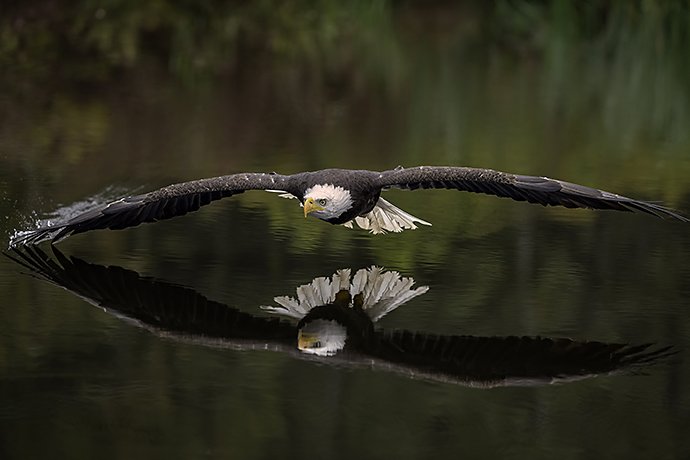
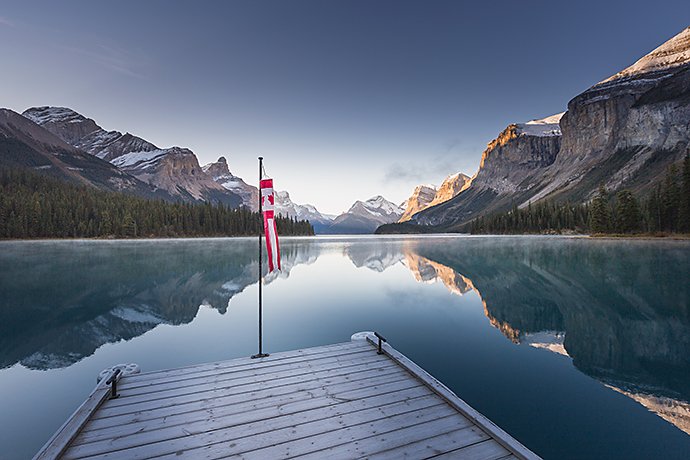
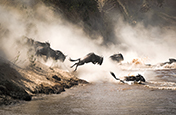
You may not have eagles nearby, but using reflections within wildlife photography can still be breath-taking. Many animals live close to lakes and reservoirs, so being patient until you spot a perfect reflection can create a truly memorable photo.
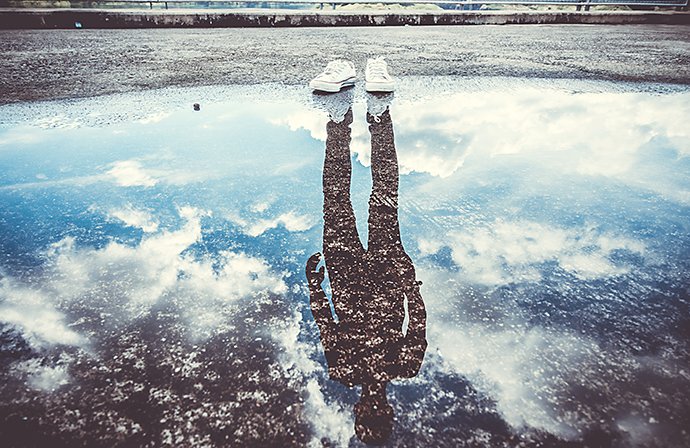
If your photo editing skills are up to scratch, you can create interesting illusions using reflection photography. For example, the above image was achieved by combining two photos – one that includes a figure stood in a pair of a shoes and the shoes by themselves. This gives the illusion of a person only visible through their reflection.
3 top tips for editing reflective photographs in Photoshop.

Once you’ve been out shooting photos, you’ll want to know how to enhance them further in Photoshop. Start with these simple editing techniques for reflection photography.
Removing water ripples.
If you’re shooting using water, there’s a strong chance of ripples on the surface. This may be okay with an abstract effect, but if you want a perfect mirror image ripples can be a real problem.
Try taking a photo using a fast shutter speed, then another with a longer shutter speed. Combining these images using Photoshop can help to reduce the number of visible ripples.
Brightening an image.

Increasing the light within your shot may help to bring out more of the detail within the reflection. Experiment with brightening your photo using Photoshop to make your reflection stand out.
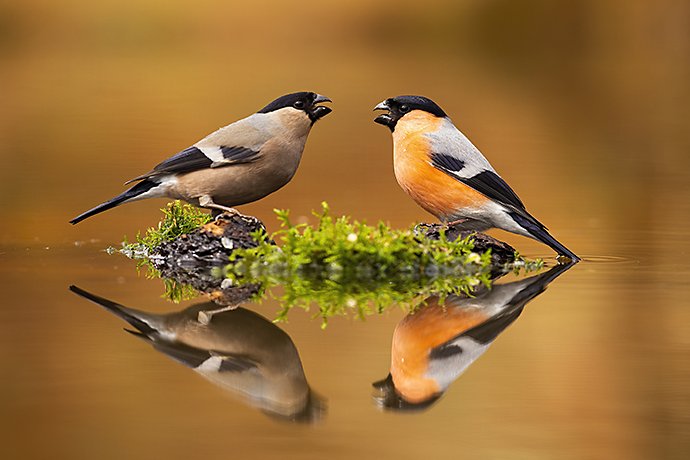
Colour saturation.
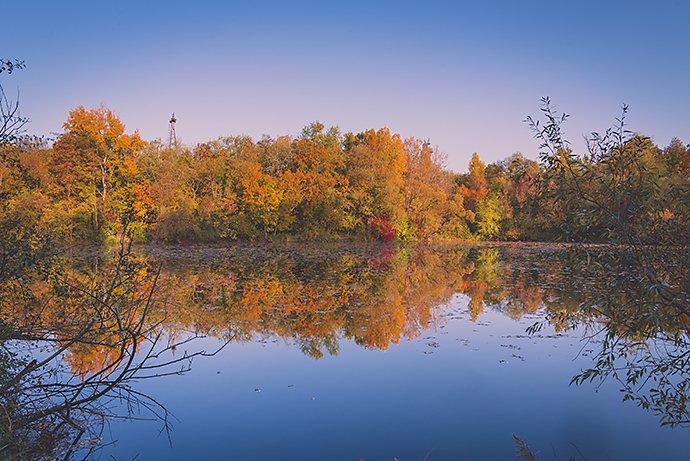
Adjusting the colour saturation could make your photos pop – the image above shows how increasing the saturation of oranges brings out the autumnal leaves in the reflection. Experiment with a combination of colour saturation and hue for reflections that jump from the photo.
Blurring the background.
Blurring areas in the shot that you don’t want to focus on can give your photo more depth and help to achieve your desired perspective. Try to focus on your subject by blurring the background of your photo, retaining the reflection, to bring it into sharper focus.
Reflection photography can capture an artistic echo of a scene in a way that makes your work truly stand out. Experiment with reflective surfaces using these tips and enrich your photos with the ‘wow’ factor.
You might also be interested in…

How to use, and break, the rule of thirds.
Improve your photo composition skills to capture more stunning images.

Understanding shallow depth of field.
Explore how shallow depth of field can add dimension to your photographs.
Discover how adjusting shutter speed can help you capture clean shots or motion-filled moments.
Tips for capturing nature photos of all kinds.
Explore the possibilities of nature photography, from animals in motion to sprawling landscapes.
Get Photoshop Lightroom.
Edit, organize, store, and share photos from anywhere.
7 days free, then Rp149.628/mo.