What is chromatic aberration and
how do you fix it?
Learn about colour fringing, how to prevent the aberration while shooting and how to edit it out in Adobe Photoshop Lightroom.

What is chromatic aberration?
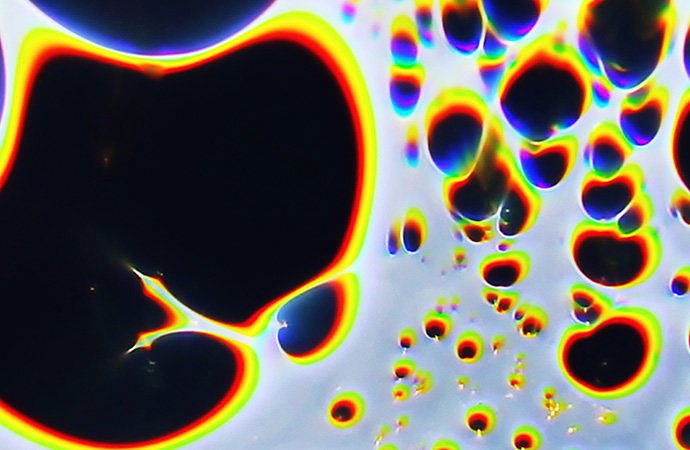
Chromatic aberration, also known as colour fringing, is a colour distortion that creates an outline of unwanted colour along the edges of objects in a photograph. Often, it appears along metallic surfaces or where there’s a high contrast between light and dark objects, such as a black wall in front of a bright blue sky. Each type of aberration causes different colours of outlines along an object’s edge.
The failure of a camera lens to focus each of white light’s different wavelengths onto the same focal point may lead to blue-yellow, red-green or magenta-purple fringing. This is due to the refractive index of glass; various wavelengths of light travel through the lens at different speeds, making it difficult for some lenses to focus each hue on the same focal plane.

Chromatic aberration correction.
You can prevent this distortion during your shoot, but you can also learn to automatically or manually correct the four different types of chromatic aberration in Lightroom. “It’s the sort of adjustment that someone who doesn’t look at photos very much might never notice, but removing it can make your work look much more true to life,” says photographer and videographer Nick Mendez.
Avoid colour fringing before it happens.
Prevent chromatic aberration while shooting by using a high-quality lens, avoiding wide-angle lenses and shooting at a narrower aperture when you can. “The best way to go about fixing it is to shoot it correctly in camera the first time,” says fashion photographer Adam Rindy.

Shoot at a narrower aperture.
Photographer and educator Adam Long recommends shooting at a higher f-stop — which narrows your aperture — to avoid colour distortion, especially when using a cheaper lens. “If you shoot a low-gradient lens wide open, at a 1.8 aperture for example, your chances of seeing chromatic aberration go way up. But if you use a smaller aperture, like 5.6, you’re less likely to see it,” he explains. Try upping your ISO, using a flash or slowing your shutter speed when shooting at a narrower aperture to make up for the loss of light.

Optimise the focal plane.
Wide-angle lenses with shorter focal lengths are more prone to colour fringing. “If you’re shooting at 18 millimetres, you’re way more likely to encounter chromatic aberration because you’re using the extremities of the glass,” says Long. Shooting at a medium focal length, around 30 millimetres when using an 18- to 55-millimetre lens for example, should help.
Fix colour distortions in Adobe Lightroom.
Remove simple chromatic aberrations in Adobe Lightroom by ticking the box that says Remove Chromatic Aberration under the Colour section of the Lens Corrections panel. Then use the Defringe controls and sliders to locate and remove any colour distortion that Remove Chromatic Aberration left behind along high-contrast edges. Click the Defringe icon under the Optics panel and use the Fringe Selector to sample the green or purple distortion and use the slider to remove the fringe. Alternatively, you can remove purple or green hues with the Defringe slider in the local adjustment Brush, Linear Gradient or Radial Gradient panels.


Lateral or transverse, chromatic aberration.
Lateral chromatic aberration, also called transverse chromatic aberration, is the blue-yellow or red-green fringing that can usually be automatically removed using the Remove Chromatic Aberration tickbox in Lightroom Classic.
Axial or longitudinal, chromatic aberration.
Axial chromatic aberration, also called longitudinal chromatic aberration, often occurs in images made with wide apertures (low f-stop numbers). It can be corrected using the Defringe sliders in Lightroom 4.1 and later.
Add chromatic aberration for a unique look.
Experiment with applying chromatic aberration on purpose to videos or photos in Adobe Photoshop, Premiere Pro or After Effects. You can take an image or film clip from average to artistic by playing with a bit of colour fringing or separating the Red, Green and Blue channels (RGB splitting). “Chromatic aberration could add a certain type of unsteadiness or psychological space within an image,” says Long.

Colour fringing as a photo effect.
Try adding a bit of colour fringing to an image in Photoshop for a 3D or retro feel similar to this architecture poster by Fabio Rahmani or these .

Artwork by Rus Khasanov
Colour fringing as a video effect.
Apply colour fringing or an RGB split to a video in Premiere Pro and After Effects to achieve a psychedelic look like these trippy oil and paint films by Rus Khasanov.
Unless you’re going for a stlylised mood with intentional RGB splitting, removing chromatic aberration is a simple way to improve your image quality and eliminate an unrealistic edge of colour that some beginner photographers may not even notice. “Looking back through old photos, I notice fringing and I am horrified that it’s been in there the entire time,” says Mendez. See if you can spot chromatic aberration in your work and try removing it with Lightroom.
Contributors
Do more with Adobe Photoshop Lightroom.
Edit photos easily with Lightroom presets, Super Resolution, easily share photos from any device and access your projects anywhere with cloud photo storage management.
You might also be interested in…
Learn how to colourise black-and-white photos.
Colourising photos can bring the past to life. Explore how to get started in this introduction.
How to enhance photos.
Balance the contrast, shadow, temperature and clarity of your photos with these photo enhancing techniques.
How to use the background remover in Adobe Photoshop.
See how to precisely cut out a subject to replace a bland image background with something that pops.
Discover how adjusting shutter speed can help you capture clean shots or motion-filled moments.


