Try rapid concepting with moodboards in Firefly Boards
Import client photos as references, then generate poster ideas using a structured prompt formula.
Published
Introduction and meet Jesús Ramirez
[Jesús Ramirez]: Building a full set of client poster concepts used to take me days.
Now I do it all on a Firefly Board in an afternoon from photos the client already sent me.
My name is Jesús Ramirez and I create TV and movie posters professionally.
In this video, you'll learn my Adobe Firefly Boards to turn client photos into multiple design concepts.
You'll also learn my structure prompting formula to make prompts easy to create and edit.
To start, go to the Firefly website at firefly.adobe.com.
From the sidebar, select Boards, Adobe's AI-powered ideation tool.
It's like an endless sketchbook for exploring ideas.
We'll use Boards to generate concepts from client images, ensuring each idea is grounded in real assets and can be fully recreated in Photoshop using traditional techniques.
To guide our inspiration, we'll use both a moodboard and a fully prompted set of design ideas.
The first step is to create your board.
Click Create board and Firefly will create your board in just a few moments
Set up your board with client photos and a mood reference
the first step is to import your reference images to do so click the add content button from the toolbar then import the assets from your device.
Select all of your reference images then click the open button the images will then load on your cursor and you can click on the board to set them down.
To get a better view of our images go into the zoom drop-down and choose Fit all content.
Then hold CTRL on Windows or CMD on the Mac and select all the moodboard images, drag them to the side, and from the Arrange icon choose Mosaic to organize them.
Now do the same for the three reference images but this time you can just double-click on the arrange icon.
Before we start generating ideas let's cover key concepts and our standard generate image module setup.
Click the Generate image button in the taskbar.
This is where we'll create our design ideas.
First, select the model.
Think of the model as an artist.
Each interprets your idea differently.
The same prompt and references could yield different results with each model.
For this project, pick the latest Google Gemini model.
Gemini is best for maintaining character likeness and handling complex compositions, which is exactly what we need to work with our client assets.
Generate a concept from a moodboard reference
Now, load your reference images by clicking the Image button.
Then select the woman's image.
This becomes reference image 1.
Each new image loads in sequence, so you can refer to each in the prompt.
Repeat this process with the image of the man.
This loads as reference image 2.
Another option is to use the Capture area icon.
Enable it and drag over the Empire State Building to set that section as reference image 3.
Next, set the aspect ratio to Tall to match movie poster proportions.
And reduce the resolution to 512.
A lower resolution speeds up generations and saves generative credits, ideal for brainstorming.
These settings and the 3 reference images carry through the rest of the video.
For the moodboard example, we'll add a 4th reference.
In the past, ideating ideas from client-provided assets was a long and tedious process.
Now, with Adobe Firefly Boards, we can quickly generate concepts to present to the client.
Since we're using the assets they provided as references, the generations can be recreated at full resolution in Photoshop and will serve as a roadmap for when the client is ready to proceed.
We'll generate design ideas using two methods.
By following a moodboard and using detail prompts.
Let's start with the moodboard method.
Here are four movie posters, each with floating heads over a scene below.
This style could work for our client.
Start by loading the moodboard image you like the most as reference.
This becomes image 4.
This step is key.
The reference image defines the overall design, so you don't have to describe it in the prompt.
You just have to describe how to use the reference images.
To save time, I'll paste the prompt.
The prompt references image 4, directing the model to use its style, composition, lighting, and color grade, while keeping the pose, expression, and camera angle from the client photos.
Click Generate, and soon you'll see the result in the filmstrip.
Now drag it onto your board to review.
And it looks great!
Ready to show the client and suitable for full resolution work in Photoshop.
Next let's generate more poster design ideas for our client.
Art direct and iterate with a structured prompt formula
This time we will put on our art director's cap.
The first thing I want you to understand about Generative AI is that dozens if not hundreds of decisions need to be made when generating an image.
You can either make the decisions yourself or let the model decide.
With a simple prompt, like "A man and a woman standing" the model will make many decisions for you, including pose, attire, composition, lighting, and just about everything else.
When crafting your prompt, it's important to decide what matters in the image and what to include.
With our reference images, likeness, body position, and location are already set.
You just have to fill in the rest.
You can start by writing a natural language prompt in paragraph form, but I prefer to use a structured prompt formula I developed for faster more organized prompts.
You can see the full formula on screen.
Treat each element as a control.
Every element is optional.
Use what matters and let the model handle the rest.
Every element you add is an art direction choice that shapes mood, composition, or color grading.
The formula gives you the controls, but the creative decisions are yours.
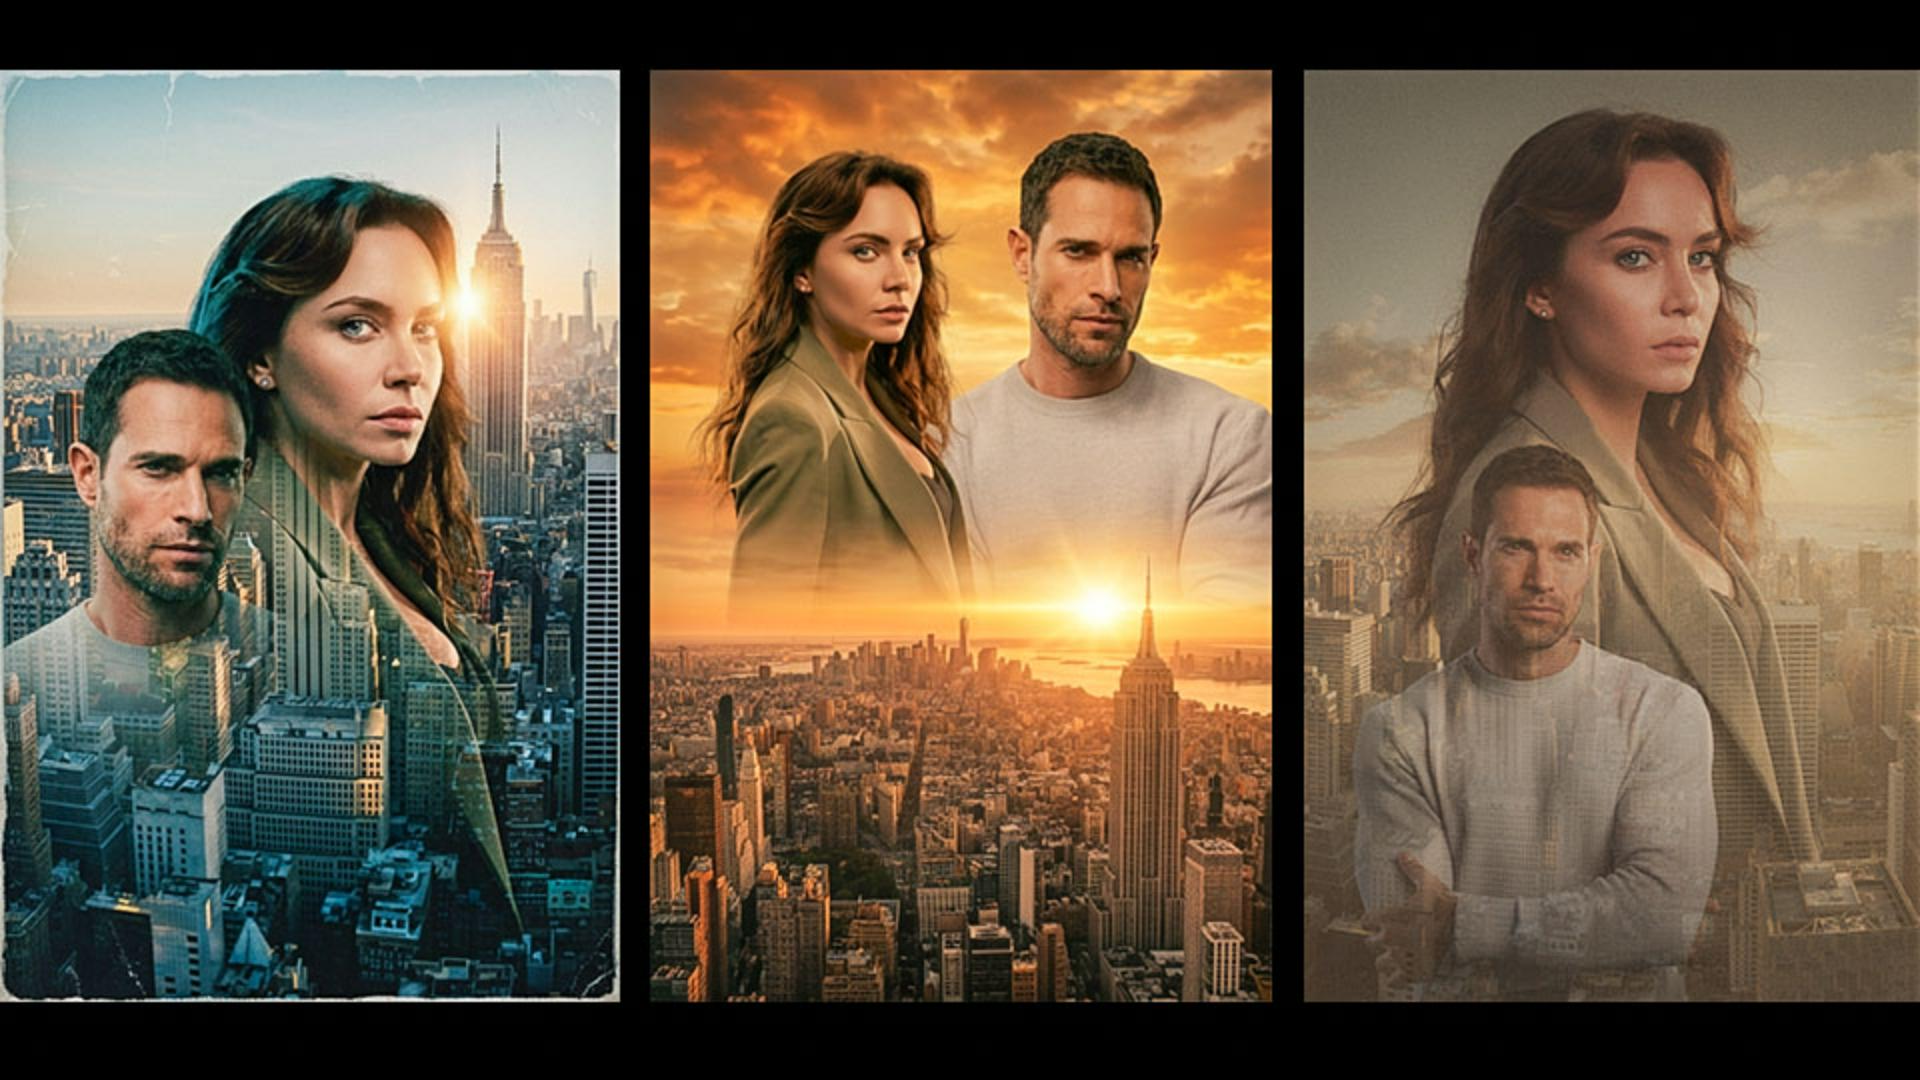
To save time, I'll paste a prompt to generate a double exposure poster.
Notice some of the elements we used in this prompt.
"Subject" uses the image labels we assign when loading the references.
"Action" forces the preservation of each reference image.
"Composition" establishes the double exposure technique and controls how the figures blend into the cityscape.
"Exclusion" tells the model what to leave out.
These, together with the other elements, shape the image's visual feel.
Now, click Generate and wait for the results to appear in the filmstrip.
Then place the result on your board to get a better look.
This is a fantastic poster with everything we wanted.
Now we can start ideating by simply adjusting the prompt formula.
Under "Composition", I'll paste an updated instruction.
It will both raise the horizon line and position the Empire State Building in the top right following the rule of thirds to keep the key elements clearly visible and intentionally placed in the composition.
Then I'll generate.
I'll place the new generation on my board.
And here's my new generation.
Notice the difference.
We are quickly making big design changes with just a few clicks.
Now that the formula is set up, we can iterate and explore new ideas very quickly.
Let's try another change.
You can add a texture overlay to completely change the feel of the generation.
I will simply paste a new texture description that will place a distress overlay on the image.
Then, I'll generate.
And here's the result.
This grunge overlay gives us a completely different style and more ideas to present to our client.
Now we can go back and continue ideating from previous ideas.
To do so, click on a previously generated image from your board and click the Load button.
This loads the prompt, reference images, and all settings used to generate that image.
And you can change the prompt for a new variation or keep the same prompt and try different models.
You can try the latest Flux or GPT models to see how each interprets a prompt.
Firefly Boards lets you generate multiple images at once, so you can run multiple models at the same time.
And here are my results.
I'll place both on the board so we can get a better look at them.
I'll place the GPT version on the board.
And both results look great!
You can really see the difference in style between each of the models.
You can now repeat this process multiple times using different starter prompts to generate even more ideas for our client.
For example, I created a set for a classic film noir poster and one for a more traditional movie poster look.
The prompts I use are on screen.
Keep in mind that this technique works beyond movie posters.
Anytime a client hands you reference photos, whether it's a product shot or portrait, you can use this same process to ideate quickly and present options before a single layer is created in Photoshop.
Now that you know how to use Firefly Boards to quickly ideate design concepts, try it with your next project.
Again, my name is Jesús Ramirez.
Thank you for watching!
What you’ll learn
Set up your board with client photos and mood references
Import client photos and moodboard images into Firefly Boards, then choose a model and set the aspect ratio and resolution for early-stage brainstorming.
Generate a concept from a moodboard reference
Choose an image as a reference so its style, composition, and color carry into new designs, while Firefly keeps your client’s image likeness and pose intact.
Art direct and iterate with a structured prompt formula
Adjust prompt elements like composition and texture to explore new directions, then compare results across models or revisit earlier prompts to keep building on strong ideas.
Instruction by

