Bonus tip: Command-click to toggle between the direct selection tool and any
Whenever I'm using Illustrator's drawing tools, I usually click into the Direct Selection tool first, and then the tool that I'm going to use.
That way, I can toggle back and forth between selecting and refining using just the Command key.
When I have complex curves or tight turns that need softening, I'll use the Smooth tool.
There isn't an assigned keyboard shortcut for it, but you'll find it nested with the Pencil tool.
With just a few anchor points, or an entire object selected, you can drag the slider to soften edges and round out corners.
Now that I've made the whales and wave feel a little bit more like my sketch, I'd like to add some of the underwater lines from my early thumbnails to the background.
I'm still exploring their placement, so I'll use the Curvature tool here.
If you can't find it in your toolbar, you can access it with Shift-Tilde.
I can quickly place points where I want the curves to change direction.
Then, I can see them take shape in real time as I go.
When I have the curves where I want them I'll press W to load the Width tool to add a little variety to my line weights Now that they're feeling right, I'll select all of those curves I'll use the menu command Object > Expand Appearance to turn the strokes into fills so they're consistent with the rest of my art.
Then I'll press Shift-E to load the Eraser tool to subtract the portions I don't need.
The square brackets let me adjust the eraser size to fit into some of these tighter spaces.
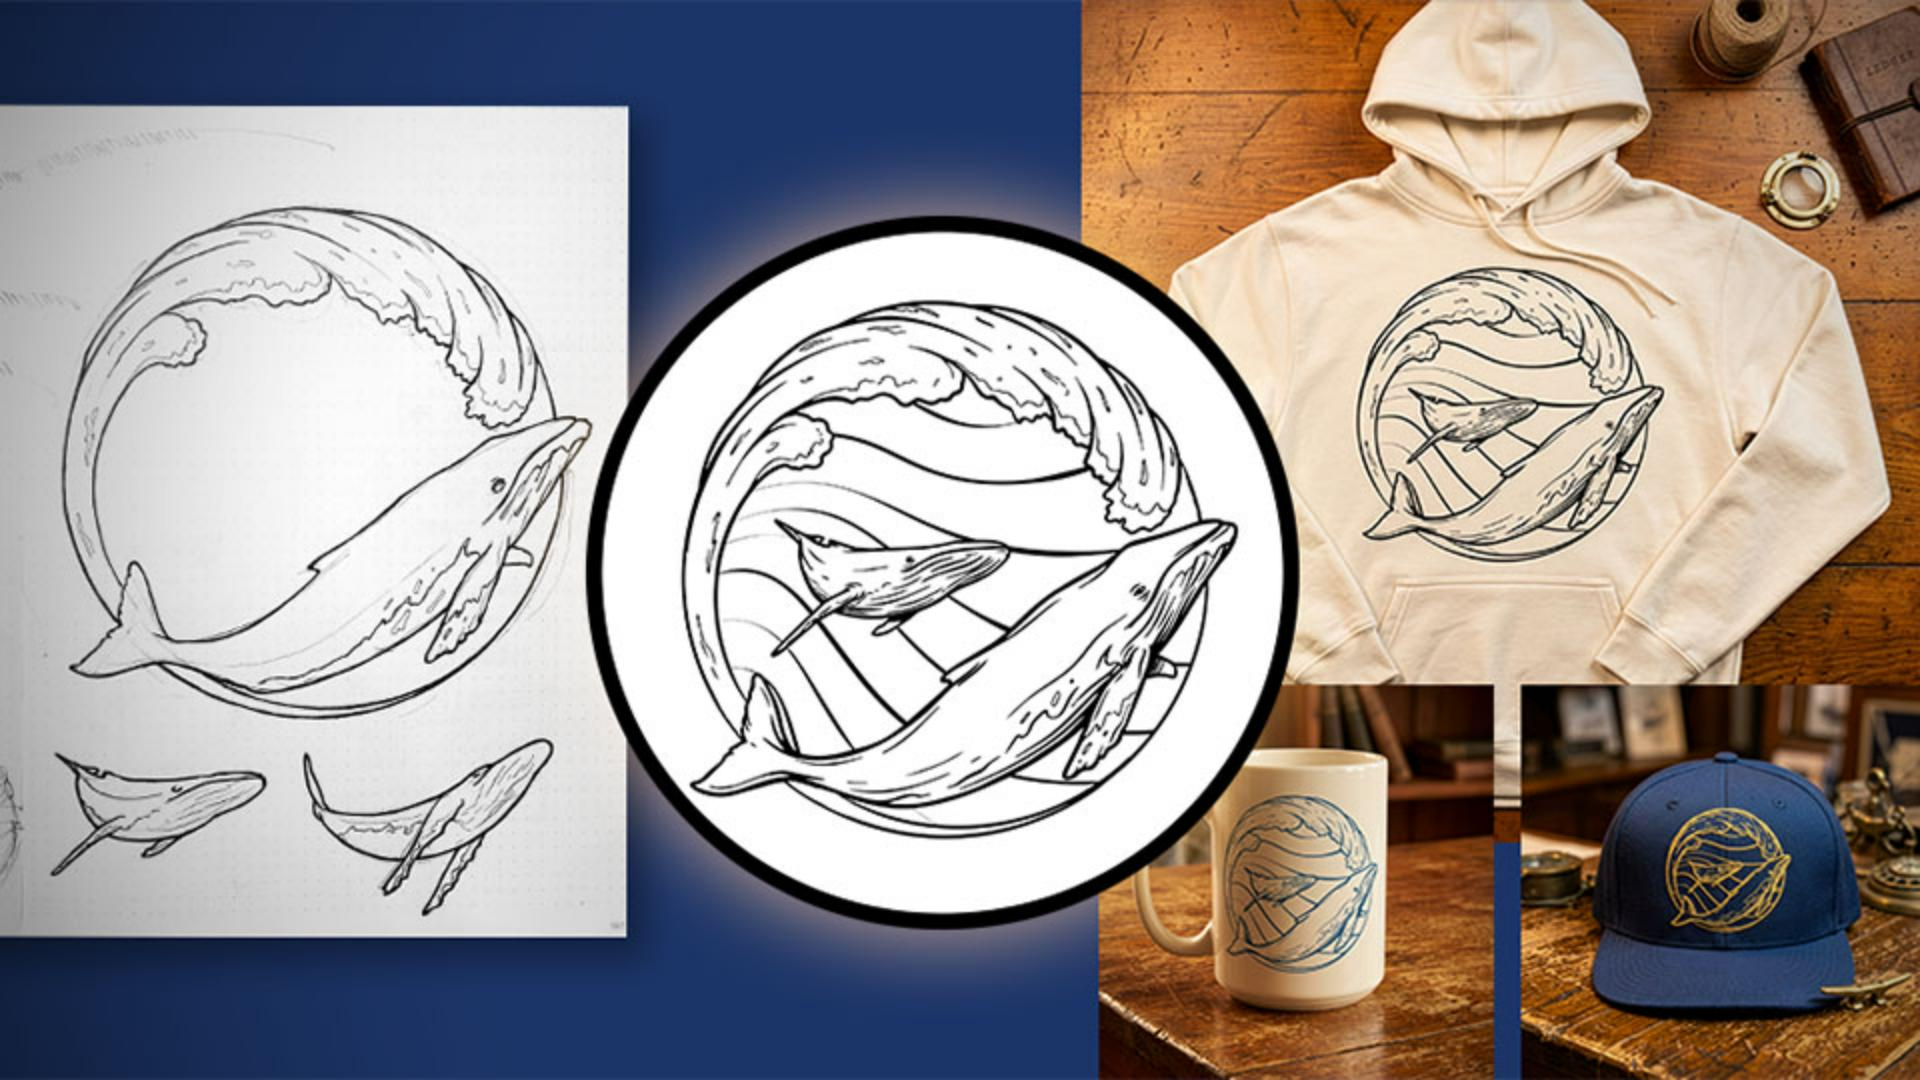
When I'm done cleaning up my vectors, I want to see how the emblem might look on the final products.
To do that, I'll jump into Firefly and create a few quick mockups.
For realistic results, I'll include details about the product, the lighting, the environment, print style, and camera angle in the prompts.
I'll include my prompt in the project file so you can experiment with it too.
I'm using a PNG of the linework as a reference, so that Firefly has some flexibility to match the different textures of production methods like screen printing or embroidery when creating the mockups.
This mockup looks great, but the background is just a little bit busier than I want.
I'll select some of these areas with a soft edge brush to remove, and that way I can put the focus back on the product.
With just a few tweaks to my prompt language, I can generate mockups of other items in the same setting and mood.
I'll include these amended prompts in the project files too.
Once I'm happy with the options, I can share the mockups with the printer and start thinking about getting things produced.
So, that's the workflow.
I started with my hand-drawn sketch, used Concept to Vector to get to a solid starting point quickly, refined it with some of Illustrator's drawing tools, and then used Firefly to preview the finished design.
With the time that I've saved in production, I'm going to get back to drawing.
I'm Colin Bright.
Thanks for following along, and I'll catch you on the next one.