The Roto Brush is a tool designed to help you quickly isolate elements and cut them out from their background.
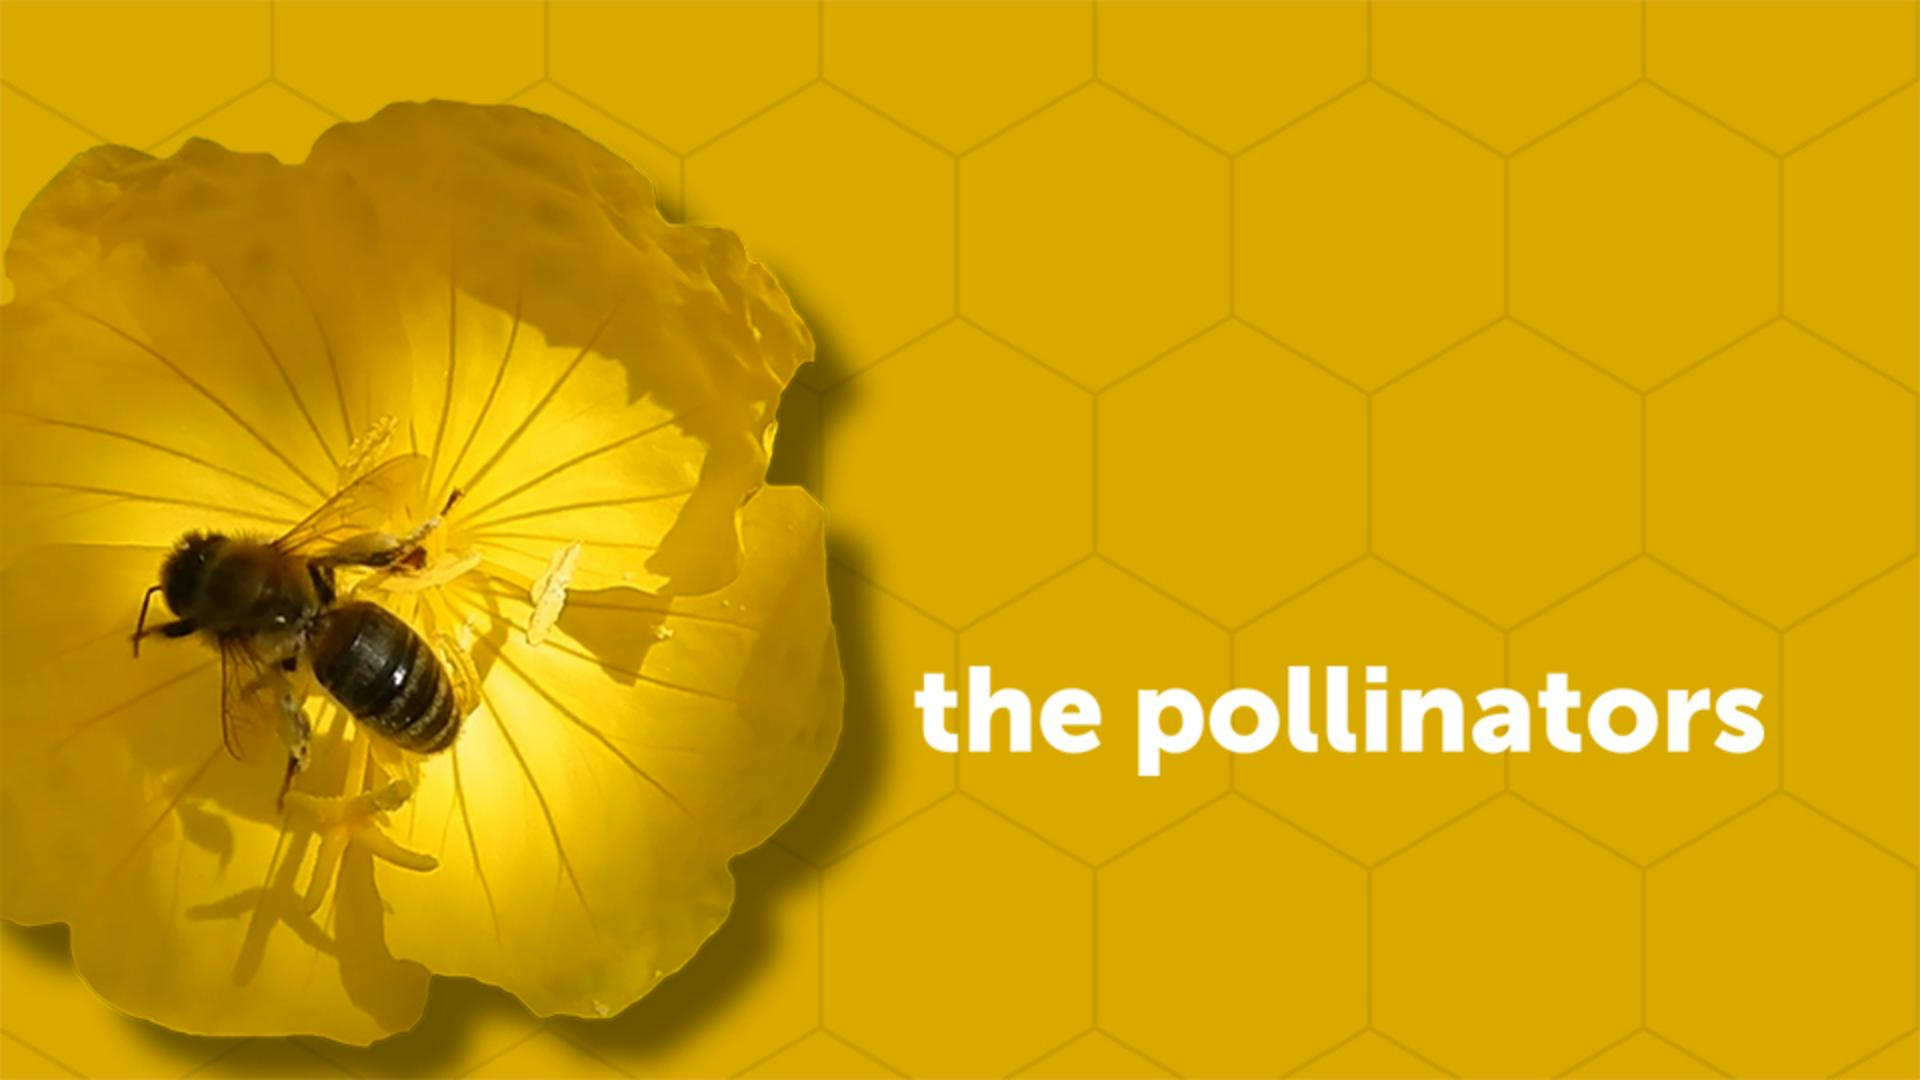
In this example, we're going to cut out this yellow flower with a bee on top from its background and superimpose it over top of this title animated background that I've already created.
So, I'll start by making sure Layer 1 is visible in the Timeline
Preparing the layer and Roto Brush workspace
and I'll move my Current Time Indicator to frame 0.
Then I want to make sure I'm working at full resolution, so I'll click on my dropdown here and make sure I'm set for Full resolution here and then I'll click on this dropdown on the right to make sure that its setting is Off (Final Quality).
Then I'll double click on Layer 1 to open it up in the Layer panel.
Now just so I can see the entire video file.
I'll go ahead and click on the magnification dropdown and tell it to fit to 100%.
Creating the initial Roto Brush selection
Now we can grab the Roto Brush tool up here out of the tool part and rather than clicking and trying to select the edges, I'm just going to click and draw inside the flower and once I've done that, you'll see a pink purple selection around the edge of my flower, and it's selected too much of the image down here.
So, I'm going to hold down Alt on Windows or Option on the Mac and I'll click outside the selected area with my red cursor and I'll click and drag over top of the areas I want to deselect and then I'll let go and you can see it's done a pretty good job selecting the flower here.
Now once you've drawn the initial Roto Brush selection, you want to pay attention to this area here.
Expanding and refining the Roto Brush span
This is the span, and this is the span of frames where it's going to apply the Roto Brush which is currently only 20 frames.
Now, even though this clip is 5 seconds long I'll just focus on the first 2 seconds for this video example.
If you want to do the full 5 seconds yourself, you can.
But I think you'll understand the it just pretty quickly when we do the first 2 seconds here.
So, I'm going to hover over the right side of my span and click and drag until it crosses over the 2 second area.
Then I'll press the Spacebar and watch the selection actually be generated over multiple frames.
Now I'll press the Spacebar to stop playback and I want to tell you if you're ever noticing problems with the selection you can step through frames by using the number 2 to move one frame at a time down the Timeline or 1 to move back up the Timeline.
I'm seeing an issue right here so I'm going to go back to the beginning which is frame 0 and I'll start this process over again, but I need to fix this one area so I'm going to zoom in by pressing the . key and then I'll hold down Alt on Windows or Option on the Mac and I'll just go over this one little area here and now it's properly selected the petals.
If you need to change the size of the brush you can hold down Control on Windows or Command on the Mac and click and drag up or down to make the brush larger or smaller.
Now I'll zoom back out again just by pressing the , key and then I'll go ahead and press the Spacebar to analyze the full 2 seconds.
Notice as the analysis is happening it's doing a really good job of isolating the selected area.
Once it gets through my span I'll go ahead and press the Spacebar to stop playback.
Now just to make sure my work area is set to 2 seconds I'll move my Current Time Indicator to 2 seconds in the Timeline and press N to set the end of my work area.
Adjusting edges and positioning the isolated element
Now let's go back to the Composition panel and you can see we've successfully isolated the flower. to make adjustments, I'll go to my Effect Controls panel here and I want to shift the edge in, so I'll click and drag on the Shift Edge parameter and I'll just have it crop in all the way around the edges just a little bit and then I want to position this flower to the left.
So, I'll select Layer 1 and press P to open the Position and I'll scrub on the X parameter to position this off the left-hand side.
Now when we go ahead and preview our animation you can see I've got my animated title underneath my isolated flower.
Now to make the flower pop off the background a little bit more, I'll press the Spacebar to stop playback.
Enhancing the composite with drop shadow effects
Select Layer 1, go to my Effects and go to Perspective and choose Drop Shadow.
Then I can increase the Softness of my shadow and add a little bit of distance.
Now when I scrub through not only do I have the isolated element, but I have a nice little drop shadow to add a little bit more pop.
And all of the selection and isolating was made possible by using the Roto Brush.
Download a sample file to practice with. This sample file is an Adobe Stock asset you can use to practice what you learn in this tutorial. If you want to use the sample file beyond this tutorial, you can purchase a license on Adobe Stock. Check out the ReadMe file in the folder for the terms that apply to your use of this sample file.
What you learned: How to isolate an element from its background with the Roto Brush tool
Create a Roto Brush selection
Make sure the resolution and fast preview options are set to Full quality.
Double-click the video layer in the Timeline panel to open it in the Layer panel.
Select the Roto Brush tool from the Tools panel.
Paint inside the object you want to isolate.
Change the duration of the span to set the duration for the Roto Brush.
Press Alt (Windows) or Option (MacOS) and paint over areas of a selection to remove those areas from the selection.
Press the Spacebar to start and stop the analysis, and make changes to the selection as needed.
Adjust the Roto Brush Matte options in the Effect Controls panel to fine-tune the selection.
Tip: Use the 1 and 2 keys on your keyboard to move up and down the timeline a single frame at a time. Once you have a satisfactory Roto Brush selection, press the Freeze button in the Layer panel to save it.
You can control how Adobe websites use cookies and similar technologies by making choices below. But note that if you disable cookies and similar technologies entirely, Adobe websites may not function properly.
Cookies are small text files stored by your web browser when you use websites. There are also other technologies that can be used for similar purposes like HTML5 Local Storage and local shared objects, web beacons, and embedded scripts. These technologies help us do things like remembering you and your preferences when you return to our sites, measure how you use the website, conduct market research, and gather information about the ads you see and interact with.
You can make choices in the menu below about what cookies and other technologies you want us to use on Adobe sites when you visit them from this browser. You can always change those choices later by clicking on the Cookie Preferences link at the bottom of the page.
If enabled:
We can improve your experience by tailoring the site and the content to things we think might be of interest
We can better keep track of your preferences — like what language you prefer to use
We will better understand your likely interests so we can provide you more relevant Adobe ads and content on non-Adobe websites and in non-Adobe apps
It will help us improve the performance of our website and those of our partners who use the Adobe Experience Cloud
If disabled:
We won’t be able to remember you from session to session so the experience may not be tailored to your interests
You’ll still have access to the content of the site but certain features that depend on cookies may not function
You’ll still see ads, they just may not be as relevant to you
General information
You can control how Adobe websites use cookies and similar technologies by making choices below. But note that if you disable cookies and similar technologies entirely, Adobe websites may not function properly.
Cookies are small text files stored by your web browser when you use websites. There are also other technologies that can be used for similar purposes like HTML5 Local Storage, web beacons, and embedded scripts. These technologies help us do things like remembering you and your preferences when you return to our sites, measure how you use the website, conduct market research, and gather information about the ads you see and interact with.
You can make choices in the menu below about what cookies and other technologies you want us to use on Adobe sites when you visit them from this browser. You can always change those choices later by clicking on the Cookie Preferences link at the bottom of the page.
If enabled:
We can improve your experience by tailoring the site and the content to things we think might be of interest
We can better keep track of your preferences — like what language you prefer to use
We will better understand your likely interests so we can provide you more relevant Adobe ads and content on non-Adobe websites and in non-Adobe apps
It will help us improve the performance of our website and those of our partners who use the Adobe Experience Cloud
If disabled:
We won’t be able to remember you from session to session so the experience may not be tailored to your interests
We’ll still count your use of our site and services
You’ll still have access to the content of the site but certain features that depend on cookies may not function
You’ll still see ads, they just may not be as relevant to you
Operate the site and core servicesOperate site and measure engagement
Always active
These cookies are required, and they are used to enable the site and related services core functionality. Without them the site could not operate, so they cannot be disabled.
These cookies enable the site and related services’ core functionality and collect statistics about user engagement, such as counting active use to help us understand trends. These cookies cannot be disabled.
Measure performance
These cookies are used to analyze site usage to measure and improve performance. Without them Adobe cannot know what content is most valued and how often unique visitors return to the site, making it hard to improve information we offer to you.
These cookies are used to analyze site usage to measure and improve performance. Without them Adobe cannot know what content is most valued, making it hard to improve information we offer to you.
Extend functionality
These cookies are used to enhance the functionality of Adobe sites such as remembering your settings and preferences to deliver a personalized experience; for example, your username, your repeated visits, preferred language, your country, or any other saved preference.
Personalize advertising
These cookies are used to enable Adobe and our partners to serve ads more relevant to your interests. Without them you will still see ads, but they might not be as relevant to you.
Personalize advertising
These cookies are used to enable Adobe and our partners to serve ads more relevant to your interests. Without them you will still see ads, but they might not be as relevant to you.