Using vector brushes and gradients
Use vector brushes and gradients to create a frosted sheet cake scene.
Published
Introduction
Decorative strokes and gradients in Adobe Animate give you the freedom to create.
Let's use them to make a frosted sheet cake scene.
Applying gradients to cake shapes
Select the top of the cake with the Selection Tool.
Now, select the Color panel.
With the Fill selected, change the color type to Linear gradient.
Select the color stoep on the left and change its value to light beige.
Select the other color stop and make it a lighter version of the first color.
Click the Add To Swatches button and store the gradient with the swatches.
Select the front side of the cake, go to the Swatches panel and select our gradient.
Let's add a border that looks like piping.
Creating piping effects with decorative strokes
We can use a decorative stroke to create the effect.
Switch to the Ink Bottle Tool, which is nested with the Paint Bucket Tool.
Go to the Properties panel.
On the Tool tab in the Color and Style section next to Style, click on the three dots.
Decorative strokes are brushes created with vectors.
Brushes can be used with many tools that create strokes, except the Pencil Tool.
Here's the novelty pattern brush flowers.
Decorative strokes can be either an art brush that scales or stretches artwork as a stroke or can be a repeating pattern of the artwork applied to a stroke.
We'll use a repeating pattern to simulate the cake piping.
Open the Brush Library and go to Pattern Brushes, PatternArrow, Arrow Floral, or type Arrow Floral into the Search field.
Swap the Fill and Stroke so that the gradient becomes the new stroke color.
Select the Color panel and let's swap the stops.
Set the Stroke Size to 12 so that it's big enough to see.
Click on the edge of the cake rectangles.
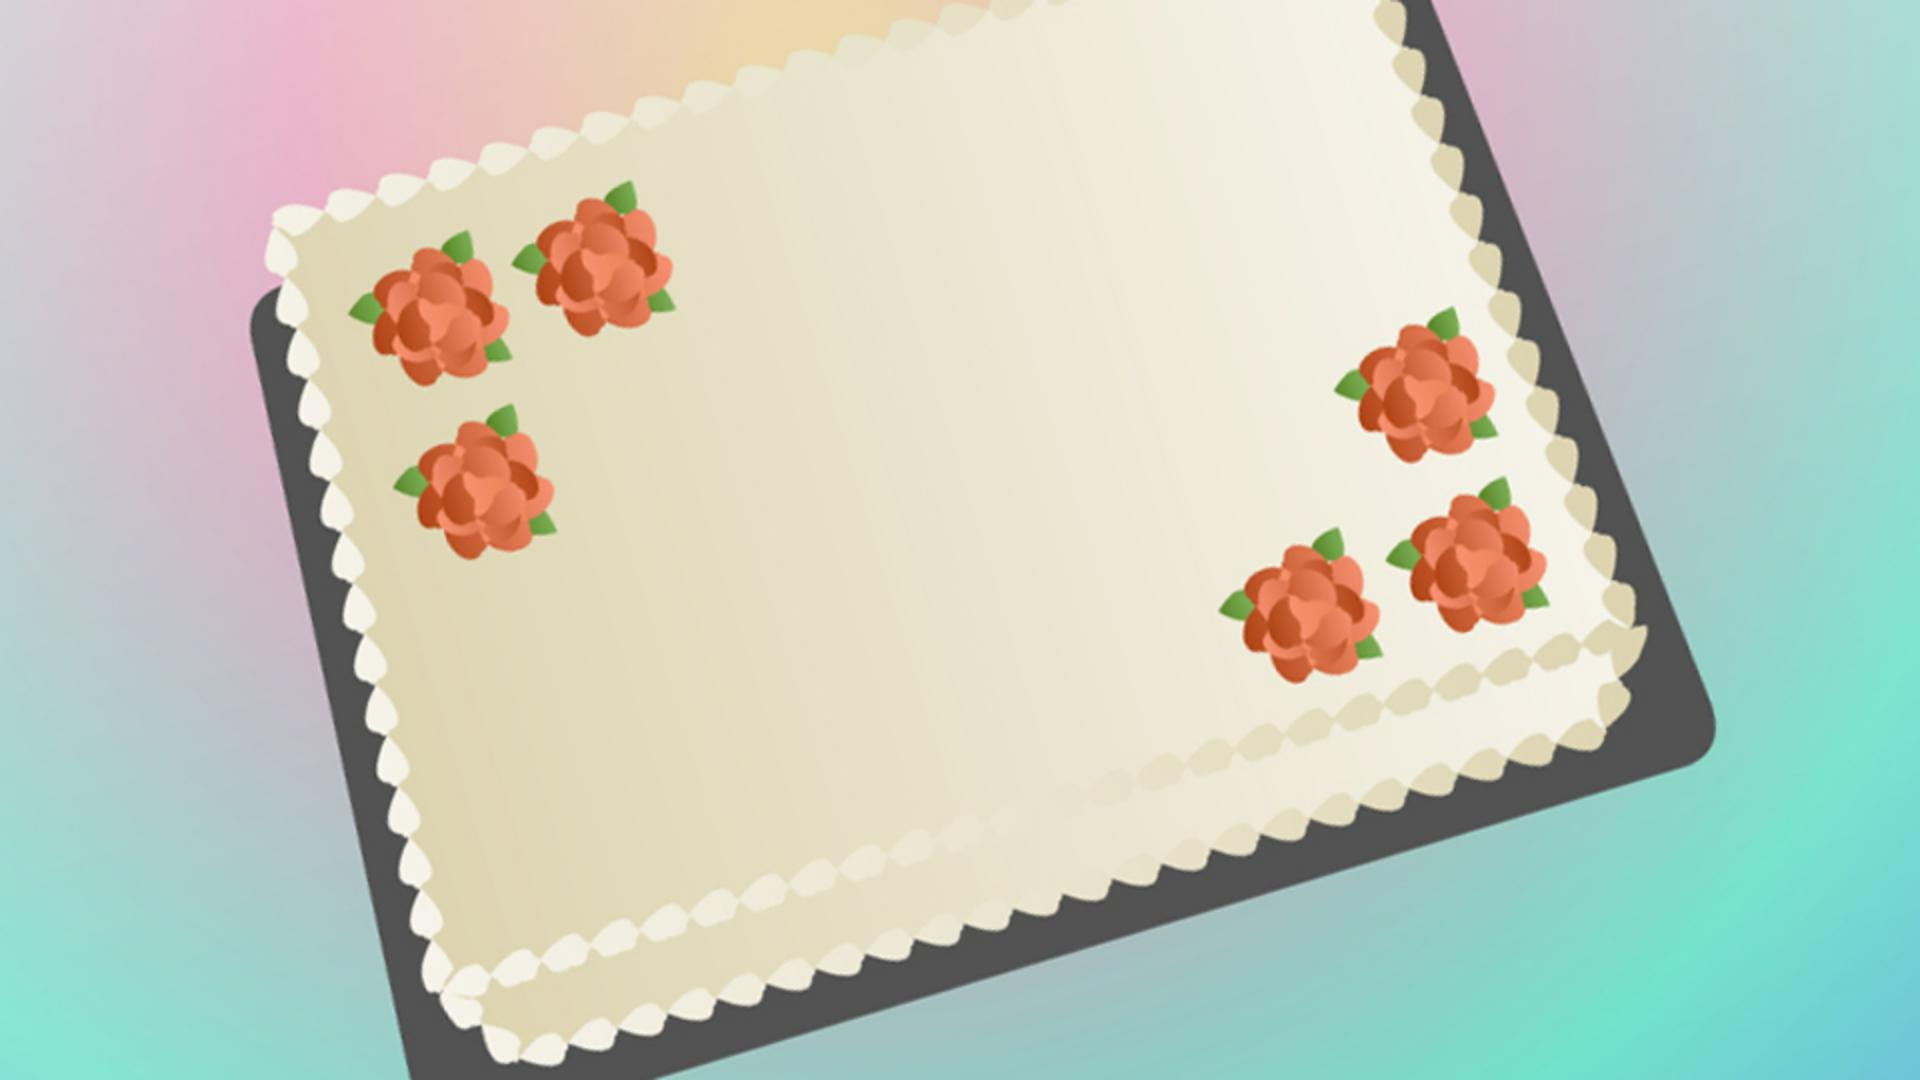
Mmm frosting.
Designing frosting flowers with pattern brushes and tints
We can use that same vector brush to make frosting flowers.
Let's use the swapped gradient for the fill.
For the stroke, select the swatch with the original gradient and let's modify it.
Increase the contrast and the gradient by making one stop darker and add this new gradient to the swatches.
Make a new layer called petals.
Draw the circle big enough for seven arrows, another one with five and another one with three.
Switch to the Selection Tool and select the five-arrow circle.
Right click to open its Contextual menu and go to Transform, Flip Horizontal.
Select all three circles.
Open the Align panel and align their centers.
Make another layer called leaves and move it under the petals layer.
Select the Line Tool and draw a line long enough to make one arrow as a leaf between the flower petals.
Draw out a couple more leaves in between the other petals.
The shapes look good, but we really need some color to make this look like a frosting flower.
Using advanced layers in Animate, which are on by default, we can add a tint to whatever is on the layer.
With the pedals layer selected, go to the Properties panel.
In the Color Effects section, select Tint and change the color to a reddish orange.
Select the leaves layer and add a green tint.
Now, you can use this flower to decorate your cake.
Select it and Alt drag, Option drag on a Mac, to make copies.
Building a gradient background with blend modes
Let's add a new layer and drag it to the bottom so we can add an iridescent colored gradient background.
We could apply a color to the stage, but we can't make it a gradient.
So let's draw a rectangle the size of the stage and apply a gradient to it.
Set the Fill to our gradient and set the Stroke to none.
Select the rectangle and select the Gradient Transform Tool, which is nested with the Free Transform Tool.
Move the center upwards toward the top of the cake and scale the gradient to fill more of the space.
We can add a linear gradient on top of it to soften it.
On a new layer, make a new rectangle with the linear gradient going from white to gray.
With the Gradient Transform Tool, rotate the gradient from a corner, making it go from white on the top to gray on the bottom.
Scoot it up and widen the gradient so that the top is a light gray.
In the Properties panel, switch to the Frame tab, and in the Blend section, set it to Overlay.
Drawing shapes, adding gradients,
Preparing artwork for animation
and adjusting color with blends using advanced layers sets the stage for whatever you'd like to animate.
Check out creating symbols for more flexibility and editing, and to get ready to animate.
What you learned:
Working with the Color panel
Setting strokes and fills
Creating gradients
Using swatches
Using the Brush Library
Working with vector art brushes and vector pattern brushes
Applying tints as a color effect
Manipulating gradients with the Gradient Transform Tool
Applying blends