Create a symbol
Save art and make it easy to update and reuse by creating symbols.
Published
Introduction
So now that we have a better understanding of the drawing tools inside of Animate, let's move forward and learn about something called a symbol.
Understanding symbols versus groups
So you can see right now if I click on this boat, it's a bunch of ungrouped individual pieces of art.
It's not moving together as a unit or a group.
And I could just press Command G or go to Modify, Group, and that would group it together.
I'm going to press Command Z or Edit Undo, and then I'm going to select the boat by grabbing the marque and selecting the entire object on the Stage.
Or you can just click on the keyframe, which selects the contents of everything in that frame.
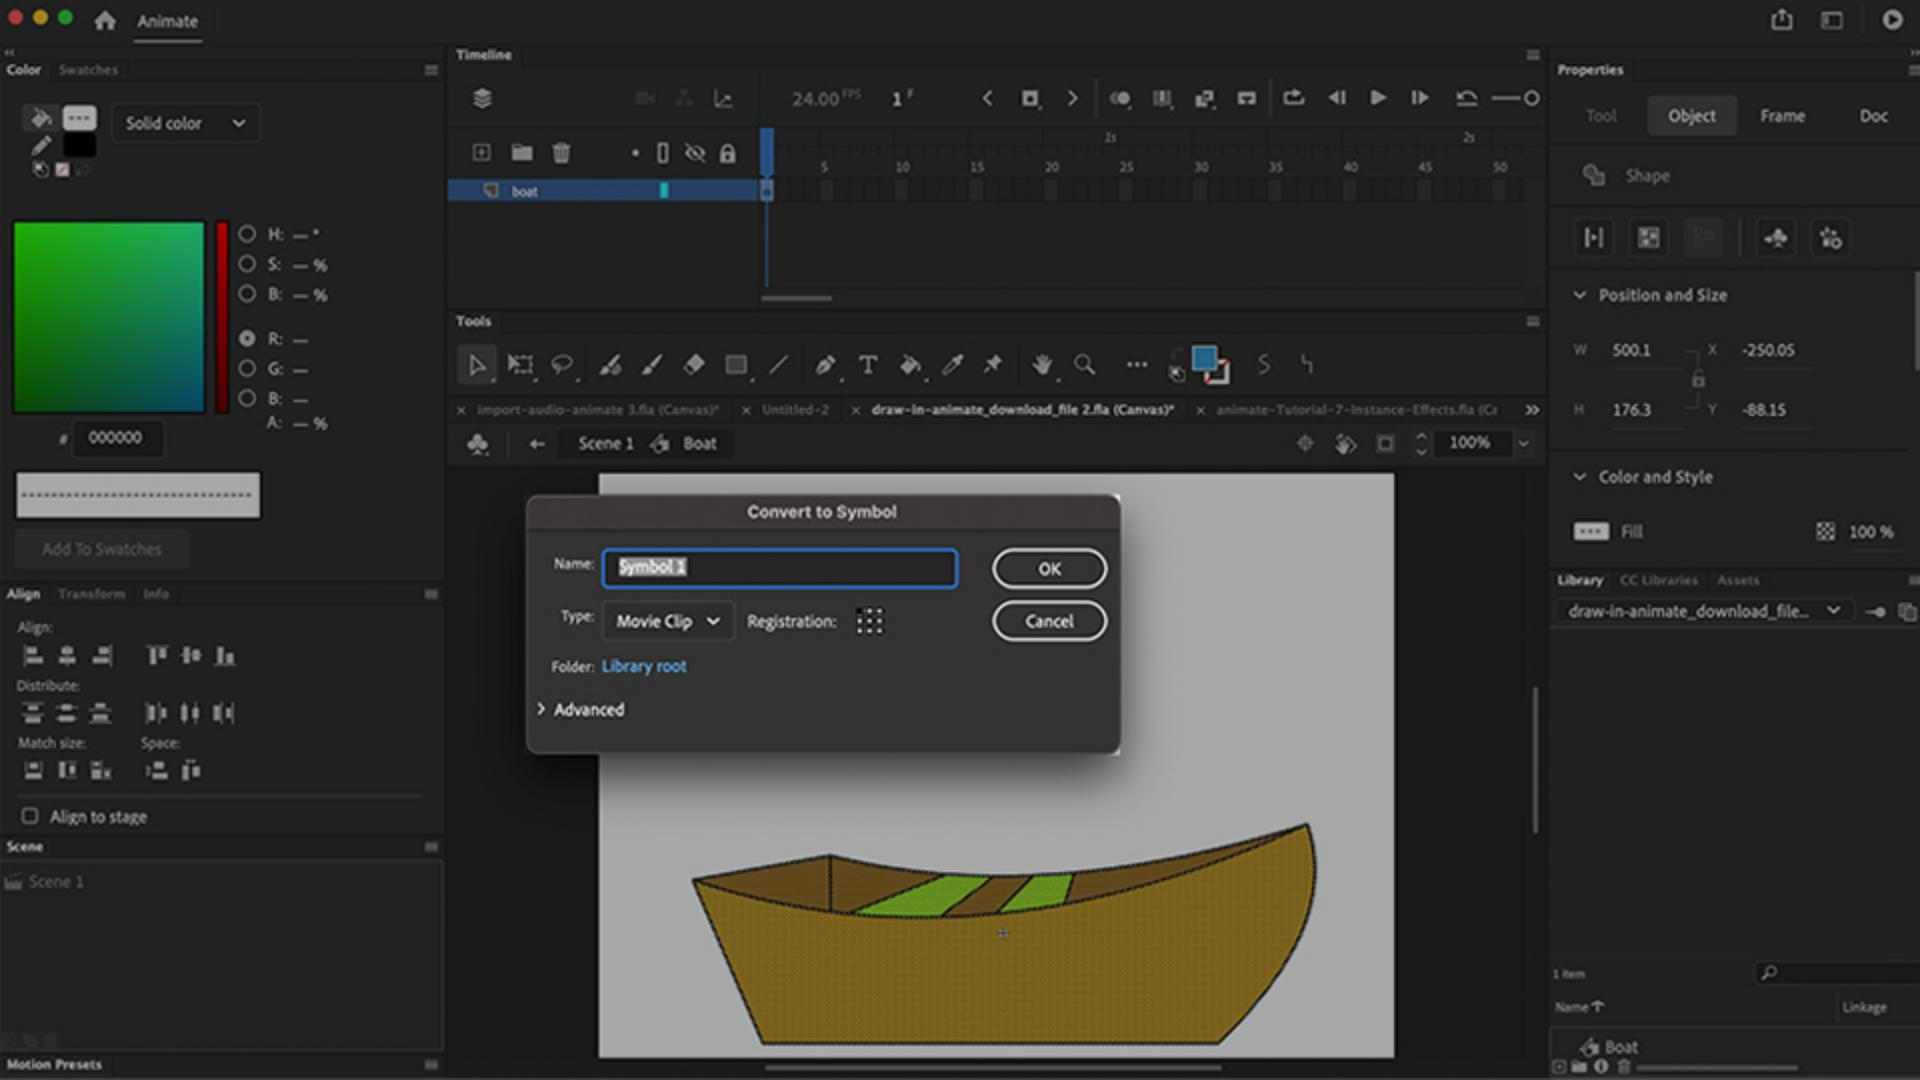
So now that I have the entire boat selected, I can go to the Modify window and select Convert to Symbol.
Converting artwork into a graphic symbol
So then we see the Convert to Symbol dialog box open and we can name this symbol Boat.
And you'll see that there are three different types of symbols.
But we're just going to focus right now on the graphic symbol, which I use for any static piece of art.
If I'm going to use it more than once, I'll convert it to a symbol.
So I'll click OK.
And now, you'll see that one of the properties of a symbol is that it's a grouped object.
So now, I have a grouped object on the Stage, which is now called an Instance.
And if I go under Window and open up my Library, you'll see that every individual project has its own Library.
The Library will hold the assets for every single project, your symbols, bitmap, sounds, etc.
So here, we have in our Library just one asset.
We have our Boat, our boat graphic symbol.
And you'll see that now, the one on the Stage is called an Instance.
It's one instance of the actual symbol that we have in our Library.
Reusing and transforming symbol instances
So I'm going to click and drag this out to the Stage.
And now, I have two instances of the boat.
I'll click and drag one more.
And now, I have three instances of the boat symbol on the Stage.
So a symbol is a reusable object that resides in the Library and you can use it over and over again.
So I could press Q on the keyboard to get my Free Transform Tool and scale these down, so every instance is a little bit different.
I can flip it horizontal.
Right click, Transform, Flip Horizontal.
So my instances can be slightly different, different sizes, different orientation.
One of the real benefits of a symbol is that it makes it easy to update your artwork and your project.
Editing symbols to update all instances
So I can even have a completed project and animation on my Timeline and all I have to do is go to Window, Library, I can double click into the symbol in the Library, and it brings me into this editing area.
Which is kind of like the dressing room for our characters.
Where we can touch up their makeup, or upgrade their art, or our actor in a play, and we knock, knock, knock, double click, and we go into their dressing room.
And you see now at the top there's a little breadcrumb trail.
And it says Scene 1 which is a link that takes us back to the main Stage.
I can open up the Library again by pressing Command L.
Again, I can double click and now I'm inside of this boat.
So it's showing me that I'm off of Scene 1 inside this boat graphic symbol.
So now, in the symbol editing area, if I wanted to change the color of the boat, I can grab my Selection Tool and select any part of this boat.
Because you'll see in the editing area, everything is ungrouped.
Making it easy to edit or update the art.
So in this editing area that I like to call the dressing room for my characters or my art, or my cast if you will, and I can click on this boat and i can just change the color.
Change it to a blue.
And now, watch what happens when I go back to Scene 1, to the main Stage.
And boom.
All three of the instances that are attached to this symbol get updated.
Making it really easy to update your art at any point in your animation or your project.
Next, we take this symbol and Animate it using motion tweening.
Stay tuned.
What you learned:
A symbol is a reusable object that resides in the Library (Command+L, Control+L on PC)
Each animate file has its own library that holds all your assets
A symbol on the stage, is called an “Instance”
You can edit a symbol by double-clicking the symbol in the Library or double-click the instance on the stage to Edit in Place.
When you update a symbol, it updates every instance in your movie
Symbols make it easy to update and reuse your art or illustrations