Create and align artwork with guides
Create polished layouts in Adobe Illustrator by aligning graphics and text to customizable ruler guides.
Published
Introduction
In this tutorial, you'll learn how to align content in Illustrator CC using ruler guides you create.
Now, ruler guides are useful when you need to have what I like to refer to as a persistent alignment.
So, if any content you bring near the edge of an artboard needs to be a certain distance from it like maybe a half inch, you can draw a guide and leave it there, that way you can snap content to it.
The ruler guides are usually created
Showing rulers and understanding ruler origin
by dragging from the document rulers.
By default, you need to show the rulers.
So, make sure the Essentials workspace is chosen.
Then click the show Rulers button over here in the Properties panel.
Now the rulers show along the top in the left edges of the document window.
And these are useful for accurately placing and also measuring content you create.
By default, the measurements on the rulers always begin in the upper left corner of the active or the selected artboard.
If you want to change this ruler origin or where the zeroes are, you can drag from here to where you want them to start.
Like maybe down here in the lower right corner.
This could be useful for measuring from the edge of the artboard for instance or from this lower right corner.
Now, to reset the zero to the upper left corner of the artboard, you can double click up here.
The units for the rulers are actually set here in the Properties panel.
Make sure that Inches are chosen.
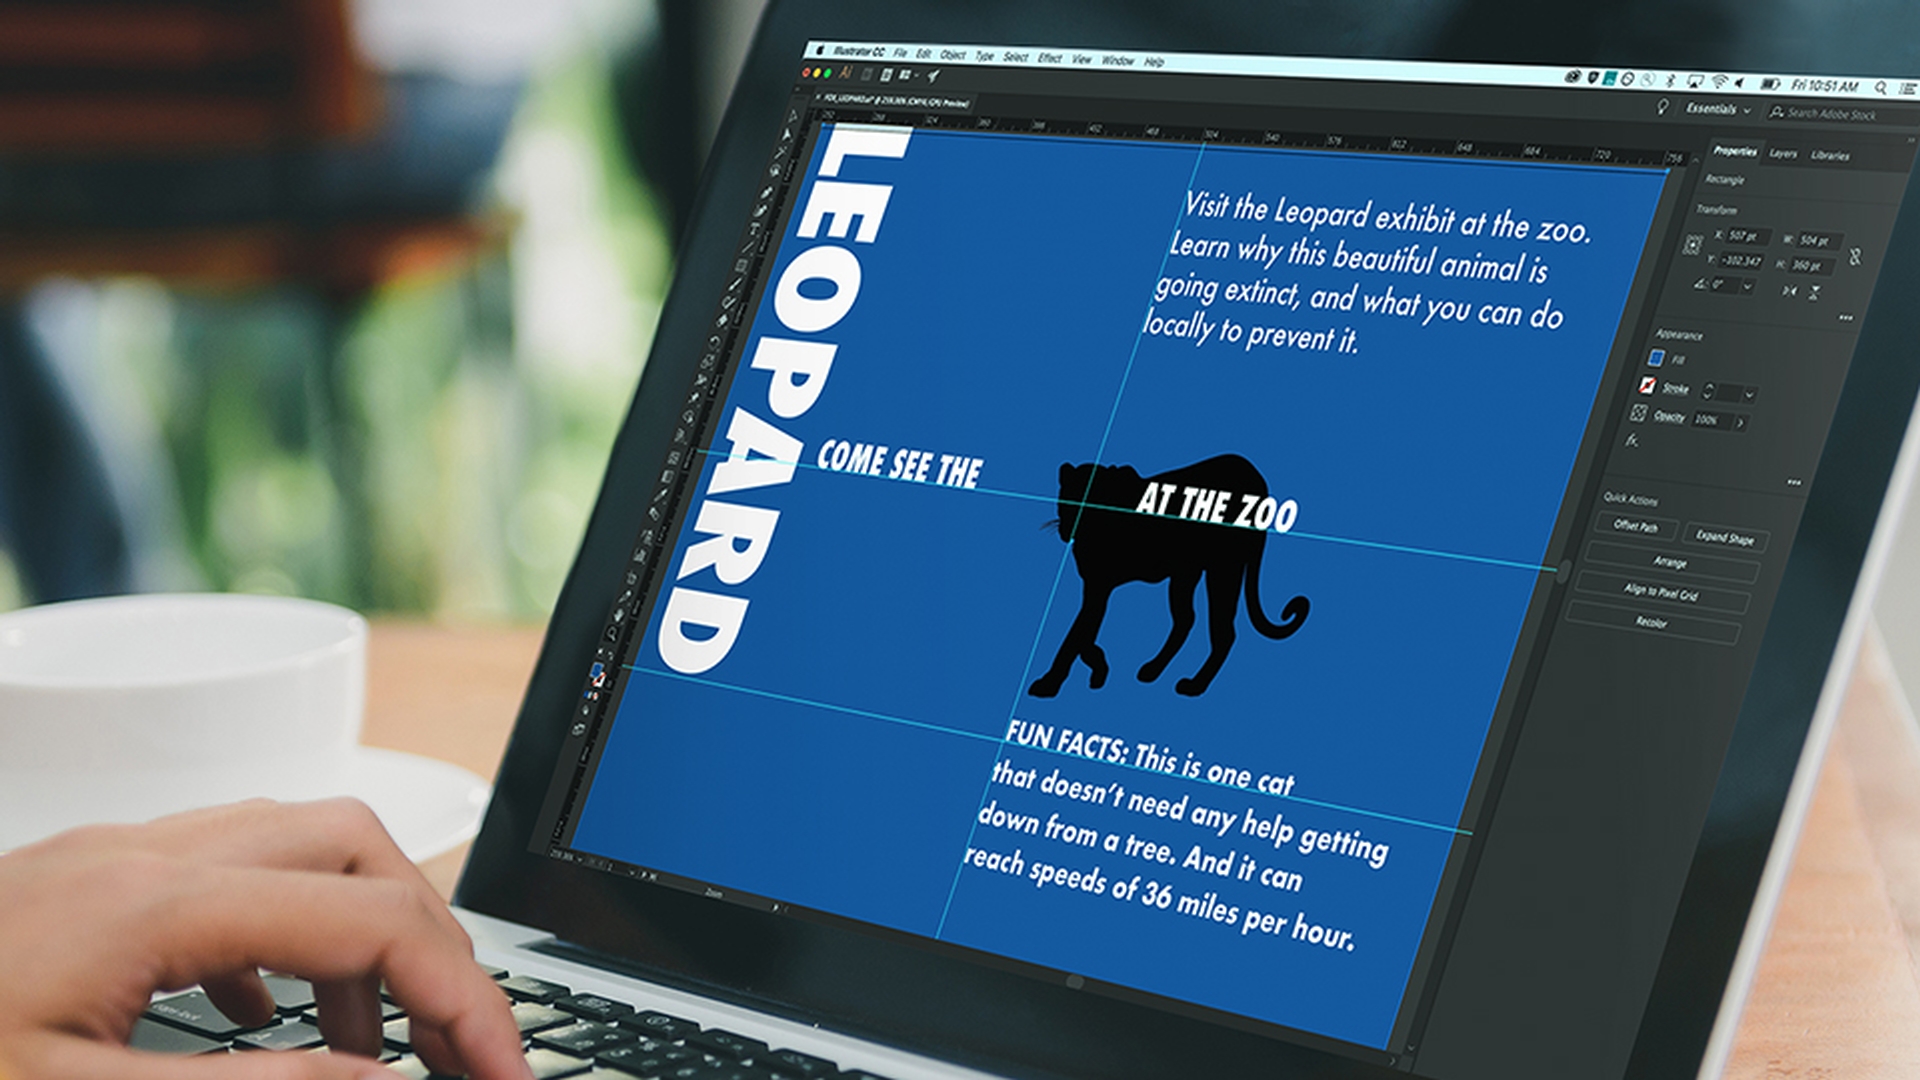
Then to create a guide,
Creating and positioning ruler guides
drag from the top or horizontal ruler into the document window.
When you release, a guide is created, and it's also selected.
In this case, you can tell it's selected because it's blue in color.
If you notice, guides you make extend all the way across the canvas area by default.
Now with the guide on the artboard and it's still selected, you can actually move it by dragging it or changing the Y position, in this case in the Properties panel.
The X value is the distance from the left edge of the artboard by default and the Y position is the distance from the top edge.
Now, to move the guide to the vertical center of the artboard, change the Y value to 2.5 or half the height of the board and then press Enter or Return.
Guides in Illustrator CC are actually treated like objects, like a line or a path you draw.
That means you can easily transform, delete or even copy them.
To make a copy of this selected guide, press Option on Mac OS or Alt on Windows and drag the guide down.
Notice that you can see how far you're dragging by the measurement label that shows up next to the pointer.
Release the mouse button and then the key when it's about this far down to create a new copy.
You could also use Copy and Paste commands when it comes to guides or you can delete one by simply pressing Backspace or Delete.
Next, you'll add a guide to the horizontal center of the artboard
Copying guides and aligning them to a specific artboard
using Align options.
Notice that there's an artboard below this one.
In this case, we don't want a vertical guide to extend all the way across that artboard, since we only need to use it on this one.
To restrict the guide to one artboard, select the Artboard tool in the Tools panel on the left and make sure the artboard you want to add the guide to is selected by clicking it, this one.
Drag a guide out from the vertical ruler on the left as you drag, press the Shift key and it it'll actually snap to the measurements on the ruler above it.
Drop it at three inches on the ruler then release the mouse button.
Select the Selection tool and you're going to align this guide to the artboard using the Align options.
Choose Window, Align to open the Align panel.
Choose Show Options from the Align panel menu up here and with the guide still selected, choose Align to Artboard from the Align To: menu down here.
Click Horizontal Align Center, so you can align the guide to the center of the artboard.
Click in a blank area to deselect the guides.
Locking guides and snapping artwork for precise alignment
Now, to lock the guides so you don't accidentally move them, you can click the lock Guides options over here in the Properties panel.
With the guides locked, next you'll drag all the content to align to them.
To ensure the objects snapped your guides, make sure that Snap to Point is selected over here in the Properties panel.
Also, with the smartguides turned on, found here in the Properties panel, it can be more apparent when content is actually aligned to the guides.
Alignment words like Intersect or Xs or Line guides will appear.
Select the Zoom tool in the Tools panel and drag across the word here to zoom in.
Press V to select the Selection tool and then select the text.
Drag the text by this small blue box to the guide.
When the pointer turns white indicating that the base line in the text is snapped to the guide, release the mouse button.
Choose View, Fit Artboard in Window.
To hide the guides, with nothing selected,
Hiding guides and finishing the layout
click the Hide Guides option in the Properties panel and go ahead and save your file.
The next time you need to align content, like text or graphics, try creating some guides.
View Align content to explore more ways to align artwork intuitively and precisely.
Contributor