See the benefits of shooting in raw format
Learn the benefits of shooting photos using Adobe DNG and other raw formats for editing in Lightroom Classic.
Published
Adobe Photoshop Lightroom is now Adobe Lightroom Classic, with the same functionality and features. If you're looking for the all-new photography service, check out Lightroom.
Introduction
[Lr Lightroom CC Library] >> One of the choices we face when taking photos [JPEG RAW] is deciding between shooting in raw or JPEG format.
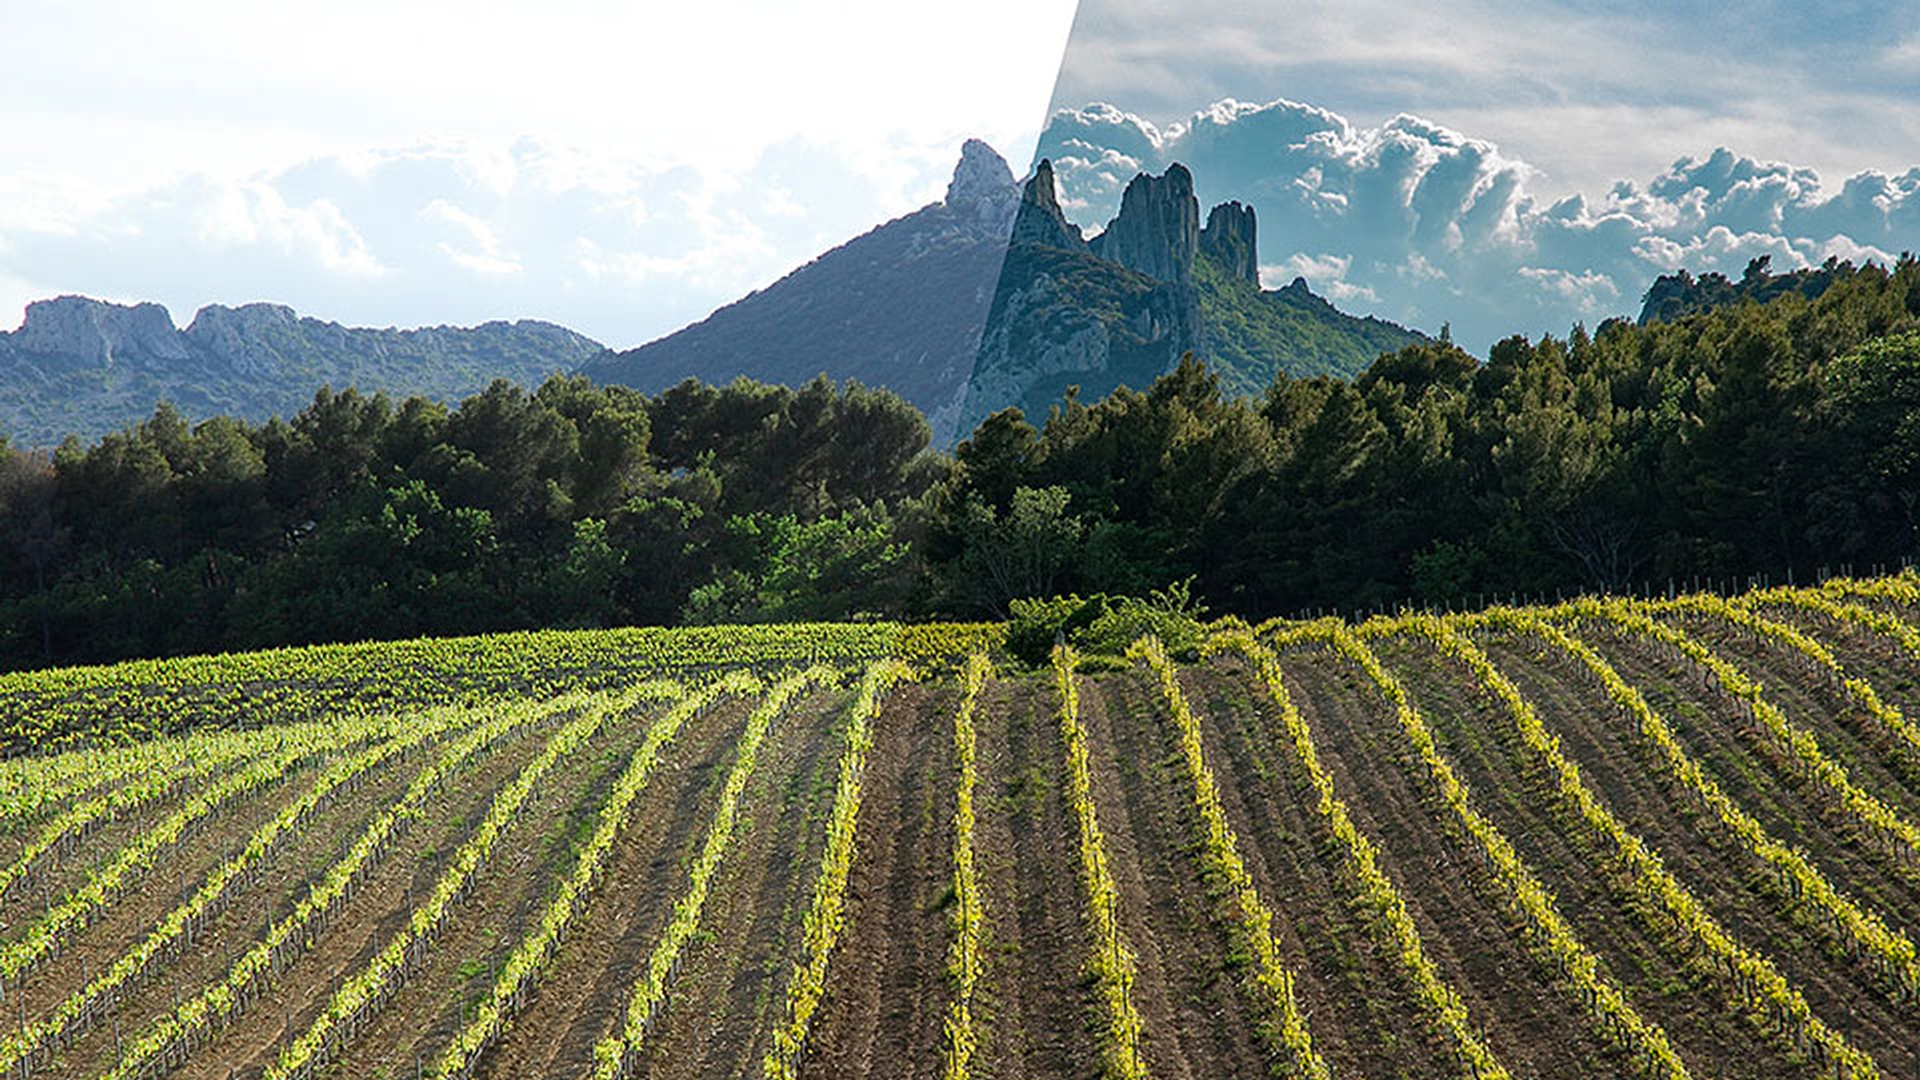
Raw gives you so much more creative flexibility in your photography and your editing in Lightroom, including the opportunity to fix exposure, as in the clouds in this scene, and easily adjust color balance, as in this sunset.
[SHOOTING MENU AUTO FOCUS SETTING ISO IMAGE SIZE IMAGE QUALITY] Whether you use a point shoot, DSLR, [FINE NORMAL FINE+RAW NORMAL+RAW RAW] or even some Android smartphones, you can choose raw as the format for shooting photos.
Every camera is different, of course, but on most cameras, there's a setting such as image quality where you can choose raw as your capture format.
Why shooting in raw offers more editing flexibility
The advantages of raw become clear once you start editing your photos in Lightroom on a computer or mobile device.
Recovering exposure and highlight detail in raw vs JPEG
We'll look at two photos shot both in raw and JPEG at the same time.
Here are the originals of both photos, JPEG on the left and raw on the right.
Let's take a look at the highlights in this first photo.
[JEPG] In the JPEG photo, there's not very much detail in the bright highlight areas of these clouds.
By nature, a JPEG file captures a much lower number of levels of brightness than a raw file.
If I try to recover some of the detail using the Highlight slider here in Lightroom, no matter how much I try, I'm really not getting any improvement.
This is where working with raw files offers such an advantage.
Look at the difference in the raw file when I move the Highlight slider, you can see, I'm actually recovering some of the detail.
I have a much greater latitude in adjusting the exposure of the photo.
In many cases like this one, recovering highlights that were simply too bright to hold any detail.
[JPEG raw] Here's a side by side comparison of the edited photos with the JPEG on the left and the raw on the right.
Once again, you can clearly see there's much more detail that has been recovered in the raw file.
White balance control differences between raw and JPEG
Now let's compare working with White Balance. [raw] Here's the photo that was captured in raw and when I go to the White Balance pop-up menu, you can see there are quite a few choices.
This means that if you inadvertently chose the incorrect white balance on your camera, you could easily change it after the fact.
And even if you had your white balance setting correct at the time you took the photo, these choices give you a wonderful creative freedom to try other settings and just see what it looks like.
Now let's work with the JPEG photo.
This time when we go to White Balance menu, [As Shot Auto Custom] see there's really only three choices, As Shot, Auto, and Custom.
This is much more limiting, leaving you to either pick Auto, which you may or may not like or to manually adjust the settings using the Temperature and Tint sliders.
Unfortunately, there's also a much smaller range available in the Temperature slider in a JPEG as compared to when working in a raw file.
By the way, a typical Lightroom workflow
Practical workflow benefits of raw in Lightroom and Lightroom mobile
is to shoot and edit the raw files and then when you're ready, to Export the finished file in JPEG format.
It's worth noting that these kinds of edits could also be done with Lightroom mobile on many Android phones.
That gives you the ability to capture the raw format right from within Lightroom mobile and then edit the raw files in Lightroom mobile.
The advantages of raw that I mentioned, a greater opportunity to fix exposure and enhance white balance control, are what make raw and editing in Lightroom such a powerful combination.
The ultimate benefit of shooting in raw, of course, is that you'll be able to create better looking photographs.