Have fun with creative edits: safely add, undo, or refine
Next, let's do something colorful.
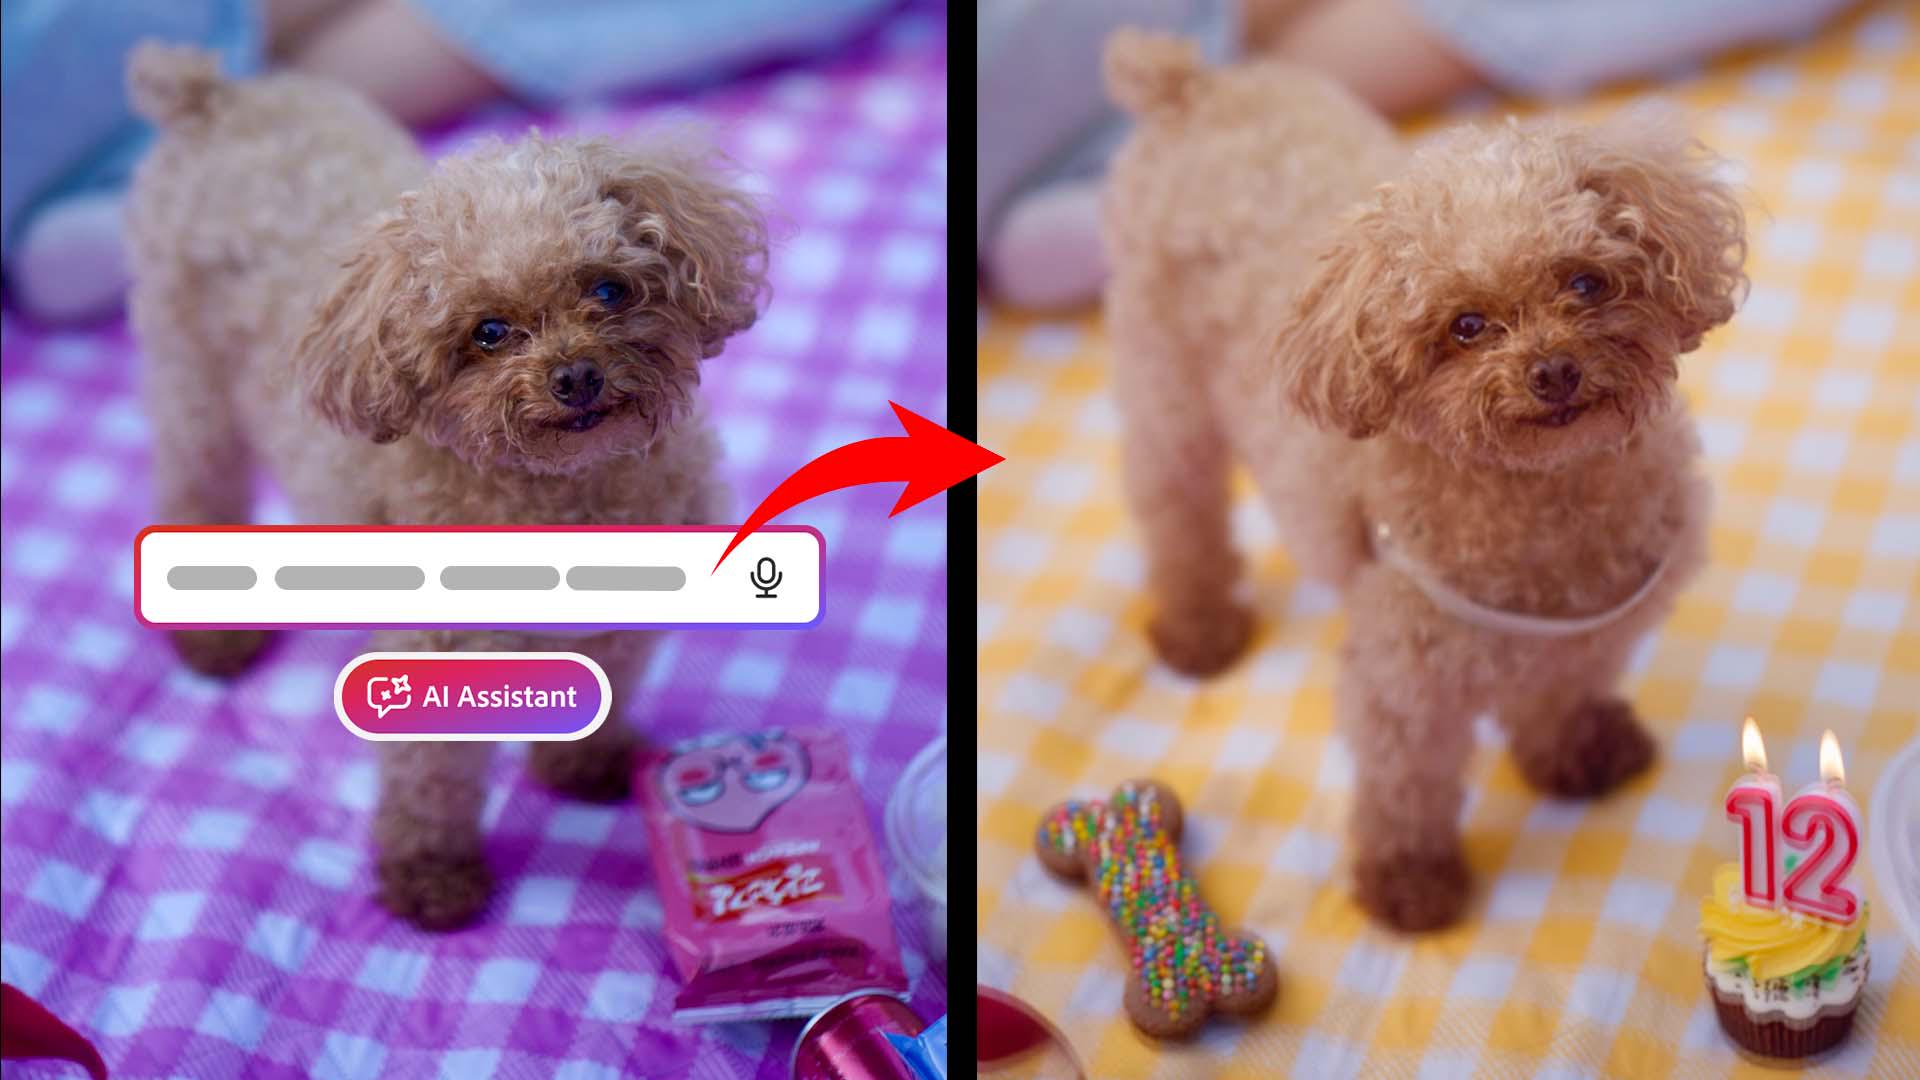
And by colorful, I mean I'm going to change the picnic blanket to his favorite color: "Change the picnic blanket to the color yellow."
And you can select which shade of yellow you would like it to be.
I like a very lemony yellow.
It always begins by interpreting my request.
Now it's generating, "change the color by keeping everything else the same."
Well, I didn't even give it that prompt; it knew exactly what to do.
Now that we have a blank canvas to work with, I'm going to go ahead and add some birthday treats into the picture: "Add a birthday themed dog treat in the picture and include a cake with 12 on it for his 12th birthday."
I'm excited to see what will come out.
It's creating selections in the photo and filling it with birthday themed dog treats - colored bone-shaped biscuit with sprinkles, on a yellow picnic blanket.
I really like how it's showing me every step of the thinking process.
That is transparency.
If you don't like it, you can press Refine.
I like this version the best.
I don't think that's enough: "Add even more sprinkles of treats everywhere!
It's a party."
I'm not a fan of either of these.
That's why it's so important that each of these prompts was generated on a separate layer so the original photo was never changed.
On the right side of the AI Assistant, you can tap Tools, and on the right side you can see all of your layers.
I don't like the scattered birthday celebration, so I tap on the Eye icon to hide that layer.
Now the yellow blanket looks a little bit out of place.
Let's make it look like it's golden hour: "Change the setting to be golden hour."
Oh, look at that glow.
I think it's a little bit too yellow right now.
Tap on the Microphone: "Can you tone down the yellow glow?"
But it is telling me that because the Layers Properties panel is open, you can reduce the opacity of the golden hour layer.
If you want to edit just on this one layer, you can go to Layer Properties [dog barking] and tap on Blend.
And I'm going to adjust the Opacity.
Now it's looking a bit more natural.
The last step before any export is to ask the AI Assistant to harmonize all the layers.
This blends everything together so the edits feel like they belong in the same photo, and not like they were added on top.
That looks cohesive.
If you like it, you can hit Save.
And there you go.
I edited everything on that photo just by talking to the AI Assistant.
I didn't have to manually select anything or mask anything or start over because I know my original photo is still intact.
Unfortunately, my dog won't know I did this, but when I'm traveling next week, I will post it on his birthday and he'll have his moment.
Now go have fun and try AI Assistant on Android with your own photos.
I'm Doreen Wang, thanks for watching and happy editing.