This tutorial shows you how to quickly and easily change the color of an object in a photo to another color using Photoshop.
Hi, I'm Colin Smith from PhotoshopCAFE.
We're going to use the Adjust colors feature in Photoshop to easily change the color of an object in a photo.
We're going to start with a simple example, then we're going to use a second example where we can jump a little deeper into some of the settings and options.
In this example, we'll change the color of this red car to another color.
If you don't see the Contextual Task Bar, go up under Window, and then choose Contextual Task Bar here.
In the Task Bar, click on Adjust colors.
You'll see seven color circles.
The first one will adjust all the colors in the image, and the other six - are the six most prominent colors in the image.
And when we adjust these, they're going to target just their specific color.
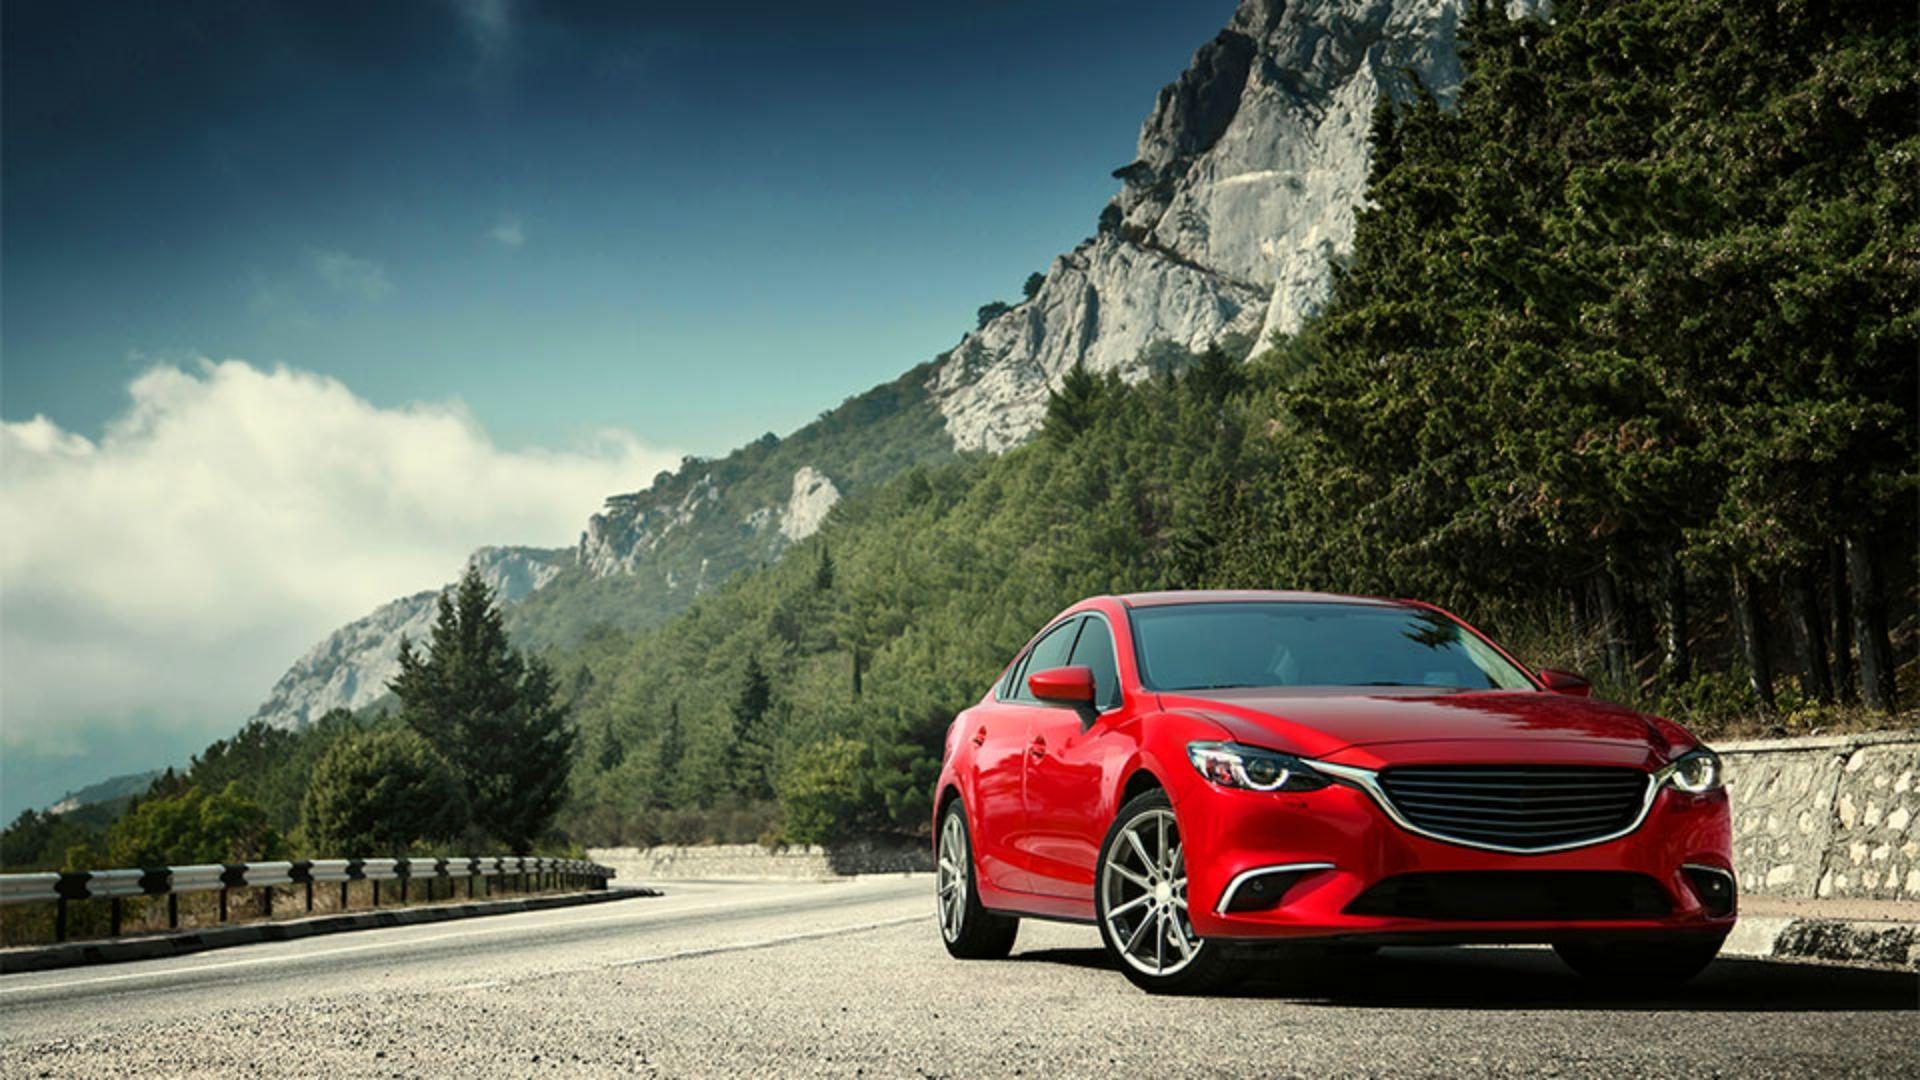
Let's click the circle that's closest to the color we want to change.
So, we're going to click the red circle.
Notice you'll see three different controls here: Hue, Saturation and Lightness.
Hue is the color itself - red, orange, yellow, green, blue, violet, indigo.
Saturation is the amount of that color.
If we go to the left, it becomes less saturated until it just goes to grayscale.
And Lightness will lighten or darken that color.
Let's change the Hue.
If we go around -127, notice we get a nice blue shade.
Let's reduce the Lightness to make it darker.
This gives us a deeper blue.
Now let's adjust the Saturation to add more vibrance to that blue.
And notice this gives us a nice Santorini blue.
Notice that the color of the ring is now split.
We've got the original - or the before color - on top, and on the bottom, we have the new color.
Now, experiment with some different shades, even taking the Saturation all the way down.
We could reduce the Lightness to get a black, or increase it to get a white, and pretty much any other color in between.
In this second example, we'll look more closely at the settings.
In this Victorian style image of a woman on a couch, we'll change the color of the dress.
Without the Adjust colors this might require some difficult selections work.
Let's click on Adjust colors.
Let's choose the second to the right with this reddish tone.
Then we'll get to adjust the Hue.
Let's make it a blue.
About -113 looks quite nice.
Notice as we adjust the dress, the skin tones are also changing.
That's because there're some similar colors in the dress and in the skin tones.
Let's make some adjustments to fix that.
When we use Adjust color, a Hue/Saturation adjustment layer is created above the layer in the Layers panel.
If we go up to the Properties panel, which is under Window, Properties, if you don't see it, you'll notice the familiar circles here, as well as the Hue, Saturation and Lightness sliders.
Scroll to the bottom of the Properties panel, and you'll see two colored gradients.
The gradient on the top is the Before - this is the original color - and then the gradient on the bottom is the After color.
As we move the far-right slider to the left, notice that it narrows the amount of colors that are being changed and it rolls off the skin tones.
Notice there's still some blue on the lips, around the eyes, and also there's some posterization around the cheek.
Let's take that a little bit more until that posterization disappears.
Notice about 10 does that nicely.
Notice we see our adjustments on the Hue because we already adjusted it.
We can adjust the Saturation and Lightness either on the Contextual Task Bar, or we can do them right here.
Let's do them inside the Properties panel.
Let's take the Saturation down to about -18 and then let's adjust the Lightness as well.
We'll go for deeper blue - round about -31.
Notice we still have some blue in the lips, around the eyes and the hairline.
And this is because the colors in those areas are too similar to the color in the dress to be able to isolate by using the Gradient sliders.
But we can easily fix this using a layer mask.
To the right of the Hue/Saturation adjustment layer, you'll see a white box - click on it.
This is the layer mask, which comes with every adjustment layer.
Now we're going to choose a brush.
We want to paint with black which will hide the contents of the adjustment layer.
So, click on the Foreground Color swatch, and then choose black, and then click OK.
Make sure Opacity and Flow are set to 100%.
With the adjustment layer selected, simply paint away the areas you want to bring back the original colors.
You now know how to change the colors in your image using the Adjust colors feature.
You also learned how to refine the colors and even paint away unwanted color changes.
Try this on your own images and see how well it works.
Again, I'm Colin Smith.
I'll see you in another video.

