Introduction
[Lisa Carney]: Ever wish you could easily combine two images, so they look like one with matching color and light?
With the Harmonize action in Photoshop on mobile, that's exactly what you can do.
Hi everyone!
I'm Lisa Carney, Hollywood retoucher, photographer, and mobile editing aficionado.
In the next few minutes, I'll show you a quick tip in Photoshop on mobile to seamlessly blend two photos together and make the colors and tones match all on your smartphones.
Step one: there are a variety of ways to open an image into Photoshop.
In this case, I will tap the + button and I'll choose a photo on my device.
Add a new subject to the scene
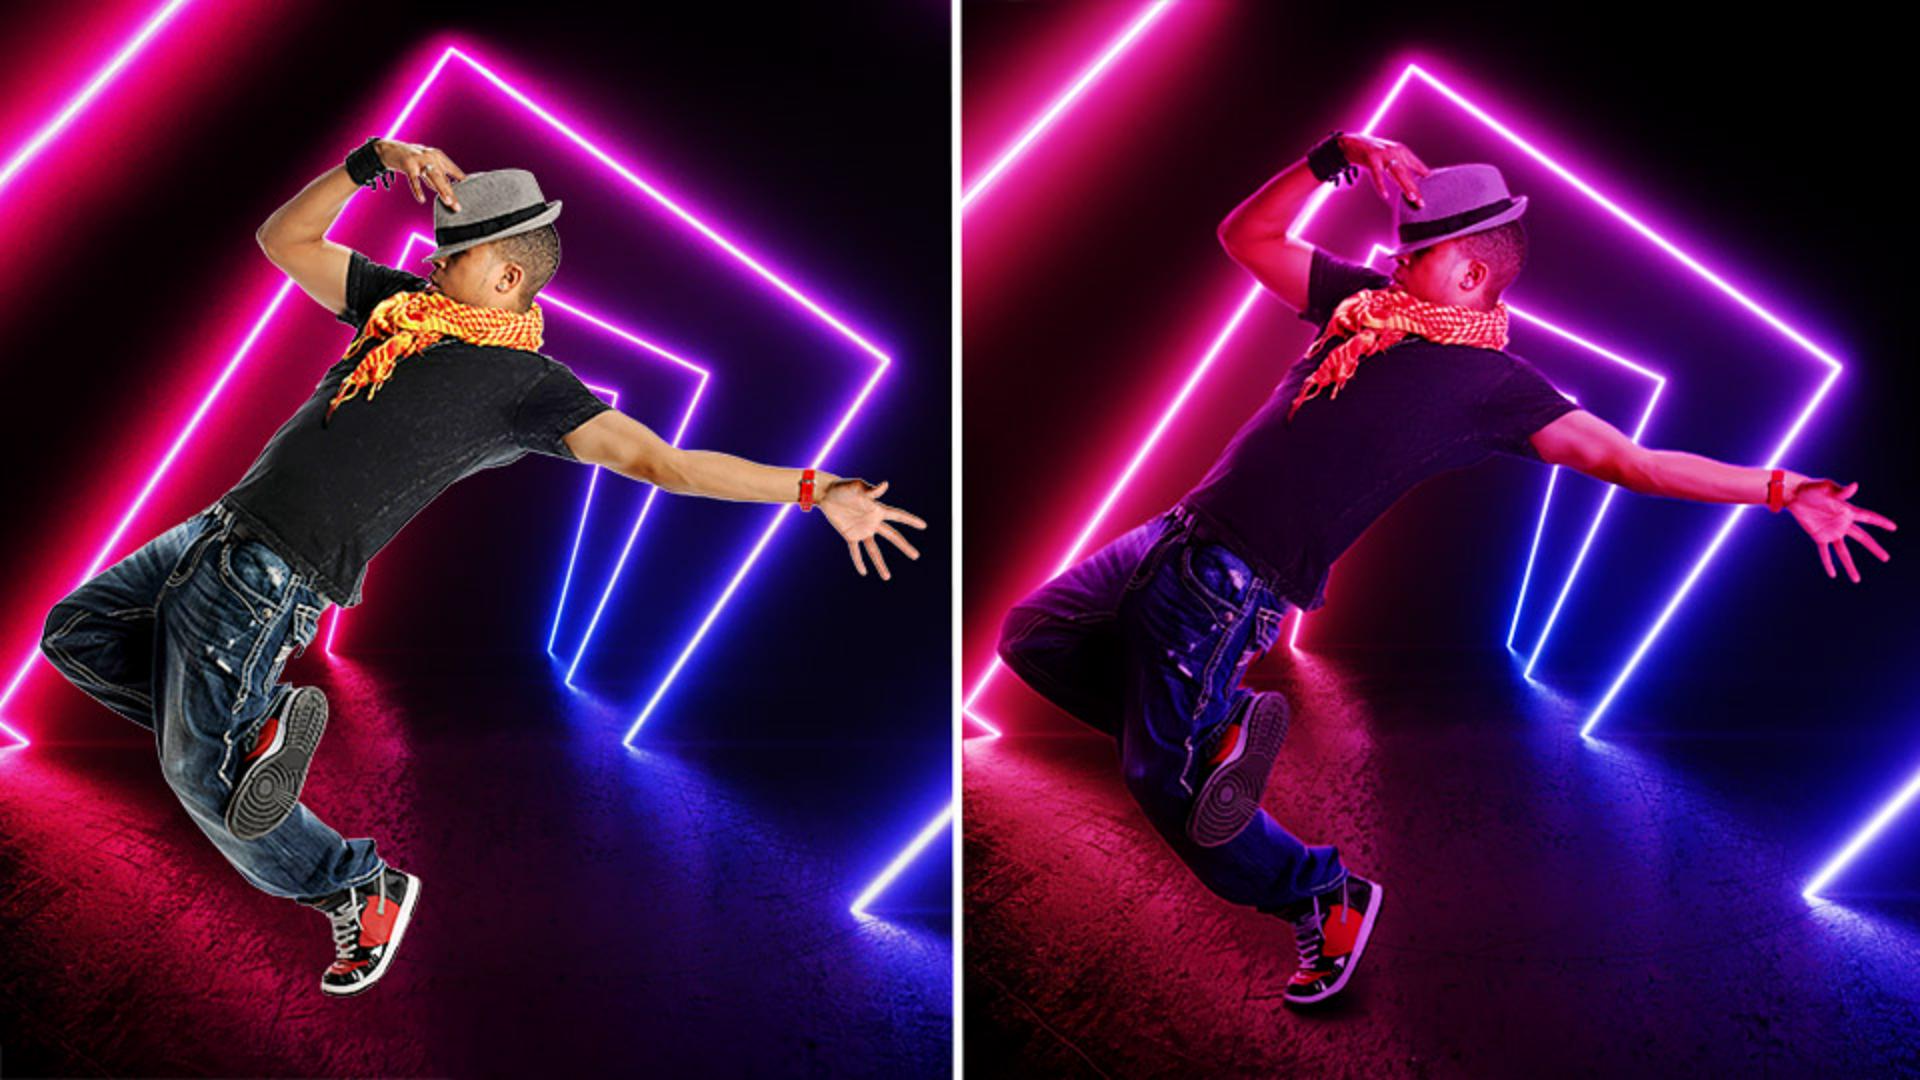
Next, I want to add a person inside that environment that wasn't captured at the same time.
I will tap the + button and add a photo of a dancer.
Remove the background on the new subject image
Now, I'll tap on Actions and tap Remove background so that the dancer is masked out.
That was pretty easy.
Now, I'm going to move and scale the dancer into position.
Tap on the blue Scale box to scale and/or rotate.
When I'm happy with the result, I'm going to tap the Checkmark.
Now, at this point, the dancer doesn't fit the environment that he's in.
Match color and lighting with Harmonize
He's too bright and far too yellow.
I will tap on Actions and this time choose Harmonize.
Photoshop will automatically match the color and tone.
What's great about this effect is I'll get three different options to choose from.
Pro tip: use two fingers to swipe up on the image so you can view it in full.
In this case, once I choose which render I like, I will tap the Checkmark.
I can also tap More for additional renders.
What can often happen is the figure can be a little dark, especially in this type of environment.
Fine-tune the lighting with an adjustment layer
To adjust the tone, I will add an adjustment layer.
I'll tap Select area, then choose Subject.
Then, I'll tap the Checkmark after selecting.
Next, I will go to Adjust, then Adjustment layers, and tap on the one I want to use to adjust the light values.
In this case, I'll pick Brightness and Contrast, and I'll adjust the sliders until I like the image values.
When I'm happy, I will tap Checkmark.
Look how easy it is to instantly put someone in the environment.
That was pretty fast and easy.
Now, give it a try with your own projects.
Again, my name is Lisa Carney, and I look forward to seeing you in the next video.
Thanks for watching and happy editing!


