How to make a solarized cinemagraph in Adobe Photoshop

Take a one-minute look at our technique; the steps are written out below.
Create alternating versions of the same portrait with targeted color changes. Then add each variation to the timeline in Adobe Photoshop and create a bold animation.
1 Target color changes.
Open a portrait and add a Selective Color adjustment layer. Select Whites from the Colors dropdown menu and use the sliders to enhance the highlights in the photo. See the changes we made below.
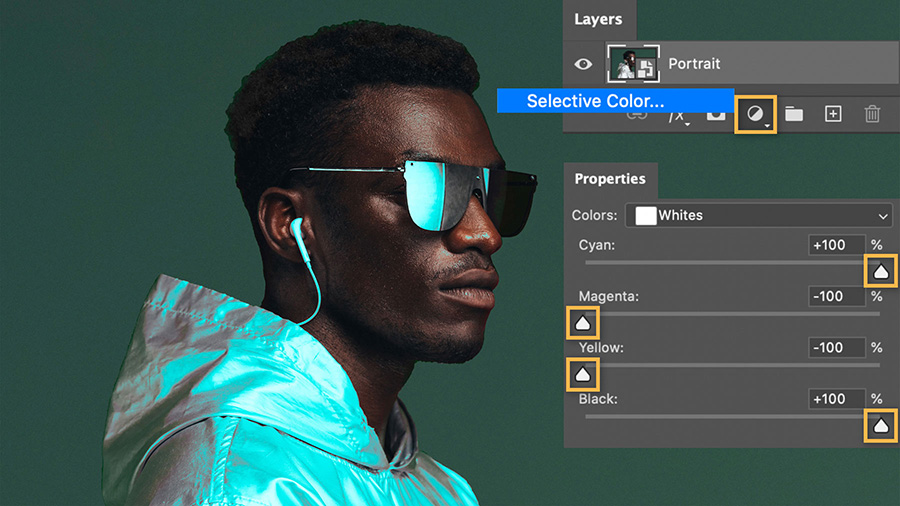
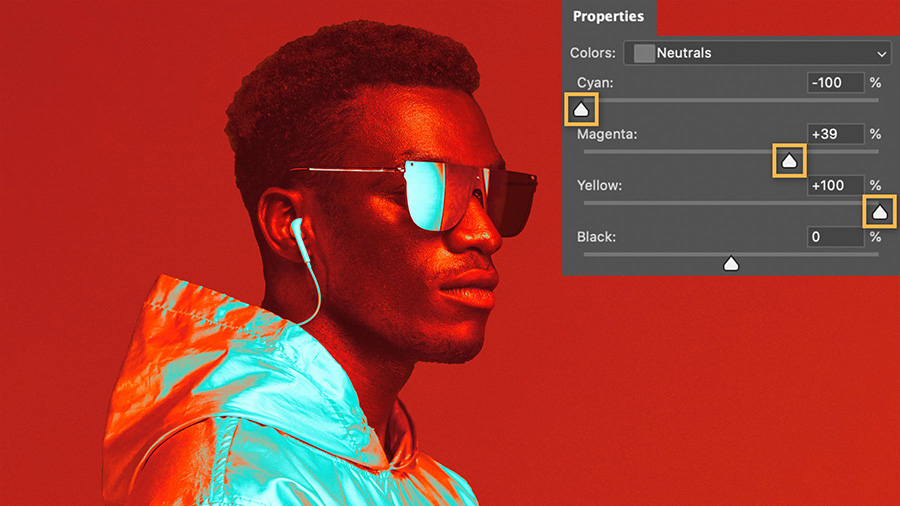
2 Adjust other prominent colors.
Repeat the previous step for other channels based on the colors in your image. We made adjustments to Whites, Neutrals, and Blacks because those were the main colors in our portrait. Our adjustments to Blacks were Cyan: +100; Magenta +100; Yellow -100; Black -50.
3 Prepare the layers.
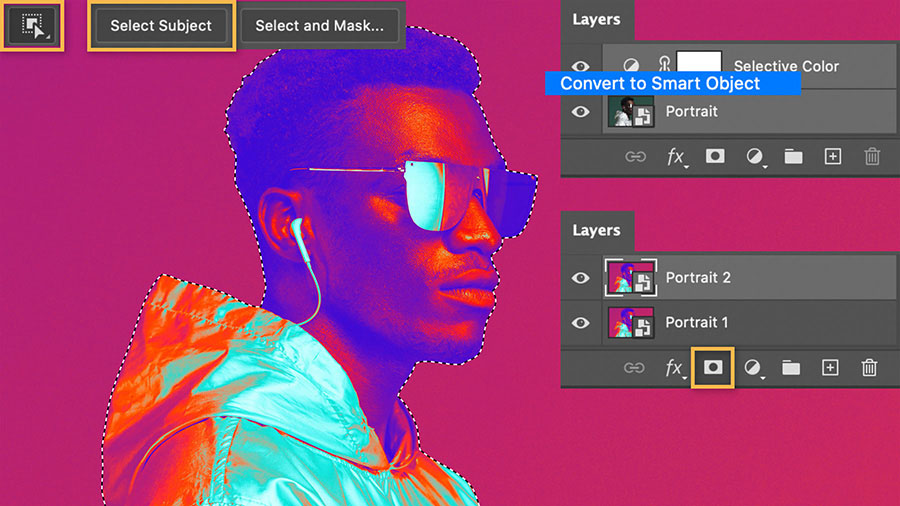
Select the adjustment and portrait layers, right-click, choose Convert to Smart Object, and name it Portrait 1. Duplicate the portrait layer by right-clicking on it and name it Portrait 2 (the layer names will be helpful later in the animation steps). Choose the Object Selection tool and click Select Subject to isolate the subject. Then add a layer mask to hide the background on the new layer.
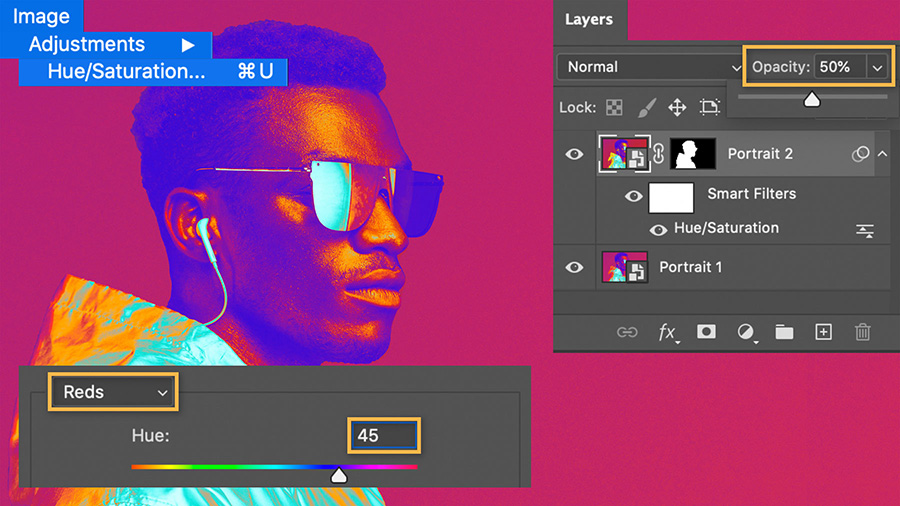
4 Create effects with color.
Click the image thumbnail for the Portrait 2 layer and reduce the Opacity to 50%. Then open the Hue/Saturation dialog box. Select Reds from the dropdown menu and set the value to 45.
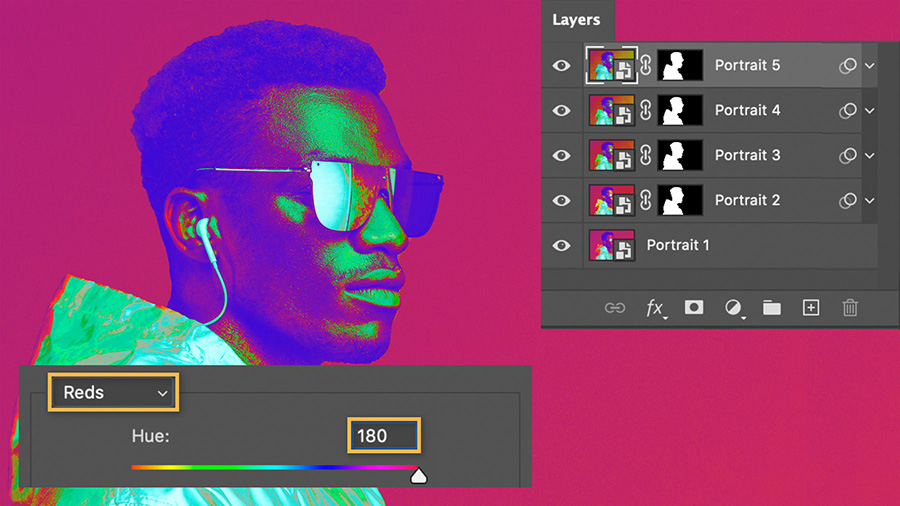
5 Make subtle variations.
Duplicate Portrait 2 to create five portrait layers. For each duplicate, set the Hue value in increments of 45 until you get to 180.
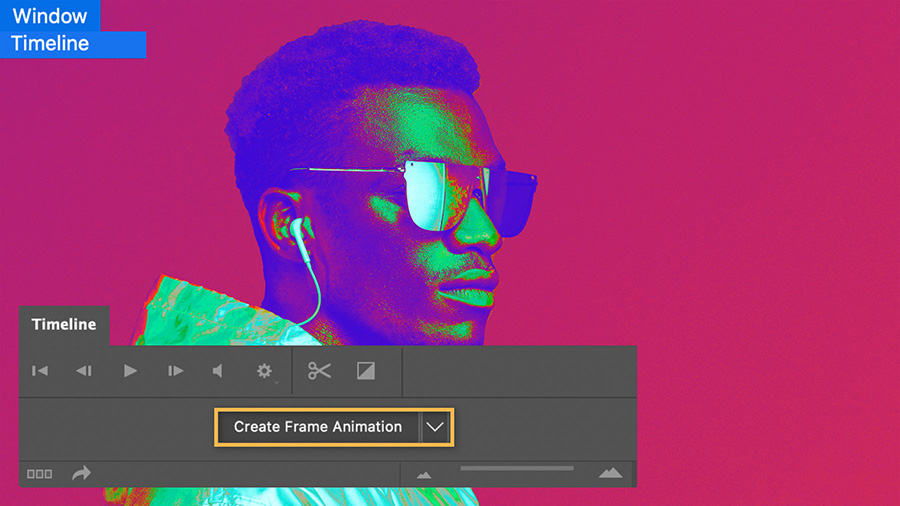
6 Prepare to animate.
Open the timeline and click Create Frame Animation.
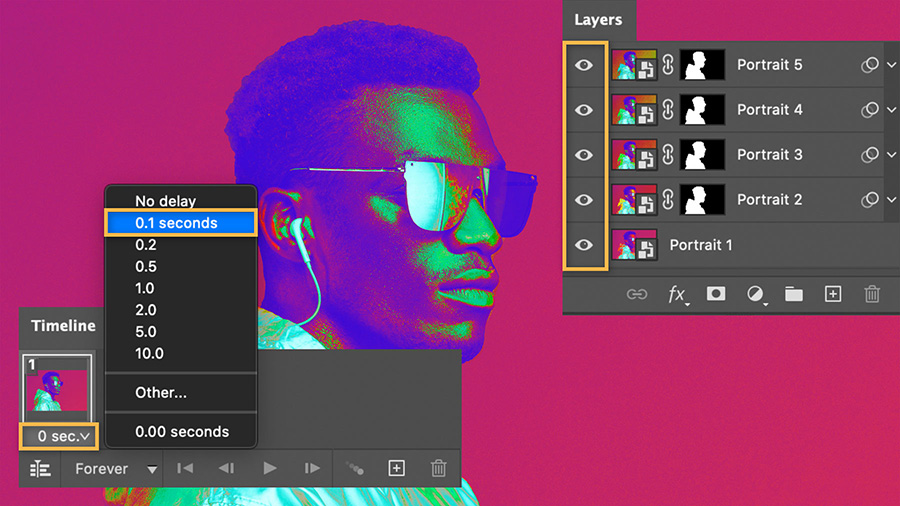
7 Create a frame.
Start with all layers visible for the first frame. Click on the frame timing and change it to 0.1 seconds.
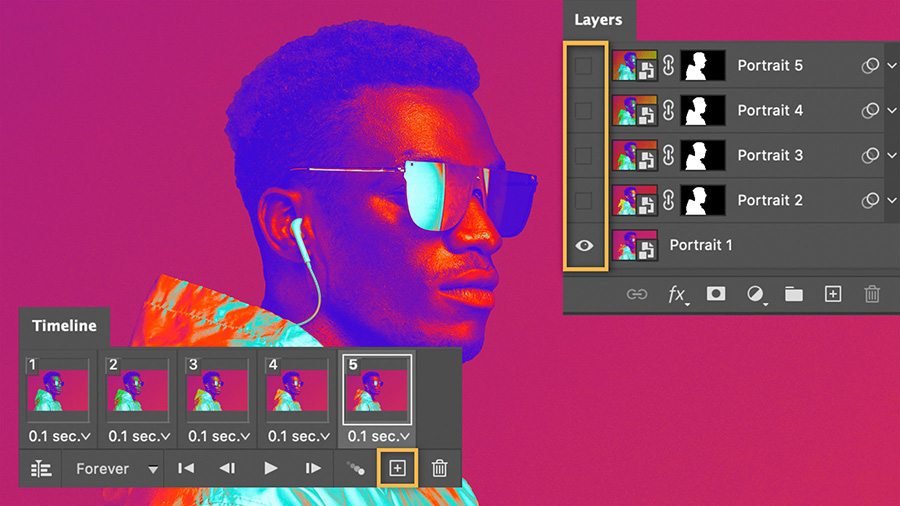
8 Build frame animation.
Click + in the timeline to create the second frame, and then hide Portrait 5. Click + again for frame 3, hide Portrait 4. Repeat these steps until only Portrait 1 is visible. With each new frame you’ll turn off the top layer. You should end with a total of five frames and the fifth frame should only have the bottom layer on.
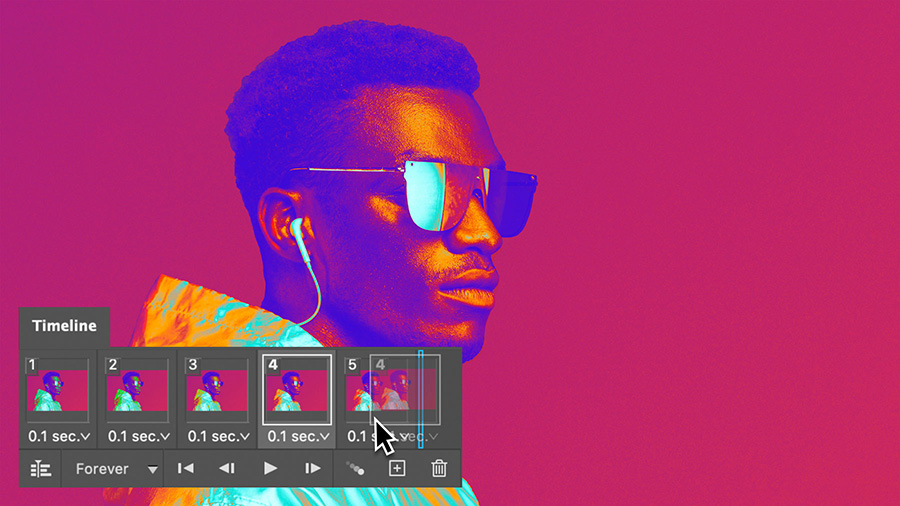
9 Loop animation.
Press Alt (Windows) or Option (macOS) as you drag frame 4 to the end of the timeline to create a duplicate. Repeat for frame 3, then frame 2. You should end with a total of eight frames and a looping animation. Press play to see the cinemagraph come to life.
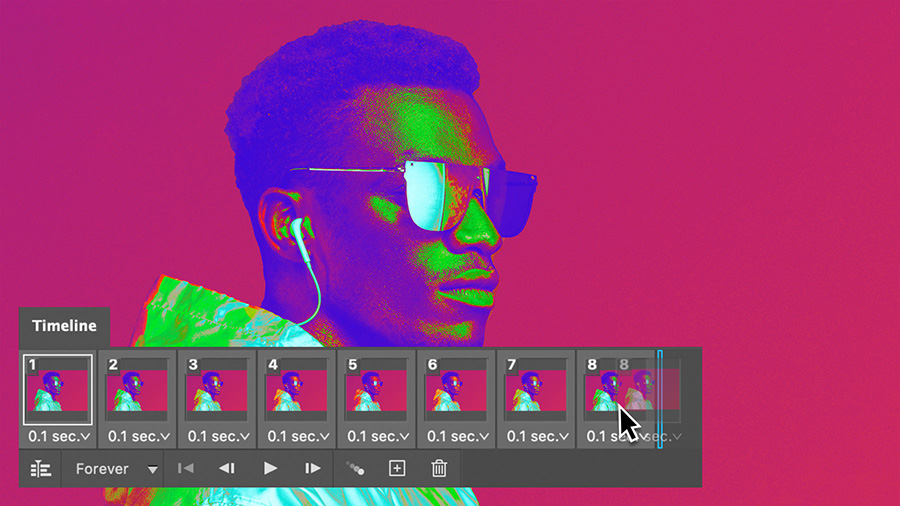
10 Duplicate frames.
These eight frames will be the core of the animation. Hold Shift as you select all of the frames. Then hold Alt or Option and drag the frames to duplicate them. Repeat until you have a total of 72 frames.
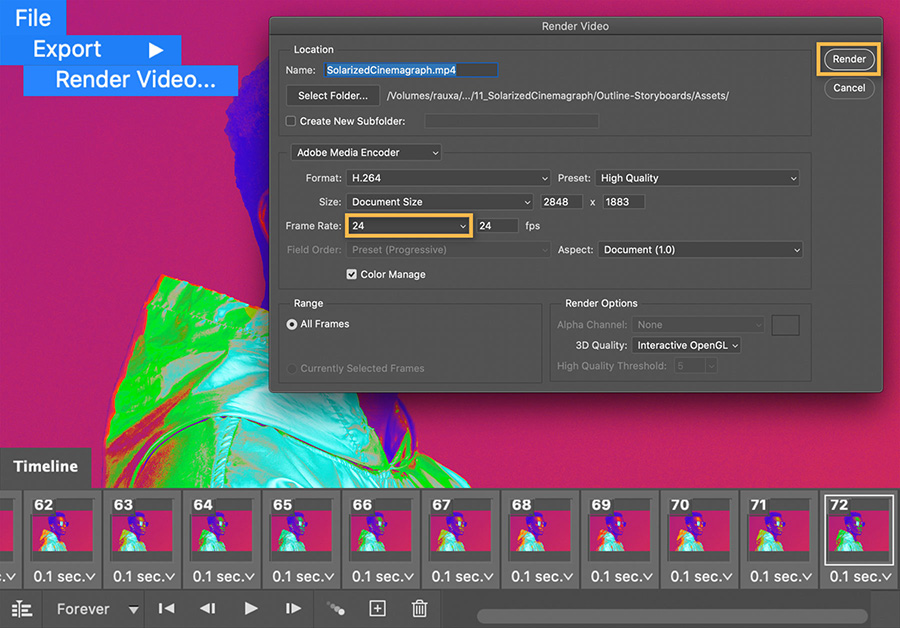
11 Change frame rate.
Choose File > Export > Render Video. In the dialog box, set the frame rate to 24 fps to create a 3-second video, and click Render.
12 Export video.
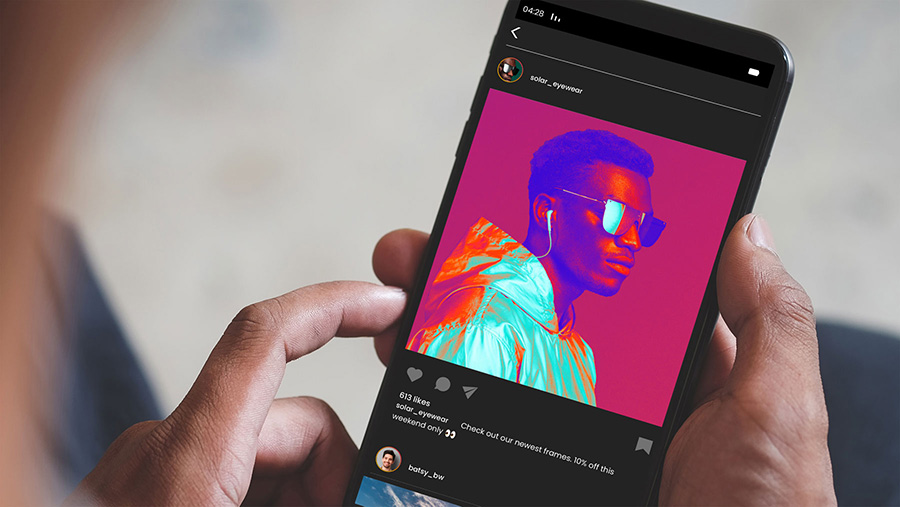
Use this video for your next Instagram post to highlight a big sale or announce a new product.