Add shadows and texture in Photoshop on iPad with Russell Brown
Add dimension to a composite with shadows and textures.
Published
Introduction
Hello, my name is Russell Preston Brown from Adobe Systems and this tutorial is all about getting you up to speed in Adobe Photoshop for the iPad.
Now, I work on both the iPad and the desktop.
There are many features found on the desktop that you cannot find on the iPad.
So, it's a combination of both worlds, working on my desktop then sharing that exact same file easily over to Photoshop on the iPad.
In this project, I want to talk about making a simple drop shadow here on the iPad, as well as, showing you some of the great new keyboard shortcuts that are available.
And one in particular I want to show you is all about blend modes.
So, let's get started with this project.
I want to create a drop shadow
Creating a drop shadow on text using layers and selections
and show you how to do it here on this file.
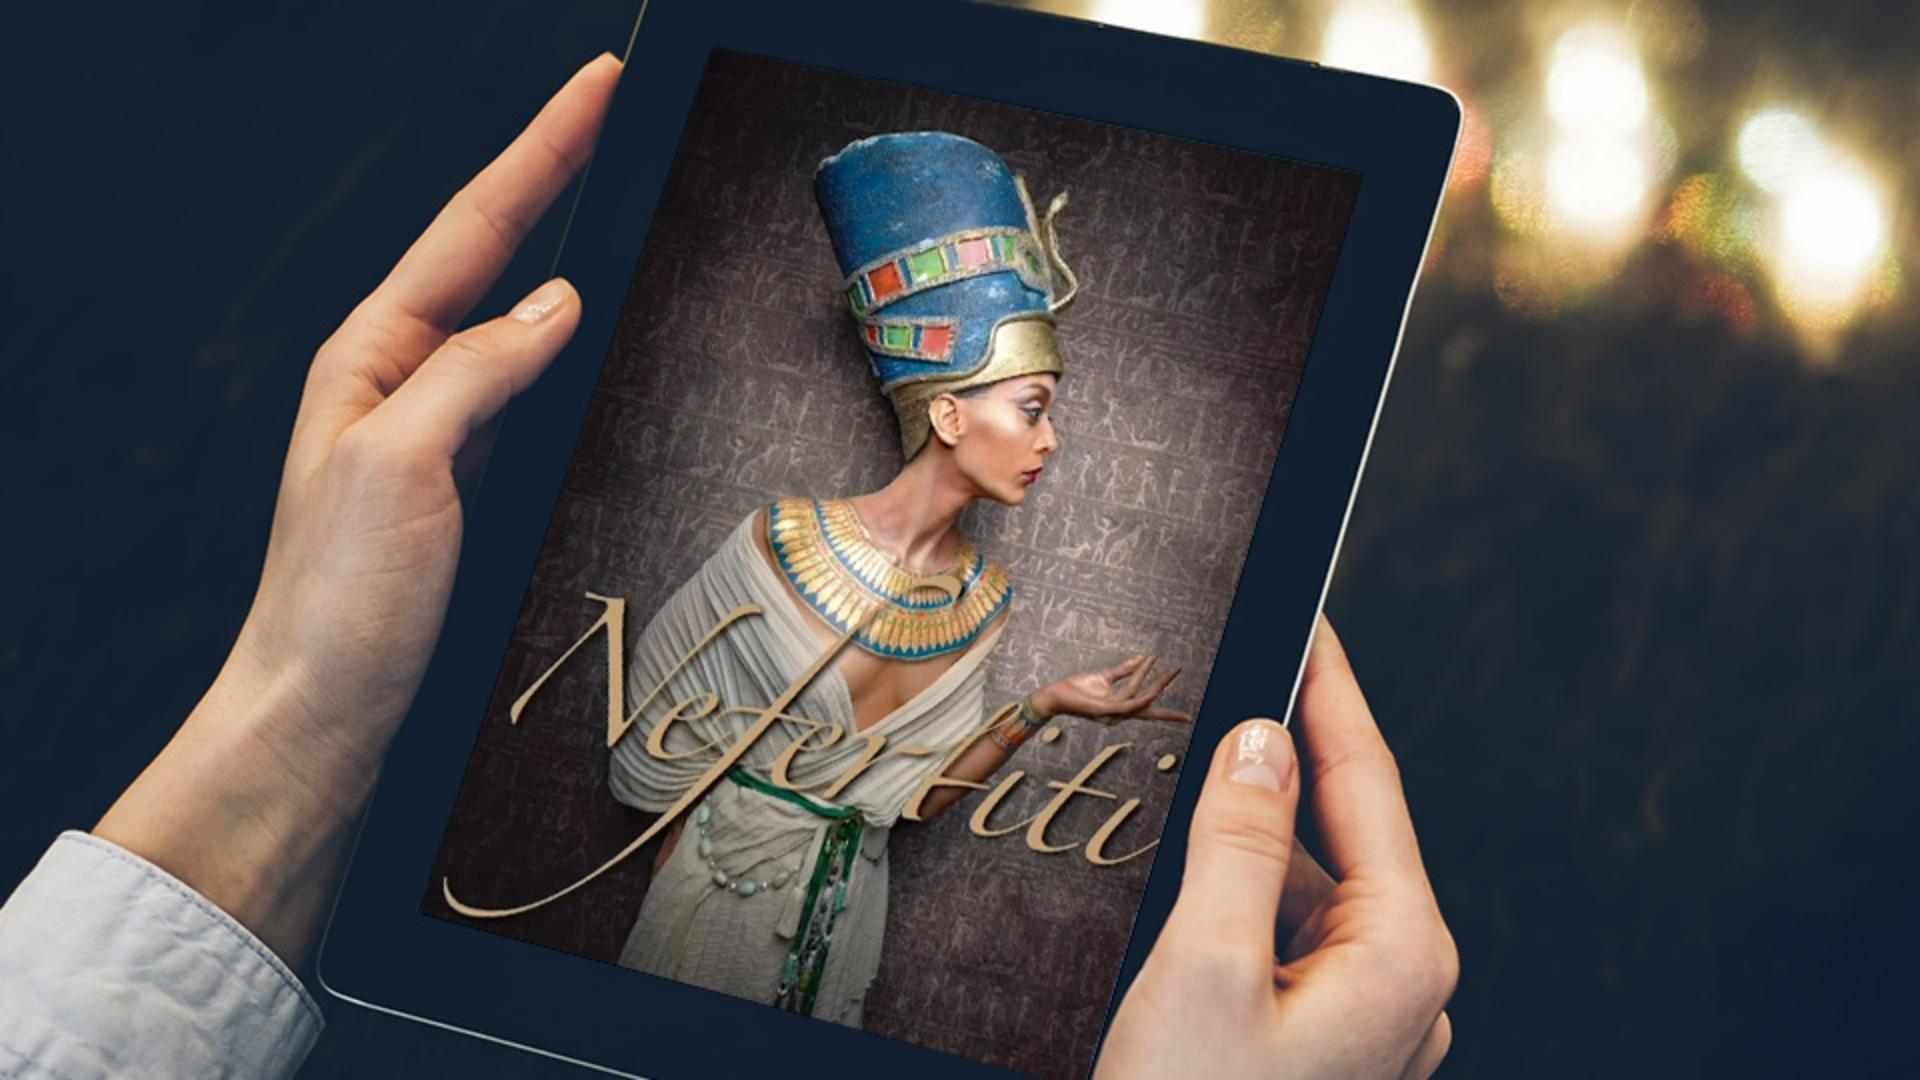
And in fact, I'm going to create a drop shadow of text.
Check this out, I'm going to tap here on my Text layer.
I'm of course in the Detailed view here in Photoshop on the iPad, where I can see all of my layers, the names of my layers and if the layer has a mask.
I'm going to select this, and I want to point out something really important for pro users.
Right over here in the Taskbar, these ... at the base, there are a lot of items here under the Layer actions that you really need to know about.
So be sure and check those out.
The one in particular I'm looking for is load selection.
I can load a mask as a selection and in this case, I can load the outlines of my text as a selection by tapping there, so now, I have this selection of the text and I want to start my drop shadow in this process.
Now of course, I could go over to Photoshop on the desktop and add a drop shadow easily to this text and then share it back to my version of this image here on the iPad, but I want to demonstrate that here.
Next, I'm going to create a new layer.
That's done with the + sign right here in my Taskbar, right there.
I now have a new layer.
Now there are several ways to fill this layer.
In this case, with black.
Let's take a look at the versions that you can use right here on the iPad, if you did not have a keyboard.
The first one is the Bucket Tool, right over here, in my Toolbar.
Select the Bucket Tool.
Make sure that my foreground color is black, which it is, then I can simply tap inside the selection.
Bingo.
I can then fill something very easily with the Bucket Tool as long as it's on its own layer.
As you can see here, Layer 1 is empty.
Ah, check this out. if you double tap on the Bucket Tool, you can select the Gradient Tool.
If I tap and drag with the Gradient Tool, I can put a gradient inside of my text as well.
Now, you know.
But here's the cool way of filling a current selection, and that's from the keyboard shortcut.
Just like the desktop, I can select Option Delete and I can fill with the current foreground color and of course Command Delete will fill with the background color.
In this case, I want to fill this with black, so of course, that's Option Delete.
That's step number one.
Step number two, I'm going to deselect this text.
I can do it down here, from the Selection Tools Action bar, Deselect, or of course, I could use my keyboard shortcut of Command D to deselect.
Now, let's move the layer stacking order.
I'm going to tap and hold on Layer 1 and drag it down below my Nefertiti text right there.
Right now, it's hidden.
Here's my next super user tip and technique, a really great keyboard shortcut.
I'm going to my keyboard and I'm going to nudge something, I can nudge it with the arrow keys on my keyboard.
I can start to use the keyboard now and I'm pressing on the arrow to the right and you can start to see the shadow coming out from underneath the text.
If I hold down the Shift key and the right arrow, I can nudge it by 10 pixels.
The Shift key and the down arrow, I can have another Shift down 10 pixels.
So, keep that in mind.
For accurate adjustments here on the iPad, a keyboard is fantastic for adjusting this with the nudge tool, the arrows to the right, left, up and down can be done with really fine precision.
Fantastic.
Here's another great thing.
With my text still selected, I can go over here to my Taskbar and tap right on this icon right here, for my Filters and adjustments.
I'm going to select Gaussian blur right here.
This is a destructive technique here on the iPad because I'm altering the pixels.
So that's just right there, that's the amount I'm looking for right there and I click Done.
That looks great.
So that's a quick way of making a drop shadow.
I'm going to double tap here in the top of my Menu bar on the percentage sign here, for my current size so that my image now fills the current workspace.
Exploring blend modes with keyboard shortcuts
Now I want to talk about one of my favorite features.
I'm going to turn on an existing layer I have in this document.
It's a Flypaper Texture here at the top.
I'm going to turn the visibility on and off here of course by tapping on the Eye icon right there.
So now, with this texture over my image, I want to demonstrate something that's really fantastic.
I want to demonstrate how to use blend modes.
Of course, blend modes can be accessed here by tapping on this icon right here to bring up your Layer Properties.
You'll notice down here that my Blend Mode is currently at Normal.
I can tap here in this dialogue and select different blend modes.
Like this, but there is something better.
If you have a keyboard, ladies and gentlemen, girls and boys, I'm going to hold down my Shift key and the - sign here on my keyboard and I can start to now cycle through these different blend modes.
One by one I can see them.
This is the best way to view all the different possibilities for blend modes.
Wow, that's a really nice version.
This is the blend mode of Hue, but I can continue by holding down the Shift key, selecting the - key and cycling through all of my blend modes.
There're some really interesting possibilities and that's what's great about using a keyboard shortcut for a process like this because you never really know what a blend mode is going to give you for a particular project.
You may find something that's really quite incredible.
I like this blend mode right here.
This looks great.
So, there you have it.
You've just seen how to make drop shadows here in Photoshop on the iPad, easily and quickly and it also demonstrated how to use this new keyboard shortcut for previewing the different blend modes, here on this project.
There you have it, a great set of features and tools here on Photoshop for the iPad.
Give it a try.
What you learned: Create a shadow to set off text, and use blend modes to add texture to a composite
Instructor