[Dave Ko]: Hey, my name is Dave Ko, and I've been using Adobe Premiere for over 30 years since it was launched; and watching it evolve to what it is today has been incredible.
And Adobe isn't just an editing tool anymore, obviously, it's packed with these powerful features, and one of the most exciting is the AI-powered Object Masking tool.
What used to take hours of rotoscoping and finessing can now be done in literally seconds.
So let me show you how to mask a subject and then throw some text behind the subject, but in front of the background.
Open the project file called Text_Behind_Title.
Select and mask your subject in seconds
We'll drag the clip from your bin onto the Timeline and press the = key to zoom in.
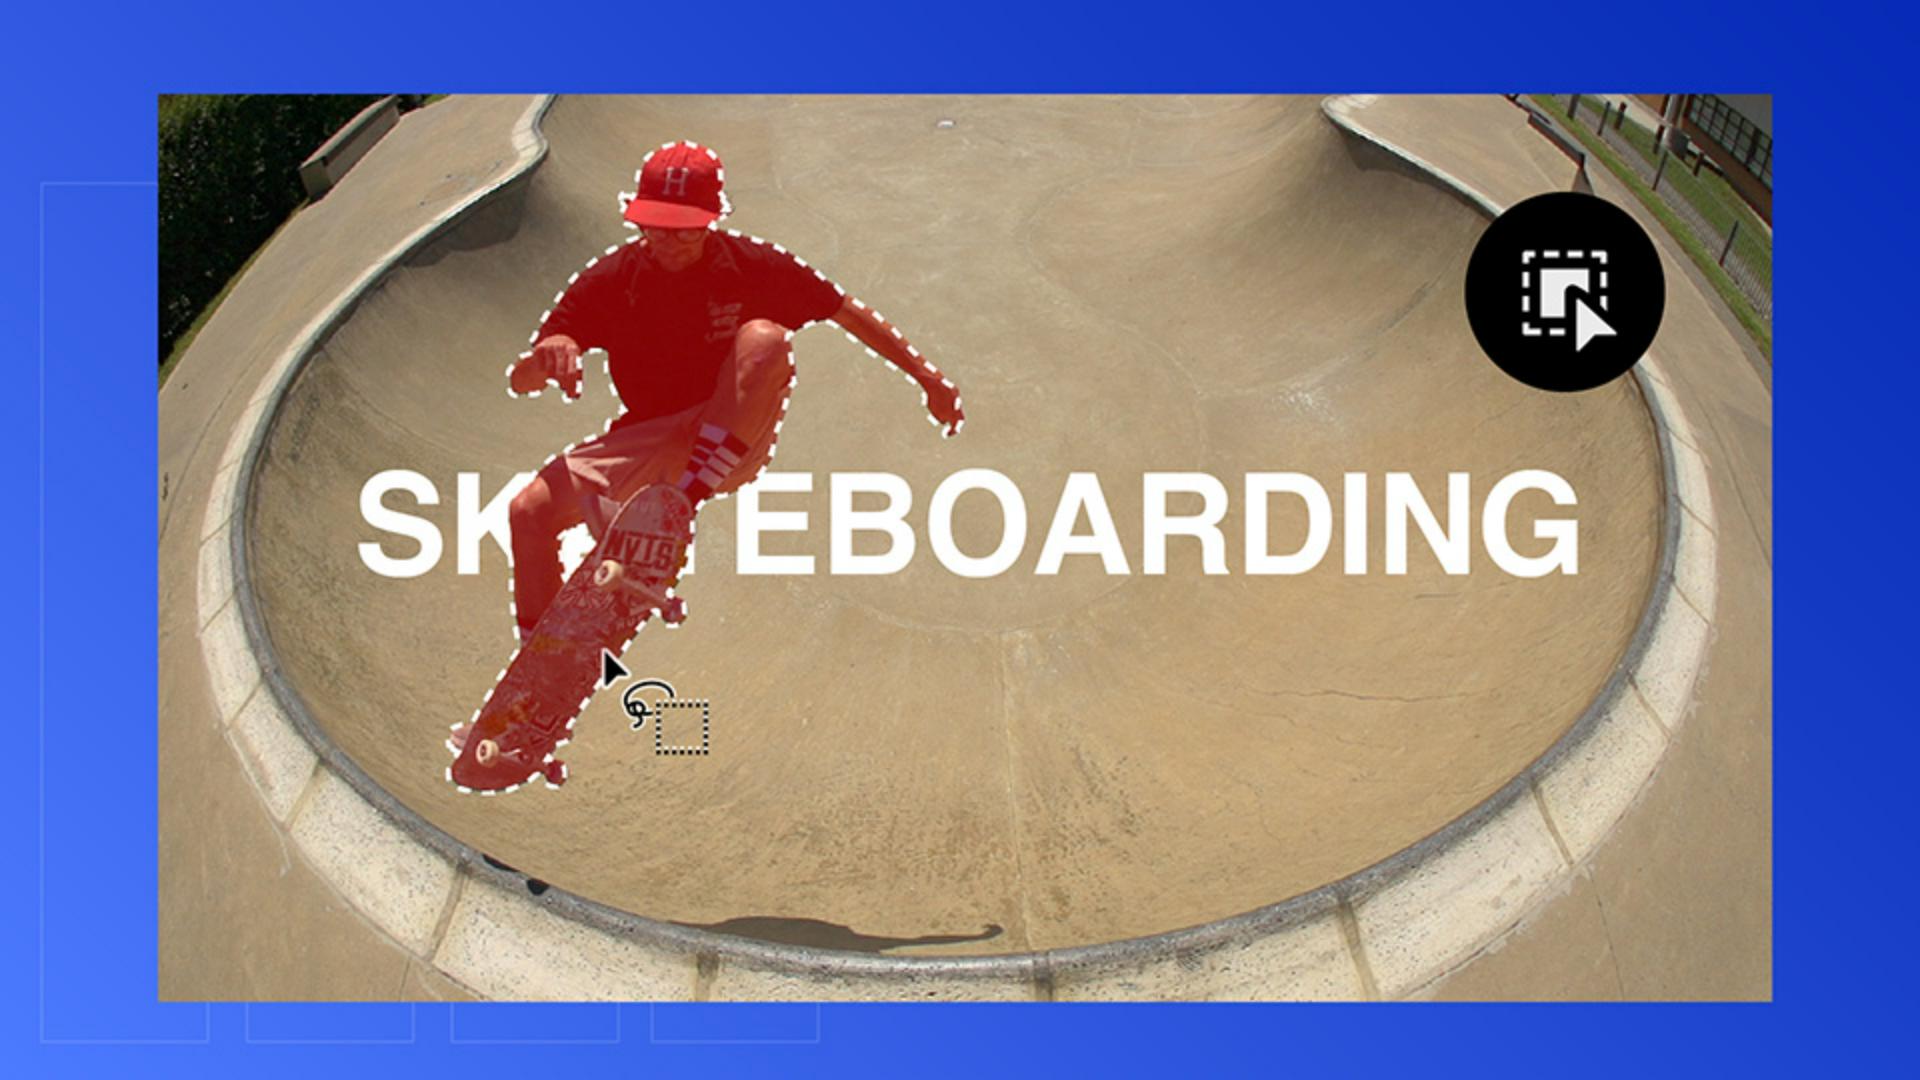
Scrub through the Timeline and find a good frame where the skateboarder is clearly visible, ideally with all the limbs showing.
And then the stronger the silhouette, the better the mask.
Now let's grab the Object Masking tool from the Toolbar and then hover over the skateboarder, and you'll see a red overlay preview.
Click on it to create the mask.
If the skateboard is not included in the mask, just click on the skateboard and it'll be added to the mask.
If you want to remove the skateboard, you can hold the Option on Mac or Alt on Windows while clicking to remove the mask.
But we want the skateboard including the mask, so let's add that back in.
Once the selection looks good and complete, we'll head over to the Effect Controls panel, and under Unassigned Masks, you'll see your Object Mask layer.
Track your subject across the clip
Click the Track forward and backward button in the middle to analyze the entire clip in both directions.
These other buttons here are to track forward only, or backwards only, or frame by frame.
And pretty quickly, Premiere tracks your subject, click magic, frame by frame.
That's the AI doing the heavy lifting while you sit back and watch.
Now let's add some text.
Add text and build your layer stack
Grab the Text tool and type something bold like Skateboarding.
Resize it, reposition it, and use the pool as your visual guide to center it in the frame.
Right now, the text sits on top, but we want it behind the skater.
This is the fun part.
We'll hold Option on Mac or Alt on Windows and drag your video layer from V1 to V3 to duplicate it.
While you have your video clip on V3 selected,
Create a clean text-behind effect
we're going to go to the Effect Controls panel and drag your Object Mask layer from Unassigned Masks into Opacity.
Now you've built a clean layer stack: masked skater on top, text in the middle, original video on the bottom.
This creates a nice text sandwich where the text appears behind your subject, but on top of your background - clean, quick, professional.
What once took tedious manual rotoscoping now just takes a few clicks.
There are so many ways to apply this look to raise the production value of your next video.
And now you can do it all without leaving Premiere.
And with that, I'll see you in the next video.
Note: Stock assets provided are for practice purposes only. See terms.
What you’ll learn
Select and mask your subject in seconds
Choose a clear frame and use the Object Mask tool to automatically detect your subject. Refine the selection by adding or removing areas for a clean, accurate mask.
Track your subject across the clip
Use forward and backward tracking to follow your subject through the entire shot, keeping your mask aligned in every frame.
Add text and build your layer stack
Insert your text and position it in the frame, then duplicate your video layer. Arrange layers so one video layer is above the text and one is below.
Create a clean text-behind effect
Apply the mask to the opacity property to reveal text behind your subject while preserving the background. This creates a dynamic, high-production look with minimal effort.
You can control how Adobe websites use cookies and similar technologies by making choices below. But note that if you disable cookies and similar technologies entirely, Adobe websites may not function properly.
Cookies are small text files stored by your web browser when you use websites. There are also other technologies that can be used for similar purposes like HTML5 Local Storage and local shared objects, web beacons, and embedded scripts. These technologies help us do things like remembering you and your preferences when you return to our sites, measure how you use the website, conduct market research, and gather information about the ads you see and interact with.
You can make choices in the menu below about what cookies and other technologies you want us to use on Adobe sites when you visit them from this browser. You can always change those choices later by clicking on the Cookie Preferences link at the bottom of the page.
If enabled:
We can improve your experience by tailoring the site and the content to things we think might be of interest
We can better keep track of your preferences — like what language you prefer to use
We will better understand your likely interests so we can provide you more relevant Adobe ads and content on non-Adobe websites and in non-Adobe apps
It will help us improve the performance of our website and those of our partners who use the Adobe Experience Cloud
If disabled:
We won’t be able to remember you from session to session so the experience may not be tailored to your interests
You’ll still have access to the content of the site but certain features that depend on cookies may not function
You’ll still see ads, they just may not be as relevant to you
General information
You can control how Adobe websites use cookies and similar technologies by making choices below. But note that if you disable cookies and similar technologies entirely, Adobe websites may not function properly.
Cookies are small text files stored by your web browser when you use websites. There are also other technologies that can be used for similar purposes like HTML5 Local Storage, web beacons, and embedded scripts. These technologies help us do things like remembering you and your preferences when you return to our sites, measure how you use the website, conduct market research, and gather information about the ads you see and interact with.
You can make choices in the menu below about what cookies and other technologies you want us to use on Adobe sites when you visit them from this browser. You can always change those choices later by clicking on the Cookie Preferences link at the bottom of the page.
If enabled:
We can improve your experience by tailoring the site and the content to things we think might be of interest
We can better keep track of your preferences — like what language you prefer to use
We will better understand your likely interests so we can provide you more relevant Adobe ads and content on non-Adobe websites and in non-Adobe apps
It will help us improve the performance of our website and those of our partners who use the Adobe Experience Cloud
If disabled:
We won’t be able to remember you from session to session so the experience may not be tailored to your interests
We’ll still count your use of our site and services
You’ll still have access to the content of the site but certain features that depend on cookies may not function
You’ll still see ads, they just may not be as relevant to you
Operate the site and core servicesOperate site and measure engagement
Always active
These cookies are required, and they are used to enable the site and related services core functionality. Without them the site could not operate, so they cannot be disabled.
These cookies enable the site and related services’ core functionality and collect statistics about user engagement, such as counting active use to help us understand trends. These cookies cannot be disabled.
Measure performance
These cookies are used to analyze site usage to measure and improve performance. Without them Adobe cannot know what content is most valued and how often unique visitors return to the site, making it hard to improve information we offer to you.
These cookies are used to analyze site usage to measure and improve performance. Without them Adobe cannot know what content is most valued, making it hard to improve information we offer to you.
Extend functionality
These cookies are used to enhance the functionality of Adobe sites such as remembering your settings and preferences to deliver a personalized experience; for example, your username, your repeated visits, preferred language, your country, or any other saved preference.
Personalize advertising
These cookies are used to enable Adobe and our partners to serve ads more relevant to your interests. Without them you will still see ads, but they might not be as relevant to you.
Personalize advertising
These cookies are used to enable Adobe and our partners to serve ads more relevant to your interests. Without them you will still see ads, but they might not be as relevant to you.