Intro and meet author Kelsey Brannan
[Kelsey Brannan]: Hi friends.
My name is Kelsey Brannan, and you may know me as Premiere Gal on YouTube.
In today's video, I'm going to show you how to create a seamlessly looping social video using Adobe Firefly and Premiere.
Let's jump on in.
You might ask, why create a loop on a social media video?
Well, besides the fact that it just makes your video more aesthetically pleasing, loops actually increase watch time retention, and rewatches on social media.
Because the algorithm favors seamless motion.
And this technique I'm about to show you will work on any type of edit.
So follow along these steps and you can make a seamless loop on your next edit.
Here Premiere Pro, I have a completed edit that me and my team made for socials, and it's about King Kong stalking me in New York City.
Now, if you're inside the Program window, which I have here on the right, down at the bottom, you'll find this Loop Playback icon.
Click on that so it will loop the playback inside of your Timeline.
Let's just play the ending so you can see how it ends, and then loops back to the beginning. [music] [Voice-over Kelsey]: I love visit...
[Kelsey B.]: That end shot of King Kong didn't connect to that beginning city shot, it felt abrupt.
But we can fix that by creating a seamless loop.
To do that, we need to export a first frame
Export key frames from your edit
and an end frame.
For the first frame, we just have to move our Playhead to a clear shot of King Kong here.
I think this looks good.
So let's go ahead and click on this little icon here in the Program window called Export Frame, or you can press Shift E, and let's name this FIRST FRAME.
You can save it as a JPEG, and if the file path is incorrect, you can always click on Browse... to save it in a folder that is related to your project.
Now let's go ahead and hit OK.
That'll export our FIRST FRAME.
Now let's move our Playhead to the very first frame and let's click on Export Frame.
This time let's call it LAST FRAME, and then hit OK.
And now let's head on over to Adobe Firefly.
From the Firefly homepage go to Generate,
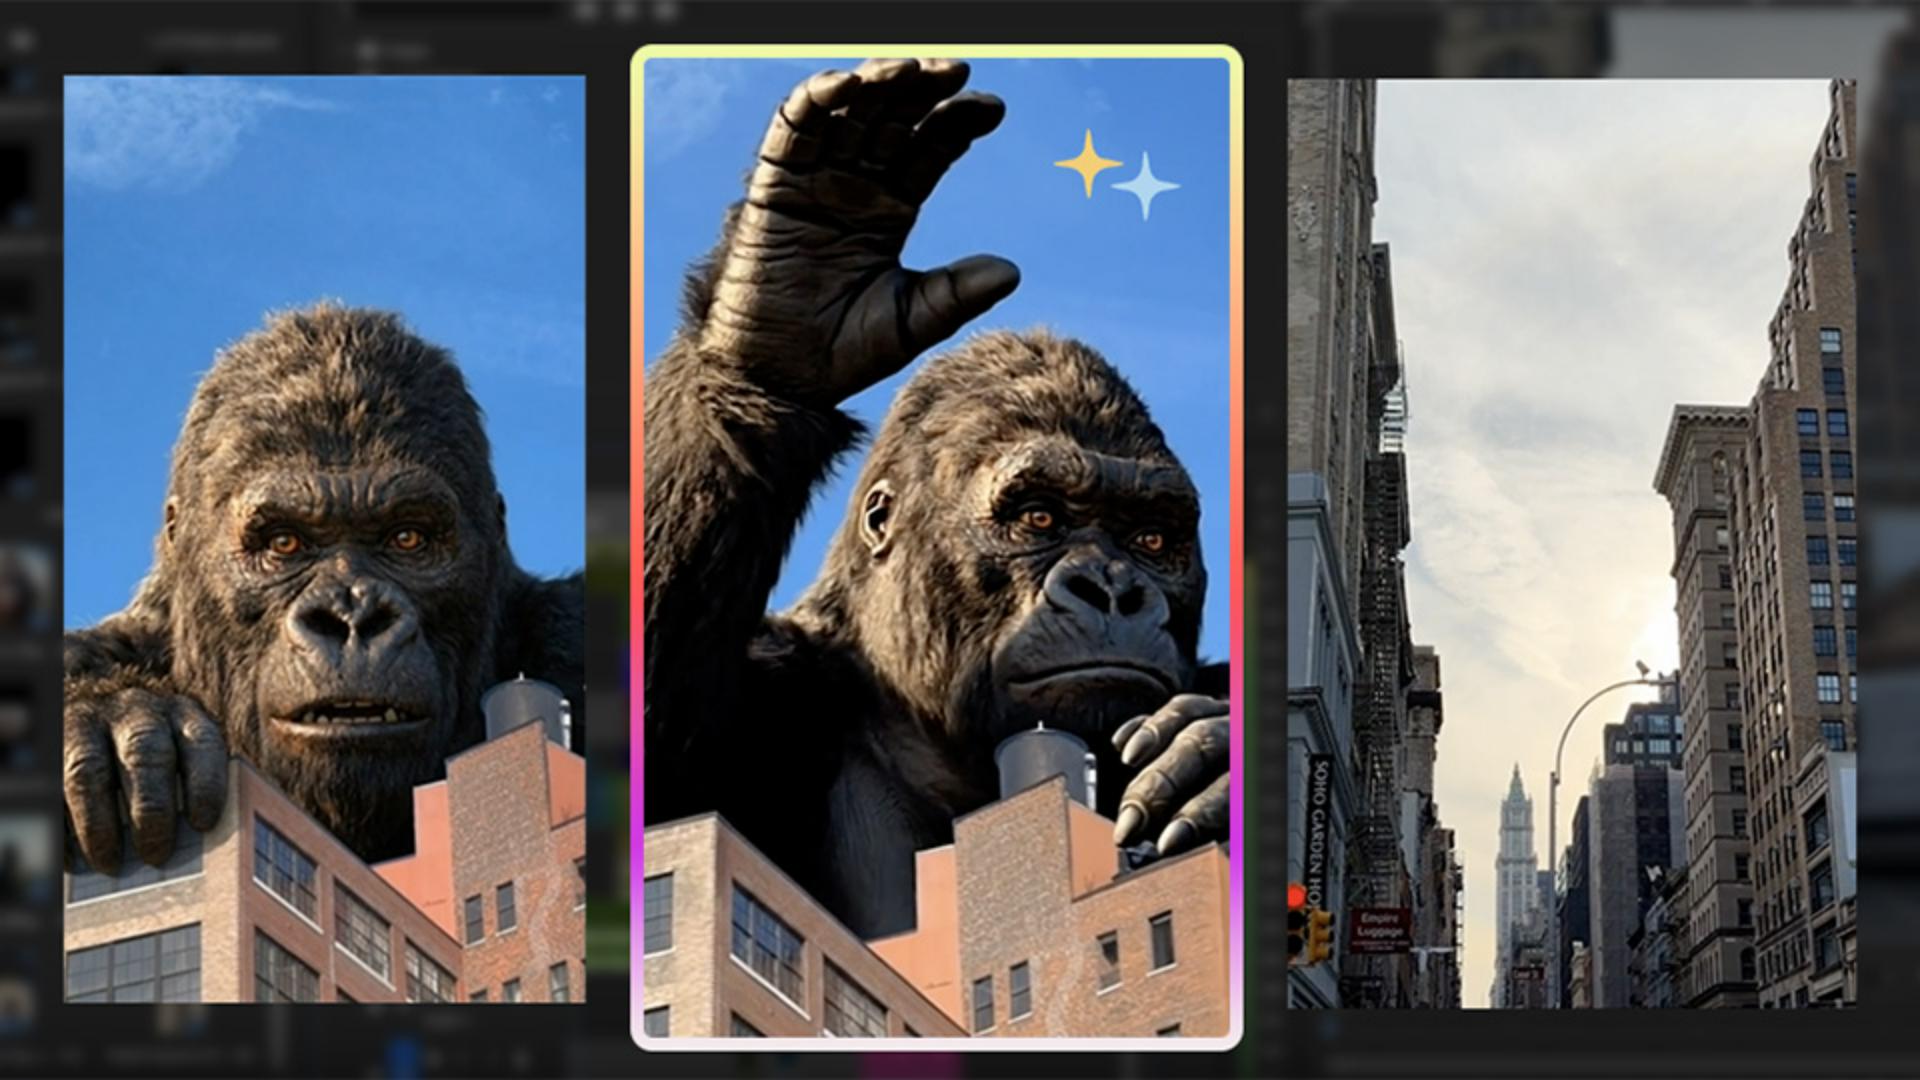
Generate the transition in Firefly
and then select Generate video.
First off, you can choose a video model from this dropdown, including the Adobe Firefly Video model or a variety of partner models listed here.
In this case, I'm going to use the Veo 3.1, then let's select a Resolution.
In this case let's use 1080p, and then for Aspect ratio, because I shot this vertical, let's choose Vertical.
For Duration, you can choose 4 seconds, 6 seconds, or 8 seconds.
In this case we'll do 8 seconds.
And Audio, you have the option to generate some sound as well.
In my case I don't need it.
So I'm going to turn this off.
And underneath References, this is where we can choose our first and last frame that we exported from Premiere.
So let's select the First, Your device, and let's select our FIRST FRAME.jpg, Open.
And let's select the Last.
LAST FRAME.jpg, Open.
And now from the Prompt field we can type out what we want to happen between these two frames: "King Kong waves and then the camera pans to the right to the city street view."
And then Generate.
And here's the result.
I think it looks pretty good.
The only thing I want to do inside of Premiere is speed up this transition, because it's a little bit slow.
But we can fix that with time remapping.
Let's download the generation and head to Premiere.
Here inside my Timeline, you can see that I made a marker where I want to place the generation.
You can create a marker just by pressing M on your keyboard.
Let's go ahead and let's drag and drop our generation
Bonus tip!
right here to line up with this marker.
And by the way, you need to have the Snap Tool on so that way it'll snap directly to this marker.
So right now when we zoom out you can see the clip is just too long.
And that's because this movement is too slow.
Refine timing for a polished loop
So we need to do some time remapping.
So Ctrl-click and then go down to Show Clip Keyframes, Time Remapping, Speed.
And this will allow you to press P to use the Pen Tool to create the moment when you want it to start to speed up.
So let's say here.
And once it slows down, right about here.
So now between these two points we can press V to go back to the Selection Tool and speed up this part in between.
So I adjusted the speed of the clip.
Now let's play it back with the Loop Playback on just to see the full picture.
[Voice-over Kelsey]: I love visiting New York City, but why is King Kong still here?
Why do you have to choose New York?
It's already so crowded here.
[Voice-over male]: Should we call somebody?
[Voice-over Kelsey]: I don't know.
Just let him do his thing.
I just don't understand, why isn't he annoying anyone else?
He's just there. [music] [Voice-over Kelsey]: I love visiting New York City.
[Kelsey B.]: There we go.
So, as you can see here, the first frame and the last frame of your video can be completely different.
But thanks to Adobe Firefly, you can seamlessly connect them together.
And you can apply this to any type of video.
For example, if you need a hero video that loops on your website, you can apply the same technique.
I hope this video was useful, and I'll see you next time.
Bye!
