Naydine shares her tip for creating 3D shapes in Adobe Illustrator and animating them in Adobe After Effects.
Create 3D shapes.
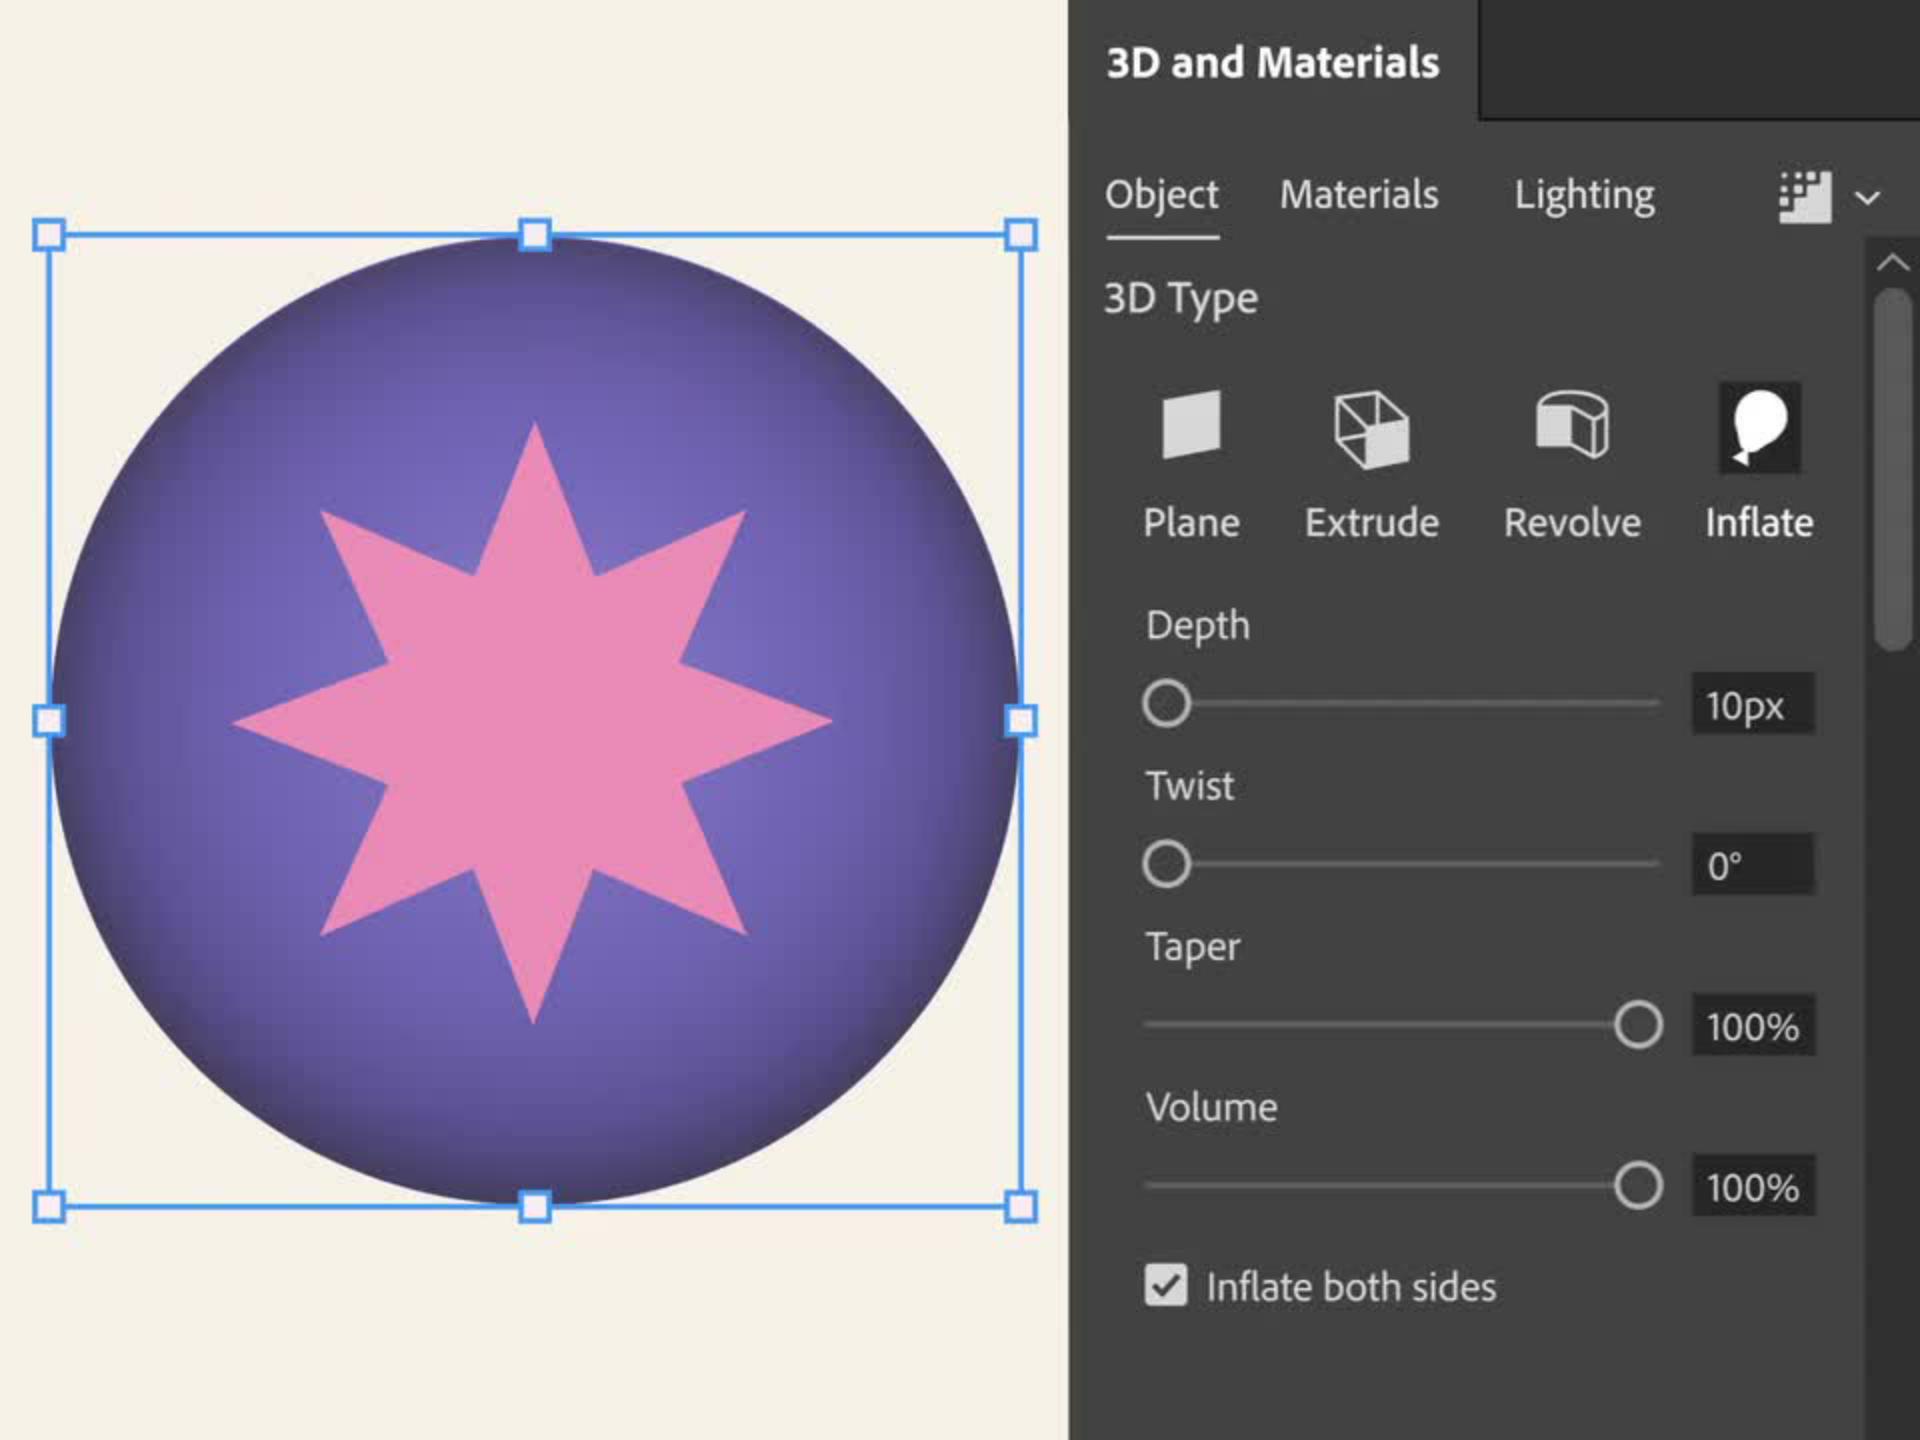
In Illustrator, use the shape tools to draw a star on a circle and then choose Window > 3D and Materials. Select the circle and choose Inflate to make it a sphere. Experiment with the settings as needed.
Transcript not available
Add light and material.
On the Lighting tab, select a preset to create a lighting angle. Naydine added two light sources.
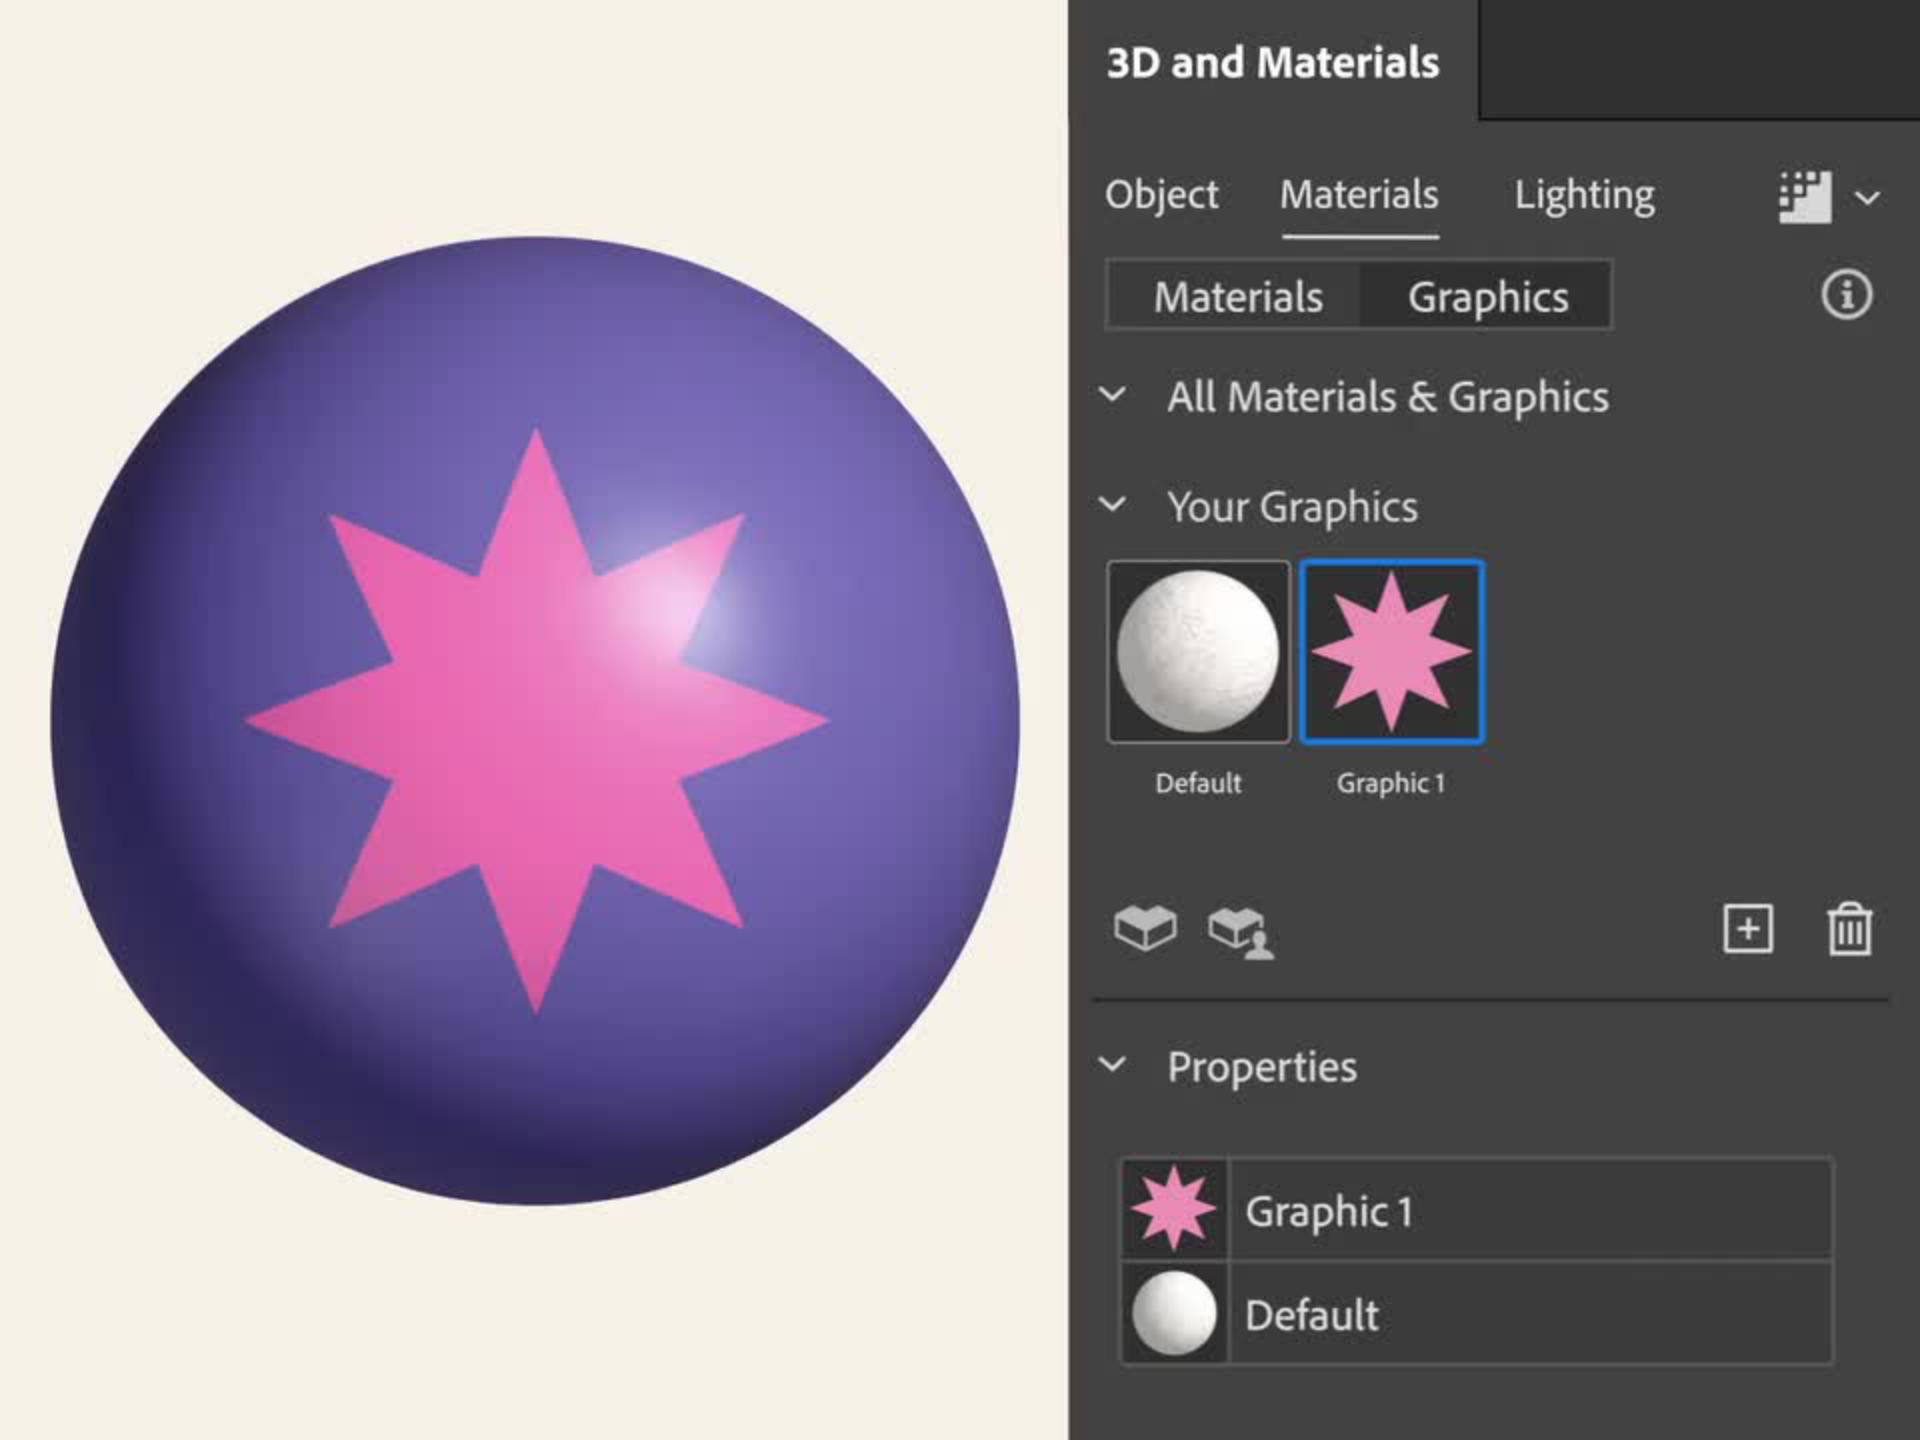
Choose the Materials tab and then select the star. Click the Add Materials (+) button and choose Add as Single Graphic. Select the circle and click the newly added star graphic to use it as a material for your 3D object. Then delete the original star.
Transcript not available
Export for animation.
Choose Window > Asset Export and drag the 3D objects you want to animate to the Asset Export panel. Select GLTF as the format, click Export, and save it to your computer.
Transcript not available
Import your artwork.
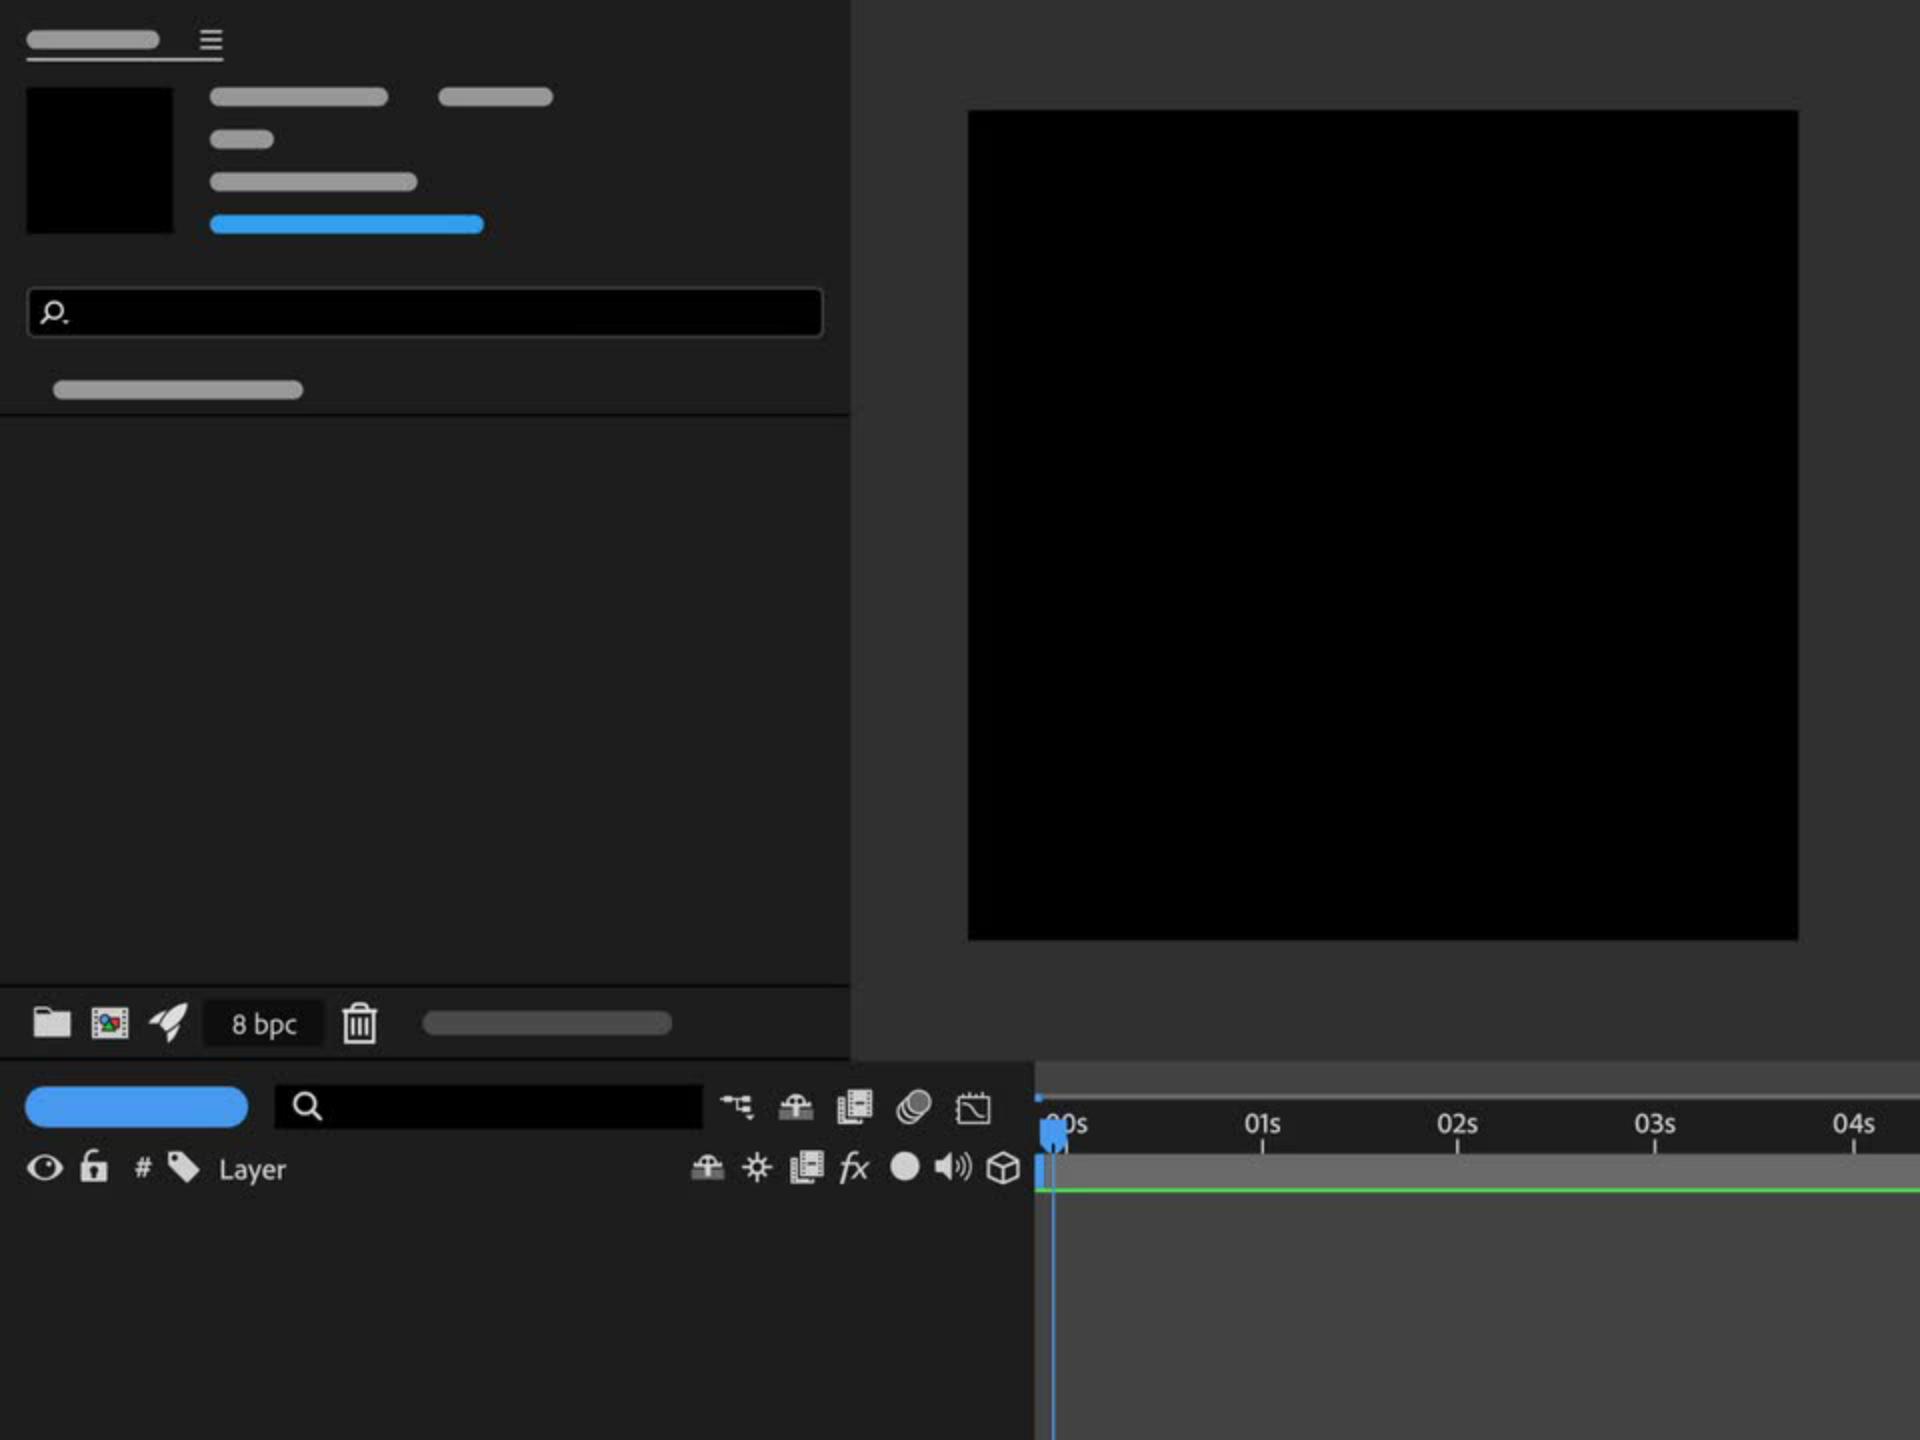
In After Effects, choose File > Import > File, and select the Illustrator (.ai) file and the GLTF folder. From the Import dialog box, select All Acceptable Files, Composition - Retain Layer Sizes, and click Open. Double-click the composition in the Project panel to add the layers to the timeline.
Drag the GLTF object onto the timeline. Resize and reposition it as necessary and then delete the sphere layer (from the .ai file). Once the object is in the correct position, right-click it and choose Transform > Auto Orient > Orient towards Camera to have the graphic facing forward.
Transcript not available
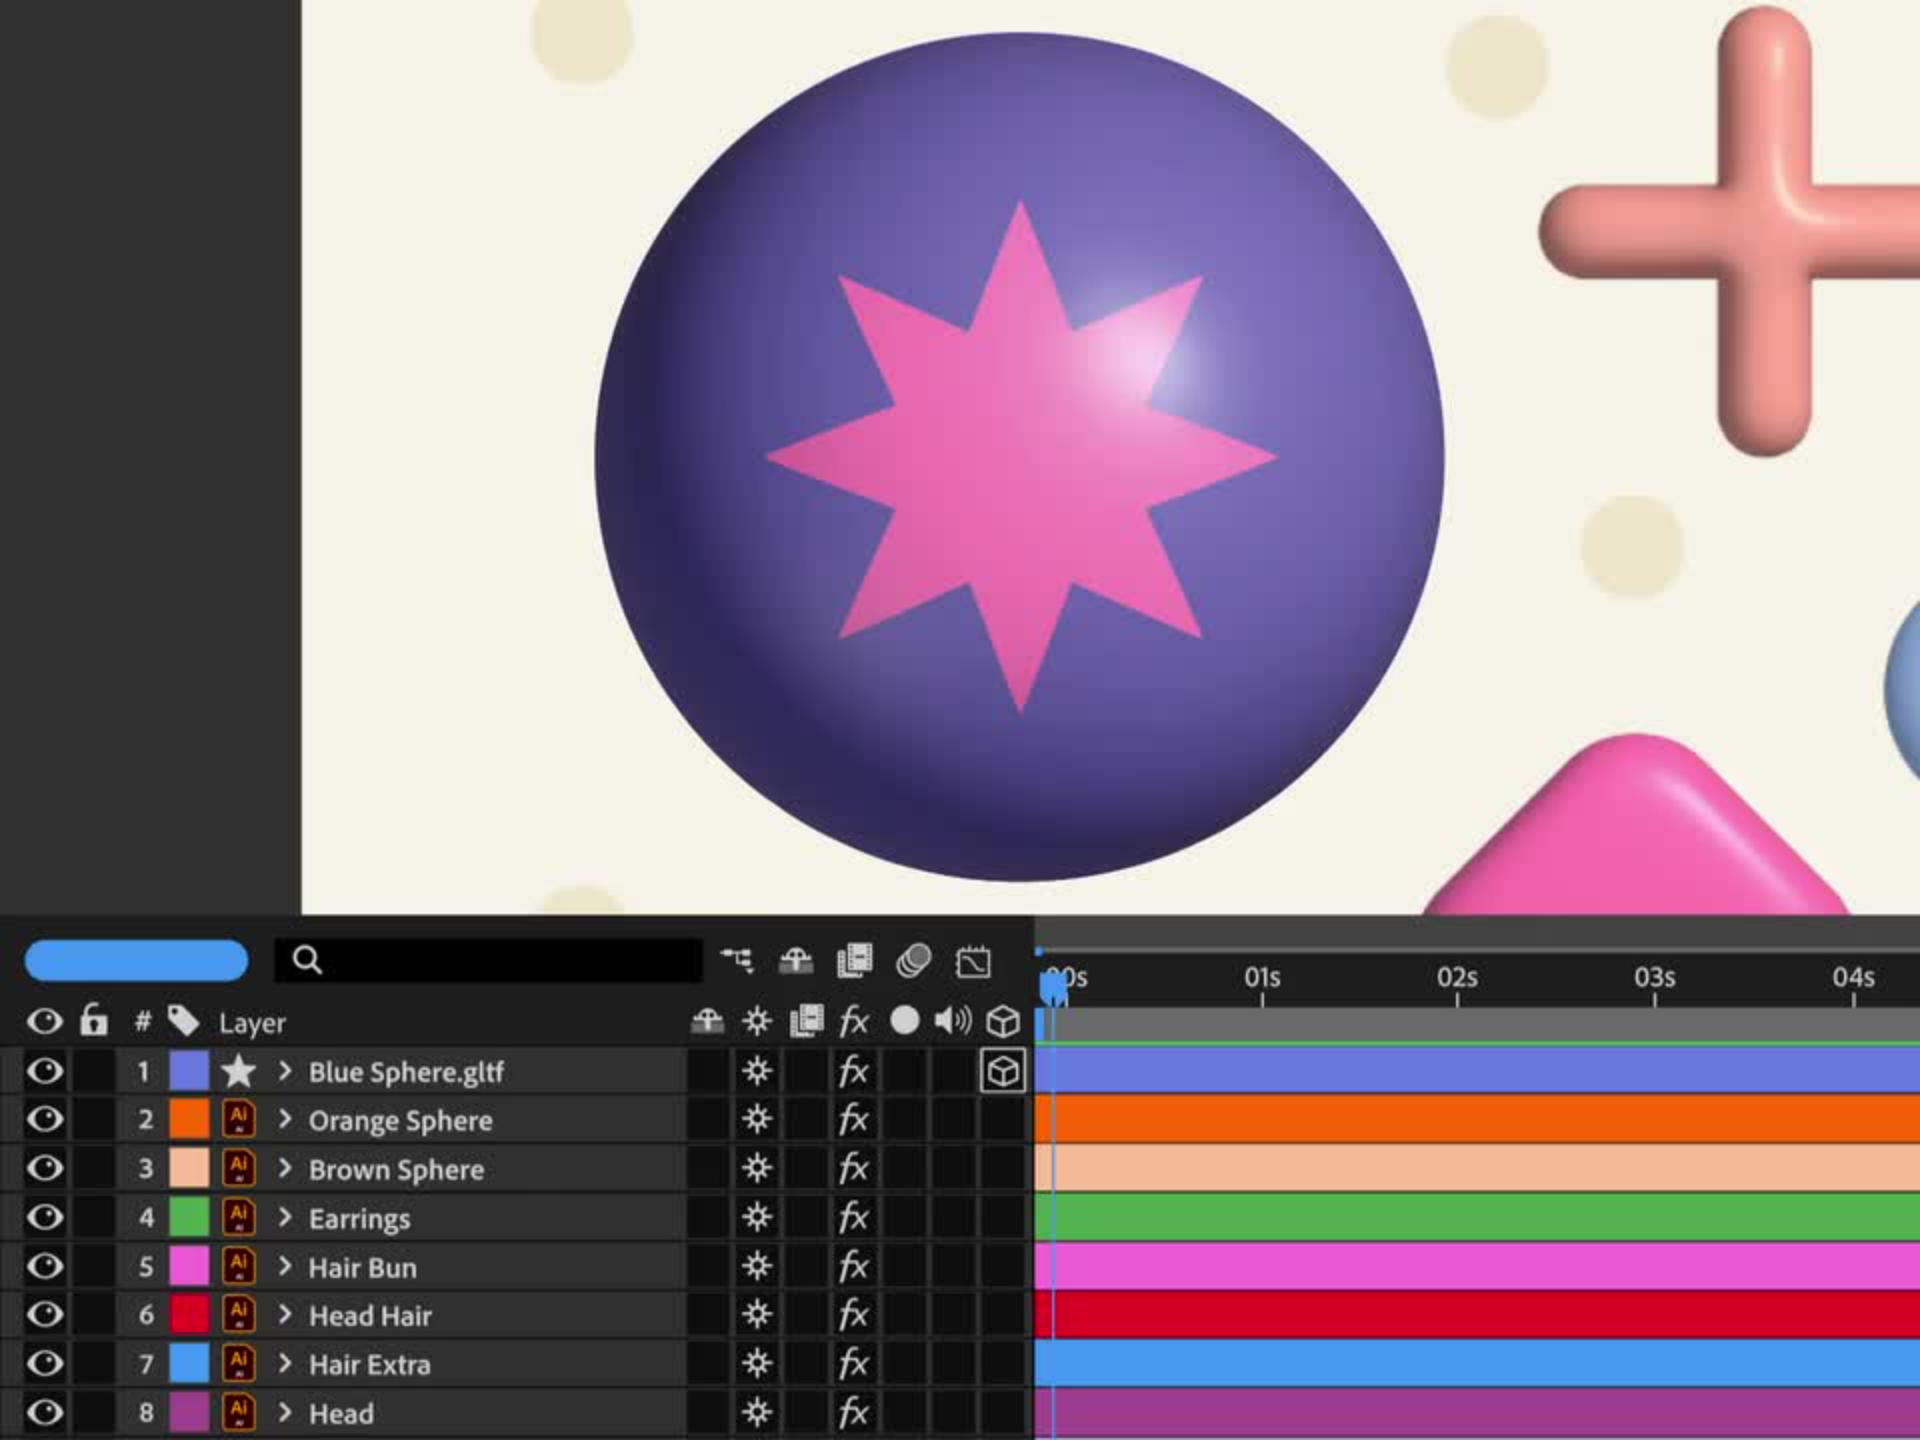
Animate 3D objects.
To add a rotation effect, select the sphere layer and press “r” on your keyboard. Click the stopwatch next to the X Rotation property to add the first keyframe. Move the playhead and change the X Rotation value to add more keyframes. Press the spacebar to preview the animation and then make adjustments as necessary.
To loop the animation, right-click on the X Rotation property and choose Edit Expression. Click the Expression language menu (arrow icon) and select Property > loopOut (type = "cycle," numKeyframes = 0).
Tip: To speed up production, copy and paste keyframes from one layer to another. Then shift the keyframes left or right to create an offset effect. You can also extend the keyframes on each layer to get unique timing effects.
Unable to load video
Export for sharing.
Choose Composition > Add to Render Queue. Then specify the output location and click Render.
Unable to load video
Try these tutorials with Illustrator
Create illustrations and other graphics with vectors.
You can control how Adobe websites use cookies and similar technologies by making choices below. But note that if you disable cookies and similar technologies entirely, Adobe websites may not function properly.
Cookies are small text files stored by your web browser when you use websites. There are also other technologies that can be used for similar purposes like HTML5 Local Storage and local shared objects, web beacons, and embedded scripts. These technologies help us do things like remembering you and your preferences when you return to our sites, measure how you use the website, conduct market research, and gather information about the ads you see and interact with.
You can make choices in the menu below about what cookies and other technologies you want us to use on Adobe sites when you visit them from this browser. You can always change those choices later by clicking on the Cookie Preferences link at the bottom of the page.
If enabled:
We can improve your experience by tailoring the site and the content to things we think might be of interest
We can better keep track of your preferences — like what language you prefer to use
We will better understand your likely interests so we can provide you more relevant Adobe ads and content on non-Adobe websites and in non-Adobe apps
It will help us improve the performance of our website and those of our partners who use the Adobe Experience Cloud
If disabled:
We won’t be able to remember you from session to session so the experience may not be tailored to your interests
You’ll still have access to the content of the site but certain features that depend on cookies may not function
You’ll still see ads, they just may not be as relevant to you
General information
You can control how Adobe websites use cookies and similar technologies by making choices below. But note that if you disable cookies and similar technologies entirely, Adobe websites may not function properly.
Cookies are small text files stored by your web browser when you use websites. There are also other technologies that can be used for similar purposes like HTML5 Local Storage, web beacons, and embedded scripts. These technologies help us do things like remembering you and your preferences when you return to our sites, measure how you use the website, conduct market research, and gather information about the ads you see and interact with.
You can make choices in the menu below about what cookies and other technologies you want us to use on Adobe sites when you visit them from this browser. You can always change those choices later by clicking on the Cookie Preferences link at the bottom of the page.
If enabled:
We can improve your experience by tailoring the site and the content to things we think might be of interest
We can better keep track of your preferences — like what language you prefer to use
We will better understand your likely interests so we can provide you more relevant Adobe ads and content on non-Adobe websites and in non-Adobe apps
It will help us improve the performance of our website and those of our partners who use the Adobe Experience Cloud
If disabled:
We won’t be able to remember you from session to session so the experience may not be tailored to your interests
We’ll still count your use of our site and services
You’ll still have access to the content of the site but certain features that depend on cookies may not function
You’ll still see ads, they just may not be as relevant to you
Operate the site and core servicesOperate site and measure engagement
Always active
These cookies are required, and they are used to enable the site and related services core functionality. Without them the site could not operate, so they cannot be disabled.
These cookies enable the site and related services’ core functionality and collect statistics about user engagement, such as counting active use to help us understand trends. These cookies cannot be disabled.
Measure performance
These cookies are used to analyze site usage to measure and improve performance. Without them Adobe cannot know what content is most valued and how often unique visitors return to the site, making it hard to improve information we offer to you.
These cookies are used to analyze site usage to measure and improve performance. Without them Adobe cannot know what content is most valued, making it hard to improve information we offer to you.
Extend functionality
These cookies are used to enhance the functionality of Adobe sites such as remembering your settings and preferences to deliver a personalized experience; for example, your username, your repeated visits, preferred language, your country, or any other saved preference.
Personalize advertising
These cookies are used to enable Adobe and our partners to serve ads more relevant to your interests. Without them you will still see ads, but they might not be as relevant to you.
Personalize advertising
These cookies are used to enable Adobe and our partners to serve ads more relevant to your interests. Without them you will still see ads, but they might not be as relevant to you.