An engaging demo reel is a key component in your online presence.
And there are many kinds of demo reel.
Depending on whether you're an actor, director, visual artists or musician.
In this example I'm working on the kind of reel a director of photography would create.
As I piece together the reel we'll explore some of the creative and technical choices I make to build it in Premiere Pro.
The first step is to familiarize yourself with your material.
And I have a useful tip for this.
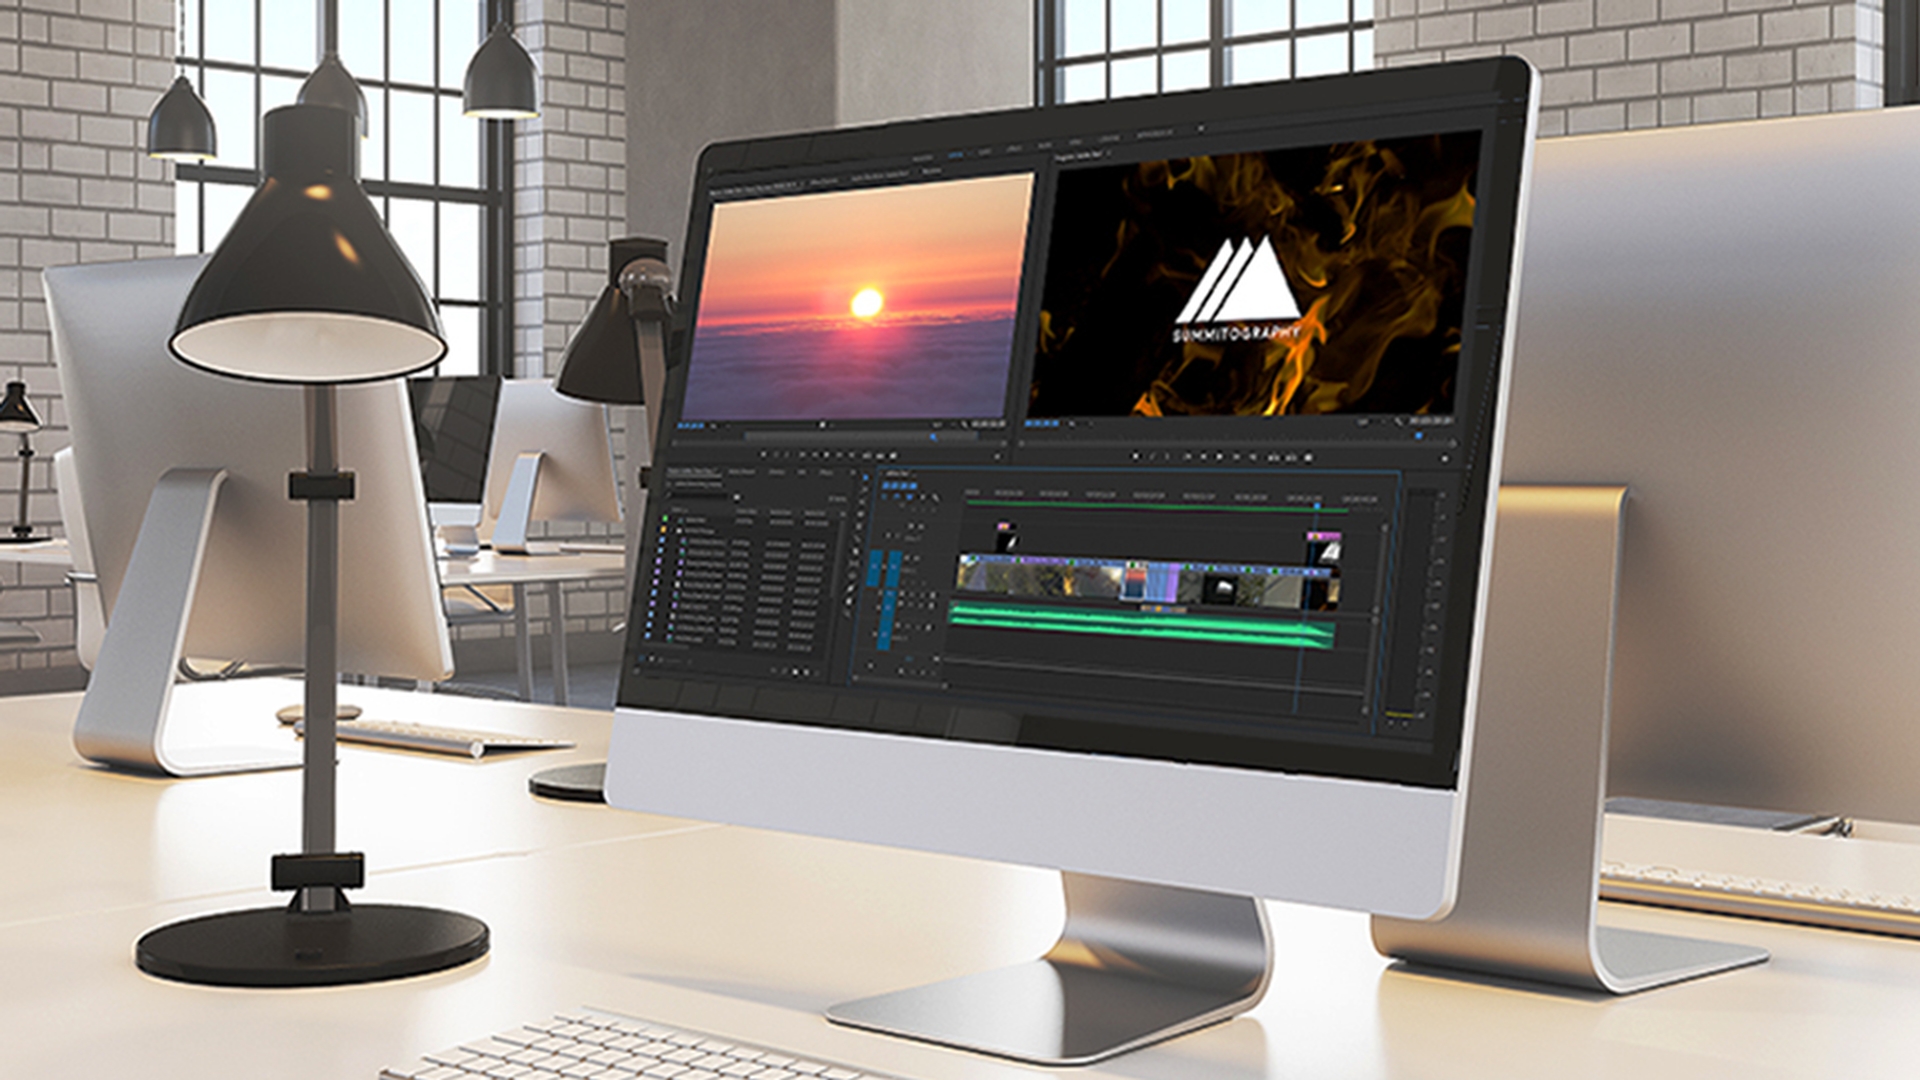
I'm opening my footage bin and switching to the assembly workspace.
Now I'm switching to the list view so I can check out the technical aspects of my available media.
There's quite a lot of variation here; some HDs, some 4k and some UHD.
And that's fine because it's important to use the highest quality versions of your media possible, particularly in a reel that's showing off your visual work, and because Premiere Pro allows you to mix footage on the timeline conforming playback to the sequence settings live during playback.
This means that Premiere Pro doesn't have to transcode everything to a single codec in order to play it back.
Let's begin by creating a new sequence.
Most of our media is 23.976 or 24 frames per second.
So I'm going to choose a DSLR preset that’s 1080 x 24p to minimize frame rate conversion.
This helps maximize image quality and playback performance.
If you're choosing between working with 4k or UHD media and think you might need to produce a regular HD version I'd recommend using UHD as the frame size is an even multiple of HD.
So you won't need to adjust the aspect ratio.
If your source material is completed films
Create a new sequence
Browse your footage
you'll probably watch them from start to finish to identify the best content for your reel.
I'm switching to icon view in the project panel and adjusting the size of the icons to the maximum so I can use them to browse my footage.
If you're working with a number of separate clips, as I am here, try scrubbing through them taking about two seconds to see the entire contents of each clip.
This gives you an overall familiarity with your material.
And you can tell if it's a long clip or a short one based on the speed the visuals move while you scrub.
I'm hover scrubbing over these clips to go through this process even faster.
I think you'll be surprised by how helpful this is.
As you edit the overall familiarity with your footage will help you recognize patterns in your media and you'll have a better sense of the content you have.
Now let's add our music.
Add a music track
I'll drag this straight onto the timeline on the second audio track in case I decide to use sync audio from video clips on audio one.
It's important to use music that conveys the right mood.
Listen to this.
It might be of value to use just a piece of a music track or to use remix in Adobe Audition to create a version that's perfect for your reel.
In this example we have music that's impactful and it's short enough for us to use the whole piece.
There are a couple of turning points in the music that we'll want interesting visual elements to line up with.
So we're going with the flow.
There's a swell in the music around five seconds.
This is the perfect time to add our company logo.
I'm going to add a marker here using the M key.
Around here there's a buildup in the music.
We want something dramatic here.
I'm going to add a marker near the end as well to remind me to add the logo again.
Add clips to sequence
Now that we've browsed through the available footage it's time to look more carefully at the material that stands out and add some clips to the sequence.
I'm going to switch back to the editing workspace.
It's important to keep demo reels brief with only the very best content displayed in a way that shows diversity without repetition.
This music is 39 seconds and I'm going to use it as a guide for total duration.
Much of the work of creating a demo reel is in selecting exactly the content that will engage viewers the best.
And let's see what we have.
I love this drone shot but we almost certainly won't want to start.
If we wanted to make a reel with a behind-the-scenes feel it might work to show the opening.
But for now I've marked a region where we have this great fly over the edge of the road.
I'll add our opening shot as the music comes in.
I can see where to drop the clip by looking at the music audio waveform.
I'm going to add a cross dissolve at the beginning by right-clicking on the end of the clip and choosing Apply Default Transitions.
This clip contains lots of high energy samples.
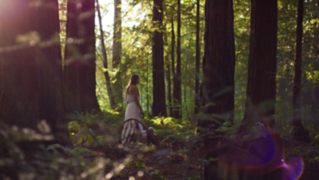
For the opening of this reel I've picked out this beautiful shot with sunlight passing through a wave.
Let's use this next.
I'm happy with the timing of the cut.
Stabilize clips
But it looks like the camera wobbles during the shot.
Now this camera movement didn't matter in the project it appeared in, but for this real that has more stable shots I think this clip would benefit from some stabilization.
Let's do that now.
I'm applying the warp stabilizer effect, which will analyze the shot in the background while I continue to edit.
This is perfect even with the default settings for the Warp Stabilizer I'm happy with the result.
Let's add a few more clips.
I've already experimented and set in and out marks for these shots so they fit well with our music.
This is a great wide drone shot that continues the theme of the previous shots.
However, it's larger than the frame size of the sequence.
So we're losing some of the image.
To fix this I can select the clip and go to the effect controls panel and I'm going to adjust the scale to see more of the image.
This is a beautiful shot.
We're still up in the sky in fact we're above the clouds.
Let's have it.
Adjust clip duration
Now it's in the sequence.
I think it takes too long to play and given the fast action in the other clips I think we can speed it up even more without distracting the viewer.
I can easily change the speed and duration by right-clicking on the clip and choosing Speed / Duration.
I'll set the speed to 250%.
And let's take another look.
Reverse clips
This is great, but the sunset feels like an ending.
And I want to feel like we're all about beginnings.
Let's turn this into a sunrise.
I'm going back into the Speed / Duration settings and I'm enabling Reverse Speed.
Let's take another look.
This is great.
This shot is fast-moving, but with the Sun in the background and the green trees in the foreground it provides a useful transition to the next content I want.
The next three action shots look like they provide some continuity.
This clip also contains some audio we can use to add presence to this part of the sequence.
We can create something of a narrative with these three thanks to their continuity of movement and theme.
The audio from the middle clip cuts in and out.
But we'll come to that later.
It's generally a good idea to leave audio adjustments to the end, so you know the visuals they're serving.
I'm happy with the contents of the other numbered clips I have here as I have already looked through them and made my partial selections.
So I'll hold the Shift key to select these as a list and add them to the sequence too.
Let's play the cut just to make sure the timing's right.
I like the look of this, but actually I think we can find a more interesting alternative to the spinning trees shot.
This shot from an entirely different project introduces something industrial looking to the reel.
And that variation increases visual interest.
Replace clips in sequence
To save time I'm going to replace the existing clip by dragging the new option on to it while holding the ALT key.
This replaces the contents of the sequence clip segment while retaining the duration and any effects applied.
It's a quick way to swap alternative takes too.
Change clip timing
We have a lot of interesting shots in this sequence now, and I'd like to take a moment to talk about timing.
Take a look at this shot.
I like the way the doorway acts as a natural transition from the shot where he's wearing indoor clothes to the new shot where he's dressed to go surfing.
The clip is the right length, but I think it'd be interesting to play with the parts of the clip I'm using here.
I'm good to use the Slip tool to reveal more of the end of the clip before the next clip.
We don't need to see him for very long to know he's leaving the room.
But if we end the clip too soon after he leaves the doorway the whole clip will appear to end too abruptly.
Let's look at that again.
Much better.
Now let's put some finishing touches on this reel.
I'll add a default dissolve at the end by right-clicking and choosing Apply Default Transition.
Now let's adjust the timing of that skating audio.
Right now I can't lengthen this audio clip because it's linked to the video in the clip above.
I'm turning off linked selection, so I can easily extend the audio from the middle clip so it plays under the clips before and after it.
Now I'll just select the audio clip and press Shift + D to apply the default transition to both ends of the clip.
Because I selected an audio clip the transition is an audio crossfade.
This will ease in and out the audio.
Let's have a listen.
Great.
Change clip frame size
Several of the clips have a larger frame size than the sequence setting.
So they're cropped.
For a quick fix I can right-click on clips and choose Set to Frame Size.
It's important that we add our branding, so customers can recognize the company more easily.
And we have a graphic ready to use.
This graphic has an alpha channel.
So clips underneath it on the timeline will appear behind the logo.
Premiere Pro has a user definable default duration for graphics that you can change in the general preferences though I tend to keep the default duration.
For this clip I'm adjusting the timing by trimming.
And I'm right-clicking to add a cross dissolve.
Export demo reel to Behance
Now we're ready to share our demo reel.
I'm making the sequence active and going to File, Export, Media.
I go to Export as H.264 and press Y to jump to the YouTube 1080p HD preset.
It's ideal for online media platforms.
You might want to try the Vimeo HD preset too.
It has a higher bid rate setting which might be good for videos with lots of motion though the file size is bigger.
In addition to exporting to a file, you can publish directly to platforms like Behance from right inside of Premiere Pro.
Add metadata tags and a description to make your video more discoverable online.
If you click the Q button the encoding is performed by Adobe Media encoder. so you can get to work on other projects in Premiere Pro while the video is output in the background.
So that's how you assemble the best clips from your best work into a short, impressive demo reel.