Introduction
Hi, in this video we’re using Substance 3D Designer to create roots.
Let’s first go over the key nodes and parameters we’ll use.
Understanding key nodes and parameters
Edge detect node detects high contrast areas in a black and white image and creates edges around them.
Edge width is the thickness of the edge.
Edge roundness rounds sharp corners.
A non uniform blur grayscale node is a high quality blur where the intensity is driven by a custom input mask.
Intensity is the maximum strength of the blur.
It’s masked by the Blur Map.
The multi directional warp node is a great node to warp shapes in an interesting way.
It distorts your shape in a few, set directions, based on an intensity input.
With mode I have control over the blending behavior.
Average is more of a soft distortion, max extends, min eats away, and chain easily gives you a really intense distortion.
The distance node creates an outward linear fade from any pixels over 0.5 grayscale value until it meets another cell.
Maximum distance sets the maximum expansion range for a cell.
Combine source/distance, by default source only, will give you a flat result, but you can decide to combine the output with another source to add some gradients to it Let’s start with a cells 4 node at a scale of 2.
Building the base root structure
Connect it to an edge detect node, invert it, increase the edge width to 4.8 and reduce the edge roundness to 2.7 for thick lines with slightly rounded corners.
Use a Non uniform blur grayscale node with an intensity of 8 to blur it with itself and forward it to a blend node.
To create two different types of roots, we duplicate this first setup and adjust the settings.
Increase the cells scale to 4 and reduce the edge width to 3.2 for thinner lines.
A lower intensity of 5.5 is needed because of them.
Now join it to the foreground of the blend node with the max lighten blending mode.
Add a directional warp node and use a perlin noise
Applying warps and distortions for root shapes
with a scale of 4 as intensity input.
Push the intensity a lot for stronger deformation and use an angle of 10 degrees to get a nice result.
Next connect it to a multi directional warp node and take a perlin noise with a scale of 14 for the intensity input.
A slightly higher intensity of 17 in max mode results in splitted roots.
Finally blur it slightly with a blur hq node at an intensity of 0.5.
Here’s our final really simple base result to get an idea.
Adding advanced details and variation
Let’s explore some more detailed setups and check out some other methods for roots generation.
Separated deformations for thicker and thinner roots give you more control over each deformation.
This really helps to tweak things better.
You can add many more deformation steps to get more details into the roots.
This really depends on the roots you want to achieve.
An additional warp step, with a smaller noise introduces some more details.
A more customized noise as intensity input for the roots splitting process helps you to define the areas where splitting happens and the intensity of the effect too.
Multiply a noise with higher contrast over a normal noise to exclude some areas completely.
Multiple blended noises help you to bring in some more variation.
Use high contrasted noises for some additional height variation.
This helps when blending it for example with dirt ground.
If you need more details along the roots, use a directional noise with some multi directional warp or warp nodes to achieve it.
Split the roots again and use the result of it as intensity input for more details.
Blur the final result slightly and use a levels node to push and tweak the height.
For some guided roots use the tile sampler node in pixel size mode.
Increase the color random value.
A Distance node in only source mode is great to get the pattern with solid colors.
Then simply use the edge detect node again to get a high contrast mask and deform it.
Experiment with other tile sampler controls for nice results.
Creating a final material and blending with ground
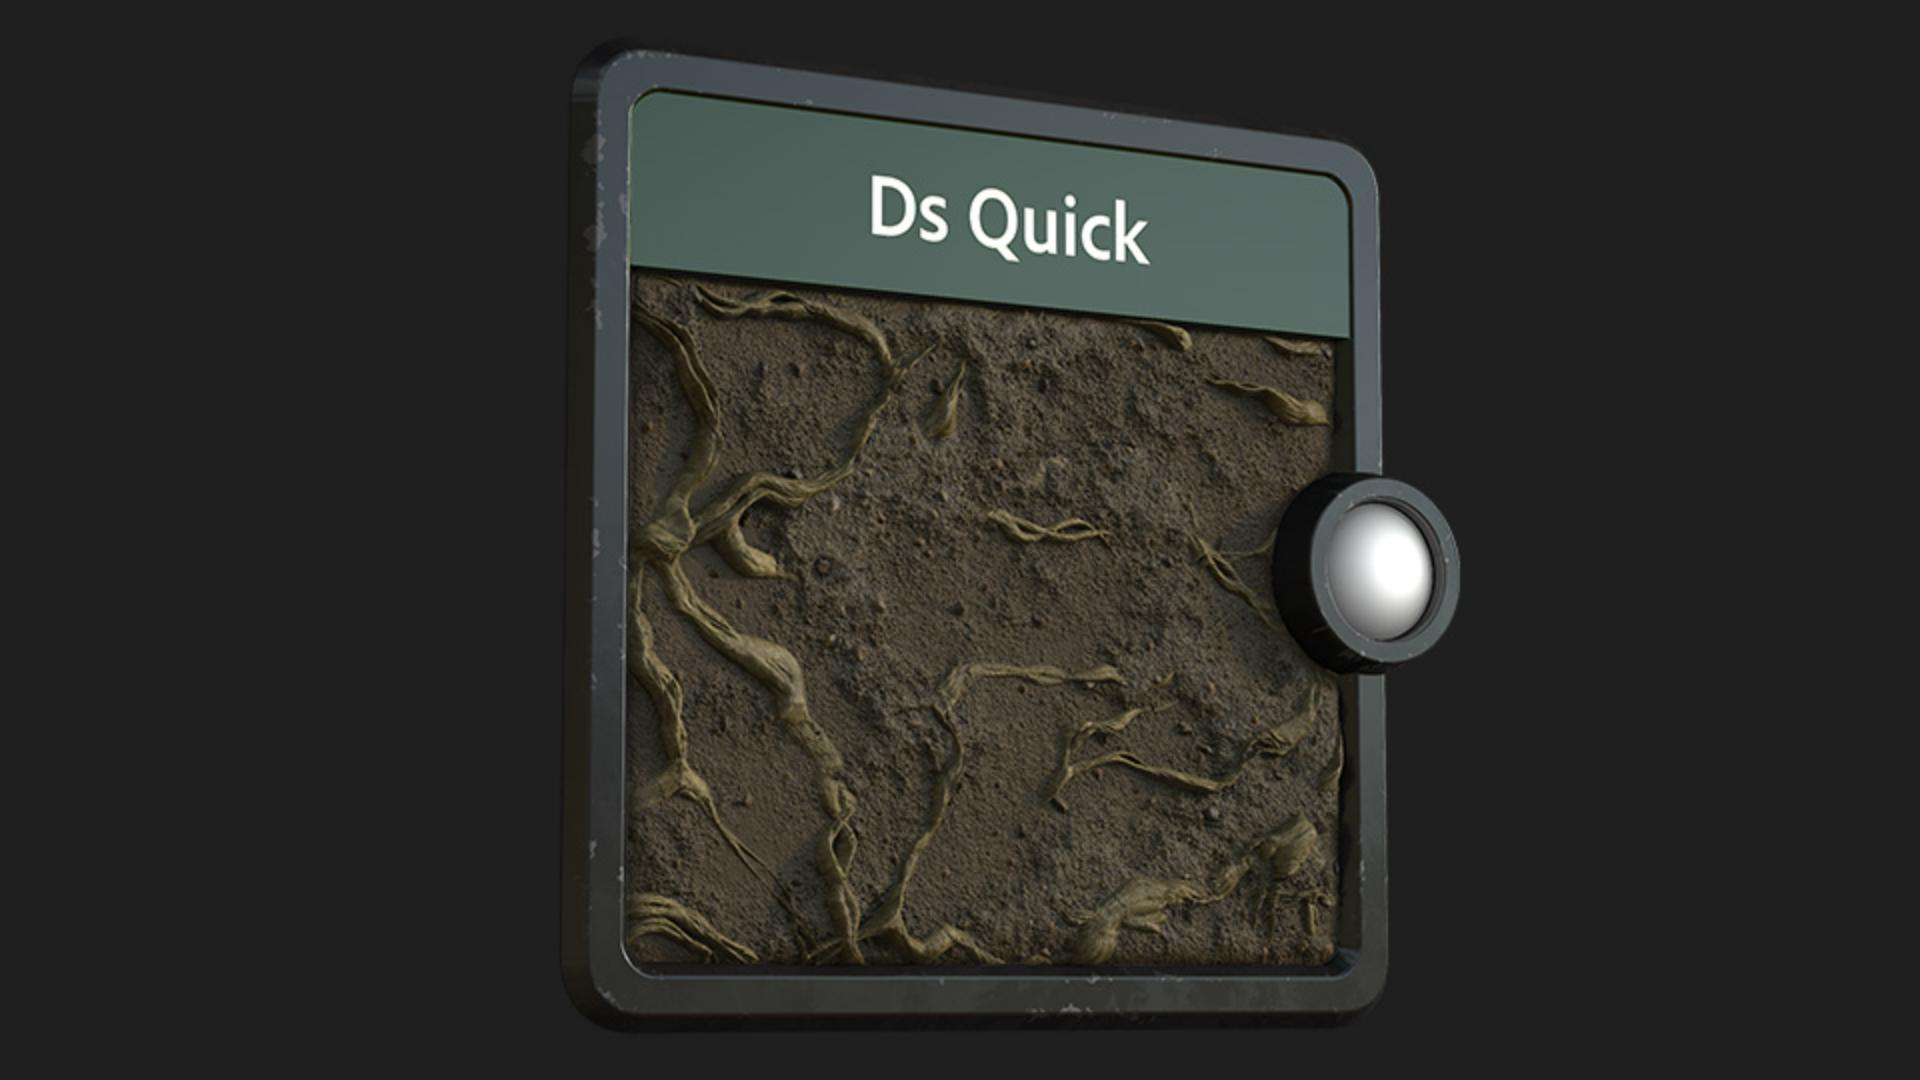
Here you see a small material I’ve done with the roots.
I used a brown uniform color as starting point and blended the details into it.
I further applied bnw spots and dirt nodes to bring in some smaller details.
To add some color channel details individually to the normal channel, I took the normal combine node. this way I have full control over individual elements.
I further used a curvature smooth node and inverted it to get a really basic roughness channel.
The blended gravel and concrete material is just a fake dirt for showing you the blending process.
Use a material height blend to blend it with the roots.
An RTAO node after blending gives you a nice result for the AO channel.
If you want to learn more, you can download and open the graphs shown in the video.
Thanks for watching and we would love to hear your thoughts, ideas and suggestions for future quicktips, so let us know them in the comments.
See you in the next quicktip episode.