Introduction
Substance Designer 14.1 is fresh out of the oven and the spline family just got bigger with the arrival of a new node: the Scatter spline on spline.
So let’s talk about it!
Just in case you forgot, right now in Designer
Understanding scatter spline on spline fundamentals
you can draw splines and scatter patterns along them.
This works similarly to the tile sampler, you plug your custom patterns in and then the scatter will place them along your spline.
With the current release you can go even further than that by scattering splines on splines and then use those generated splines to scatter even more splines, or new patterns!
If your head isn’t spinning yet, let’s dive into practical use cases to see how it all works.
Creating a basic snowflake structure with splines
We can start with a very simple example, just to ease ourselves into this new way of working.
One of the first things that comes to mind when thinking about splines on splines is fractal structures and the snowflake is a great example of that so I made this piece of jewelry as an experimental project.
And here let me remind you that all the projects I’m going to present are fully available for download, we tried to make them as easy to explore as possible with comments and navigation pins so that you can really learn from them at your own pace.
This time we also put together a graph with some choice tidbits – cool use cases, happy accidents, interesting effects that we wanted to share with you.
We’d love to know what you think about this, if you find it useful and if you’d like to have more content like that in the future – so please let us know in the comments.
Alright back to work!
So I have a basic spline setup here, just three splines placed at an angle that makes up a half snowflake.
What we can now do is grow new splines on this structure, so let’s jump into it by bringing in the Scatter spline on spline and have a little walkthrough.
Notice that it has 2 spline inputs: the first one is for the parent spline, which is the spline you want to scatter upon, in our case that’s our main setup here, and the second one is for the children spline, that is the spline you want to be scattered.
You can leave this one empty if you don’t have a custom spline to scatter, and this is what we’re going to do for now.
Exploring parameters for placement, scale, and rotation
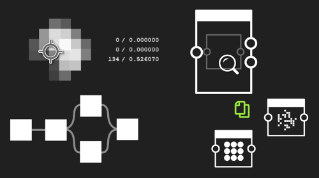
Ok let’s have a look inside the node: to make things clearer, I’m going to scroll down to the very bottom and enable the background preview – just makes things easier to understand.
And again, keep in mind that this is only affecting the preview, not the actual output of the node, which is just these splines here.
Ok let’s start from the top.
The first thing you get to choose is the side your splines are scattered on, so you have left, right, both, alternate and random.
Let’s go with left and right.
You can obviously choose how many splines you want – let’s stick with 8 – The start and end slider are very handy because they let you trim the distribution range, so you see here the center is a bit cluttered so to fix this I’m just going to push the start slider a little to the right so that it clears out this area.. ok.
We’ll go over the remaining parameters in a bit.
Next we have the size parameters, pretty self-explanatory, but they let you achieve very interesting effects.
For instance at the bottom we have an option to scale down based on the parent spline start and end, again – direction matter. if I go back to my first spline and flip it.. see?
The effect gets inverted.
Now that effect is nice but not exactly what I want: what I want is for the splines to get bigger around the center, and to shrink down towards the ends – so I want some sort of spike in the center.
How can I do that?
Well, it appears we have a scale map multiplier just like in a Tile Sampler.
But things work a little differently with splines because you get to choose between two different sampling modes.
It may sound complicated but it’s actually very simple: Texture space works like in a Tile Sampler, it super imposes the texture over the whole 1 to 1 space.
Horizontal mode however samples one line of the image for each spline.
You can think of it as if it was unfolding the spline horizontally and picking up the values as it goes.
Knowing that, we can assume that a simple mirrored gradient will work, so let’s try it… rotate it… and there we go.
Let’s just add some randomness to the mix… ok.
Next we have the position settings, nothing new here, you can move your splines along the tangent, along the normal.. you can offset along the spline, and randomize all this.
As for offset by thickness, let’s keep that for later.
Now the rotation section is quite important: because when you scatter splines on both sides you can then tweak the angle like so… which already gives a more snowflaky look right? - and if you switch the mode to absolute you can rotate the splines independently from the parent spline.
(Which as a side note is just incredible to make northern lights but let’s close that digression for now) Alright I think we have a satisfying base for this snowflake so let’s just finish it.
All that is left to do is to add these ending arrows at the tips, and that’s actually a good exercise: if you’ve been following along – why don’t you pause the video and try to solve this by yourself, just putting into practice what I just showed you.
Alright let’s do it quickly together.
To get this effect we need another Scatter Spline on Spline, we can actually duplicate this one… hook our secondary splines to it,… and oouh!
Ok we obviously have too many splines: we only want one pair at each ends.
So what I’m going to do is first reduce the amount to 1, then push the Start slider… but you see when I go to the max they seem to disappear before they reach the actual end of the splines..
And that’s because we’re still using that gradient to scale them down, so let’s fix this quickly in the size section… toning down the randomness… alright.
We can finally bring all these splines together using append nodes because they’re still separate at this stage….
So this one.. and this one, and this one… and this one.
You can deactivate the direction arrows if they get in the way.
And last but not least we can render everything using a spline render node.
A small caveat here: unless you’re plugging something in the background this node will default to 8 bits so to avoid any further banding issues I’m going to manually switch it to 16 bits .
And that’s it!
You now have a half snowflake that you can reform using mirrors.
Now if I show you my final setup this is what I have….
I used small tricks to turn it into something interesting: like a slopeblur to inflate the structure .. with just a blurred intensity map like that… And to fill the gaps a simple reaction diffusion pattern does marvel.
What is great about this setup is that it is very easy to iterate on it: since we have some randomness we can play with the seed… move around the branches… change the amount… really versatile.
Building complex multi-level spline structures
Ok let’s move on to a more advanced project.
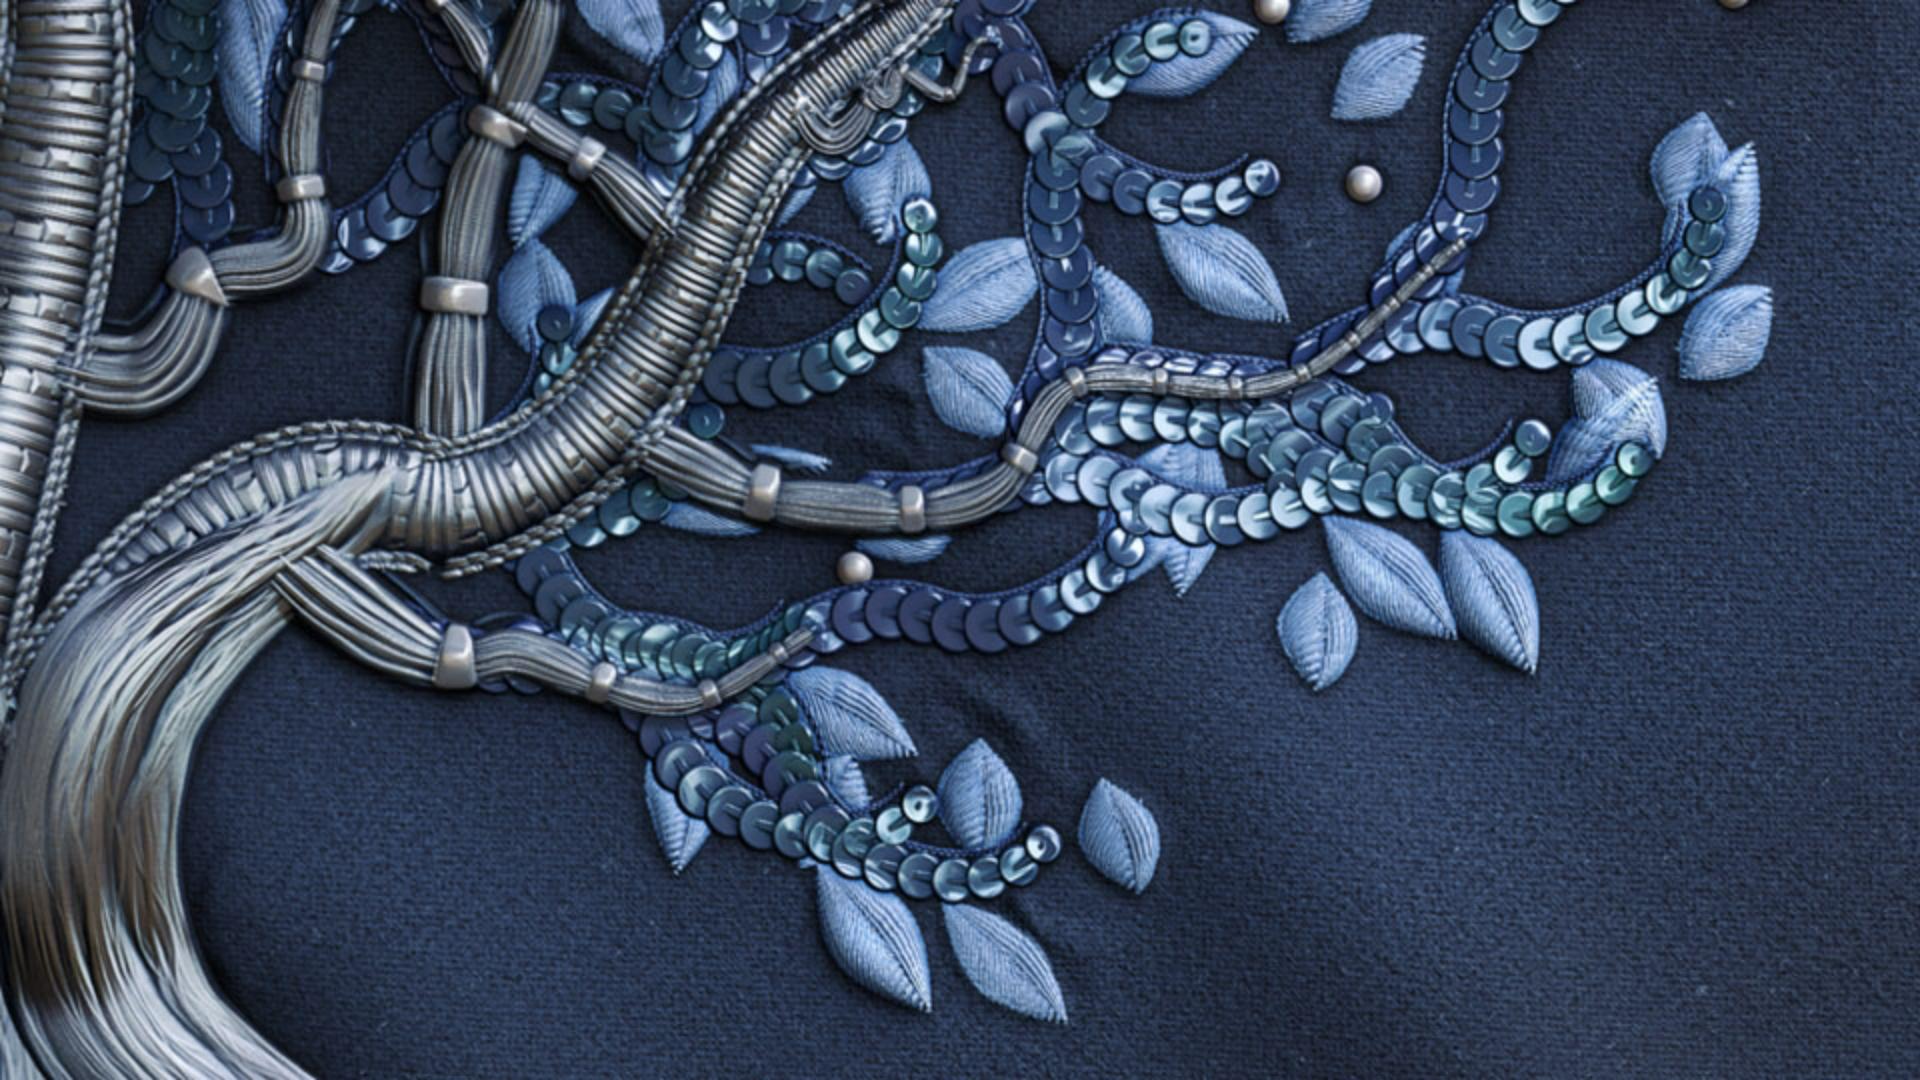
Alright there’s a lot going on here, but you’ll notice that in reality everything revolves around these two phase.
Each orange frame corresponds to a level of splines: so we have the primary splines here, then the secondary, then the tertiarary, and finally the last splines that make up the leaves.
But this is just the structure, the skeleton.
To turn that into a fully fleshed embroidery we need to render these splines, and this is what the green frames are for: as you can see, each spline gets its own treatment: I used different textures for each level: here there’s classic silver threads, hear there’s sequins, for the leaves I used threads; etc.
So to sum it’s all about: creating the splines, rendering them, assembling them with the rest.
Now we’re not going to redo this whole embroidery, but we can create its structure together to see how you can really harness the power of the scatter spline on spline. (again you can take the time you want to examine the graph) Alright where does it all start?
Well you see that we have this block here that drives all the other splines so this is going to be our beginning.
I duplicated it on the side so that we can start from here.
This time everything that I’m going to show you will be previewed through a regular scatter on spline: if you reduce the shape distance to zero you get that nice ribbon and it’s just a convenient way to preview both thickness and height at the same time.
Now just a few words about the setup, itself: I’m actually reusing the exact same base as for the snowflake (see we have the three main branches here), but I made a few adjustments to give us a head start and make them more organic and “tree like” so to speak: first I added some thickness using a sample thickness node, which basically lets you drive your spline’s thickness with a map – super handy because here I can widen the base with a simple gradient… and offset it as I want with levels.
Easy.
The second thing I wanted to address after assembling everything is the height: by default those 3 splines share the same height right – they all come from the same source here – and it might cause intersection issues down the line so to prevent that I randomized their height by running them through a sample height.
The sample height does the same thing as the sample thickness: it lets you change the property through a map.
The trick here is to switch the mode to random horizontal and drive it with an anisotropic noise, so that each spline inherits the value of a different line.
Very handy, very easy to randomize too.
And finally, to break that very straight look, I used a spline warp with a Perlin to get soft distortions.
So this here, all this, is going to be our primary splines, out of which all the rest will flow.
Refining branches and advanced spline controls
So let’s add a frame to make the structure more readable.
Alright we’re now ready to scatter some branches on that structure.
Let’s add a Scatter spline on spline, and this time take things a bit further.
Ok so default state: straight splines scattered on the left and over the whole length of the parent spline.
Let’s switch to alternate and trim both ends a little to begin with..
Alright.
Time to have some fun and try out the custom spline mode.
I’m going to add a polyquadratic spline and connect it to the custom spline slots.. there we go.
Now a few words about the custom spline or, as I will call it, the children spline: by default its global position and rotation do not matter so you see if I add a 2D transform here, it has no effect whatsoever.. that’s because the spline position is set to “along spline” by default, which will automatically snap it into place.
If you toggle that to “absolute”, then you can use the 2D manipulator to place it wherever you want, it can quickly get complicated however so I would recommend keeping the default setting unless you have a specific need for that.
And you can also play with the pivot point for more precision, but again most of the times you won’t have to worry about these settings.
Obviously it gets interesting when we start moving points around… like so… and as I do that, note that the splines rotation also changes because it’s based on the first point tangent, and so you can clearly see it happening if I mess with the beginning of the spline (but we’ll get back to that).
All I want is a simple curve … something like that… Now you see that yes our children spline is scattered on both sides but the orientation is not mirrored: to fix this fix just enable symmetry.
We now have a good basis that we can refine to make it look more natural: randomizing the scale… I’m also going to reuse the gradient texture to taper the ends… ok.
Next there’s a few interesting sliders that can help us in the position section: we can randomize the offset… and if you want to sync your children spline with the parent spline thickness, you can do so using the offset by thickness parameter; this is useful if you want your splines to rest on the surface of the parent spline so to say - let me actually preview the rendered result – see?
And if I change the thickness here… the offset will adjust itself accordingly so that my splines are always neatly placed… Now let’s move on to the rotation parameters.
We already covered most of them but there’s one we haven’t talked about, and it’s the rotation map parameter.
We don’t really need it for our branches, but just to demonstrate what it does on another setup: so I’m plugin the same gradient in the rotation map input, and I have it set to horizontal mode.
And… here we go… as you can see it’s the same behavior than in a tile sampler: where the map is white the rotation is maximal and vice versa.
And interestingly if I push the contrast to the max, I can use it to flip certain splines like so… very useful, and we actually put this example in the tidbits graph that we shared with you.
Note that you can also affect the symmetry itself if you want to.
Now back to our branches.
They’re almost done, but there are still two sections I want to walk you through because they can look a little bit complex at first, I’m talking about the height and thickness sections.
The reason we have these is because we’re combining two sets of splines, each with their own thickness and height data and we need to be able to control how they both interact with one another.
Let’s focus on the height first: as you can see on the render here, by default the children splines inherit their height from their parent, which is what you want in most cases: just having them at the same level.
Now let’s have a look at the sliders we have to change that.
First you see that you get the same controls twice: once for the start and once for the end of the spline so it may look like a lot of options but it’s actually just those three parameters that you can adjust for each end.
The mode, at the top is set by default to “From parent spline + custom spline”.
Now what does that mean?
If you’re ever unsure about what a parameter does, now is the time to remind you that they all have detailed tooltips to guide you so here we can read that this mode “uses the height of the parent spline, then adds the custom spline’s height to it.”
In other words it acts like an additive blend: if I start pushing the slider you see that the height from my custom spline – which, remember, is at 1 by default – is slowly adding itself to the base height.
And you see that if I push it too far the cumulated heights start to hit the range limit, creating this clipping in my render.
So when using it really keep in mind that it’s adding and not multiplying.
As for the offset slider, it just helps you adjust the result from that first slider.
The two other modes are pretty simple: “manual” just switches to absolute values so you get one slider for each end, and “from custom spline” keeps the custom spline height without adding it to the parent’s height.
In our case we can stick to the default mode, and if we want the children splines to be tucked under we can always input a negative value, or a positive one if we want them to stick out more.
Alright what about the thickness?
Well it works more or less the same way, we get two sets of options – one for each end, and by default the children splines inherit their thickness from the parent: see?
This spline here is thinner than this one here.
The only difference with the height is that the two values are not added to one another, here you just go from one to the other.
So when the slider is at one the thickness is fully inherited from the parent, and when you set it to zero you revert to the children thickness – which in this case is the default zero, so my splines completely disappear.
For our branches I think a slight tapering would be nice… something like that.
Then it’s just a matter of warping everything slightly and we get a nice set of secondary branches!
And from there you can just reapply the same logic for each new set of spline: just add another scatter spline on spline, pick the splines you want to grow them from, and play with the parameters - which is what I did for this third set of branches here.
Just to finish off I’d like to show you the settings of the fourth set of splines, which correspond to the leaves in my embroidery.
You see that it’s just a bunch of straight splines that I scattered about the ends, there’s no curve or anything… the secret here was to play with the thickness.
You see my custom spline may be straight, but it has some thickness in the middle, creating this leaf shape.
Then, in the scatter spline on spline, I toggled the thickness mode to custom spline so that the children would just keep their own thickness without being affected by the parent thickness.
And that’s it!
Using a regular scatter I was able to use that thickness to embroider the leaves nicely.
And this concludes our exploration of the Scatter spline on spline.
I hope you’re excited by all the possibilities that this node opens, we look forward to see what you’ll create with it!