Introduction
Hi, in this video we’re using Substance 3D Sampler to create a plaid fabric material in minutes based on the generator we created in Substance 3D Designer.
Let’s setup the scene with a cloth mesh in combination with a studio HDRI.
Setting up the scene and base fabric material
Now import the generator into your assets folder by clicking onto the plus button and choosing it.
Use a base material as starting point by clicking on the add a base material button.
Then choose the fabric preset and reduce the specular level to 0.1 for a good starting point.
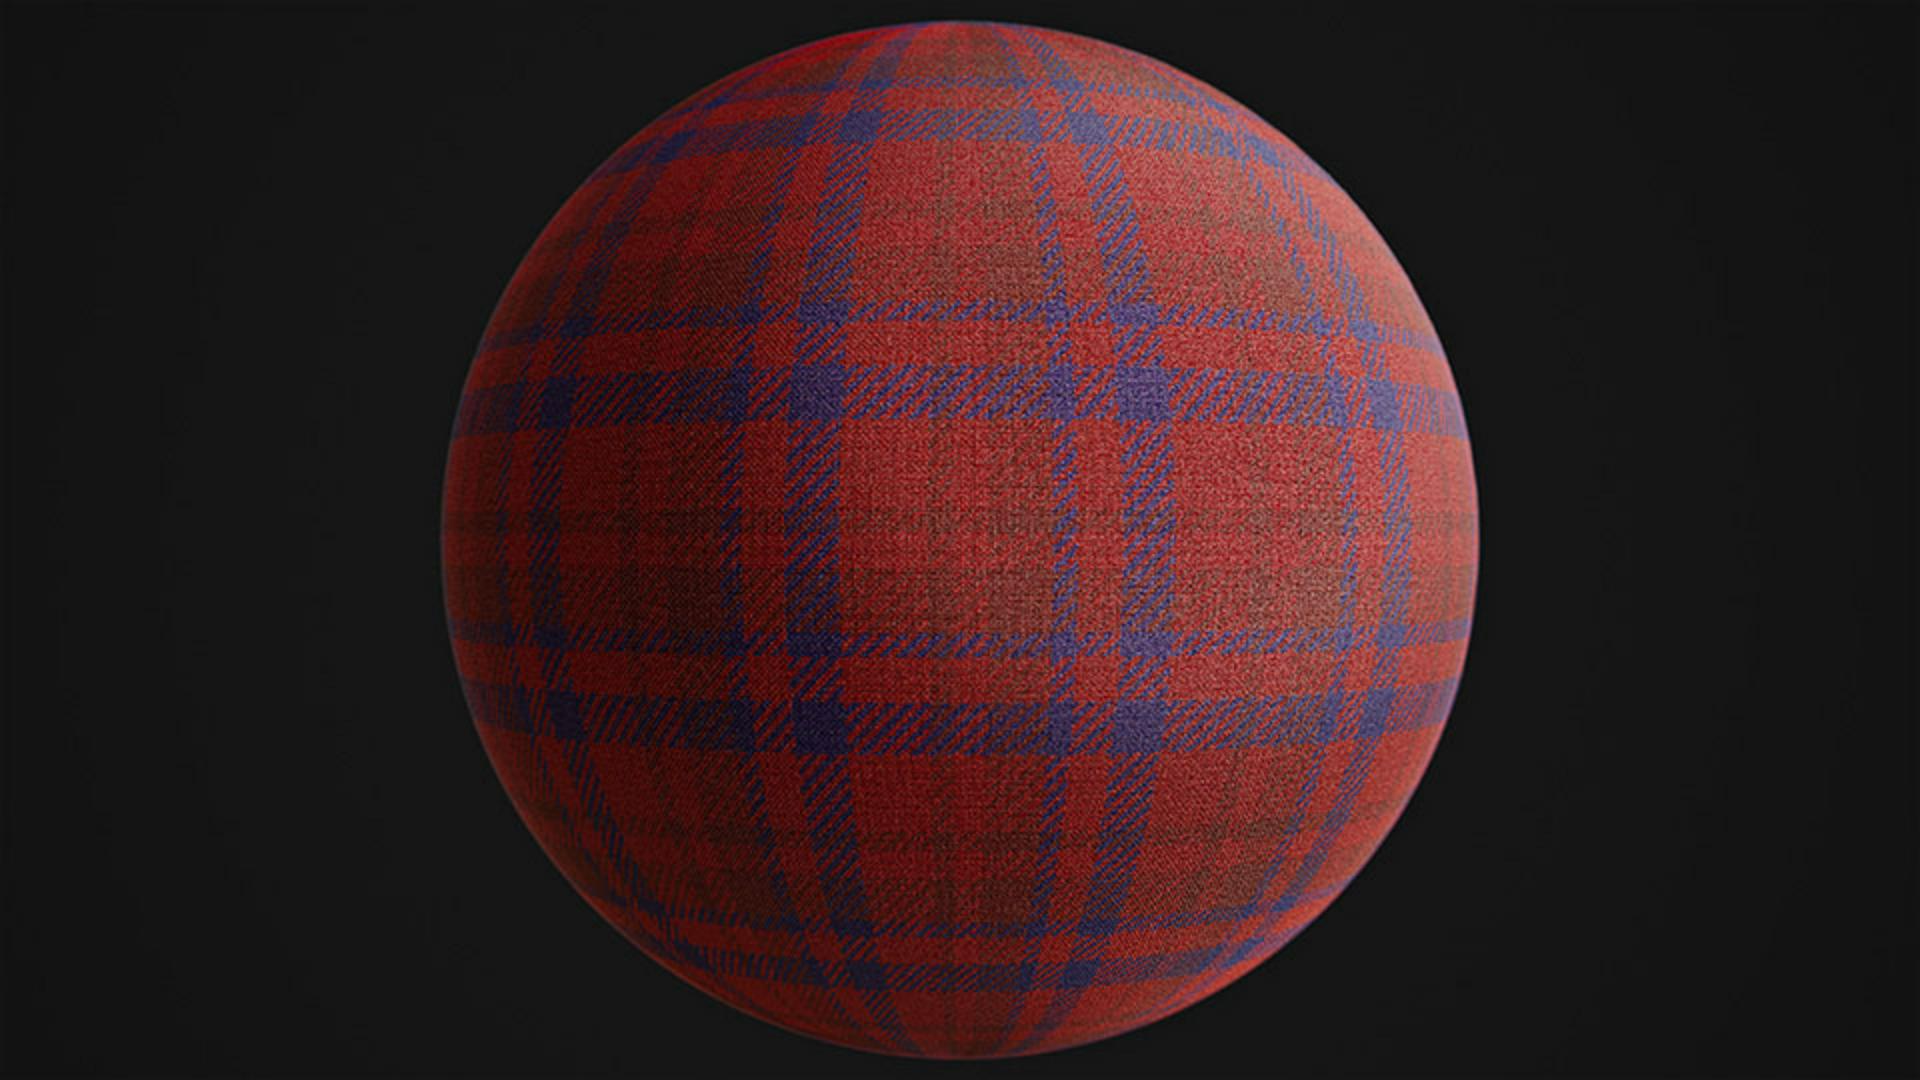
Creating the plaid pattern with generators and weave filters
To get the base fabric weave, add a cloth weave filter in the layer stack.
Then activate the custom color and click onto the crossed out color field to add in the plaid pattern texture generator.
Now increase the size multiplier to 60 for smaller stitches and push the width of the warp and weft 1 slightly for thicker fibers.
A bit more imperfection helps to make it look less generic.
Refining colors, pattern structure, and scaling
Next tweak the 3 colors of the genrator.
Let’s choose a reddish one as first, a dark purple one as second and a dark red as third color.
With the mirror switch we can make the pattern symmetrical.
Now reduce the stripes and variation a bit to get a simpler pattern.
Tweak the color of the base material to a darker tone to fill the holes.
Don’t forget to rename the material and save the project frequently.
If you want somehow to have clear edges for the color, drag the generator directly into the layer stack and choose base color.
Then you could use a blur filter and blur just the base color channel slightly if needed.
Let’s add a transform filter and scale it by 2 for an even smaller structure.
Enhancing material details with displacement, AO, and noise
Sometimes while working on a material, we need to tweak the tiling and displacement in the viewport.
To adjust the height of the displacement, use the displacement button and adjust the height scale.
Use a height to AO filter with a really low value and the uniform distribution for a slightly stronger AO.
Finally add a channel switch filter to map the height onto the roughness channel.
Reduce the intensity to a low value and choose the subtract blending mode to make the outer areas shinier.
If you want to add some additional small color variation details into the basecolor channel, just drop in the anisotropic noise texture generator and choose the basecolor channel.
Increase the amount a lot to match the size of the threads and lower the opacity to a really low value for a natural look.
To check the result in different lighting conditions, you can choose
Previewing lighting and exporting the final material
between several different environment lights till you find one that looks great.
With Shift+Right mouse button you control the environment rotation.
Here’s our final result.
You can save this setup as sampler archive to tweak the layers at a later time, use send to to send it directly to another Substance app, export it as an SBSAR for other 3D apps and engines or just export it to texture files.
There’s a way to get this material in to every 3D software!
If you want to experiment and learn more, you can download the file shown in the video.
Thanks for watching and let us know any ideas or suggestions in the comments.
See you in the next episode.


