Introduction
Hi, in this video we’re using Substance 3D Sampler to create a breathable shoe fabric material in minutes.
Because it will be a material for a shoe
Setting up the scene and applying a base material
we choose the shoe mesh in combination with the atelier HDRI.
Use a spacer mesh material as a starting point.
To add it, click on the materials button in the starter assets tab and drag and drop it onto the shoe.
Sometimes while working on a material, we need to tweak the tiling
Adjusting material properties and surface details
and displacement in the viewport.
To adjust the height of the displacement, use the displacement button and adjust the height scale.
Now start with a different random seed to get another iteration and not just the basic version of the material.
Tweak the different colors first for a nice dark to light blueish surface transition.
Then we lower the fabric roughness to get a more shiny look and push the normals slightly.
Increase the height range to 1 and push the position slightly to prepare it for blending with another material.
Blending multiple materials for layered fabric effects
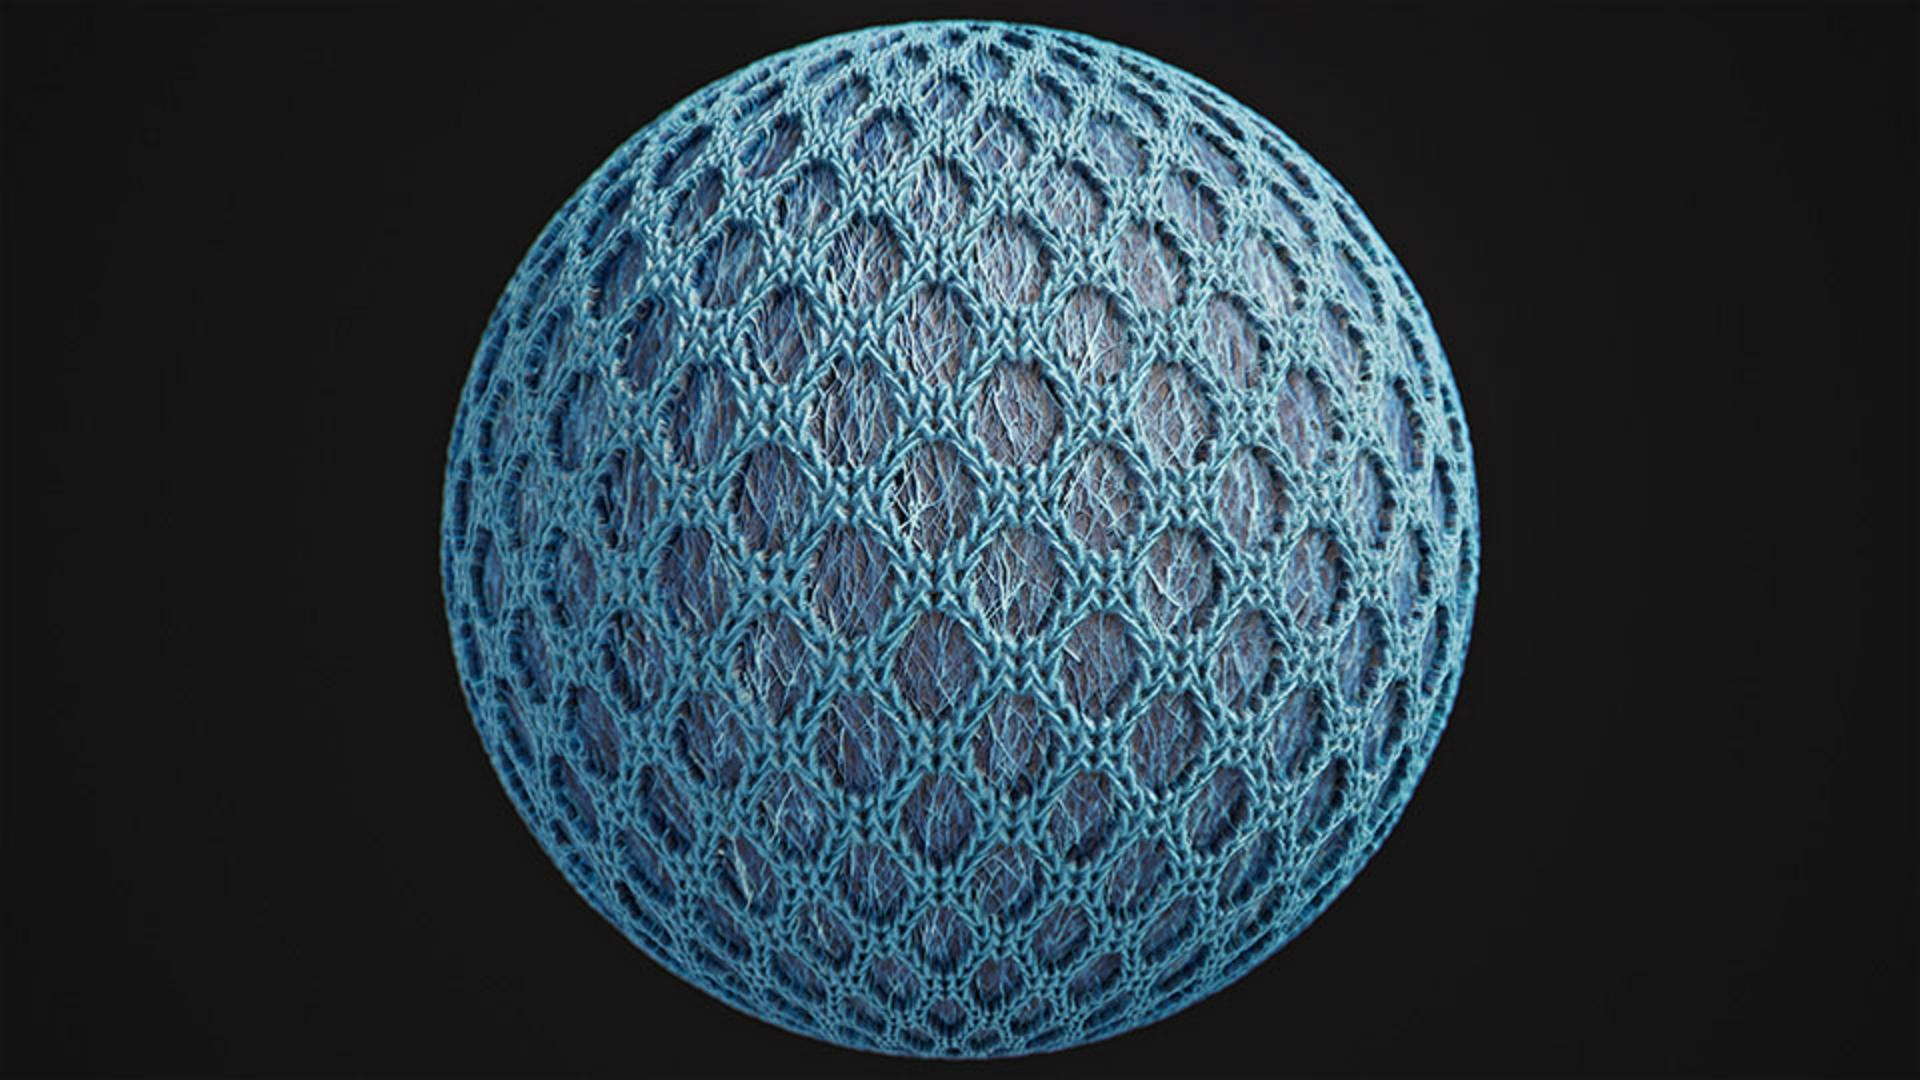
Further we add in a second material to get the fibers look below our spacer mesh material.
Drag and drop the felt material onto the shoe mesh.
Don’t forget to rename the material and save the project frequently.
Adding two materials on top of each other will create a blend.
This way you can combine multiple materials.
To tweak the blending settings, click on the button next to the material preview.
Now lower the contrast and the blend opacity slightly to make the transition between both materials a bit softer.
Then we get rid of the bottom material color match, so that only the colors from the material itself are used.
Let’s now tweak the felt material settings.
Start with a different random seed and choose a nice blue color.
Reducing the color variation helps to make it more uniform.
Further reduce the roughness value a little and reduce the fibers density for a slightly smoother surface.
Finally increase the tension to get straighter fibers.
To get better AO information, add the height to AO filter
Enhancing details with AO and fine adjustments
in the layer stack.
Switch the mode to normal and lower the intensity and spread for a softer result.
Further make it more uniform.
Previewing lighting and exporting the material
To check the result in different lighting conditions, you can choose between several different environment lights till you find one that looks great.
With Shift+Right mouse button you control the environment rotation.
Here’s our final result.
You can save this setup as sampler archive to tweak the layers at a later time, use send to to send it directly to another Substance app, export it as SBSAR for other 3D apps and engines or just export it to texture files.
There’s a way to get this material into every 3D software!
If you want to experiment and learn more, you can download the file shown in the video.
Thanks for watching and let us know any ideas or suggestions in the comments.
See you in the next episode.