Introduction
Hi, in this video we’re using Substance 3D Sampler to create a carbon fibers material in minutes with some advanced channel switch filter effects.
Setting up the scene and base material properties
Let’s setup the scene with a cloth mesh in combination with a studio HDRI.
Use a base material as starting point.
To add it, click on the add a base material button, then activate the anisotropy and emissive color channels.
The emissive channel will just be used for channel switching later on.
Reduce the roughness value slightly, add in metallic and introduce a bit of anisotropy to get the base material ready.
Choose the square tile texture generator as a base for the pattern, drag
Creating the carbon fiber pattern with generators
and drop it into the layer stack and choose base color.
Reduce the y amount to 1, increase the shape scale and reduce the y shape size for smaller shapes.
Now we switch the offset mode to all vertical and offset it to get a stairs look.
To get the
Using channel switch filters for anisotropy and pattern blending
anisotropy angle, add a channel switch filter in the layer stack.
Switch the output channel to anisotropy angle and lower the opacity to get some angle variation.
Don’t forget to rename the material and save the project frequently.
A blur filter is great to define the shape better.
Choose base color and increase the intensity a lot.
Then introduce anisotropy with an angle of 0.25 for a vertical blur direction.
Add the anisotropic noise generator into the base color channel and rotate it.
Max lighten with a low opacity gives a nice blended result.
To blend in a 90 degree rotated result of this layer we use a channel switch filter and copy it into the emission color channel.
Now use a transform filter and activate widget and parameter for more control.
A horizontal flip in combination with a 90 degree rotation works fine.
Then we have to offset it and deactivate all channels except the emissive color one.
Let’s blend it back over the base color with another channel switch filter and the max blending mode.
Further add another transform filter and scale it a lot smaller.
To get the height information, add a channel
Generating height, normals, and refining material channels
switch filter and copy the base color onto the height.
For the AO channel use a height to AO filter and for the normals a height to normal filter with a low intensity.
Sometimes while working on a material, we need to tweak the tiling and displacement in the viewport.
To adjust the height of the displacement, use the displacement button and adjust the height scale.
Use a colorize filter with a dark gray color and lower the luminosity to almost 0 for a nice uniform color.
Further add a last channel switch filter to get the roughness from the height channel.
An opacity of 0.6 in combination with the divide blending mode makes the outer areas more reflective.
Play with the anisotropy settings of the base material for another look.
Finally add a fill layer to make the emission color black, so there are no unintended side effects.
Adding detail variations, lighting preview, and exporting
If you want to add some additional details like scratches, fingerprints or others, just drop in a texture generator and choose for example the roughness or metallic channel.
It’s really simple to add variation to individual channels with the texture generators.
To check the result in different lighting conditions, you can choose between several different environment lights till you find one that looks great.
With Shift+Right mouse button you control the environment rotation.
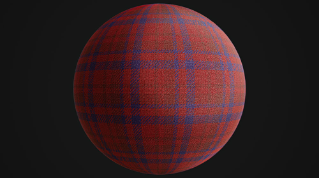
Here’s our final result.
You can save this setup as sampler archive to tweak the layers at a later time, use send to to send it directly to another Substance app, export it as SBSAR for other 3D apps and engines or just export it to texture files.
There’s a way to get this material into every 3D software!
If you want to experiment and learn more, you can download the file shown in the video.
Thanks for watching and let us know any ideas or suggestions in the comments.
See you in the next episode.