Customer Stories
See how Adobe customers are building great experiences with Creative Cloud Pro for teams.
Make a slide deck that shows off your ideas, holds your audience’s attention, and even entertains them.

Whether you’re presenting a pitch deck, leading a webinar, or simply sharing your ideas with your team, keep in mind that humans naturally think in terms of narrative. In fact, neuroscientists have discovered that listening to a story can activate all parts of the brain and even lead to changes in behavior. As a presenter, you can take advantage of this human quirk. By sharing a story with a beginning, middle, and end, a presenter draws in audience members and stirs their emotions. Showing sales numbers to potential investors will be more effective when it’s part of a presentation that weaves a compelling narrative. Creating a slideshow highlighting important data can help you relay the high points of a dense report to your employees. No matter the information, before you start thinking about specific presentation slides, ask yourself what story you want to tell. Who is your audience and how do you want them to respond?
Present your story as a classic three-act play with your audience as the hero. What do they want? What obstacles must they overcome to achieve their goal? Begin with the first obstacle, and build a little suspense before you offer the solution. You might tell a smaller story about facing that obstacle, giving it a place in the larger narrative. Then move onto the next obstacle and do the same.
In the second act, present your solution to the problem. What is it and how does it work? How will it successfully help your heroes reach their goal?
In the final act, your narrative ends with the audience getting what it needs: resolution. Their problem is solved with the help of your solution or product, and maybe something extra — like a problem they haven’t even anticipated — is also solved. Once you’ve filled in the details of this basic structure, you’re ready to start making slides.

Slide design is crucial for every deck, no matter the presentation software you’re using. Working elements of visual storytelling into your entire presentation will ensure that even audience members watching on laptops stay engaged. Just follow these simple rules:
Stick to a visual theme.
A consistent look — with consistent typography and a basic color scheme — will help your audience stay focused on the content of your slides.
Keep it simple.
Avoid cluttering your deck with endless charts, tables, or bullet points too small for everyone to read. Allow for plenty of white space on each slide, so the crucial information stands out.
Find the right tools for every job.
Pie charts are great for demonstrating percentages. Vertical bar charts show changes over time better than horizontal bar charts, which are best for comparing quantities. To visually represent trends, a line chart is your best bet. You might also try creating an infographic to help your audience visualize your data or to tell a smaller story within your larger narrative.
Incorporate video or audio.
People sit up straighter and pay closer attention when you break up your static slides with video and audio. Use motion and sound to help draw your audience’s focus to your key takeaways.
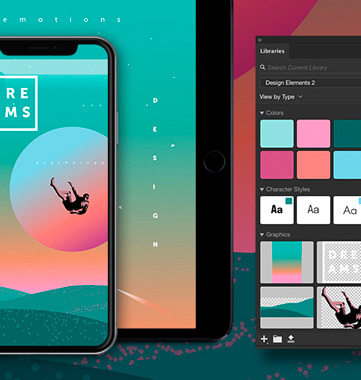
To create an impactful and entertaining presentation without starting from scratch, choose one of the many presentation templates in Adobe Stock and open it in InDesign. Then import your brand logo and other marketing assets for a consistent look.
Once you’ve got the visual theme and color palette you want, consider including surprise elements like high-quality Adobe Stock photographs, illustrations, or even movie clips to help your work really stand out. Plus, in InDesign, a simple two-step command allows you to export and preview, so you can immediately see every single slide through your audience’s eyes.
To start a presentation from scratch, follow these steps:

1. Find the right page size.
Click on File in the InDesign main menu, then New Document. A dialog box will open. If you’re not sure what dimensions to use, set the page width to 12 inches and the page height to 9 inches. Click Create and a blank page will appear.

2. Choose your background.
Remember to keep it simple, but look for a striking background image that works with text overlay. The deck’s title can also become part of the background.

3. Create paragraph styles.
Keeping it simple applies to your text too. Select no more than three text styles to keep the title font, body font, and footnote font consistent throughout the presentation. Creating paragraph styles also allows you to change font and size with a click of a button, saving you time in the long run.

4. Set up master pages.
Master pages streamline your slide design workflow and ensure your presentation looks professional and well designed. You can create one slide with three columns, one with a big background image as a transitional slide, one that highlights a customer quote — the list goes on. Add image and text frames to the master pages so you can drop your content in later without having to overthink the layout.

5. Add images and text.
Once you’ve created the master pages, it’s easy to drag and drop Photoshop (.PSD) files, PDFs, Illustrator (.AI) files, JPEGs, PNGs, or GIFs into the image frames. To add text, just copy and paste text files or select the Type Tool from the toolbar and type directly into the text frame.

6. Add page numbers.
Page numbers will help you and your audience keep track of any sequentially paged documents. To insert page numbers, select Type from the main menu, then Insert Special Character, then Markers, and finally Current Page Number. InDesign will automatically number the slides.

7. Add finishing touches.
From movies and sound clips to hyperlinks, cross references, and page transitions, you’ve got plenty of interactive options to make your story as compelling as possible.

8. Export your slide deck.
When you’ve finished creating your deck, the final step is to export it in a format that can be projected or distributed. Exporting as Adobe PDF (Interactive) lets you play or click through interactive content directly in the presentation.
To export, just click File in the main menu, then Export. From the Format dropdown menu, select Adobe PDF (Interactive), and then click Save.
Design Marketing Materials that boost sales and brand recognition.
Ways to boost your customer engagement.
5 ways your small business can stand out from the competition.

See how Adobe customers are building great experiences with Creative Cloud Pro for teams.

Browse the latest guidelines on effective design, marketing, and more.
All plans include the Admin Console for easy license management, 24/7 tech support, unlimited job postings on Adobe Talent, and 1TB of storage.
US$23.99/moper license
Annual, billed monthly
Your choice of one Adobe creative app such as Photoshop, Illustrator, lnDesign, or Acrobat Pro.*
US$99.99/moper license
Annual, billed monthly
Get 20+ Adobe creative apps including Photoshop, Illustrator, InDesign, Adobe Express, XD and more.
