Teach your character to walk
Go beyond facial movements for your puppets in Adobe Character Animator by creating walk cycles, looped frames that allow your character to walk without requiring you to animate each step. Make adjustments for various leg lengths, avoid foot slippage when looping frames, and fine-tune the walk behavior for each puppet’s performance.
Published
Go beyond facial movements for your puppets in Adobe Character Animator CC by giving them Walk Behaviors that allow your characters to move across the scene.
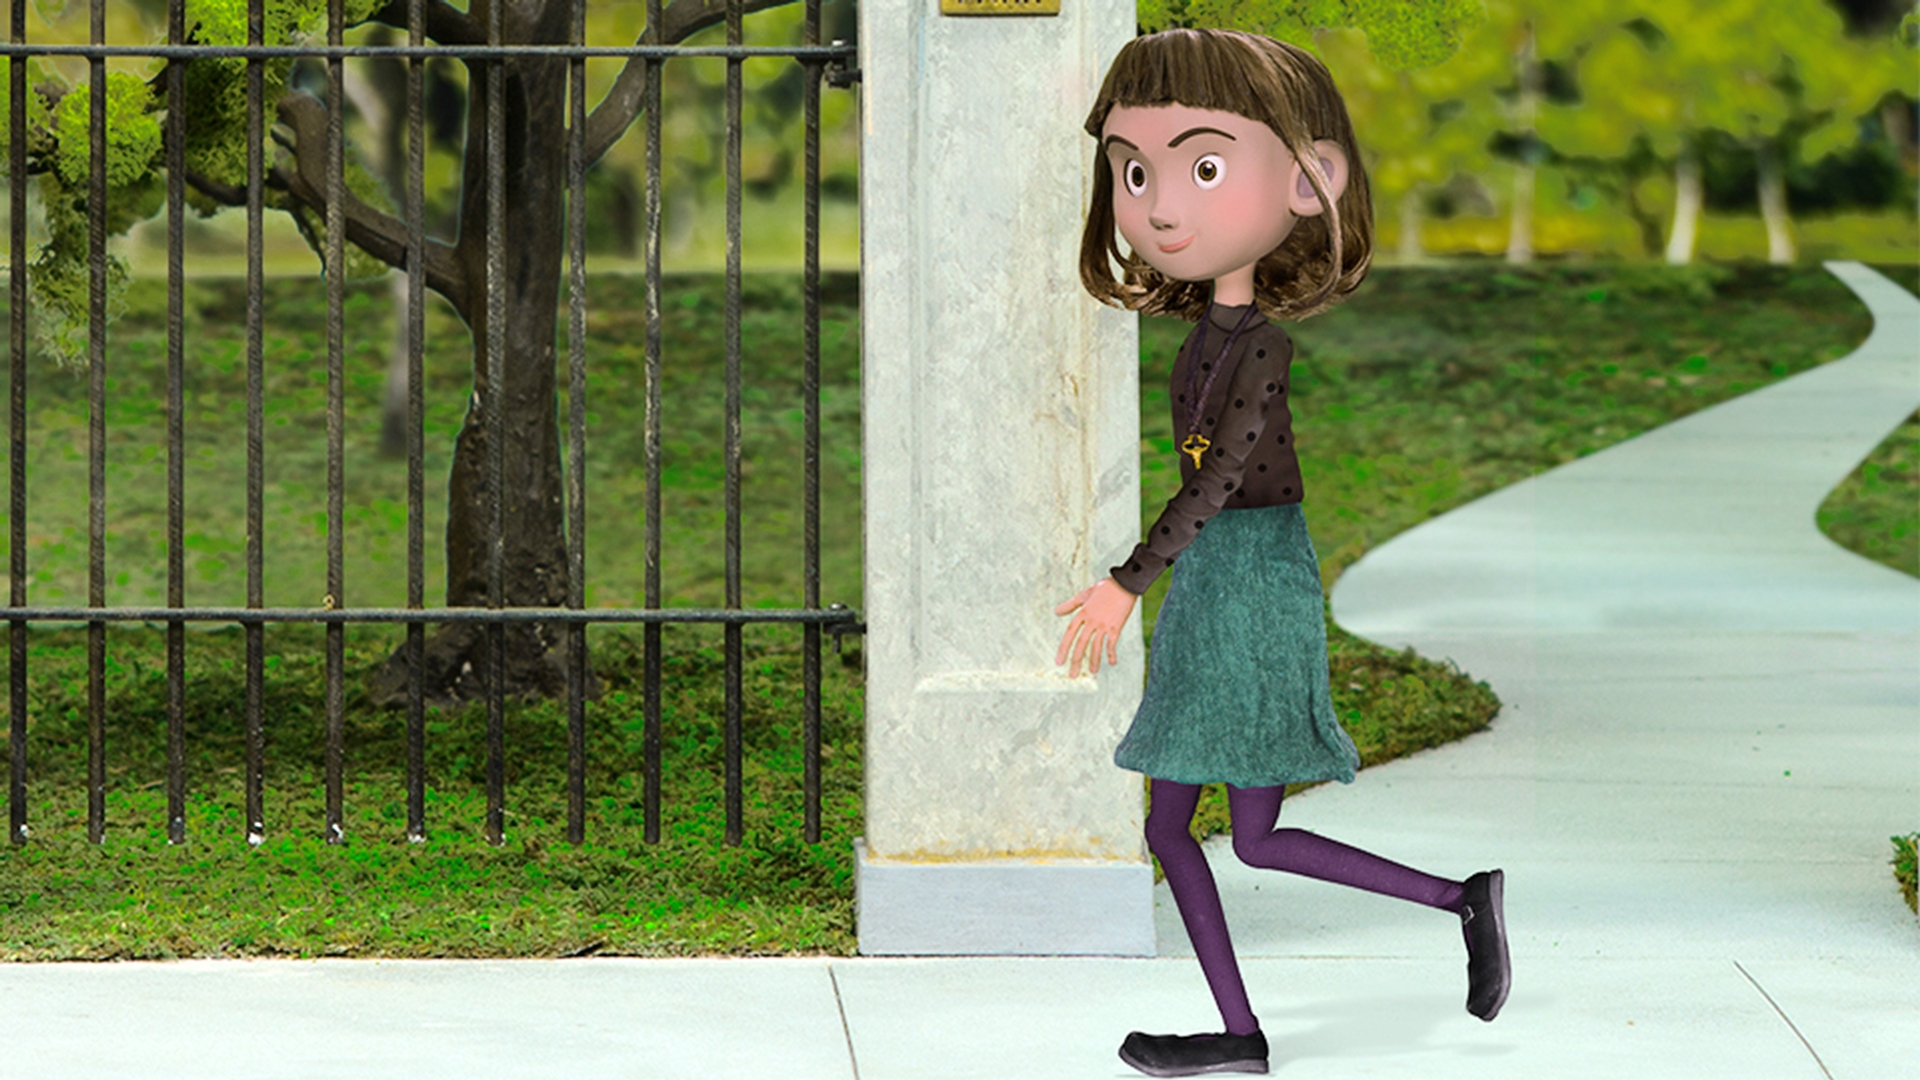
I want to show you how to create a walking and talking character for an animated online short.
This character Maddie is a physical model that an artist photographed on a green screen set.
She was then brought into Adobe Photoshop CC where each part was isolated and organized.
Maddie follows the basic recommended puppet structure,
Structure the puppet in Photoshop
which is a Top Level plus Character Name group followed by Head and Body groups inside.
To get Maddie moving first we'll need to set up a few things.
We want to make sure each arm and leg is in a separate group - which Maddie luckily already has.
Note that each part is vertical and straight, which will serve as a great default starting position.
The walk behavior works best when it's used for characters with side profile views.
Then we need to make each group independent, which we can do by adding a plus (+) symbol to the front of each parts name.
This ensures when the arms and legs move they won't conflict with each other or pull or warp the rest of the character.
Instead they'll move on their own as independent body parts.
With that done we can save the .psd and open up Adobe Character Animator CC.
To import the file, we'll go to File,
Import... and select the .psd that we just saved.
This brings it into Character Animator CC as a puppet in the Project panel.
If we double click the puppet, it opens up the Rig workspace, which gives us a familiar view of our Photoshop CC layers and artwork.
But with some additional tools to help setup Maddie for walking.
The first thing we want to do is select the top level puppet above our layers and view the current Behaviors in the Properties panel on the right.
These Behaviors are automatically added to every puppet we import and cover basic animation functions like Head and Eye movement and Lip Sync.
If we click the plus icon and select Walk we'll add that behavior to our set and give Maddie a new extra ability to walk.
The next step is to start adding handles at key areas and tagging them as body parts.
The Handle tool creates invisible data points that Character Animator CC understands and translates into how and why things animate.
We'll select the Body group from our layers list and with the Handle tools selected, add a single handle right where the belly button would be.
When we do this the right properties should now show the Tags panel including a Body section.
By selecting the middle dot in the body we have now tagged this handle as a Waist.
We'll do the same procedure to create a second handle below the waist, which will tag as the Hip.
For the neck tag instead of making another blank handle, we can just select the Head group and apply a Neck tag there.
This will help ensure the whole head will bob and move when the puppet walks.
We're not done yet, but let's add Maddie to a scene and see how things are looking so far.
With our puppet selected in the Project panel click the Add to New Scene button in the lower left corner.
This places Maddie in a scene and switches to the Record workspace.
Even at this early stage, we can start to see some subtle motion in the character, because Character Animator CC is using the walk behavior to move the hip, waist and neck.
Click the Rig workspace again
Rig the arms and legs
to return to rigging Maddie.
And we can start to tackle one of the legs.
Let's select the right one first.
The first thing we want to do is select a Staple tool and staple the leg to where it would connect to the body, at the top.
Selecting the group again gives us the option to set an Attach Style in the right properties, which we should set to Hinge to give the leg a nice pivoting action.
Once that's done we can now begin adding and tagging handles.
Using the same process as the body, we'll add the Right Knee, Right Ankle, Right Heel and finally the Right Toe.
Then we can repeat the process for the other leg.
Select the Left Leg, use the Staple tool to connect it to the body, change the Attach Style to Hinge and add and tag the handles: Left Knee, Left Ankle, Left Heel and the Left Toe.
The last step is tackling the arms, which we'll do in the same way as the legs.
Select the Right Arm, staple it where it would connect to the body, change the Attach Style to Hinge, and add in tag handles for the Right Elbow and Right Wrist.
Finally let's end with selecting the Left Arm, Stapling, setting the Attach Style to Hinge and adding tagged handles for the Left Elbow and the Left Wrist.
If we click Record in the top workspace bar now we should now see Maddie walking with full leg and arm movement.
The Walk behavior on the right
gives us several customization options if we select a Style drop-down, we can try several different presets like a Strut or a Run.
If we wanted to make Maddie's limbs less rubbery and give them a little more structure, we could go back into the Rig workspace select an arm or a leg, then select the Stick tool and drag a line where we think a bone would be.
Repeating this multiple times for each leg and arm, will allow for more rigidity in the limbs.
Instead of Maddie walking all the time, we can also change her to only move, when we press the left and right arrow keys.
By selecting that in the Start drop down and then setting Body Speed to 100%, now when we press the left and right arrow keys Maddie walks forwards and backwards without any foot sliding.
There are several other options to customize like the Stride Length, Step Speed, Arm Swing and more.
It's worth the time to experiment with these parameters to customize the movement to something that works for your unique puppet.
If we wanted Maddie to have different views
when she's moving left or right or standing still, we could make those views in our original Photoshop file: Frontal, Left profile and Right profile.
Each group would need to have its own unique Head and Body.
And we would need to rig each like we did for the single view.
That may seem like a lot of extra work, but doing this would allow us to have a character that can change views depending on if they're walking left or right, or stopping.
The walk behavior makes character movement quick and easy.
Now that you've seen how it works on Maddie, try adding it to your own creations to see your puppets come to life and move like never before.
If you want to follow along with this tutorial, use the Maddy puppet asset. Click Save to copy the assets to your Creative Cloud Library. (Copyright Ⓒ 2017 Athena Studios. Permitted use is granted for educational and training purposes only. See enclosed license.)