Generate and edit project assets in a unified Firefly canvas
Work with everything in a single streamlined workflow without switching apps or tabs. Save reusable Elements in folders.
Published
Introduction and meet Kaleb Gonyea
[Kaleb speaks in a creative studio with screens and artwork in the background.]
Kaleb Gonyea: Have you ever needed to generate multiple assets for a project, like images and videos, that all feel like a cohesive set?
Hey, my name's Kaleb Gonyea, and today, I'm going to show you exactly how to do that using a new generation and editing space.
From the first idea to your final content, your creative direction can stay consistent through the entire process without having to switch tools and tabs.
Let me show you how.
Create and edit images in one connected space
[The screen switches to the Adobe Firefly homepage interface.]
Let's start by clicking the new title card on the Firefly homepage labeled Explore the New Generation and Editing Experience.
[He clicks on the Explore the new generation and editing experience card.]
Right now, it's in beta, but it may be widely available by the time you're watching this video.
From here, you'll be met with two options.
[He opens the top-left menu and selects New project.]
You can either open a recent project or create a new one.
I'm going to create a new one.
Later, I'll show you how projects can help you organize both generated and non-generated assets into folders and subfolders.
Let's take a quick look around the interface.
[Four action tiles are highlighted at the center of the workspace.]
The first thing you'll notice are these four tiles in the middle of the screen.
These are quick actions that show you some of the things that you can do, like generate images and videos, edit them, or add them to a timeline.
On the left, we have two options, Project Media and Files.
[Kaleb navigates between Project media and Files on the left sidebar.]
Project Media allows you to drag and drop media or select files to import.
Files let you view your files, files shared with you, or other projects you're working on.
This gives me an easy way to keep everything organized as I work.
Let's start by creating an image.
[He types a prompt in the text box and clicks Generate.]
Let's create a blue turtle with a green shell.
[An image of a blue turtle with a green shell swimming by coral appears.]
Nice.
This looks really cool.
Let's take a look at some of the things that we can do with this image.
I can edit the turtle using features like Markup, Tune, Fill, and more.
You can get to these by selecting Edit Image [He clicks the Edit image button beside the generated image.] on the right side of the image.
From here, I can add a prompt, use Markup to annotate specific areas of the turtle, or choose Tune to control the intensity of an edit.
[He selects Tune from the left toolbar and clicks the Neon glow preset.]
Let's select Tune and see what happens when I choose the Neon Glow preset.
I can apply it to the entire image or select specific areas of the image.
For this one, let's apply it to the entire image.
[A neon glowing turtle is previewed with color variations below.]
Wow, look at all these options with the Neon Glow.
From here, I can use the slider to dial in exactly the look I'm going for.
[He drags the edit strength slider and clicks Apply.]
Once I'm happy with the result, I can select Done in the top-right corner.
Save reusable elements to keep a project consistent
Okay, great.
Now I have this neon turtle that I'm happy with, let me show you how I can turn it into an element [He clicks the Create element button on the right.] so I can continue using the same asset throughout my workflow.
You can save a character, location, or object as an element, then reuse it in new generations to help keep everything consistent as your project evolves.
That way, you don't have to create the same thing from scratch every time.
To do this, let's click Create Element on the right side of the image.
Once I do that, a new menu will pop up.
[In the pop-up modal, he selects Character and names it Blue-turtle.]
I want to make sure I have Character selected at the top.
We'll create a location and object next.
Then I want to give my turtle an easy name I can remember, along with a description to match.
I'm going to name this Blue-turtle.
One really cool feature in Firefly is the ability to create a character reference sheet.
All I need to do is click Select All, and this will generate.
[He clicks Select all under Build character sheet to generate angles.]
This is going to use 100 credits, but it will generate multiple angles of my character [A grid of reference images displays the turtle head from various angles.] that I can use throughout my project.
Perfect.
We just created our first element.
Let's go ahead and create a location and object next.
I'll use my turtle as a reference to help keep everything consistent.
Great.
Now we have a location and an object.
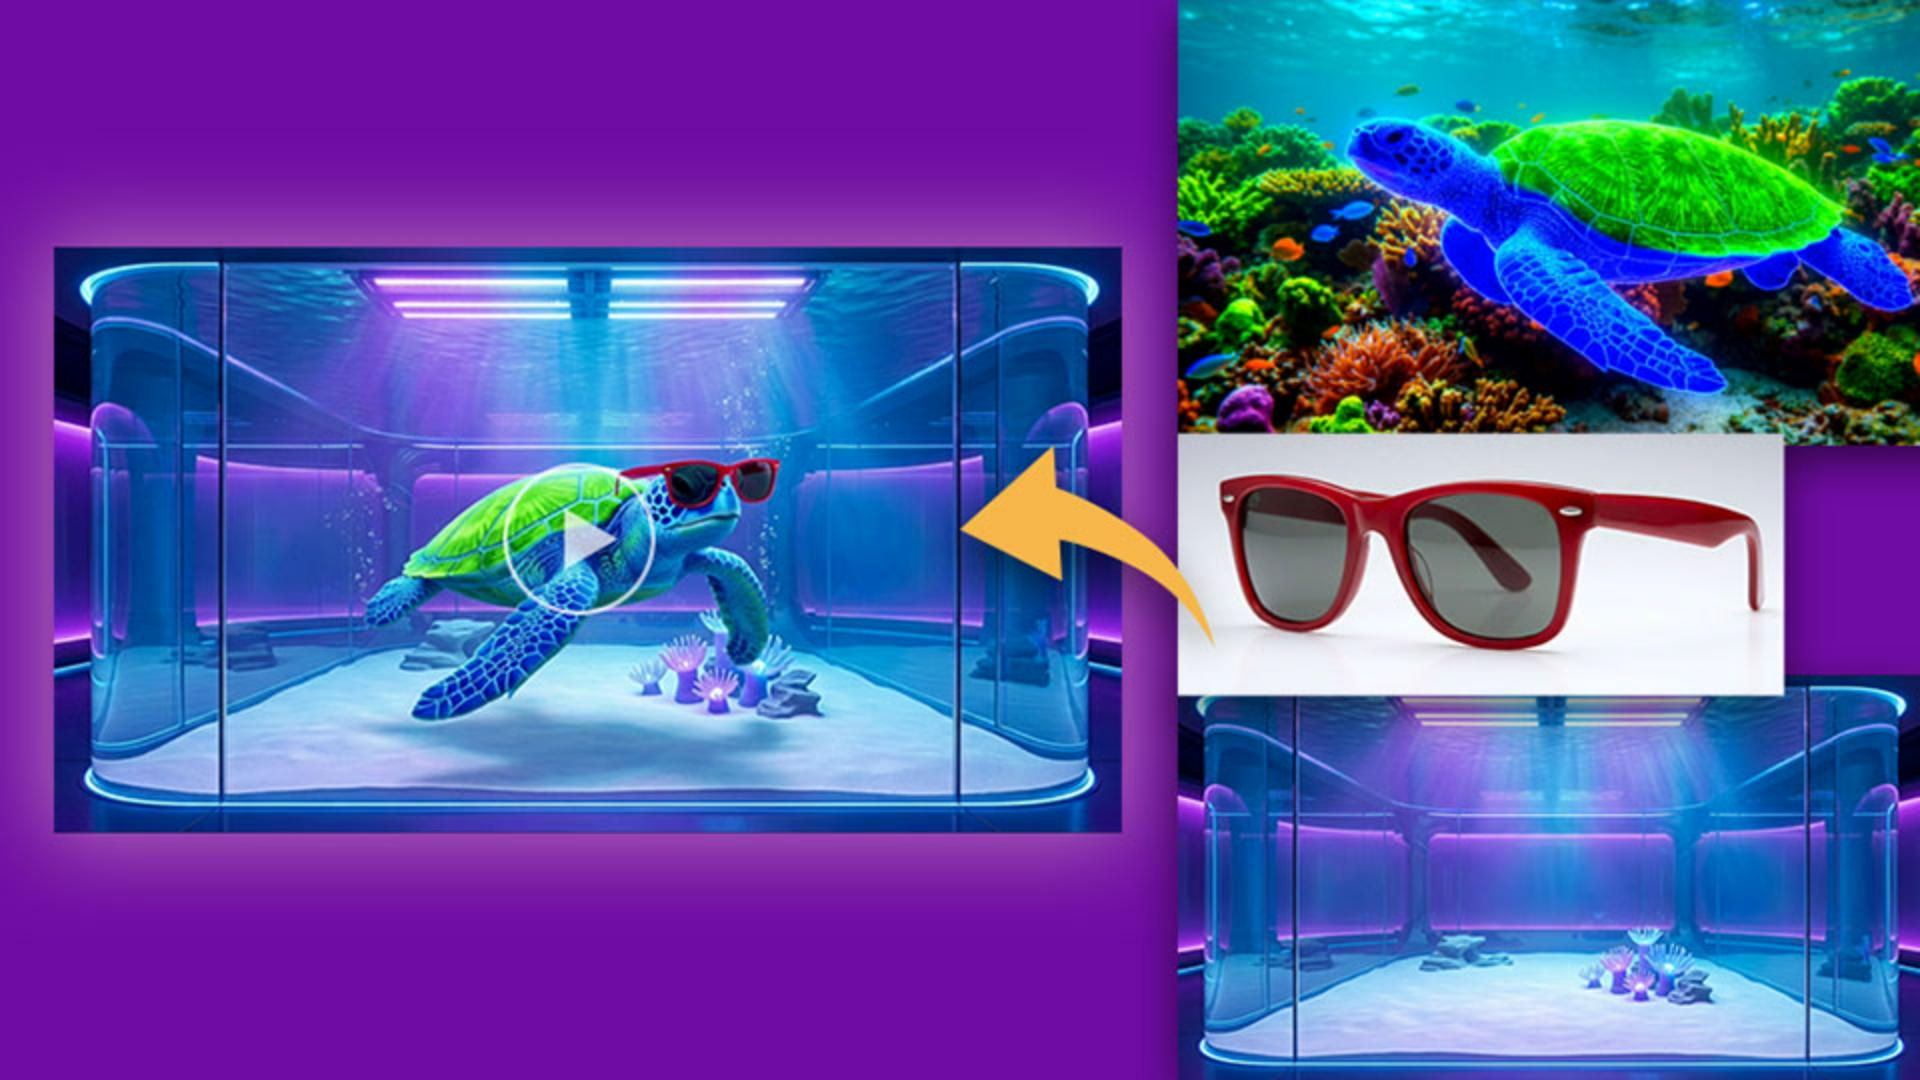
[Kaleb generates an aquarium scene and red sunglasses, saving each as an element.]
Let's define these and create elements for each one.
Now that I have a character, location, and object, let's generate a new image and call out each element to combine everything into one composition.
This is really easy to do.
I can either call them out directly in my prompt using the @ symbol [He tags the character, aquarium, and sunglasses elements in the prompt bar.] or I can select elements at the bottom of the prompt box.
Let's click Generate and see what we get.
It's worth noting that currently elements are available only with non-Adobe models, although this may change.
Check this out.
[A composite image shows the neon blue turtle wearing red sunglasses inside the tank.]
I was able to generate a new image with all three elements together, and it did a great job keeping everything consistent.
Since I'm happy with how this asset turned out, let's save it to a project.
I can easily do this by selecting Save to Project.
[He clicks Save to project and organizes assets into named folders.]
From there, let's build out a few folders to keep everything organized so I can easily find and reuse these assets later.
Turn images into videos and edit them together
Now let's turn this image into a video.
All I have to do is select Generate Video on the right side of the image.
[He clicks Generate video on the right panel.]
From here, my image becomes the first frame.
I can write my prompt below, choose which model I want to use, [He selects a video model, enters a motion prompt, and clicks Generate.] and set my aspect ratio.
Once everything's dialed in, all I need to do is click Generate.
Perfect.
[A video plays showing the turtle swimming smoothly inside the neon aquarium.]
I now have a video of my blue turtle swimming around the futuristic aquarium wearing red sunglasses.
From here, I want to show you that I can edit several clips together from my generations.
I can do this easily by clicking the three dots in the top-right corner.
[He clicks the three dots menu and selects Add to timeline.]
It's worth noting that I used the new Google Omni Flash model to make some additional clips.
It uses fewer credits, so it's a great way to try out new videos [He selects Gemini Omni Flash from the partner model dropdown menu.] at a lower resolution without using as many credits.
From here, I can start bringing all my generated clips together into one edit.
I can drag and drop media directly from my project onto the timeline, [He drags generated video clips from the media panel onto the bottom timeline.] making it really easy to start building out my video without ever leaving this space.
If you've ever used a timeline-based video editor before, this should feel pretty familiar.
I have four main tools here, [Icons for Select, Hand, Split, and Record voiceover tools are highlighted above the timeline.] the Select tool for selecting and moving clips, the Hand tool for moving around my timeline, the Split tool for cutting clips, and the Record Voiceover tool for recording audio directly into my edit.
From here, I can cut clips, stack them, move them around, and arrange everything exactly how I want.
It's a pretty familiar video editing workflow, [He adds transitions, trims clips, and scrubs the playhead through the beach and aquarium sequence.] but that's what's really nice is that I can go from generating my assets to organizing them and editing my final video without ever having to leave.
[Kaleb reappears on screen, speaking into his studio microphone.]
And just like that, I was able to create my own video using multiple image references, all in one place while keeping everything consistent.
This is going to make reusing assets and creating new content going forward so much easier.
Again, my name's Kaleb Gonyea, and I'll catch you on the next one.
[Kaleb smiles and points before the video fades to black.]
What you’ll learn
Create and edit images in one connected space
Generate an image, then refine it using tools like Markup, Tune, and Fill. Adjust the intensity of an effect until the look feels right.
Save reusable Elements to keep a project consistent
Save a character, location, or object as an Element, then reuse it in new generations. Combine Elements in a prompt to bring an entire scene together with a consistent look.
Turn images into videos and edit them together
Generate a video from any image, then arrange clips on a built-in timeline. Cut, move, and combine clips without switching to another app.
Instruction by

