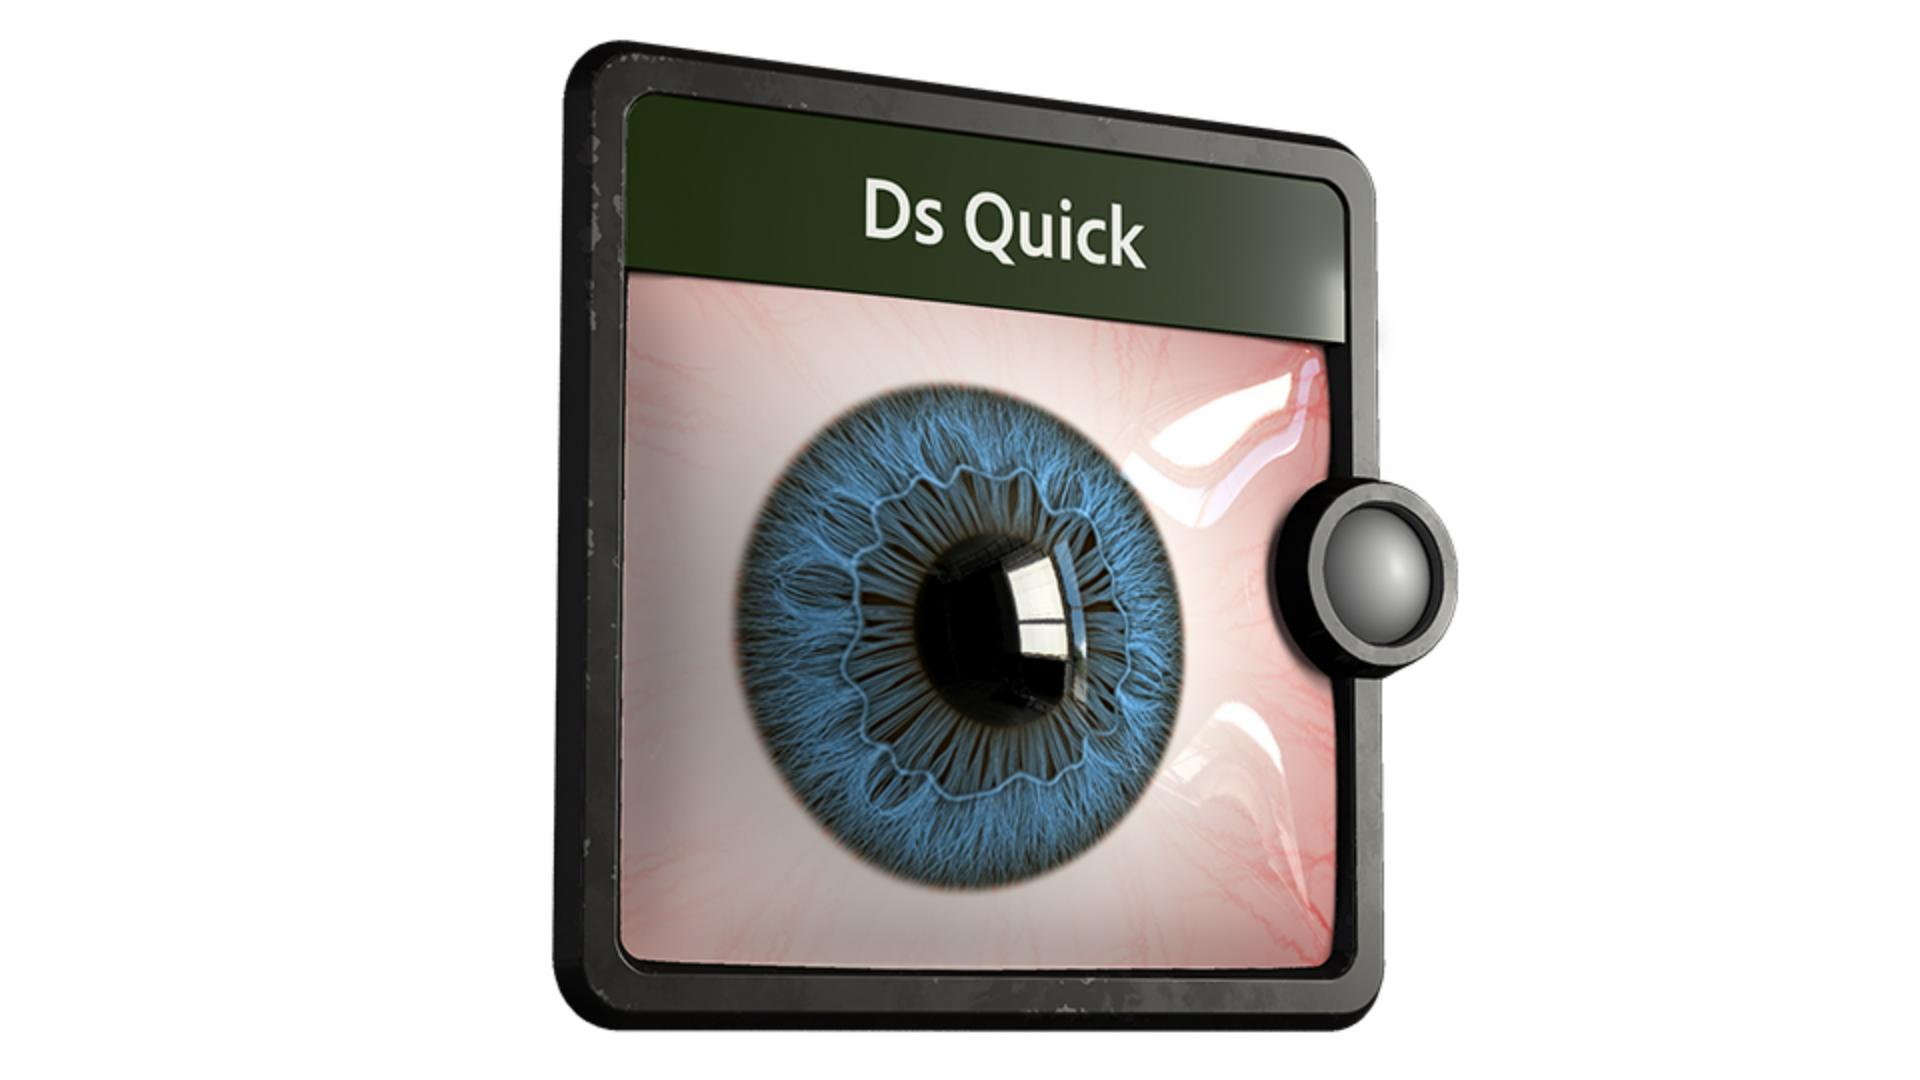
Introduction
Hi, in this video we’re using Substance 3D Designer to create an iris.
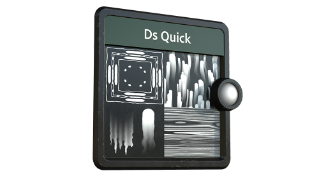
Let’s go over the key nodes and parameters we’ll use first.
Understanding spline nodes and parameters for iris creation
The scatter on spline grayscale node is a powerful node to place patterns along the input splines.
Shape spacing controls the minimum pattern scatter distance along a spline while still position the first and last pattern exactly on the start and end.
Size start attenuation decreases the size for patterns closer to a spline’s start.
Spline height multiplier is a global multiplier for each pattern along the spline.
The spline sample height node uses an input height map to modify the height of the input splines.
With sampling method, you control value-to-spline mapping.
Texture space applies values directly in place, horizontal along splines assigns rows to distinct splines, and horizontal along spline random offset x and y adds random offsets per spline.
The spline warp node displaces the splines based on an intensity or vector map.
Start and end attenuation are used to control the warping effect near the start and end of the spline.
A value of 1 means that no warping is applied.
Let’s build this iris setup together.
Building the base iris structure with splines
You can reuse it later as starting point for more complex ones.
Let’s start with a spline circle node and a circle radius of 0.18, duplicate it, increase the circle radius to 0.5 and connect both circles to a spline bridge 2 splines node.
Then increase the bridge splines amount to 2000 for a lot of iris lines and connect it to a spline sample height node.
Add an anisotropic noise node and tweak the x and y amount to 3 and 120 and join it to a blend node.
Use a curve node with a slightly tweaked gradient as foreground in multiply blending mode and forward it to the height map input to define the grayscale values of the splines.
Then we change the sampling mode to horizontal along spline offset y to get individual values for the splines.
Connect it to a spline warp node and use the anisotropic noise as intensity input.
Lower the warp intensity to 0.06 for less intense customized deformation, change the sampling mode to horizontal along spline offset y and increase the start attenuation to 0.8 for less deformation towards the pupil area.
To scatter shapes along the splines we use a scatter on splines
Adding deformation and detail with warp and scatter nodes
node and reduce the shape spacing for denser placement.
Switch pattern to paraboloid and reduce the scale to 0.006 for thinner lines.
Increase the start attenuation to 0.9 for thinner shapes towards the pupil and increase the spline height multiplier to 1 to use the sample height values.
Duplicate the first 6 nodes, increase the upper circle radius to 0.3 and the bridge splines amount to 2400 for smaller line details.
Add a spline warp after the upper circle node, and connect a perlin noise with a scale of 18 to the intensity map input to deform the circle.
Tweak the curve to a more linear look that the lines get brighter towards the inner circle.
Duplicate the iris spline warp and scatter on spline nodes and connect an anisotropic noise node with an x and y amount of 3 and 1024 to the intensity map input to get a lor of variation.
Let’s reduce the warp intensity slightly to 0.04 for a softer deformation.
Connect the inner deformed ring to a scatter on spline node, reduce shape spacing to 0 for denser shapes and switch the pattern to paraboloid for a smooth ring.
Connect the final splines to a blend node and the ring to the foreground in max lighten blending mode with an opacity of 0.6.
Forward it into a non-uniform blur node.
For a smoother slightly blurred transition use a spline fill node to get a solid shape of the inner circle, blur it with a blur hq node and connect it to the blur map input with an intensity of 2.5 Finally connect it to a height blend node and use the scatter on spline node output as height top input.
A height offset value of 0.25 blends them nicely together.
Here’s the final base result of our individual eye components.
Enhancing iris details and creating veins
Now, let’s explore how to use these parts, add some veins, and apply a final color pass.
To get even more iris details use some more spline warp nodes with a tweaked splatter circular grayscale node as vector warp input.
This results in nice density variation and deformation.
For the additional veins base, I applied the same techniques used for the iris details.
Use spline poly quadratic nodes to customize smaller veins and scatter them on top of existing veins.
Ensure that point 4 is always centered for correct alignment.
Take a splatter circular node to distribute them around.
Finally, you can use a multi-directional warp node to split them up even more.
The level of detail depends on how realistic you want the result to be.
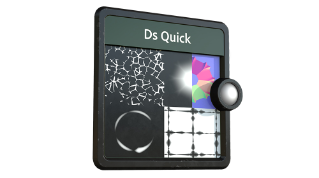
Applying color and finalizing the iris material
A radial gradient from white to reddish with smooth tangents is an ideal base.
Transform the iris splines and colorize them with another gradient.
Use a slightly blurred disc shape as an opacity mask for the blending process.
For highlights, extract the curvature smooth values from the iris splines and blend them over in add/subtract blending mode.
For the pupil, simply blend a black color with a slightly blurred disc shape.
A reddish color, blended on top in overlay mode with the final veins as an opacity mask, works perfectly.
If you want to learn more, you can download and open the graphs shown in the video.
Thanks for watching and we would love to hear your thoughts, ideas and suggestions for future quicktips, so let us know them in the comments.
See you in the next quicktip episode.