Introduction
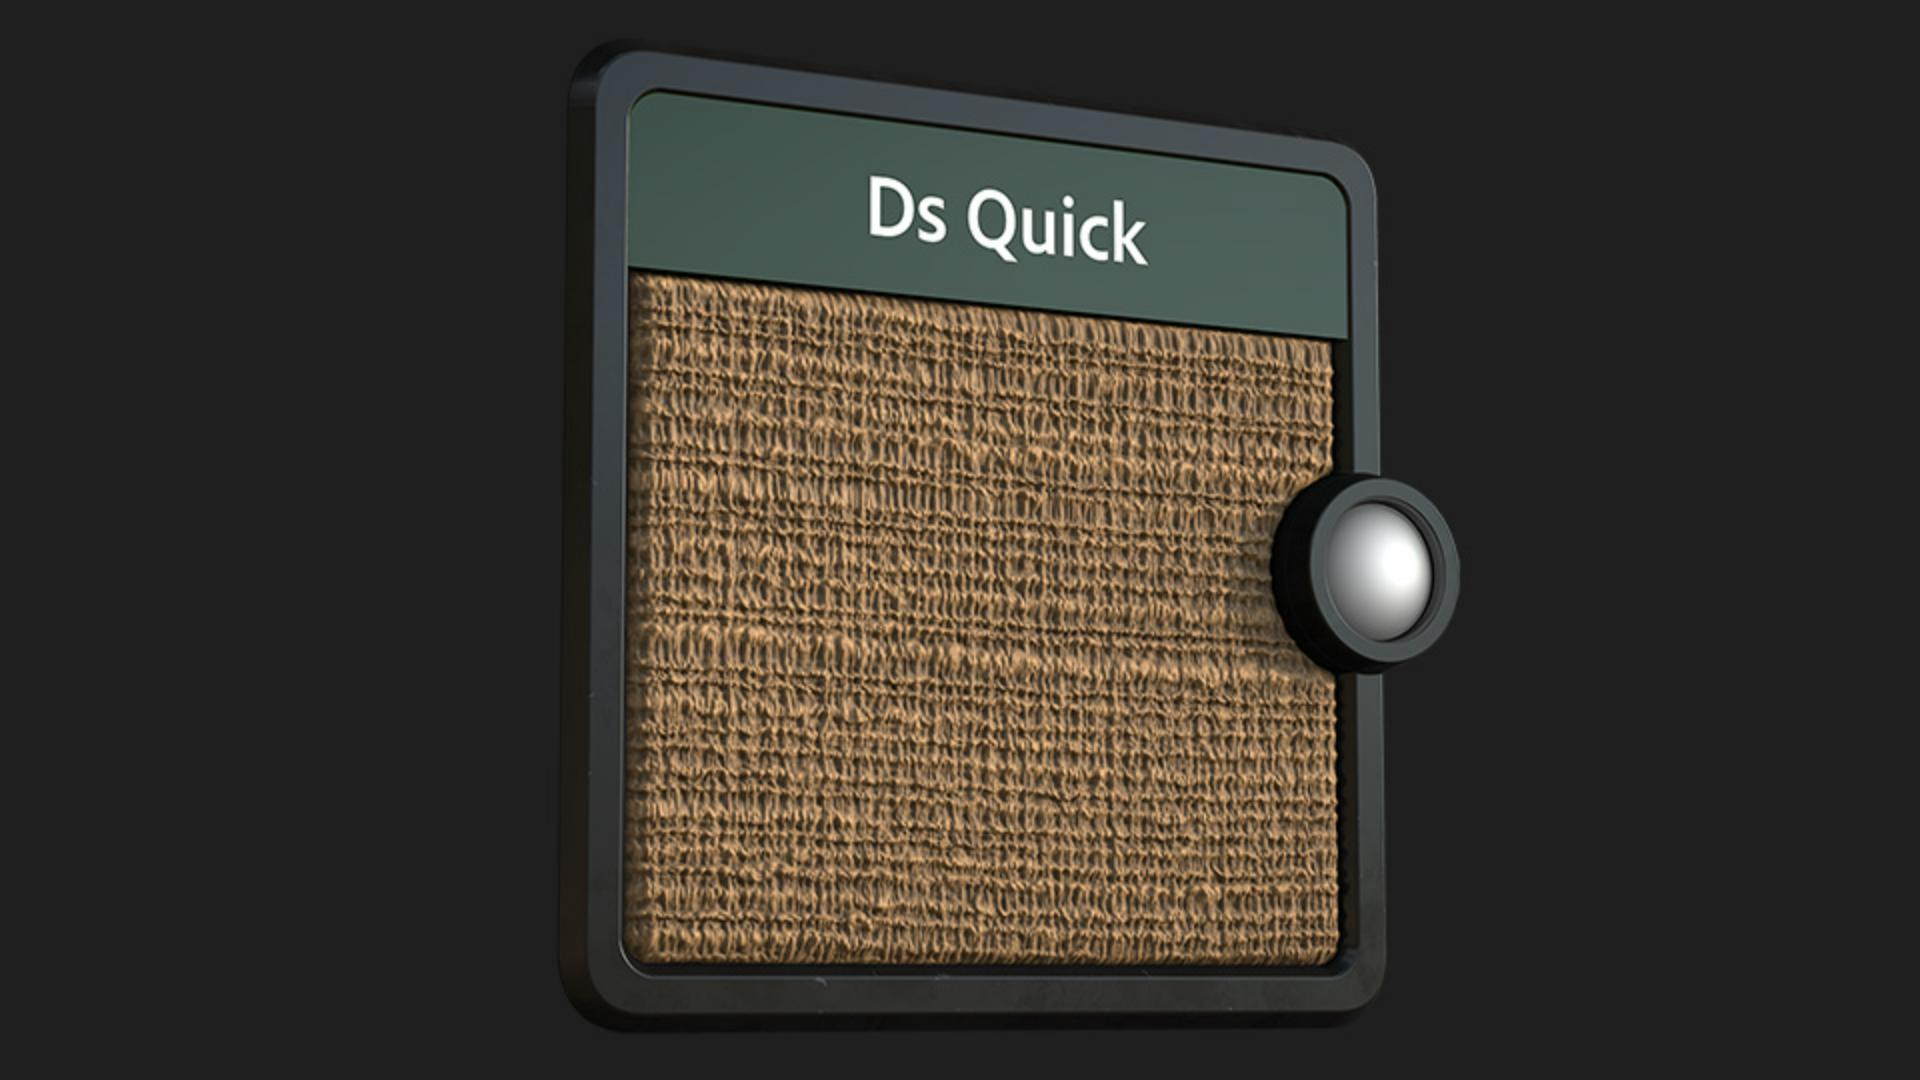
Hi, in this video we’re using Substance 3D Designer to create jute fabric.
Understanding key nodes and parameters
Let’s first go over the key nodes and parameters we’ll use.
The tile generator node is a powerful node to make regular or random patterns.
It’s a simpler version of the tile sampler node, with less controls and inputs.
In the pattern list you choose the shape to repeat.
You can use some pre-defined shapes, or set your own custom pattern input with “image input”.
Pattern Specific lets you change the selected pattern’s shape.
The effect is dependent on the selected pattern.
The directional warp node warps shapes in a certain direction based on an intensity input.
Intensity is the main control for the warp.
There’s never one right value, it depends on your inputs.
Don’t hesitate to type in a really high value, beyond 1.
Warp angle sets the angle of the warp effect.
The levels node allows you to remap the values of an input by setting input and output remap factors.
You can control it either in the histogram view or use the values view which you can access by clicking on the values button.
Level in low remaps the input low values to become full black.
Level in high remaps the input high values to become full white.
Building the base weave pattern with tile generator
Let’s start with a tile generator node, switch the pattern to crescent, change rotation to 90 and increase the pattern specific to 0.3 for a bend thread shape.
Now push the X and Y amount to 500 and 300 for more and smaller shapes.
Switch the size mode to normal size, reduce the size Y to 0.6 and increase the scale to 2.25 to get overlapping shapes.
Tweak scale random to 0.25 and rotation random to 0.05 for some variation.
Now we increase the luminance random slider to 0.7 for color variation.
Connect it to a transformation 2D node, rotate it 180 degrees and tweak the offset X and Y to 0.001 and 0.005 to bring the mirrored shapes in position.
Add a blend node and use the transformation 2D output as foreground of the blend node with the max lighten blending mode to get the horizontal lines.
Forward it into another blend node.
Then we connect it to a transformation 2D node, rotate it 90 degrees and scale it 50 percent in width direction to get vertical lines. switch the blending mode to max lighten and reduce the opacity to 0.5.
Now forward this to a directional warp node and use a gaussian noise node with a scale of 16 as intensity input.
Next reduce the intensity of the directional warp node to 2 and change the angle to 90 degrees for a vertical deformation.
Let’s join it to a blend node and rotate the result 90 degrees for the foreground.
Switch the blending mode to max lighten and lower the opacity to 0.6 for a denser and more detailed structure.
Refining structure with blending and directional warp
Here’s the final base result of the setup we just build.
Let’s explore a slightly more advanced setup and check out
Adding advanced variations and thread details
some other methods for more accurate weave patterns.
An additional warp step with a smaller noise blended over the non warped texture introduces some more thread details.
Just increase the scale of a duplicated tile generator to make the horizontal pattern thicker.
By using an anisotropic noise in combination with a levels node, you can easy mask out certain line areas.
After this, simply use the same deformations to match the fibers perfectly and blend it over for thicker and brighter threads.
The same details you can add to the vertical threads too.
Add a blurred anisotropic noise in combination with a warp node with a really small intensity, you can stretch out certain areas to make the stitches more organic.
It results in some more stretched areas and a generally uneven look.
If you need a more accurate woven look,
Creating accurate weave patterns with weave generator
use the weave generator node for a basic weave pattern.
It is great to control the weave pattern and gaps aswell.
It further has general mask output and individual masks for horizontal and vertical areas to make masking process simpler.
Tweak the level in mid slider of a levels node to define the shape better.
Use the crescent shape to make some bend threads.
The symmetry random of the tile generator is great for a nice variation.
Further offset the threads and blend it together with a 90 degrees rotated pattern to get another nice base weave version.
There are so many possibilities, have fun while exploring it.
If you want to learn more, you can download and open the graphs shown in the video.
Thanks for watching and we would love to hear your thoughts, ideas and suggestions for future quicktips, so let us know them in the comments.
See you in the next quicktip episode.