Introduction
Motion brings life to your 3D project whether you want to create a video or an interactive 3D experience.
Making objects, materials and lights move over time is called animating.
Core principles of 3D animation and keyframing
For simple models, that's all you need to think about.
But when models get complex, you have to prepare them for animation.
That's what we call rigging.
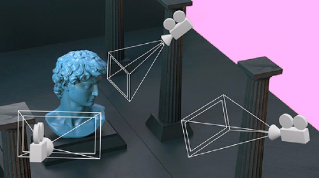
Animating in three dimensions is no different from animating in two dimensions.
You just make properties of an object move over time.
3D applications that let you animate have a timeline that allows you to playback or slide through the duration of your animated sequence.
Any property of an object can be changed at any point along the timeline.
A value change at a specific time point is called a keyframe, and your object moves because it interpolates between these keyframes when an animation is played.
For example, to make your object spin 360 degrees, you create a keyframe with the rotation at 0 degrees at the start of your timeline, then you move to the end of your timeline and set a keyframe with the rotation at 360 degrees.
When the animation plays, it rotates from 0 to 360 degrees, while time advances.
Keyframing like this is the easiest and simplest way to animate, but it involves a lot of manual work, so you might sometimes want to use other methods to create animation.
It's also not always easy to create realistic, believable motion.
Motion capture and simulation techniques
There's a technique to capture movement from something that moves in the real world.
It's called motion capture or mocap in short.
Motion capture means the computer captures that motion from the real world and brings it into the virtual world.
Think of it like scanning, but for animation.
Just like with scanning, there are different mocap techniques, from running smart algorithms on simple video footage to using high-tech, expensive gear and studios.
Each method has its use, with the more advanced methods being much more precise and reliable.
Some cases are almost impossible to animate by hand or capture from real life, things like smoke moving, a building collapsing, or a machine exploding into many parts.
To animate something like this, you let computer algorithms calculate the physics behind it to simulate it as realistically as possible.
Running simulations means you're not doing any animation work by hand, but you set up and tweak rule systems for forces like gravity and wind.
Making simple animations like spinning an object or bouncing a ball doesn't require any real preparation work, but complex objects always need to go through an extra step before they can be animated easily.
That step is called rigging,
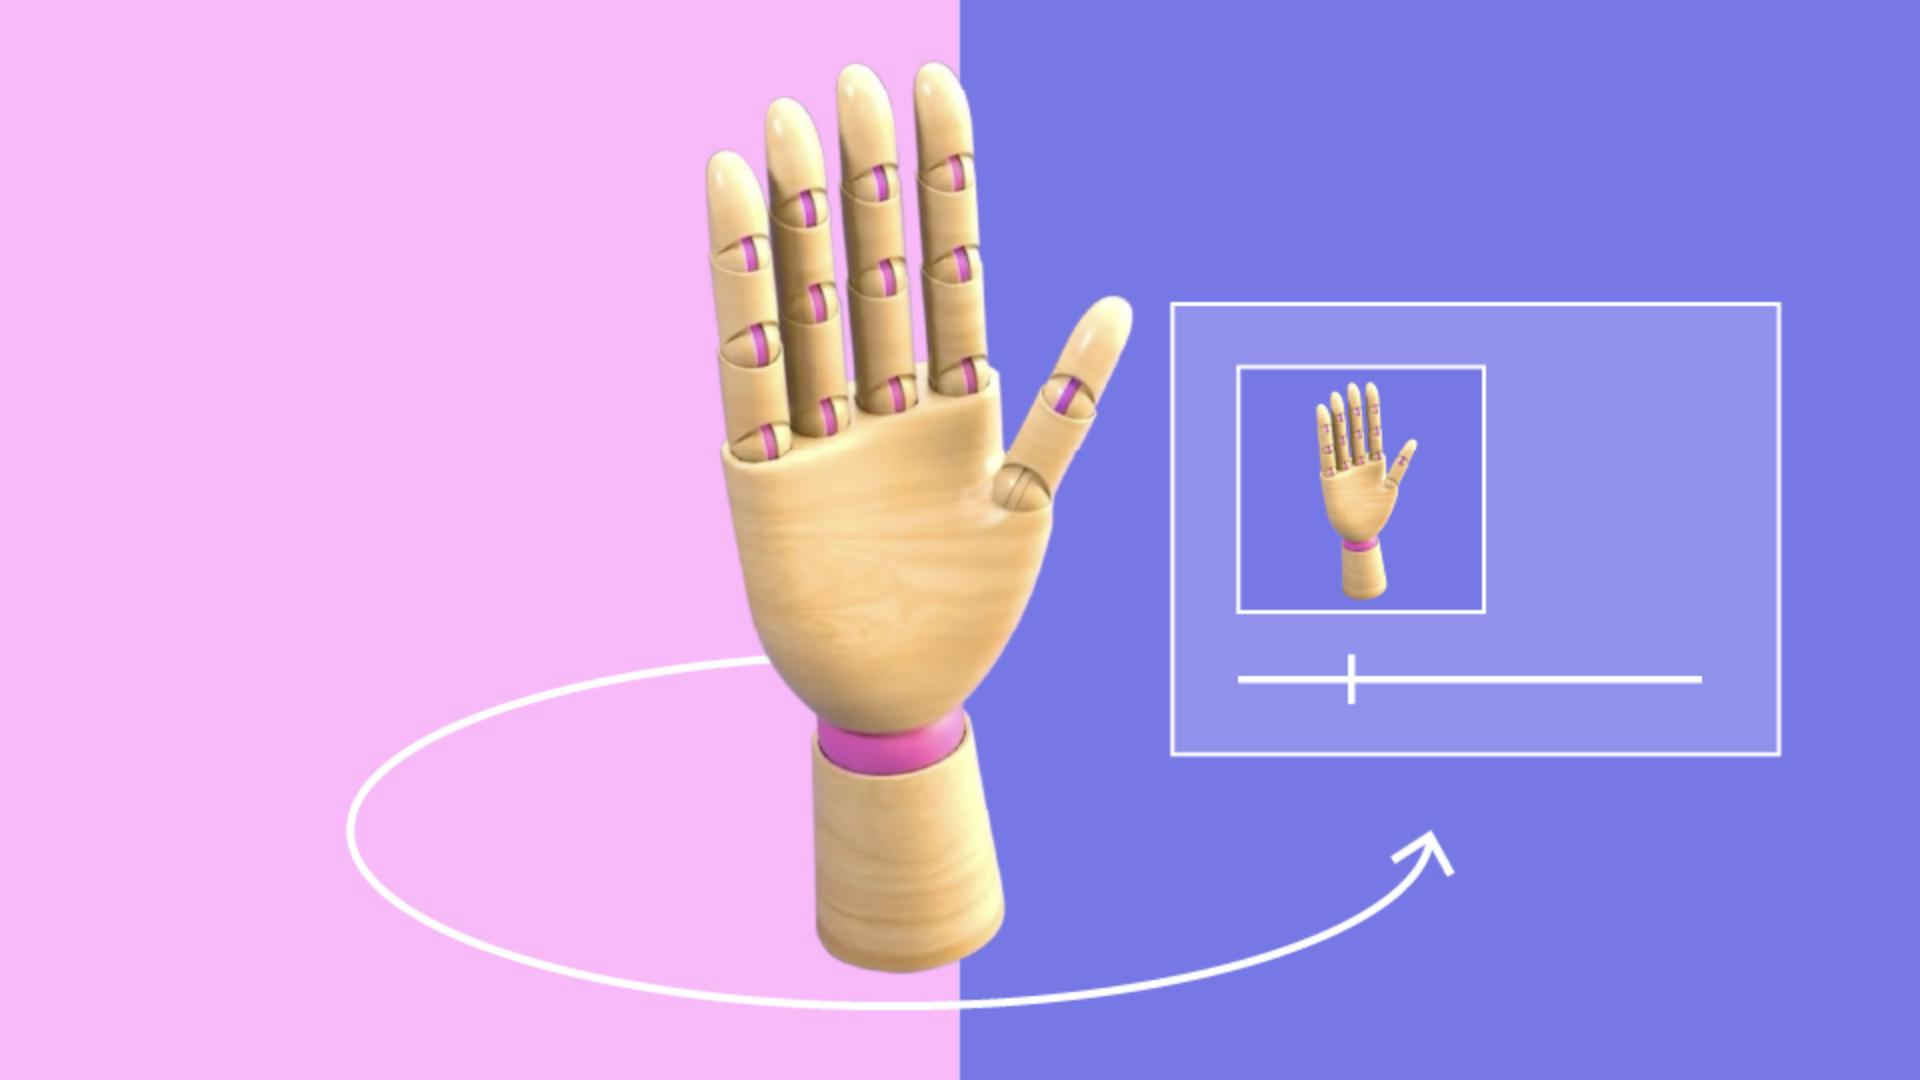
Rigging for complex animation
and it comes down to building a virtual skeleton and controls for it.
There are three main reasons to build a rig for your 3D model.
First, your object could be very complex and consists of many parts, so much that it becomes impossible to handle each part individually.
Think of a clock, moving one gear at a time would be tedious, but a rig simplifies this and lets you control many parts at once.
Second, with a rig, you can deform a 3D model when animating.
Think of it like bones with tissue and muscle around it.
Rig lets you morph, bend, and twist your 3D model in ways, otherwise not possible.
And third, rigging lets you do movements that would be very hard otherwise.
For example, keeping a hand in place while the body moves around is hard to do, but having a rig means your computer can help calculate solutions for these tough cases.
Think of it like moving an action figures limbs one by one compared to moving a puppet with strings.
Having a rig for your model makes things much easier and faster to animate.
Some applications offer services that can help you get started quickly with character animation and rigging.
They provide a library of high-quality animations and rigged characters that you can import and adjust to your liking.
Finishing up and next steps
We've covered almost all 3D creative steps by now.
In the next video, we'll focus on creating your final 3D outputs through staging and rendering.