Substance Painter can now be used on very large-scale assets. Thanks to the layer instancing feature it is possible to texture assets with a large number of UDIMs very fast.
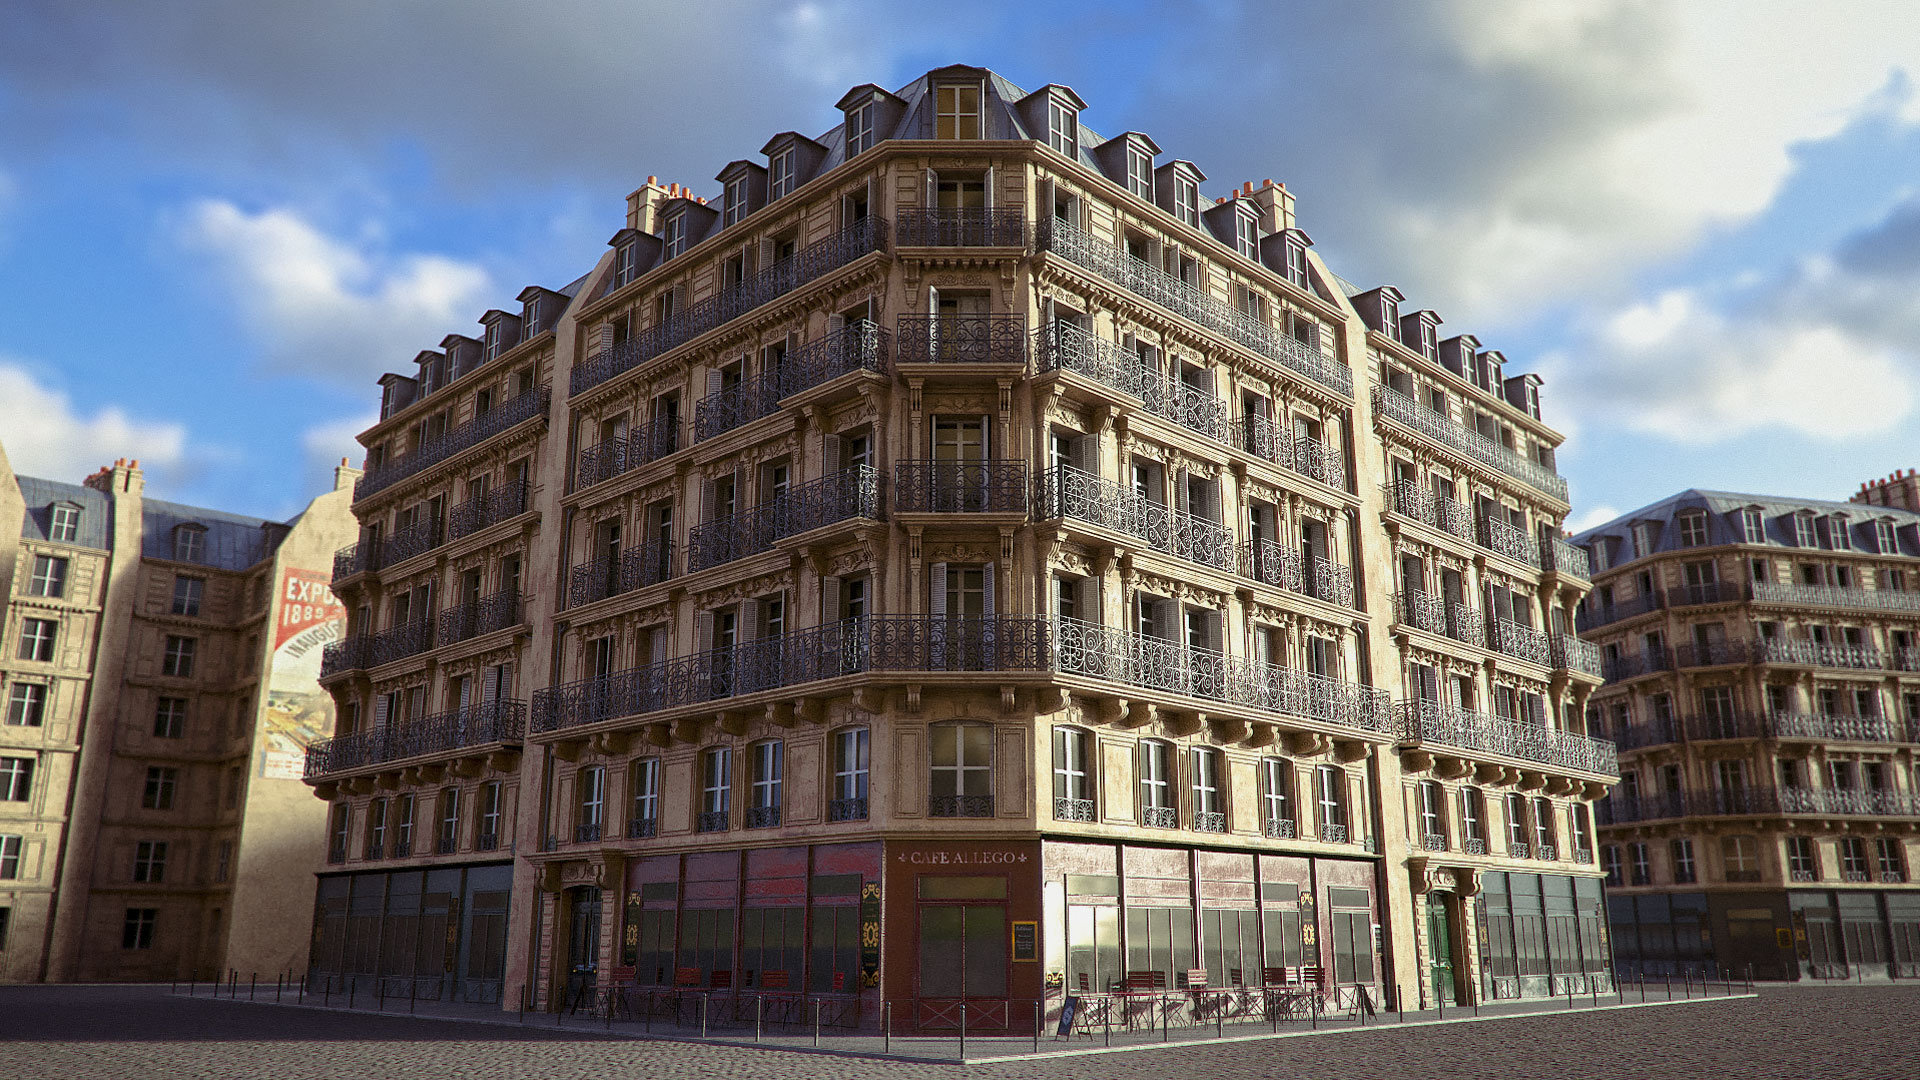
In this tutorial you will learn how to texture an large asset in a short amount of time, such as this Parisian building, composed of more than 2.5 million polygons and with all the elements broken down into 44 UDIMs with Casimir Perez, texture artist from Allegorithmic.
The process took three days: two of those being dedicated to creating the UVs, one was dedicated to texturing and rendering.
The asset used in this tutorial is from Turbosquid and can be purchasedhere .
Working with UDIMs
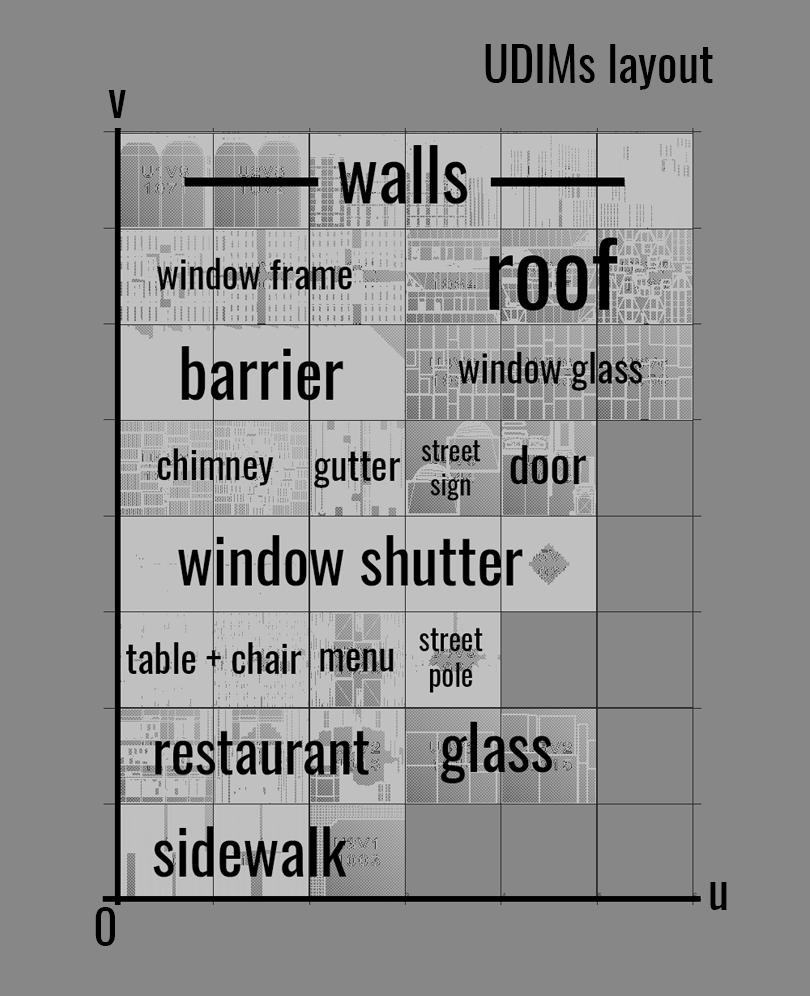
For people who aren’t familiar with the UDIMs, it is a workflow where you can use a UV space larger than 0-1 for the layout of your UVs. You can go up to 10 UV tiles on the horizontal line and infinite vertically.
To start, we need to be smart in terms of UV.
You have to think your UV layout density so you will not have too many resolution problems.
On the other hand, to work faster with big asset, you can arrange the UV tiles in rows so you can easily use the instancing feature. By rows I mean part of the assets : every UDIM tiles 100X is the sidewalk part, every UDIM tiles 101X is the restaurant part, and so on…
With this technique you can layout all the UVs to multiple tiles automatically. You don’t have to place the shells by hand.
Example : The th row is the walls part, it’s made of 6 UDIM tiles. When you will use the instancing feature, you will already know that you can instance layers on every UDIM 107X. With that workflow, it easier to find the parts you want in the prompt window (you will see later how it is looks like).
Creating the Substance Painter project
In order to improve performance when working on a project with a lot of UDIMs like this one, it is better to start a low-resolution project, as it is always possible to go higher later if necessary. 1024 or even 512 is a good choice depending on your GPU capacity.
Don't forget to check Create a texture set per UDIM tile option !
Baking the additional maps
When it comes to bake the textures for very large assets you have to be clever. Don’t increase the project file size when it isn't necessary.
Here are a few tips to help with that:
The normal map is useless if you don’t have a low-res mesh (most of the time, it’s the case in VFX/Animation workflow).
The ID map is important, so you don’t have to select by hand the mesh parts to assign materials, only by colors.
Thickness isn’t needed when working on a hard-surface model,
Reducing the baking resolution for the world space normal, position and ID maps is often a good solution to reduce the file project (in this project, it is reduced to 2K).
For the position maps, you can now select the full object
mode so your tri-planar projection will be seamless across every tiles.
However, the AO and the curvature maps which are needed for Substance Painter’s mask generators will need to stay at a higher resolution, here 4K.
Using layer instancing
To help with organization and gain some time later, create one folder for each part of the asset and then
instantiate each folder to the right UDIM tiles.
Example : The 2nd row ( UDIMs 101X ) is the restaurant part, you can instantiate blindly a folder to all the tiles in that row.
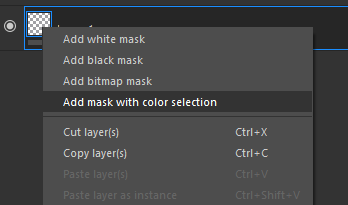
Finally, inside the folders, you can now start making the look dev. Add some materials, place them with the ID map ( add mask with color selection), add wearing using smart mask and smart material, ...
Tips : When you want to remove all the child of an instance: copy/paste the parent and then delete the old one. It will remove all of the instances on every other UDIMs.
Adding some details
Because we don’t support the painting across UDIM tiles yet, you have to jump into the right UDIM tiles and then create the layers you need (not instanced) for creating some specific details.
Example : We need to add a logo to the storefront. Here is how you can do.
Tips : To navigate to the right UDIM tile within the viewport use the shortcut Ctrl + Alt + right click when your mouse is over the UDIM you want to select.
Cleaning
Happy with the look of the asset, I recommend a cleaning pass.
Try to reduce layers as few as possible. Often two or three materials is enough.
Keep it simple.
Also, when working with fill layers, be very selective about the channels you use. Sometimes normal, height or metallic aren’t needed, and it reduces computing time to process all of your actions at export time or when you want to increase the resolution.
Example : Having a single dirt folder instanced across all of the UDIMs for the overall look of the asset is a good way to reduce a project size. But I recommend you to make the look dev on a single/few UDIM before instantiating it ;)
Previsualization in iRay
Before exporting the maps, you can use iRay for some test rendering. This path tracer provides a closer look of what your offline renderer will ultimately render. Especially for the roughness maps, where a more contrasted range is visible. That way you are sure of the result and you don’t need to export the textures multiple times.
Exporting textures
Having done the look dev for the asset, it’s time for the export process. Since I render my assets with Arnold 5, I use the default template provided by the software (Arnold 5 UDIM) and set everything to a higher resolution, usually 4K, sometimes 2K.
The total export time took less than 10 min for 44 UDIMs ( 5 x 44 = 220 maps in total!).
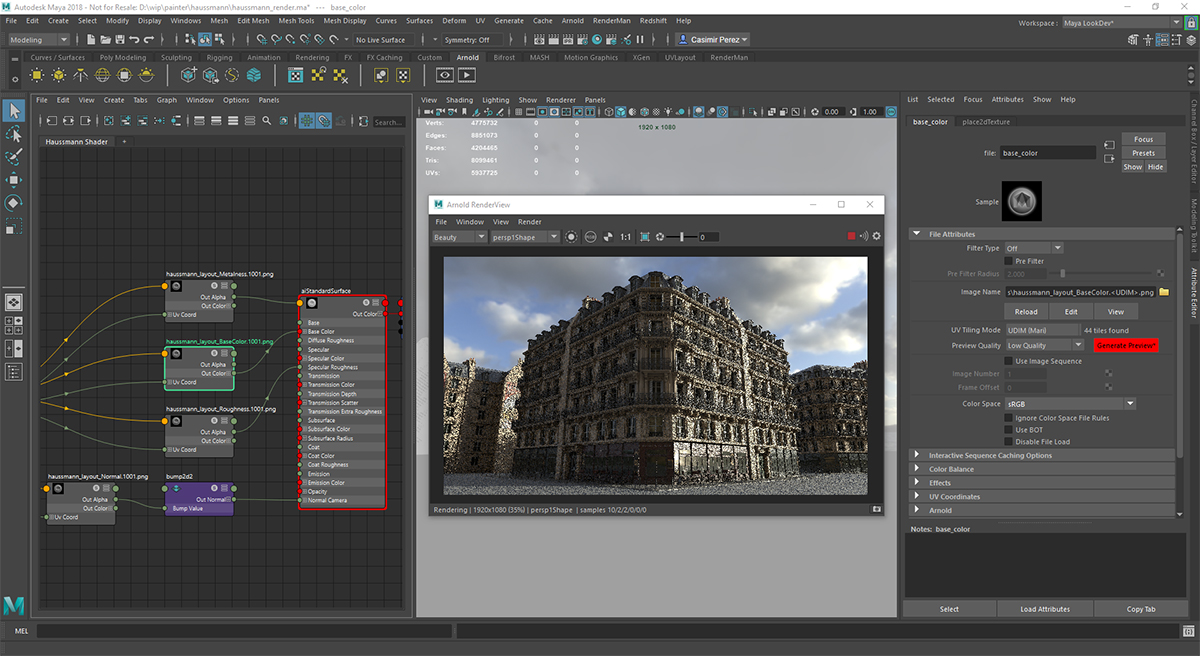
Rendering in Maya
In your Maya scene, you only need to create one aiStandardSurface shader and then plug your maps in the right inputs.
Make sure that you have selected the UDIM option in the properties of each file node.
For the lighting, you can use one of the HDR of Substance Painter with a SkyDome light (in the Substance Painter shelf you can right click to export the resource).
Then click render and away we go, it’s as simple as that!
You can control how Adobe websites use cookies and similar technologies by making choices below. But note that if you disable cookies and similar technologies entirely, Adobe websites may not function properly.
Cookies are small text files stored by your web browser when you use websites. There are also other technologies that can be used for similar purposes like HTML5 Local Storage and local shared objects, web beacons, and embedded scripts. These technologies help us do things like remembering you and your preferences when you return to our sites, measure how you use the website, conduct market research, and gather information about the ads you see and interact with.
You can make choices in the menu below about what cookies and other technologies you want us to use on Adobe sites when you visit them from this browser. You can always change those choices later by clicking on the Cookie Preferences link at the bottom of the page.
If enabled:
We can improve your experience by tailoring the site and the content to things we think might be of interest
We can better keep track of your preferences — like what language you prefer to use
We will better understand your likely interests so we can provide you more relevant Adobe ads and content on non-Adobe websites and in non-Adobe apps
It will help us improve the performance of our website and those of our partners who use the Adobe Experience Cloud
If disabled:
We won’t be able to remember you from session to session so the experience may not be tailored to your interests
You’ll still have access to the content of the site but certain features that depend on cookies may not function
You’ll still see ads, they just may not be as relevant to you
General information
You can control how Adobe websites use cookies and similar technologies by making choices below. But note that if you disable cookies and similar technologies entirely, Adobe websites may not function properly.
Cookies are small text files stored by your web browser when you use websites. There are also other technologies that can be used for similar purposes like HTML5 Local Storage, web beacons, and embedded scripts. These technologies help us do things like remembering you and your preferences when you return to our sites, measure how you use the website, conduct market research, and gather information about the ads you see and interact with.
You can make choices in the menu below about what cookies and other technologies you want us to use on Adobe sites when you visit them from this browser. You can always change those choices later by clicking on the Cookie Preferences link at the bottom of the page.
If enabled:
We can improve your experience by tailoring the site and the content to things we think might be of interest
We can better keep track of your preferences — like what language you prefer to use
We will better understand your likely interests so we can provide you more relevant Adobe ads and content on non-Adobe websites and in non-Adobe apps
It will help us improve the performance of our website and those of our partners who use the Adobe Experience Cloud
If disabled:
We won’t be able to remember you from session to session so the experience may not be tailored to your interests
We’ll still count your use of our site and services
You’ll still have access to the content of the site but certain features that depend on cookies may not function
You’ll still see ads, they just may not be as relevant to you
Operate the site and core servicesOperate site and measure engagement
Always active
These cookies are required, and they are used to enable the site and related services core functionality. Without them the site could not operate, so they cannot be disabled.
These cookies enable the site and related services’ core functionality and collect statistics about user engagement, such as counting active use to help us understand trends. These cookies cannot be disabled.
Measure performance
These cookies are used to analyze site usage to measure and improve performance. Without them Adobe cannot know what content is most valued and how often unique visitors return to the site, making it hard to improve information we offer to you.
These cookies are used to analyze site usage to measure and improve performance. Without them Adobe cannot know what content is most valued, making it hard to improve information we offer to you.
Extend functionality
These cookies are used to enhance the functionality of Adobe sites such as remembering your settings and preferences to deliver a personalized experience; for example, your username, your repeated visits, preferred language, your country, or any other saved preference.
Personalize advertising
These cookies are used to enable Adobe and our partners to serve ads more relevant to your interests. Without them you will still see ads, but they might not be as relevant to you.
Personalize advertising
These cookies are used to enable Adobe and our partners to serve ads more relevant to your interests. Without them you will still see ads, but they might not be as relevant to you.