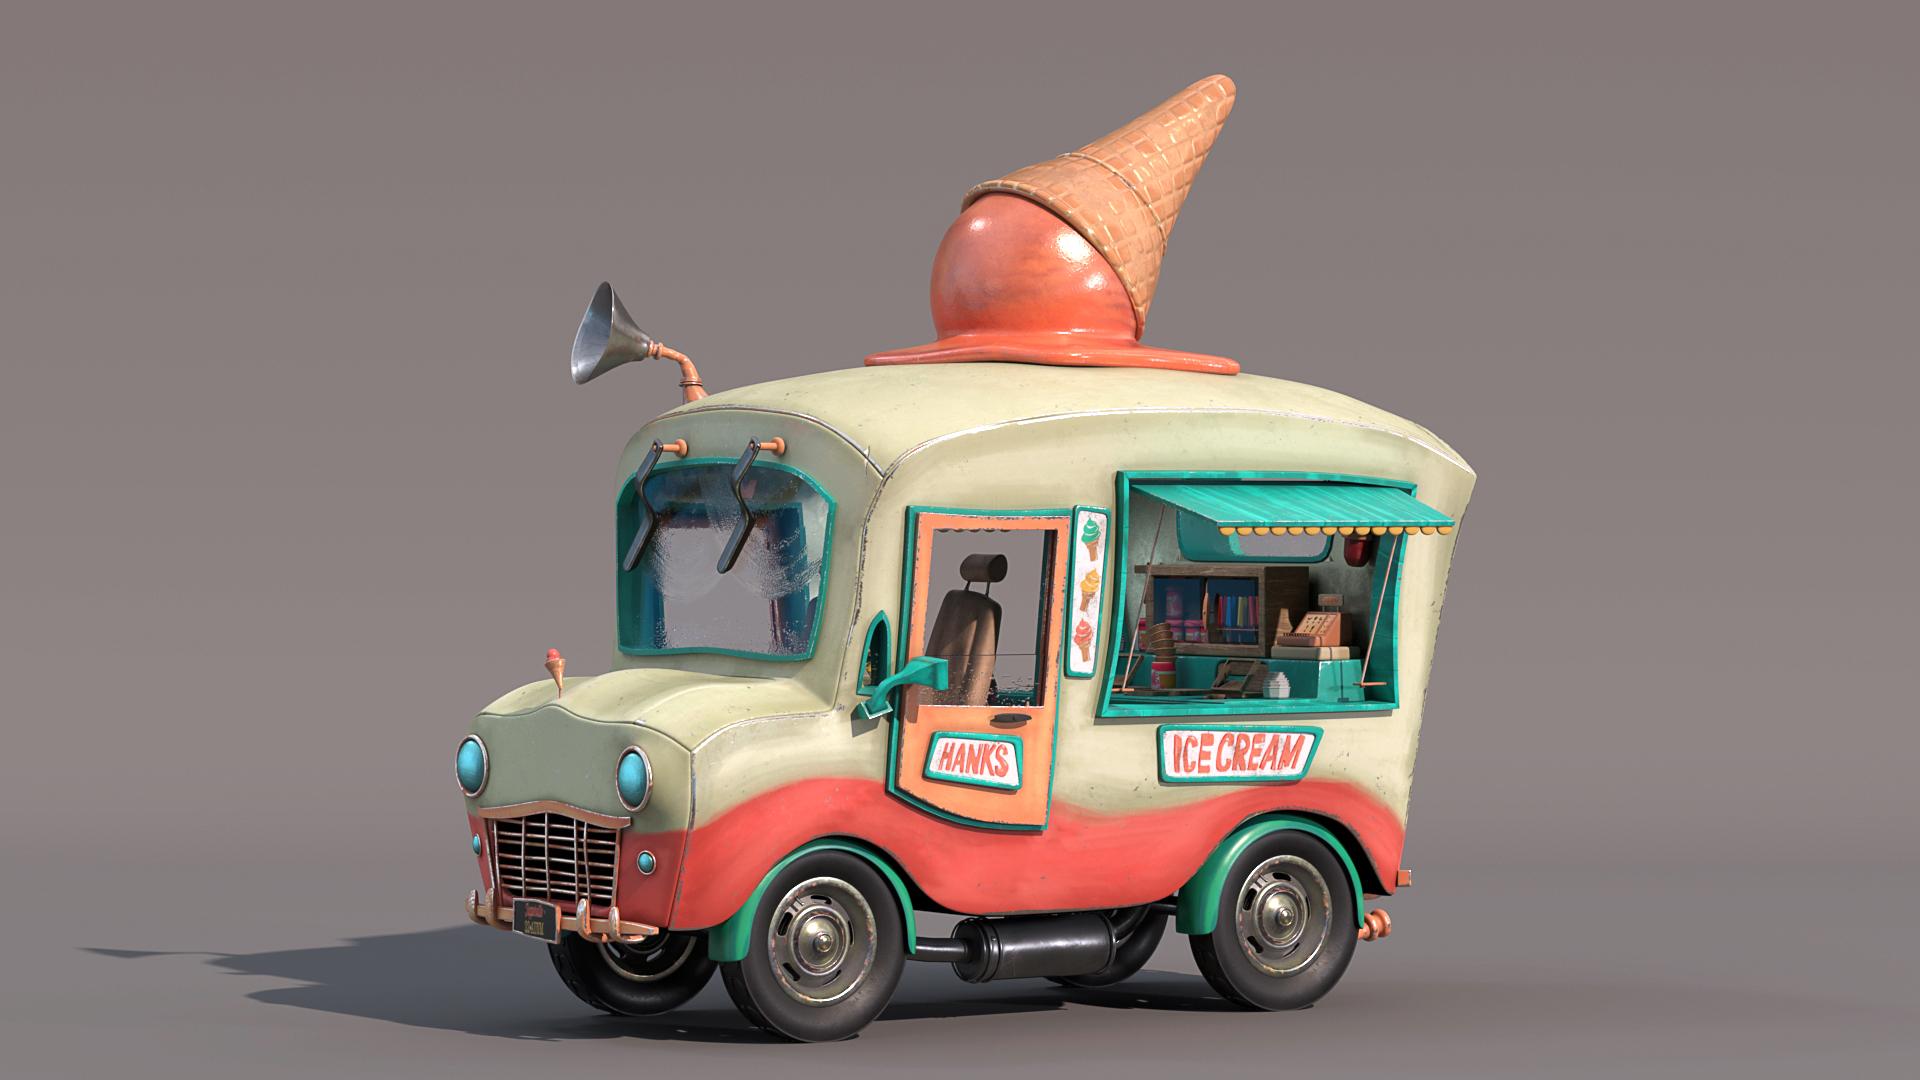
This Ice Cream Truck prop is from a short that I have been digging away at for a very long time! Stay tuned :)
First I started with a very loose sketch to start modeling from and refined it as I went along inside Maya. Here’s the final model:
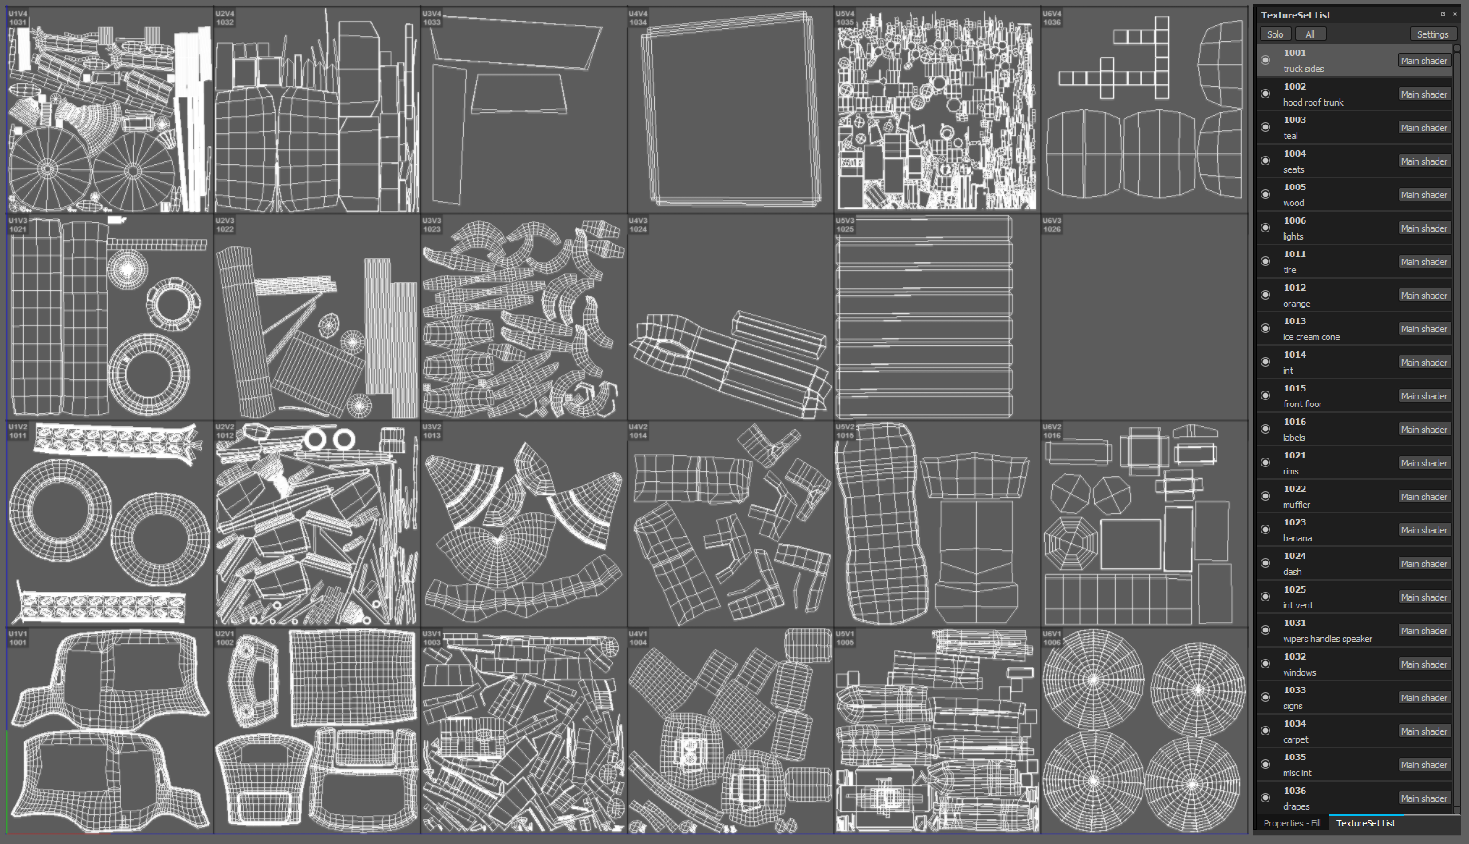
Next up: UVs. I laid them out so "like materials" are in the same texture set AKA tile: all wood, all plastic, all metals, and so on.
I then exported all geometry out as an FBX. (I did smooth some of the larger pieces of geo so when it’s subdivided at render time, inside Maya with Arnold, I don’t have weird UV seams. Lots of tutorials already exist on these workflows so I won’t get into that!) Now on to Substance Painter!
Create a project and make sure to click "Create a texture set per UDIM tile". This way, on export, I will usually only need one shader for all these different tiles instead of one shader per tile (how cool is that?). As you can see above, I gave each texture set a description. (Right-click on the set and select “edit description”)
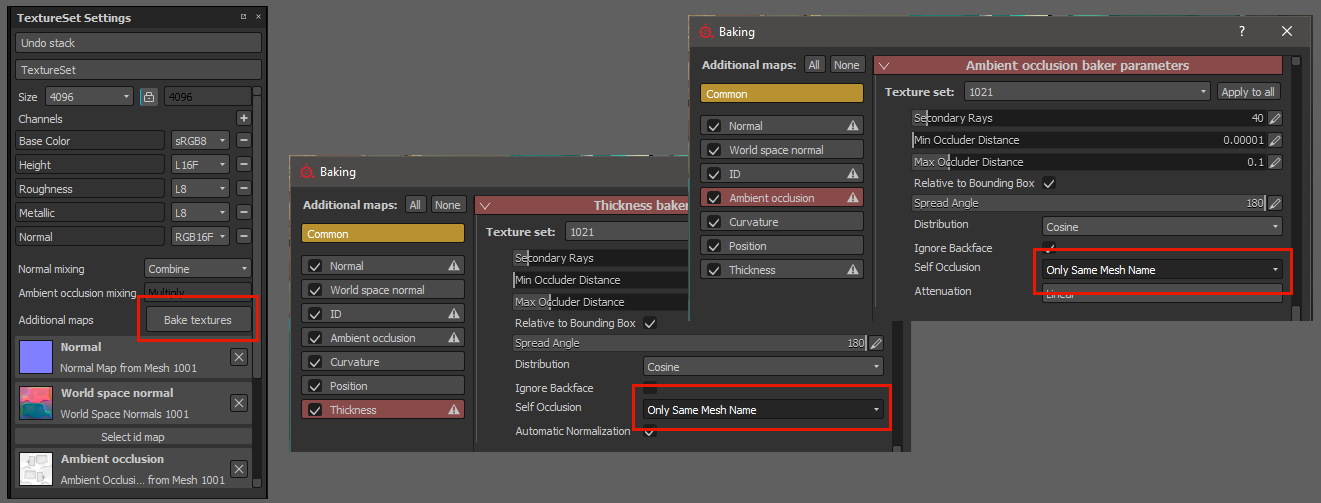
Before getting started, I bake all maps at 4K.
Pro tip before baking: If this is going to be animated I make sure to switch both Thickness and Ambient Occlusion to "Only Same Mesh Name" so there isn’t dirt painted where an asset might be moving.
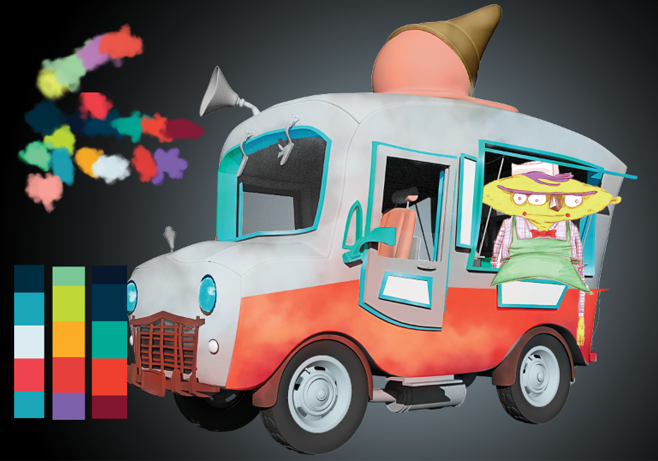
I went through a few color iterations before I ended up around here. Always good to have reference before heading to paint ;). I like to use the Explore option athttps://color.adobe.com to get started with color combos. A really great resource. Also, meet Hank! He is next up!
"Hank" character illustration by HouseSpecial Art Director, Gee Staughton
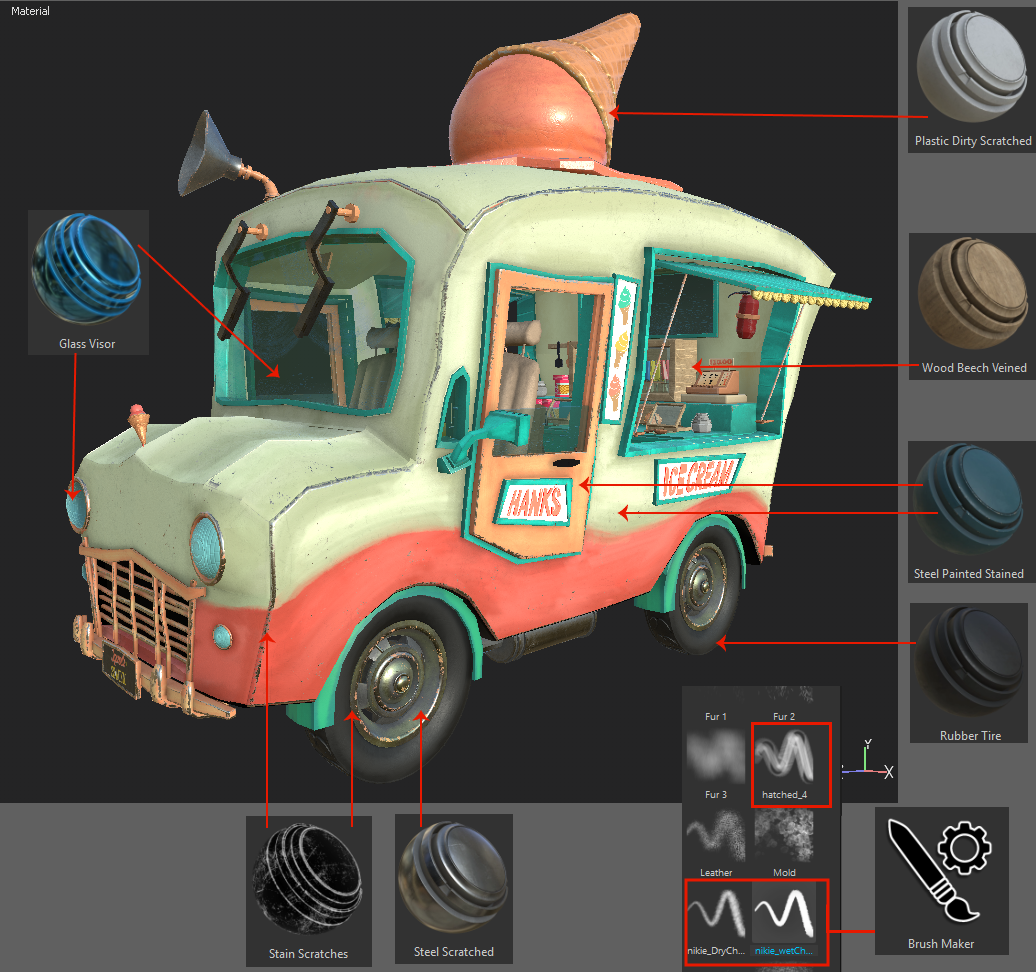
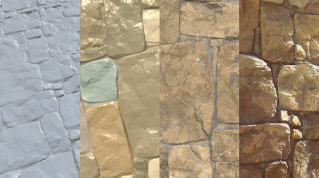
First, I went through each set and assigned it some sort of Material or Smart Material. Here are some of those presets:
Shoutout to Gaetan Lassagne from Allegorithmic for this hatch brush (https://share.allegorithmic.com/libraries/136
) that I use all the time! I also used brush maker (located under the alpha shelf) to make two sketchy brushes. One looks like a wet charcoal and the other a dry charcoal.
I used this mainly along the panels and the ice cream cone. I usually have a layer that’s white and another that’s black on overlay when using these brushes.
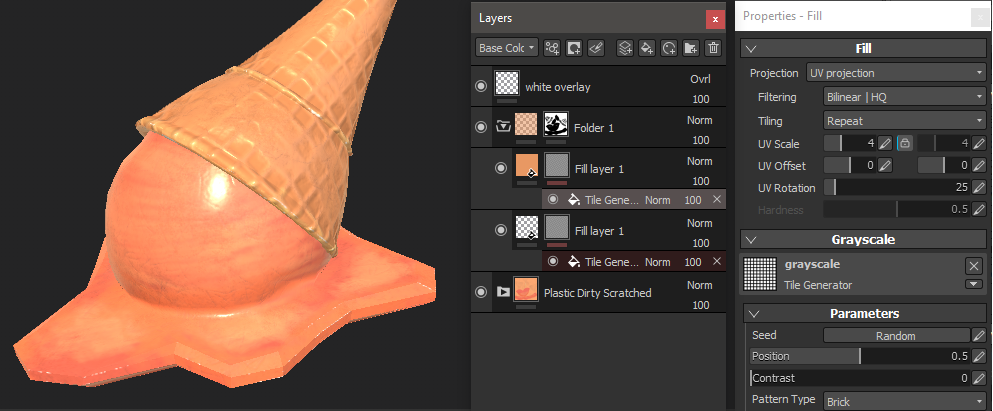
It was pretty easy to create the cone pattern using this tile generator set to brick for height and color. You can also see the white overlay here at the top of the layer stack for some sketchy detail.
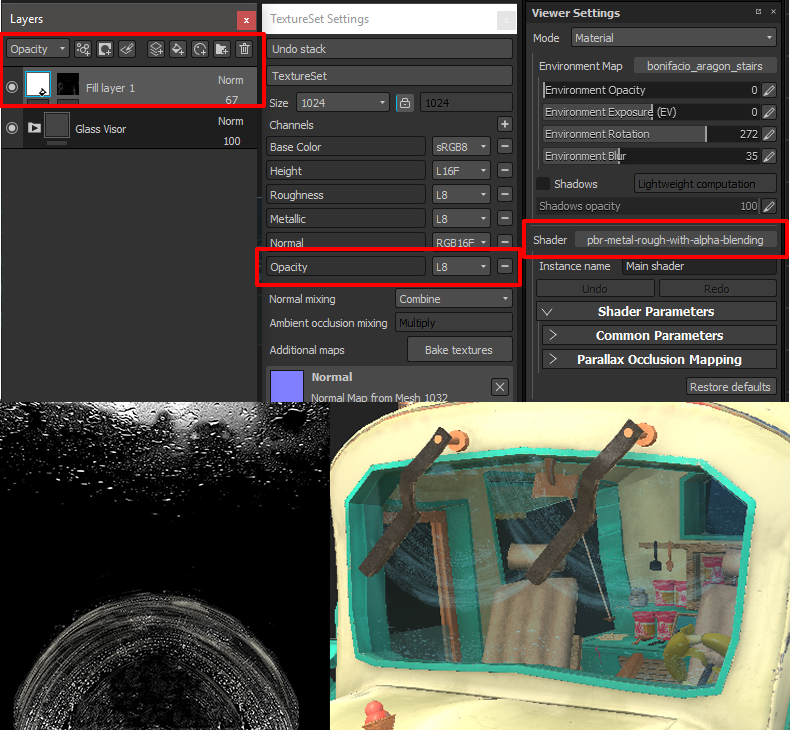
For the windows and headlights, I needed to add an opacity option:
First, in the TextureSet Settings, click the little plus sign by Channels and add "Opacity."
Next, in the Viewer Settings, make sure to change the shader to "pbr-metal-rough-with-alpha-blending."
Now I have the ability to create a new fill layer with only opacity, height and color active. I then created an alpha in Photoshop and used that to project through a mask on the fill layer. This created the look of streaks on the windshield and dirt/drips on the windows.
Here are a few other maps I made in Photoshop:
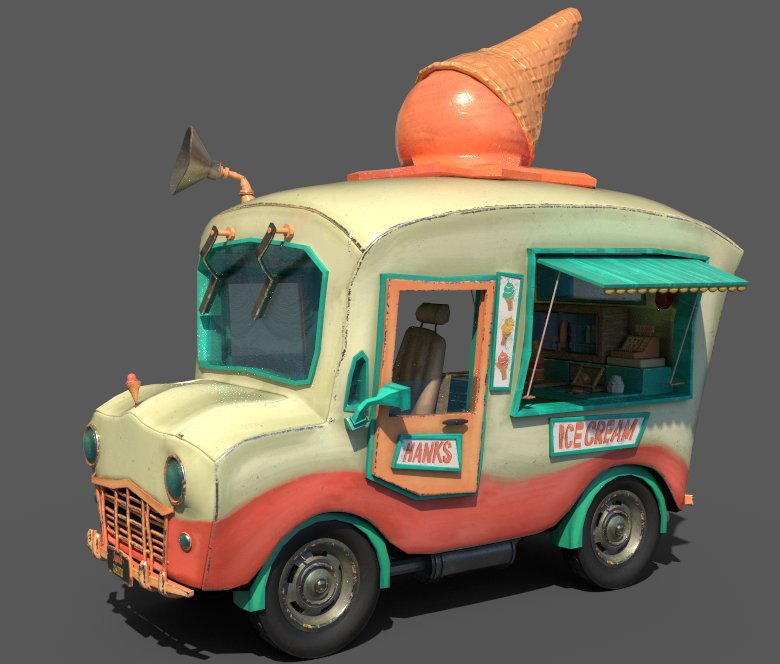
And here’s the final Iray render:
Before heading to Maya, I uploaded this to Sketchfab which Substance Painter has a button for, located in the texture export settings. Check it out here:
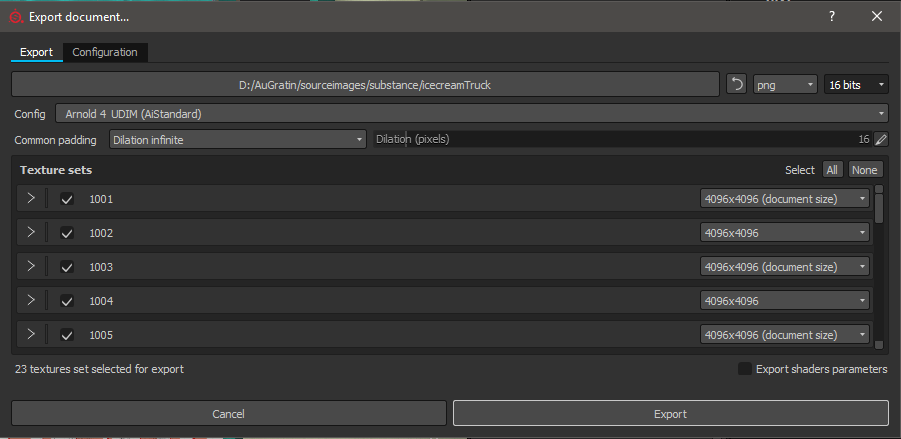
Now for exporting to Maya! I’m currently using 2017 with Arnold 1.2.4.4. I still have a lot of projects going with this older version, so this is why I'm using the "Arnold 4 UDIM (AiStandard)" config option on personal projects. I also prefer 16-bit png files. This workflow, however, is very similar to Arnold 2.0 + with Maya’s fairly new Color Management workflow. Because I’m going to be using this for a short, and will be rendering it from multiple angles, I’m exporting all channels out at 4K.
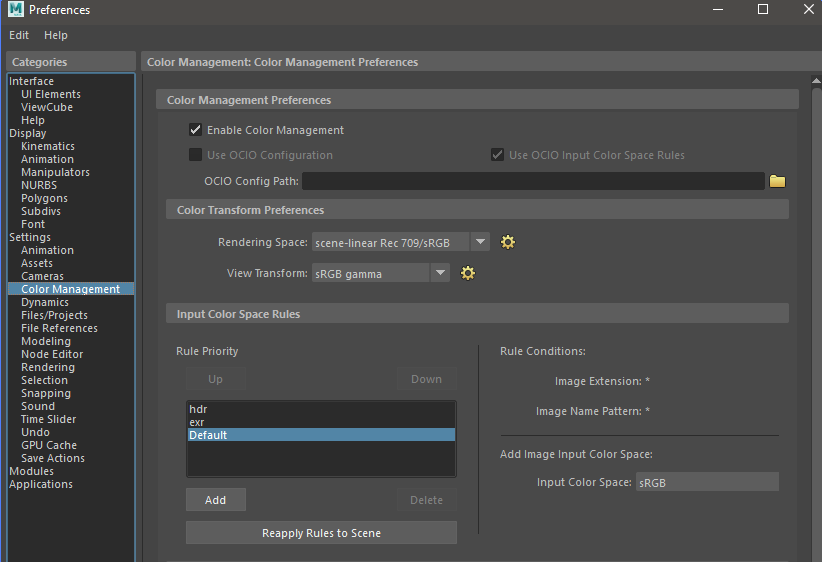
Great, all the files are now exported so the first thing I want to check in the Maya scene is that Color Management is enabled. You can find this option in Windows->settings/preferences->preferences, color management tab. I have found that if you created the file in an older version of Maya, this is off by default. If this is a fresh scene, it should be on by default.
Please note this workflow is meant to be used for rendering with tx files only. I never work with anything BUT tx files. They render 10 timess faster and in the commercial world, time is everything! I’m continuously updating my tx files for rendering so this is the workflow for tx files only! Be sure to flush your texture cache if you are recreating tx files.
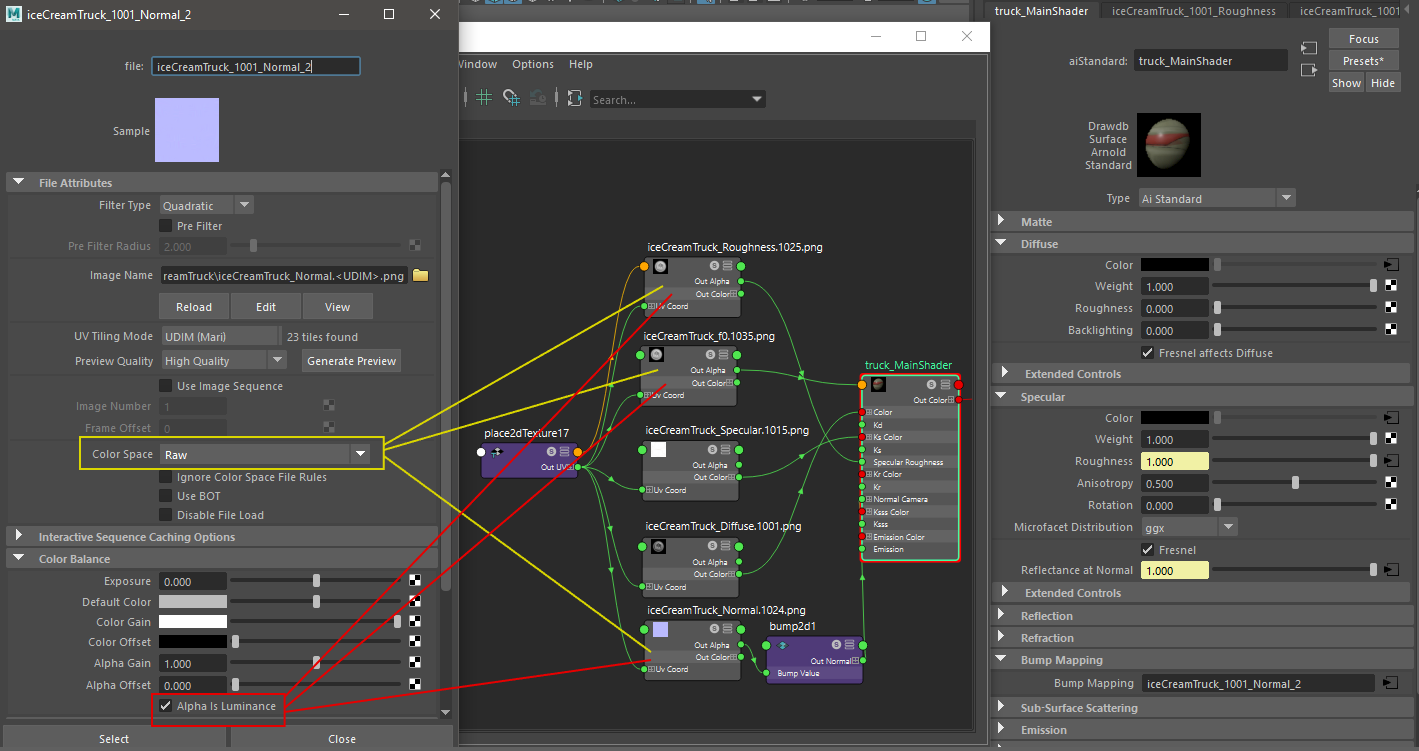
First, I create an aiStandard shader. Because I exported all texture sets with the UDIM workflow, I currently only need to make one shader and flip all my UV tiling mode settings to "Mari" so it creates the code in my aya texture file path. SP’s Diffuse to Color. SP’s Specular to Spec Color. SP’s Roughness to Roughness. Check “on” Fresnel and plug SP’s f0 to Reflectance at Normal. SP’s normal to Bump Mapping (switch bump node to “tangent space normals”) *If you’re using Arnold 2.0 and above, there is now a “aiNormalMap” node that can replace the bump node. It’s great because it has a strength slider which the Maya bump node is lacking.
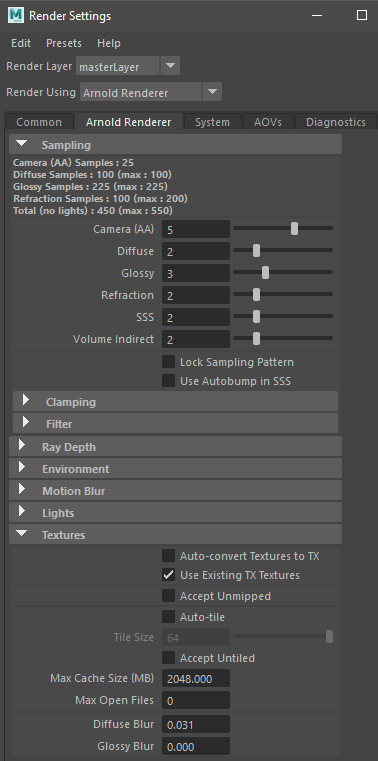
BEFORE hitting the render button, it’s important to note, "Create tx files automatically" is on by default in the render settings, under the Arnold tab, in the texture menu.
Turn "auto-convert Textures to TX" OFF!
You need to set the shader parameters up first if you want to keep that clicked on. (Or to be safe, just unclick it!) Once you have switched colorspace to RAW for roughness, f0, and normals, you are safe to create tx files which I usually just do via the tx manager.
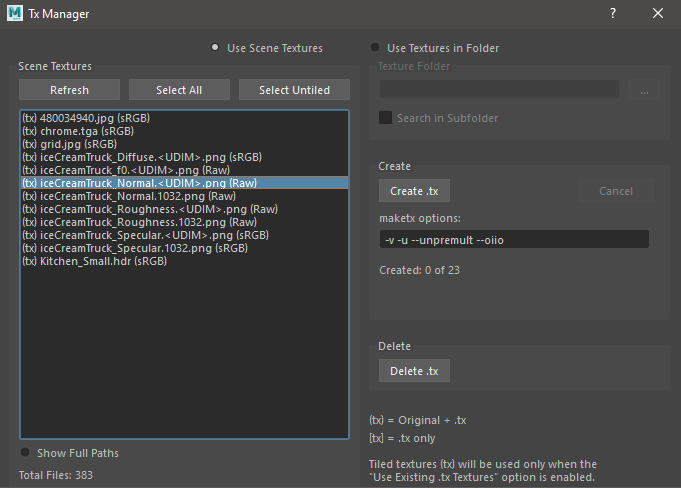
You can see here in the tx manager, the files listed above are switched to RAW. *Note, if you create TX files before switching to RAW, they will not be created in the correct color space.
Next, I set up a simple light rig of two spotlights for rim, a reflection dome and one directional light. I did end up using an additional shader for the glass. I needed to set it up a little differently than the rest because of its refraction. Two shaders for the entire asset! Almost no setup time. Very awesome. And here’s the final render!
You can control how Adobe websites use cookies and similar technologies by making choices below. But note that if you disable cookies and similar technologies entirely, Adobe websites may not function properly.
Cookies are small text files stored by your web browser when you use websites. There are also other technologies that can be used for similar purposes like HTML5 Local Storage and local shared objects, web beacons, and embedded scripts. These technologies help us do things like remembering you and your preferences when you return to our sites, measure how you use the website, conduct market research, and gather information about the ads you see and interact with.
You can make choices in the menu below about what cookies and other technologies you want us to use on Adobe sites when you visit them from this browser. You can always change those choices later by clicking on the Cookie Preferences link at the bottom of the page.
If enabled:
We can improve your experience by tailoring the site and the content to things we think might be of interest
We can better keep track of your preferences — like what language you prefer to use
We will better understand your likely interests so we can provide you more relevant Adobe ads and content on non-Adobe websites and in non-Adobe apps
It will help us improve the performance of our website and those of our partners who use the Adobe Experience Cloud
If disabled:
We won’t be able to remember you from session to session so the experience may not be tailored to your interests
You’ll still have access to the content of the site but certain features that depend on cookies may not function
You’ll still see ads, they just may not be as relevant to you
General information
You can control how Adobe websites use cookies and similar technologies by making choices below. But note that if you disable cookies and similar technologies entirely, Adobe websites may not function properly.
Cookies are small text files stored by your web browser when you use websites. There are also other technologies that can be used for similar purposes like HTML5 Local Storage, web beacons, and embedded scripts. These technologies help us do things like remembering you and your preferences when you return to our sites, measure how you use the website, conduct market research, and gather information about the ads you see and interact with.
You can make choices in the menu below about what cookies and other technologies you want us to use on Adobe sites when you visit them from this browser. You can always change those choices later by clicking on the Cookie Preferences link at the bottom of the page.
If enabled:
We can improve your experience by tailoring the site and the content to things we think might be of interest
We can better keep track of your preferences — like what language you prefer to use
We will better understand your likely interests so we can provide you more relevant Adobe ads and content on non-Adobe websites and in non-Adobe apps
It will help us improve the performance of our website and those of our partners who use the Adobe Experience Cloud
If disabled:
We won’t be able to remember you from session to session so the experience may not be tailored to your interests
We’ll still count your use of our site and services
You’ll still have access to the content of the site but certain features that depend on cookies may not function
You’ll still see ads, they just may not be as relevant to you
Operate the site and core servicesOperate site and measure engagement
Always active
These cookies are required, and they are used to enable the site and related services core functionality. Without them the site could not operate, so they cannot be disabled.
These cookies enable the site and related services’ core functionality and collect statistics about user engagement, such as counting active use to help us understand trends. These cookies cannot be disabled.
Measure performance
These cookies are used to analyze site usage to measure and improve performance. Without them Adobe cannot know what content is most valued and how often unique visitors return to the site, making it hard to improve information we offer to you.
These cookies are used to analyze site usage to measure and improve performance. Without them Adobe cannot know what content is most valued, making it hard to improve information we offer to you.
Extend functionality
These cookies are used to enhance the functionality of Adobe sites such as remembering your settings and preferences to deliver a personalized experience; for example, your username, your repeated visits, preferred language, your country, or any other saved preference.
Personalize advertising
These cookies are used to enable Adobe and our partners to serve ads more relevant to your interests. Without them you will still see ads, but they might not be as relevant to you.
Personalize advertising
These cookies are used to enable Adobe and our partners to serve ads more relevant to your interests. Without them you will still see ads, but they might not be as relevant to you.