Keyboard shortcuts are the most efficient way to quickly edit your films and save time in the process.
Use your arrow keys to quickly toggle through your clips, as well as shortcuts for fast forward and reverse to go through the footage quickly and find the best moments.
You can then cut your clip in a few different ways.
The most fundamental and basic way inside of Premiere Pro is by pressing C or using the Razor Tool in your Toolbar, along the left side panel.
But for an easier and quicker way to cut your clips as you're going through your selects, I have set the letter J to the Add Edit shortcut.
And once I cut the clip, press W, which is my shortcut for Ripple Delete, which simply deletes all the footage that I've cut previously.
You will then follow this process until you get to the end of all those clips, essentially pulling out all the best moments in a very efficient and quick way so we can dive into the edit as soon as possible.
Now let's move on to properly labeling and structuring your clips even more.
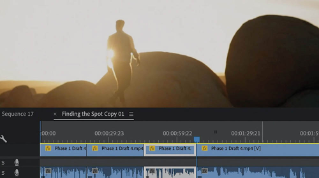
When it comes to labeling and color coding clips, it's simply a preference.
I like to do this so that I can label my favorite moments once I go through the selects and then drag those clips that are labeled for different scenes above my Timeline, so when I'm scrubbing through the Timeline, I can see them a little bit more quickly.
You can then also add markers and Chapter Markers to your Timeline by going to Marker and scroll to Add Marker, or by pressing M and double-clicking into that marker to make specific notes on the scene or the section that you're referring to.
Once you feel good about your labels and your Chapter Markers, we are going to move on to the next section, all about Pancake Editing and a more efficient way to start editing those clips.
Once I've gone through and made my initial selects, I create another sequence with the exact same sequence settings, and I name this a draft cut or a rough cut and this is where we're going to actually start pulling those selects and building the film.
Open up both sequences and they will naturally open up side-by-side in tabs next to each other.
But we're all about efficiency and time-saving hacks, so what you're going to do is drag that draft cut and pull it down right below your select sequence until that purple line hovers on your Timeline.
Those sequences will now be stacked on top of each other rather than next to each other.
This method is a bit more advanced and doesn't always have to be implemented, but it is the most proficient way to easily build the early versions of your draft.
You will now go through your selects and just start dragging those moments that you want to bring into your cut from the select sequence above onto your now new draft or rough cut sequence.
This method of editing is known as Pancake Editing, and if you get really, really efficient at this, it will save you a ton of time with overwriting clips and just get into the process of actually editing your film much quicker.
This is really where I feel the creative juices start to flow, and your film and story begin to take shape.
In chapter four, we start to refine our rough cut and continue our editing process.
Let's move on.