Social Media Secrets: What It Takes to Make a Standout Video

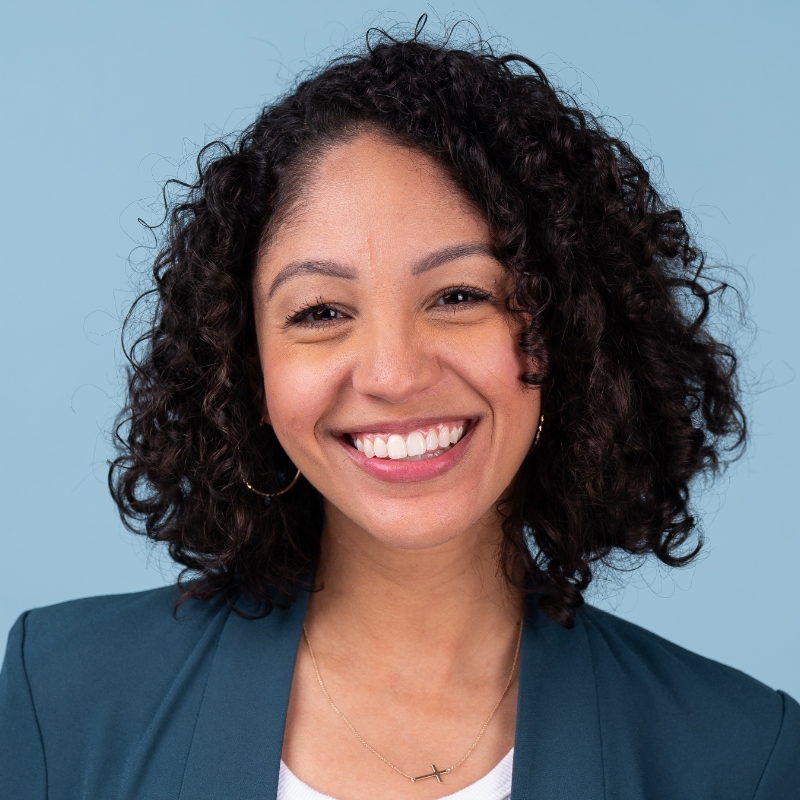
[Music] [Karina Anglada] Hello, everyone. I hope you are having a wonderful MAX so far. Thank you so much for attending my session. Also bonus points for being here early and day two. Appreciate you all. My name is Karina Anglada, and you are sitting in on Social Media Secrets, What It Takes to Make a Standout Video. This session is jampacked with creative strategies I've learned over many years. But before we get into the content, I want to share a little bit about myself. So I work with Adobe where I get to collaborate with video customers to help them optimize in their video workflows. And what you're seeing on screen is actually a small part of my role, which is doing a lot of virtual events, customer meetings, talking about our video tools like Premiere Pro, Frame.io, and all of the exciting things happening with Generative AI and Adobe Firefly. But prior to joining Adobe, I spent over 10 years as a producer and video editor creating all sorts of content, mostly in the sports industry. So I began my career working for the Detroit Pistons, that was my first big girl job. Then I moved to Auburn University where I worked in the athletics department. And most recently, I was working with the Golden State Warriors. And at each stop, I was responsible for producing and editing content not only for social media but for video boards, some documentary style content for television shows, and somehow all of it ended up on social media. So I want to stop on this photo of me. This is from when I worked at the Pistons, and you can see that it was definitely my rookie year because we had a shoot, it was outdoors, and I forgot my rain gear. Right? Very bad rookie mistake. And I had to be strategic with what I did and to protect the gear. And that's to find the nearest thing that would help me out and that was finding a trash bag. Now, why am I bringing this up in a session on social media? Because as frustrating as it is to have creative limitations and challenges which comes all the time with the content that we're working with, that is the beauty of creativity because some of my best career moments have been in those moments when I've been forced to iterate and think critically about how to solve an issue creatively. So if there's one tip that you take away from this session, it's that you already have what it takes to stand out on social. It's your ideas, your brain, your heart, and your art that will separate you from everyone else and help you make great content. And still, this session that you're here today will give you practical takeaways for how to take that content even further, and hopefully you don't have to do it while wearing a trash bag over your head. Right? So if you have questions throughout this session, jot them down in your phone or your notebook and we will try to leave some time at the end. Now as I was putting this session together, I wrote down a few of my biggest takeaways that I-- That are the most general ways to stand out on social. And the first is you want to hook your audience. Right? In the first three seconds, it's so important to capture the attention and to tell your viewers what they're watching from the start. Right? Social, you got to work smart and fast. The second tip that I have is that you want to think in thumbnails. So as you're working through your footage, what frame of video stops you in your tracks? What catches your eye? Think about your content as if it were a thumbnail that will tell the story. And the third is to identify what's relatable. A lot of times there might be issues on set or something happens where maybe something falls in the background or there's a funny moment or a doorbell rings. Those moments can actually set you apart and those might be really useful and play really well on social media. And the last tip that I have is to consider adding text, images, and sound effects to your content. Right? We'll get into some practical ways that you can do this in Premiere Pro, in After Effects, and with the help of some Adobe Firefly. So let's get right into it. The first thing we're going to talk about is how to work smart, not hard. And one of the ways you can do that in Premiere Pro is by leaning on something called project templates. So this is an example of what a project template looks like. So let's break it down. We have this graphic here and it's on v2. It's an overlay that I can toggle on and off. And what project templates do is they help you standardize and speed up your workflows from the start. But in this case, I also have this fully baked timeline ready for me to work with that has the overlay, a layer for me to replace with my content, and it also has these captions. So I can choose this subtle caption option with the black background and white text or I can toggle on the bold captions and get a sense of where I want my captions. Now this is really helpful and there are plenty of social media templates within Premiere. So Facebook, Instagram, TikTok, X, YouTube, all there, and they show you the different ways that your footage will appear. Right? So they show you these safe zones that you can work with. So here's an example of what your content might look like. And what's great is, with these project templates, you can see where the icons are for that specific platform, which is really great because each one has their own devices. They're left to their own devices. So here you can see where some of that content might be cut off. But you might say, "Well, hey, Karina, "like how do I find this if I've never used them before?" Well, if you're starting a project from scratch, you can click new project and here there are dropdowns that you can work with. So I was working with those social media templates, there's broadcast templates, there's standard templates, and you can also add and create your own. So if you have a project that you are working with and you're using and reusing common assets like graphics or logo bugs or lower thirds that you're going to repeat over and over, you can save that as your own template and customize that from the start. So that's project templates. It helps you standardize your workflow and it helps you identify where your content will play out on each platform. So super, super helpful. So let's jump over to the next thing I want to talk about, and I want to talk about the importance of trimming the excess on social. Now you could be like this guy who's trimming each blade of grass one by one, bit by bit, and while that's very detailed and very nice, ain't nobody got time to do all that. Right? So we are going to trim the excess together using some footage of an interview. So I'm going to jump over to my other sequence here, and I've got my interview with this woman named Lauren. Now I am in what's called my text based editing workspace. If you've never used that before, you would go to Window, Workspaces, Text Based Editing. And here it gives you this nice layout with your text on the left hand side, your text panel. Now, what is text based editing? It's exactly what it sounds like, you edit based on the text. It's a new way to edit that makes creating rough cuts and finding really key moments as simple as copying and paste. So if you've ever used commands like copy, cut, and paste in text document, you can text base edit. So let's take a listen. We've got our whole transcript here, and you might say, but wait a minute, okay, this is cool. Let's take a listen and play some of it. Here we go. [Lauren YS] My name is Lauren YS. I'm a muralist. I've been a muralist for 10 years, and I'm a twin. Okay. So the interview is going through. Right? It's following along on the timeline. I could also search for words, so she mentioned she's a muralist. So if I wanted to type the word mural, now it shows me in my transcript all of the times that she said mural, and I can jump to the specific words where she says mural. And notice on the timeline, it's also jumping to that exact frame where it is. But you'll say, "Okay, that's cool and all, "but, Karina, how did you get the transcription "in the first place?" Well, there's three ways that you can transcribe your media. I already did it. But if you are starting your project, on the Import panel, on the right hand side under Import settings, you can toggle on automatic transcription and this will give you the option to choose different languages based on what language your media is in. You can enable language auto detection. You can label the speakers. So if you have a producer who's off camera or you have two people that are being interviewed or more, you can label those speakers. And from here, you can set your transcription preferences. Right? So you can auto-transcribe all imported clips or just the clips in your sequence. So that's the first way that you can transcribe your media. The other way that you can do it is if you import a file. So let's go Import, let's go this, import this Coach Interview, and if I right click and click Transcribe, it's going to give me this dialog and it's going to ask me to transcribe, and there you see it's working on device. It tells me the progress, and by the way, it's not going to hiccup. I can still be working around, I can add markers, I can still be working on my project as that's transcribing in the background, so that is a huge time saver. The last way that you can set your transcription preferences is under Settings or Preferences, Transcription, and you can toggle on Automatically Transcribe Clips. All right. So we've decided we know how to transcribe. There's three different ways we can do it, but let's start working with our content here. So the last thing I want to mention about this text panel, and we see our full transcript is in the bottom right corner of the text panel, there's these transcript view options. When I click that, I can tell Premiere, hey, show me filler words. So words like um or ah. Show me markers. Show me the speakers, and show me pauses. And I can also set the pause length. So if I want to set my minimum pause length to 0.2 seconds because we're working quickly with social assets, I would click Save. And now when I hover over these ellipses, it shows me the length of the pause. Right? And it also shows me filler words are identified here in the script. So hover over these ellipses, this one's 0.6 seconds, this one's 1 second. Right? Anything that's above that 0.2 seconds that I set. So that's so nice because sometimes, depending on the content, you might want a dramatic pause if you're doing something a little bit more serious. But for social, we want to work fast and snappy. So what we're going to do, and by the way, I forgot to mention, I always forget to mention this. It's like my favorite thing. But you can also see the markers. Right? So when I click through my transcript and I scrub through, I can see my markers are visually represented too on my text panel. So if I hover over this white text, I can see that I added my marker, which was how she talked about her introduction to Adobe tools. If I click Collaboration, here I see purple, she's talking about collaboration. So you can imagine how useful this would be for an interview that's an hour long or longer. Right? So this is text based editing and a great way to visually work with your content. But like I said, we saw those pauses before and we're working with social media. So we want to cut the fat, we want to trim the excess, so let's batch delete all of those pauses right now. Next to the search bar, you can click this little icon and select pauses. Now it shows me all of the pauses throughout the interview that are highlighted and it gives me the numerical representation of those numbers. I can jump through them at any point. And if I want to-- Let's see here.

Click Delete and then Extract and Delete All.

Look at my timeline. All those pauses have been removed with a click of a button and now I see all of the cuts that are applied where those pauses were. So this is really useful and I can do the exact same thing, the exact same process with filler words. So if you have an interview with somebody that says um or ah a lot, I won't name any names, but I've listened to a lot of interviews with professional athletes and they say um a lot. So this is really handy. Right? You can click Filler Words, the exact same process, click Delete, Extract, Delete All, and those filler words are removed. So what was about a 17-ish minute interview is now 12.5 minutes. So we've cut down our time on working with this content. So text based editing and batch delete saves you a ton of time, and you can start looking through your media and just focusing on what was said. Right? Just focusing on the actual words of your content. So we've started working with our edit. We've batch deleted pauses and filler words, but I want to actually start building a rough cut. So I'm going to jump over to another sequence, and I'm actually going to pull up my multicam interview. So with multicam, what I've done ahead of time, and we won't get into the specifics of how to do it in this session for time purposes, but I've synced all three camera angles to be in one multicam sequence. Right? So I have all of these angles that I can work with. Now what I want to mention is I want to start building this edit. Okay? So we're going to search for her name because I remember she was introducing herself when I was listening through and skimming through this content. And I'm actually going to toggle off pauses and filler words for now because I just want to focus on the text. So I want to see where she mentioned-- "Hi. I'm Lauren. "I'm a muralist, and I've been a muralist for 10 years." Let's take a listen and see how that sounds. Hi. I'm Lauren YS. I'm a muralist. I've been a muralist for 10 years, and this is my work. Okay. So I'm going to switch to this medium shot, and I'm just going to select this text, and we're going to start building a rough cut together. So I selected this text, and because I have this toggled on, it's automatically going to set an in and out point for me, which I'll get to that in a second. But I'm going to insert this onto my timeline by either clicking this button in the text panel or I can press the comma key for it as a shortcut, and that gets added to my timeline. From here, I remember she said something about street art. Right? She's a muralist, so I see there's three results where she said street art, and here it is. I was always a fan of street art. I'd never seen anyone do a mural before. So I'm actually going to take this sound bite, we're going to switch this to this tight shot, I'm going to press the comma key, add that to my timeline, and now for this next part where she says, "But I always loved large scale work "and I thought it was the coolest thing on the planet," I'll select that text and I'll go with the super wide shot there because she's talking about large scale work. I want to see that. And so I'm going to press comma, and I'm going to keep building my edit. So I remember she also, during her interview, said something about when she painted her first mural. So we're going to switch angles again. And she said, "They gave me a box of spray paint and I just faked it." Right? So we'll add that to our timeline. Let's see. Let me go one more time. Here we go. There it is. I'll switch angles, she says, "And painted my first mural. "It was obviously not my best piece." Add that. Switch the angle again. "But from then, I got addicted to it." Right? So you see how quickly I started building this rough cut, but let's see how I actually did on the edit. Let's see if I made any mistakes. Let's play it. Hi. I'm Lauren YS. I'm a muralist. I've been a muralist for 10 years, and this is my work. I was always a fan of street art. I'd never seen anyone doing a mural before, but I always loved large scale work and thought it was the coolest thing on the planet. They gave me a box of spray paint to use, and I just faked it and painted my first mural. It was obviously not my best piece. But from there on, I just got addicted to it. Hi. I'm-- All right. So pretty, pretty good. Not bad. Right? But you'll notice as I'm playing the sequence here, now in my text panel, I see my sequence transcript. Now the reason this is, if I click back in my source, right, that multicam or click anywhere in my source, now I see my source transcript. So that's the entire full interview. The reason this is, is because at the bottom of the text panel, there's something called follow active monitor. So when I check that on, now if I click in my timeline, watch where I click, it's going to give me my sequence transcript now. But any time I click in my source or the source window, it takes me to my source transcript. So this is a great way to keep track of everything, right, to make sure that any changes are nondestructive to your source media. That will always be there. So this is one way that you can build your edit with multicam using text based editing. Right? But like I mentioned before, I said if you could text based edit, you could use things like copy, cut, and paste, but I haven't done that yet. So let's say I'm working through this and you know what? I like when she says I just faked it, but I don't know. That doesn't do her justice. Her work is just so beautiful. So I'm actually going to completely get rid of this line. "They gave me a box of spray paint to use, and I just--" Let's get rid of sort of faked it, and let's see if it picks up and painted my first mural. So I'm going to select sort of faked it. And watch on my timeline, it marked an in and out point of what I selected. So when I click delete, that gets cut from my timeline. And if I select anything else, so maybe I want to move this first sound bite instead of cutting it, I don't want to necessarily cut it. I want to move it to another place in my timeline. Because remember, I said at the beginning, the first three seconds of your content is very important. And while I like that she introduces herself and she says that she's a muralist, if you don't know who she is, you're like, "What am I watching?" So I actually want the first part of my story to be that "I was always a fan of street art." So I'm going to select this first sound bite, I'm going to cut it, I'm going to move it to the end of my timeline and press paste. And now you see I've started to rework my edit in a really nice way. So now let's see what it sounds like. I was always a fan of street art. I'd never seen anyone doing a mural before, but I always loved large scale work and thought it was the coolest thing on the planet. And they gave me a box of spray paint to use, and I just painted my first mural. It was obviously not my best piece. But from there on, I just got addicted to it. Hi. I'm Lauren YS. I'm a muralist. I've been a muralist for 10 years, and this is my work.

So it kind of works. And you can see how quickly you can start iterating and getting different versions and trying different sound bites. I did that all the time. I'm a Libra. I'm very indecisive. So a lot of times, I'm like, "Well, let me try this way. "Maybe if this sound bite, maybe that'll sound better." Right? With text based editing, I wish I had that when I was working with the sports organizations because that would have saved so much time. Right? And the other thing that's cool is, for those of you who are a little more advanced editing, a lot of times you might have to do something called frankinviting. Where you might take another word and add it to another part of the interview so that it sounds a little bit more smooth. Well, you can do that with text based editing. You can search for all the times she said "the." Right? So if she pronounced "the" low and it worked with another piece, there's so many ways that you can use text based editing to your advantage. So that's text based editing in a nutshell. What I want to do next is I want to create captions. So one of the things that is really important when you are working with your content is you want to improve your content accessibility. Now this is important for a variety of reasons. Number one, maybe you might have people that are hard of hearing or maybe you're like myself and sometimes you get a little overwhelmed with all of the social content, and you're like, "I just want to watch things on mute. "I want things to be quiet, and I want to read captions." So content accessibility is really important. And a great way that you can improve your content accessibility is by adding captions. So let's add captions to this edit that we are in progress on. In the text panel, we were in the transcript panel here, but I'm just going to jump over to captions. And from here, I'll click this button, Create Captions from transcript, and it gives me this dialog where I can set my preferences. Here I have different caption styles that I've saved from previous projects, but I'm going to use the default caption for now. So I'm going to select None. I can set my maximum length in characters, the minimum duration in seconds, and I can also choose if I want single or double lines. I'm going to choose single lines because she had like a nice natural cadence. And I'm going to click single and create captions, and boom. That's the power of speech to text. Y'all, I clicked how many times? Maybe three? Like this is absolutely incredible. Like now I can see my subtitles on the captions track, and I've got all my captions here. And by the way, if you do need to edit them, you can at any point. Right? If there's happen to be a misspelling or maybe there's a proper name that needs to be adjusted, you can make those adjustments. But I like this white font, but it's hard to see. Right? So I'm going to double click my captions and I want to adjust it here. So when I double click it, it takes me to the Properties panel. And I'm just going to adjust my text. So let's choose another font. That one is pretty good. And I'm going to change the color. White is cool, but maybe we can use the color picker and maybe we can-- It wants to record. Maybe we want to choose something off of the mural and we want to maybe have this yellow. I think I'm going to choose a bright neon green, maybe a little more yellowy green, and click okay. So I've made these adjustments and I could also, if I want to, I can move them around. But let's say I like this text. Right? And you can change all sorts of settings. I just changed the color and the font. You can do the size. You can change the placement. We'll get into that in a little bit. But when I click Off, all the rest of my captions are that original track style. Right? That's no problem because under Properties, under Track Style, there's a button here that you can click called Redefine Style. And when I click it, I can redefine the style that I just made to all the captions on my track. And when I do that and I press Okay, now I have all of those consistent captions on my timeline. What's great about this is you can also save this track style for future use. So if I click this plus sign and click create style, I can name it lime green yellow captions bottom. Right? And I can save it to my project and it also can save it to local styles. And there it is. So there's all my track styles that are ready for me to work with. So that's a quick way that we not only created captions, but we customize them and then we also save them for future use. So we are moving along and building our edit together. So that brings me to my next point, which we want to upgrade our audio. Now hopefully, y'all weren't in the club in Miami last night, but if you were, hopefully your ears aren't damaged. Right? Audio is so important to video editing. I would argue even more important than the visuals at times. Right? So one of the things that I love about working with audio is that you can be so creative with it. And I think a lot of times we forget that you can do a little bit extra. So we're going to walk through some ways that you can improve your audio. Now the first way is by using something called Enhanced Speech. Now in the interview with Lauren that we saw before, it was that nice clean audio. You heard the microphones. But there's plenty of situations that I've been in where ish happens. Right? You're on set and maybe a mic failed. Or maybe it was not plugged in all the way, for whatever reason, something happened on set. Or maybe all you had was your onboard camera mic because of the situation you were in. Right? I mentioned that my background was working in sports. A lot of times, you were just running and gunning and capturing whatever you could. If there was a big moment after a game and you wanted to mic up a coach, that's probably not going to happen because the way things work. So using Enhanced Speech to the rescue. Now let's play this audio. This is actually the camera, the internal camera mic. Let's take a listen and see what it sounds like first. Collaboration is one of the coolest things that you get to engage in as a muralist. So it's like its own-- I see some people laughing. Yeah. That's not great. Right? So if I want to enhance this speech, I'm going to click this little icon on my audio track. It's a person speaking. And what it's going to do is that took me straight to Essential Sound. Now why is this important? Because it auto tagged my audio as a piece of dialog. And because it's a piece of dialog, it takes me to Essential Sound and I see these commonly used presets for dialog. So maybe I want to make it sound like she's in a large room or a small room or make it distant or close-up. Now from here, I'm going to click Enhance, and it's going to process. And what Enhanced Speech does is it makes voice recordings or dialog sound like it was recorded in a professional studio, and it will remove the background noise and the echo. And there's also a mix amount slider where you can control the enhancement of the audio that you just generated. So let's take a listen now. Collaboration is one of the coolest things that you get to engage in as a muralist. So it's like its own language, you know? I went to Japan and went and painted in a warehouse with a bunch of amazing Japanese artists. Don't speak English. I don't speak Japanese. But when you paint together, you're communicating with each other. So let's take a listen to what it sounded like before, and I'm going to set my mix amount all the way to zero and then slowly bring it up so you can hear the difference. Collaboration is one of the coolest things that you get to engage in as a muralist. So it's like its own language, you know? I went to Japan-- So that's the amazing power of Enhanced Speech. It is such-- I wish I had this so many times. There were so many shoots that I'm like, that would have been nice to have a lot of times. All right. So moving on. We've fast forwarded in time and suddenly we are brilliant editors and we've got a timeline that we are in progress on. So I've got my rough draft here. I'm working slowly but surely. And one of the things that I want to address is sound effects. Right? Like there's these moments here where she's working with her spray paint and I love this camera trickery of making it seem like she spray painted the camera. But one of the things and I'm going to mute our music track for now, is when I play it, it's just blah on its own. It was obviously not my best piece. They gave me a box of spray paint to use and I just faked it. I just got addicted to it. So I added in, you can hear some of the spray paint can here, just some gnat sound that I had. But I want to spray paint sound effect. I want to bring it to life to make it seem like we're right there in front of the camera. So one of the things that I'm going to do in Essential Sound, I can click browse, and here there's all my Adobe Stock music, but now we also have sound effects. So you can search for sound effects directly in Premiere Pro. Here are all the different categories that you can choose from. There's free and premium options. So I'm just going to actually type in spray paint.

And here is an option, so let's take a listen.

So that's actually going to be perfect. So I'm going to scroll down, see my audio here, and I'm just going to drag and drop this on. And here we see that she's spray painting it on. Let's add a cut here and just match it up, maybe let's adjust it a little bit. And I actually want to do the same thing with the other piece where you can't really see that she's spraying, but it looks like something's there. And the other thing that I want to do, and I'll make this bigger for all of us, is I want to add a fade. Right? And so I'll just select this little fade handle and I'll just slowly I can bring it up or down, and now I can see I can make this fade there. I can make my adjustments. I can fade it out there so it has a nice smooth one. And let's do the same thing with the other one. Right? Let's just fade it out so that it doesn't come on or off super dramatically. It's spray paint sound effects, so it'll sound smooth. Now let's take a listen what it sounds like now.

Let's go back here. They gave me a box of spray paint to use and I just faked it. I just got addicted to it. Right. So let me bring that up real quick. Let's set it to zero. Now you see that it's sounding like you're there. It's sounding like it's more authentic. It's not just video with some audio and some dialog. It's bringing everything to life. Now the last thing that I want to call out is I've got my music track here. Again, it's pretty long. You may have used this. It's called the remix feature. It is such a time saver and I wish I had it all the time, especially when I was doing long form documentary work because a lot of times, as you're building your edits, sometimes the timing changes or a producer says, hey, can we cut one minute out of this section? And you're like, no, I got to reedit all the music. Remix tool to the rescue. So I'm going to click the little music icon, and that'll take me again straight to Essential Sound. And from here, there's those commonly used presets, but this time for music, and I'm going to remix this song to 30 seconds. So when I remix the song, it's analyzing the clip and it's using AI and powered by Adobe Sensei to now remix that track. And on my timeline, these squiggly lines represent the cuts that it made to the song. So we had our long song. You saw how long it was. It was well past my content. Now it's at that 30-second mark because I used AI audio tagging to take me straight to Essential Sound. I used the Remix tool. And by the way, if I wanted to, I can make my adjustments. Right? I can remix it again and do whatever I want, whatever I need just to get that remixed audio. Let's take the music off mute and let's see how the piece is starting to feel now. I was always a fan of street art. I'd never seen anyone doing a mural before, but I always loved large scale work and thought it was coolest thing on the planet. My first mural was obviously not my best piece. They gave me a box of spray paint to use and I just faked it. I just got addicted to it.

I feel like a nap! Hi, I'm Lauren YS. I'm muralist. I've been a muralist for 10 years, and this is my work.

I grew up in Denver, Colorado, and I was-- So that fade actually works really nicely because even though it blends a little bit into the next shot, it sets everything up. It sets our piece up. We've got almost like a little bit of a teaser before we get into the longer content of her story. So if I really wanted to, I could take that section and make that its own section as a promotional piece or publish it on different platforms as a way to get her story out there on social content. So we worked with audio using Enhanced Speech, and we learned about audio, auto tagging, and we used some free sound effects within Premiere Pro. But now we want to reformat our content. Right? So the important thing about working on social is that you got to work quickly. And so we want to reformat our content quickly. I don't know about y'all, but I've gotten a few requests where the deadline was yesterday. But it's today. Right? So we want to reformat our content very quickly. And one of the ways that we can do that is by using something called auto reframe. So again, we fast-forwarded a little bit in our project. Right? I see I've got my larger captions here. We're starting to build the edit that we are working with. Now if I wanted to do this before auto reframe, what I could do is I could go to my auto reframe, I could duplicate my sequence, then I could go to my copy and then go to my Sequence Settings and then I could go change these to 1080x1080. Okay. Press Okay. It's going to change everything. Okay. Now I started to do it, but dang it, now she's cut off there. Okay. Let me just go to my effects. I can type in the auto reframe effect.

This is taking a lot of time. This video is only 30 seconds, but imagine me doing that for every single clip. Ain't nobody got time for that. Okay? Ain't nobody got time. So we're going to go back to our 16x9 video. And what we're going to do, because we want to reformat our content quickly, is we're going to right click our sequence and click Auto Reframe Sequence. And when I click Auto Reframe Sequence, it's going to give me these different target aspect ratios that I can choose from. So I can choose square version, vertical, 9x16. For now, I'm going to choose vertical, 9x16. And I can also set my motion tracking. Right? So depending on the content, how quickly it's moving, I can set it to slower motion. Maybe if it's some sport content, a little bit faster. I'm going to set it to default. And what auto reframe will do is it's going to duplicate my sequence into the different aspect ratio that I select, and it's going to apply that auto reframe effect to all the clips in the sequence. So you saw that auto reframe effect that I applied. It's going to do that for me now. So I'm going to click Create, and bam, there it is, 9x16. You saw it move over. It was working auto reframe in the background. And now I have my auto reframed content that's ready for me to work with. Now I could repeat that process as many times as I want. So let's do it again. I'm going to auto reframe sequence because I just got word that they need a 1x1 version and they want it to be a post, right, on Instagram. So I'm going to change it to square 1x1, click Create, and notice that even though it was reframed to 9x16 vertical, the captions even got bigger with the 1x1 as well. So let's do it one more time for good measure because, again, somebody came in and said, "Hey, we need a 4x5 version." So change it to vertical 4x5, and now you see how quickly I've been able to reformat my content for multiple platforms for me to work with. And again, if I want to make any adjustments, for example, here. Right? Maybe I like the framing. She's in the frame. But if I want to make an adjustment, I can go to my effect controls, and I can go to my reframe offset, and I can still move her around. So you're not tied. You're not locked to whatever auto reframe gives you. You can make subtle adjustments or maybe you want some artistic decision making. And maybe you want to show half her face and have something behind her. Maybe you want to animate some text behind her. You can still customize everything even working with effects controls with auto reframe. So that's auto reframe in a nutshell. Let's keep moving forward.

So the other thing that I want to do is I want to show you some really cool ways that you can use Adobe Firefly with video. So this is how it stands today. You saw some exciting sneaks at the Keynote yesterday. That's not in the latest version of Premiere Pro yet. But you can see where we're going and this is something that you can do today. So let's pretend I'm working with a client. And the client came back and they said, "We love this shot, "but, these things "in the front of the video of the interview "are very distracting. "Right? "There's what looks to be like a bounce card, "a blanket, maybe a scrim on the side," and they're like, "Can we get rid of that?" Now lazy me, previous me, would click this and be like, "Yeah, we can remove it. "Let me just scale in. "It's removed." Right? But let's be honest, she's a muralist. I could, right, move it over, but it totally changes the intention of the shot. Right? It changes the feeling of the shot too. So what I'm going to do is I'm actually going to lean on Firefly and Photoshop to help me maintain this shot while still removing some of those objects. So I'm going to click Export Frame here. And what this is going to do is going to ask me to name it. I'll say remove object, Lauren floor. Right? And it's going to import into my project when I click okay. So I'm going to click Project here. Let's go, let's find it. Let's see. There it is. Remove object, Lauren floor. So I'm going to right click, and I'm going to edit it in Photoshop. And from here, it takes me to that frame that I just selected. So if I want to, I can use the selection brush tool and I can start selecting these objects. Right? So I can select this guy. I can select the blanket here. Notice how my brush size is pretty big, but that's okay. And I didn't do a perfect job. I'm using a trackpad by the way, and not on a mouse here. But in my contextual taskbar, I can click Generative Fill, and it's going to ask, what would you like to generate? I'm going to leave it blank and press enter. So now, Photoshop powered by Adobe Firefly and Generative AI is going to remove those objects that I selected. Now I have different variations, and look at the detail. Let's zoom in here real quick. I mean, it maintained this line here on the floor, this yellow line. If I want to, I can look at the different variations and choose my favorite. I think I'm going to go with the first one here. And I can iterate as many times as I want. Right? If I don't like those variations, I can repeat the process that I just did. But I'm going to click Save, Export, Quick Export as PNG, and we're going to save this in our folder. So Social Media Secrets, let's just call it that folder. We're going to remember where we save it. And I'm going to import that and we're going to find that object. Here it is. And we're going to import that. So there's the objects that are removed. I'm going to bring that onto my v2 and there's our image. Right? But where's the video? She's not moving. So what we're going to do is we are going to mask her out. Right? So I'm going to go to my effects controls here and I'm just going to mark around her. Now there's a lot of ways that you can do this. You can do this the opposite. You can select the opposite of where she is. She doesn't move around a ton, which is nice. But you'll say, "Okay, wait, Karina, but the objects are still there. "What are you doing?" Well, I have to invert this. So now and I can move the mask around. Now you see and I can make some adjustments. Right? Now you see what I'm doing. Now those objects have been removed, and now this is starting to look like exactly what the person, the client that I'm working for asked for while still maintaining that shot. So I removed those distracting objects, just a few of them. Now the reason that this works is because it's locked down shot on a tripod. Right? If you don't have a locked down shot, everything is going to be moving around it. Right? Because it's locked down, you can choose those still objects. There's not light affecting anything. And as you can see, right, I moved around her arms, so it's a little bit of post production trickery. So that's generative fill in Photoshop with video. All right? So the other thing that I want to talk about, and we saw it in the Keynote yesterday, is we want to elevate key moments or important moments in the video. And for Lauren's story, she talks about growing up in Denver. She talks about splitting time between her grandparents in Hawaii, and I thought it was a really key moment in the video. But I don't necessarily have footage of Hawaii. And I could find assets on maybe Adobe Stock or some drone footage, but I want to be a little more creative with that. So I'm actually going to rely on generative video in Firefly. Now before I show you what I decided to do with the piece on Lauren, I want to show you some of the really cool ways that one of my colleagues, Byron in the UK, is using generative video. So he painted this. It's a watercolor art of his. And he took that into Firefly, and he generated video off of this still and turned it into this incredible piece of video content. And look at all the different iterations of what he did. This cute little dino. Are you kidding me? This is so cool. You can imagine the possibilities and the new ways that you can story tell in a different way than before. Right? Again, this is imagery that stemmed from his art, which is absolutely spectacular. There's these other outputs, there's these little cute monsters, and you might be wondering, "Okay, Karina, yeah, that's so fluffy and cute, "but I'm not actually going to use this in my video. "Right? "Like what does this have to do with my content?" Well, there's so many possibilities for using generative video. I'm just going to quickly scrub through some of them. Right? There's again, these animated cute characters. But think about using product shots. Right? B-roll filler, filling in moments that you just need some temporary assets. Right? Or maybe tell a story visually through text in a different way or using elements as ways to stylize your content. Right? Like these are assets that you can be very specific on. And I'm just scrubbing through all of this content here, but these are just some of the ideas that you can have. And I want you to get your phone out because there is a wait list, and I want you to get on that wait list because all of y'all are here bright and early at Adobe MAX. But generative video is now in beta. And again, it's powered by Adobe Firefly, and it's designed to be commercially safe. And this lets you take video clips to communicate your creative ideas, to take your content to the next level, and make new elements. All right. So that's generative video, but let's take a look at what I decided to do with my content. So again, I told you she mentioned growing up in Hawaii. Here's what I came up with. I grew up in Denver, Colorado with a family, a single mom. My mom was a flight attendant and my dad was a pilot, so I think that's where my love of travel comes from. I grew up half time in Hawaii on the islands with my grandparents, so I sort of go between the mountains and the islands.

Right. So I decided to take the idea of her visiting Hawaii and the art and her work and her craft, and I put it together using some B-roll filler here. But you might also wonder, okay, I also mentioned that I could potentially use it for content to fill in. Right? Elemental stylized content. So this is another thing that I created, this paint graphic. And you might be like, "Well, that's cool. "But I want to turn this into an actual end card." So I'm actually leaning on something called dynamic link. So I'm going to jump over to After Effects. And this is the same piece of content that I had. Right? So I've got my bottom layer and I duplicated the top layer, and I'm going to use something called roto brush to essentially select this pink paint to come off. Right? Because I want to use it as a transition effect and a way to use an end card. So I'm going to try to do this quickly as I can because we have only so much time left. So I'm going to double-click that top layer. And what roto brush does is it's going to select what I use here. So I'm going to select the paint and I can clean the lines up ever so slightly. Right? I can make some adjustments here. I'm going to clean up some of the black. It recognized some of this. Now this is a tricky piece of content because again the different colors is kind of recognizing different moments. And so I'm going to let it go and roto brush is going to work. Right? You'll see it's following the line of this. And again, this is live. It's not going to be perfect. It's a work in progress. But there's also this teal here. So I'm going to deselect that and let's come back a few once before it starts. I'm going to start here, select that. See, it's starting to do that. And what roto brush tool is doing, you can see it, it followed that corner and it followed the paint edge. Right? So this is the incredible power of roto brush. It's selecting the layers that I'm working with, and now I have an option to turn this into a really cool end card. So I'm going to go back to my composition here, and you'll say, "Hey, wait a minute. "I don't see the text that you're talking about." Well, that's because my text is on the bottom here and it's toggled off. So let's bring it up underneath the top layer and below or above rather, that background layer, and now I don't want the title to come on until after the paint rolls. Right? So we want this to be maybe a transition, and then there it comes on. But you'll say, "Wait, it doesn't reveal the whole thing?" That's no problem. I can just go to the point where it settles here, and I'm just going to add a keyframe here, and I'm just going to quickly go whoop, and it's going to come off. Right? So you see what I'm doing here. Now I could have this other layer behind and I could maybe add a solid so that this comes on. Let's do that. Let's add that to the bottom. And then let's have it after it rolls on. Let's have it come on right about there. Right. Again, work in progress, but you're starting to see now I have this end card ready for me to work with. And now when I go back to Premiere, because it's connected to by dynamic link, when I go here, I see those changes that are adjusted on my timeline in Premiere Pro. So Premiere Pro and After Effects are talking to one another. And let's say I want to make a change for some reason. Let's say I want to change the text to a different color, for example, or maybe I want the word "the" to be a little bigger. Let's just change the color for now so you can see the example, and let's make it bigger. So now when I go back to Premiere, I can see those changes really quickly. So that is the power of dynamic link and being able to work quickly and make changes using the power of After Effects and roto brush 3. And now we're at the point where we want to start delivering our content. So we want to accelerate the delivery process because I know that when you're at the finish line, it's like a relief. But it's also you're exhausted, so you want to get it done as quickly as possible. So we are going to take this piece of content, and what we could do is, we could-- Let me go back to my auto reframed content real quick. By the way, I forgot to mention this. This is what it would look like in, with my project template with that graphic overlay, right, before I export. But if I'm ready to export, I can just toggle it off so I can see where everything is. So if we wanted to export this, I could go to my Review panel and send it to Frame.io for me to collaborate with other people so I could directly upload this sequence from my timeline and click Upload, Active Sequence, and I can set my different settings. Right? And I can even set markers. So if I wanted to add a marker as a comment and say, "Hey, what do you think about this section?" Right? And when I click okay, when I click Upload, Active Sequence, I can check this export markers as comments, and it will upload that marker as a comment. So just like After Effects and Premiere were talking to each other, Frame and Premiere are talking to each other as well. And by the way, if I wanted to share any assets, I could just share directly from the Review panel, and I could copy this link and share it for review or I could share a presentation link if I want it to have a little more custom branding look a little bit nicer. And here with presentation, you can also enable downloads and password protect it. You can do all sorts of fun stuff. So that's one way to share and collaborate with others really easily. But the last thing we want to do is we want to export it. Right? So I'm going to go to my Export panel, and let me go find my 9x16 edit here. Let's go.

This guy.

Let's see. Let's do this one. So if I want to export this version, I'll go to export. And from here, I can toggle on which platforms I want to export to. So this is my 16x9 version. If I want to upload to YouTube, I'm logged into my YouTube account, and this is a huge time saver because I can set my playlist, I can add my title, quickly add my description right here from the Export panel in Premiere Pro. But if you're paranoid like me, you can also set your privacy settings. Right? So you can set it to public, you can set it to unlisted, you can set it to private. So you have those controls, and you can also set your custom thumbnail. Right? So maybe you want to have this thumbnail here or you could use different ones. Now the same thing applies for the other social platforms. Now this isn't a 9x16 video for TikTok, which obviously would perform better, but let's pretend it is. Right? Same things apply. You could-- you put it as a post or a draft. You could set your caption here, so learn about Lauren's story.

And from here, same thing as before, you can use the current frame to set the cover image. You can also check if you want to allow comments, if you want to allow duets and stitches, which is so great. And you can use these to publish your content much more smoothly at the end of the day. So we're going to go back. And the last thing that I want to mention, the most important thing that you need to do when you're making social content is to have fun and to experiment. And I would love to connect with you, so I'll put this up for a second, and you all can connect with me. I would love to hear about the video content that you're creating. I would love to see the content you're creating. I would love to stay in touch. And don't forget to fill out the survey. I hope you have an incredible, incredible Adobe MAX. Thank you so much for attending my session, and have a great rest of your day.

[Music]

In-Person On-Demand Session

Social Media Secrets: What It Takes to Make a Standout Video - S6607

Sign in
ON DEMAND

Closed captions in English can be accessed in the video player.

Share this page

Speakers

Featured Products

Session Resources

No resources available for this session

About the Session

Unlock the secrets to creating eye-catching video content that captivates your audience on social media. Join Karina Anglada, an award-winning editor, producer, and strategic business executive, to learn quick and effective techniques to produce engaging videos that stand out in a crowded digital landscape. Discover practical tips, creative strategies, and the latest tools to elevate your brand’s video presence and drive meaningful engagement.

In this session, you’ll learn how to:

  • Use Adobe Premiere Pro and After Effects to create unique social content
  • Utilize powerful features that will take your content from basic to phenomenal
  • Be more organized to whip out content quickly
  • Capture viewers eyes quickly and make them subscribe for more content
  • Collaborate and share your work with key stakeholders
  • Output projects best suited for social media

Technical Level: Beginner

Category: How To

Track: Video, Audio, and Motion

Audience: Graphic Designer, Social Media Content Creator

This content is copyrighted by Adobe Inc. Any recording and posting of this content is strictly prohibited.


By accessing resources linked on this page ("Session Resources"), you agree that 1. Resources are Sample Files per our Terms of Use and 2. you will use Session Resources solely as directed by the applicable speaker.

Not sure which apps are best for you?

Take a minute. We’ll help you figure it out.