Photography (20 GB)
NZ$ 19.32/mo incl GST
Get Lightroom, Lightroom Classic and Photoshop on desktop and iPad.
Learn more
From clear blue skies to dramatic sunsets, Adobe Photoshop Sky Replacement has all you need to make an image pop.
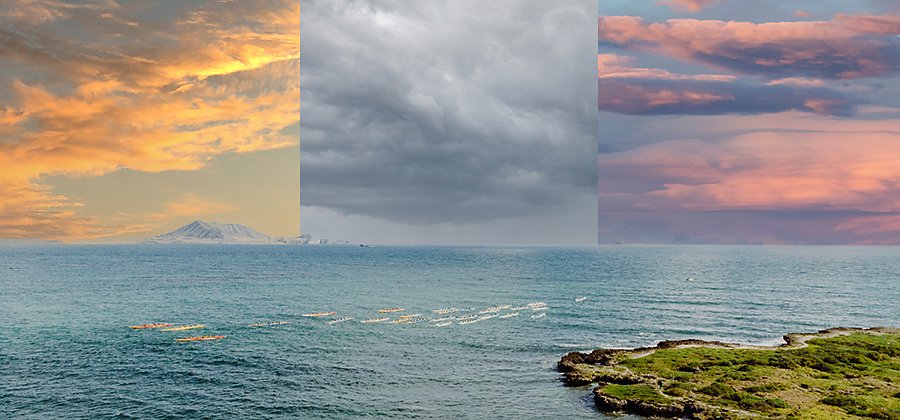
Don’t let a drab sky ruin near-perfect images. With Photoshop editing tools you can quickly adjust many aspects of your shots. Sky Replacement is a feature in Photoshop that helps you to enhance your images no matter what the weather was doing during your shoot.
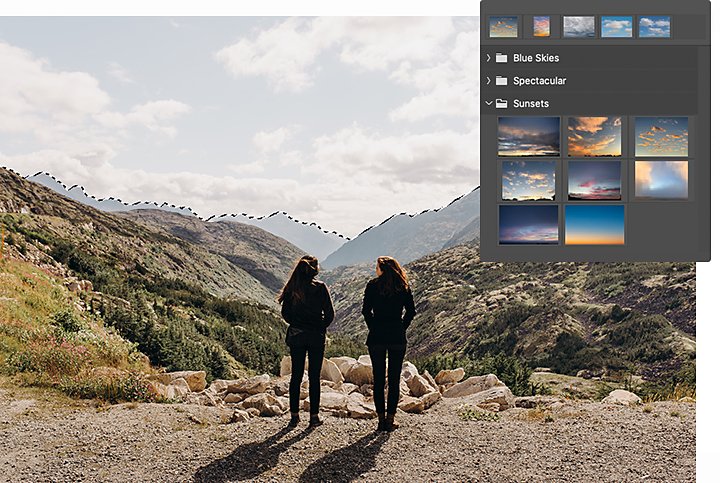
The Sky Replacement tool uses artificial intelligence-powered Adobe Sensei to insert a new sky in place of the sky in the original image. Thanks to Sky Replacement algorithms, Photoshop can analyse and recognise the current sky and then plug in a new one. Upgrade your original sky in three steps:
1. Go to Select and choose Sky from the drop-down menu.
2. Choose Edit › Sky Replacement.
3. Use the sky drop-down to select a new sky from one of the preset sky images.
Adobe Photoshop offers a collection of skies, organised in three categories: Blue Skies, Spectacular and Sunset. Blue Skies include daytime skies in solid blue or with clouds. Spectacular skies range from dramatic storm clouds and sunscapes to rainbows and a night sky. Sunset features yellow, orange, pink and red sunset hues.
You can also import and use your own sky image to replace the sky. To do this, click the down caret and then the plus sign — you can import any JPG or PNG image.
“The best thing about Sky Replacement is that everything remains editable via the traditional Photoshop workflow,” says photoshop expert Jesús Ramirez. “This is not like a filter where once you apply it, you’re stuck with it. You actually have a lot of control and all these controls eventually become a layer mask or adjustment layer.”
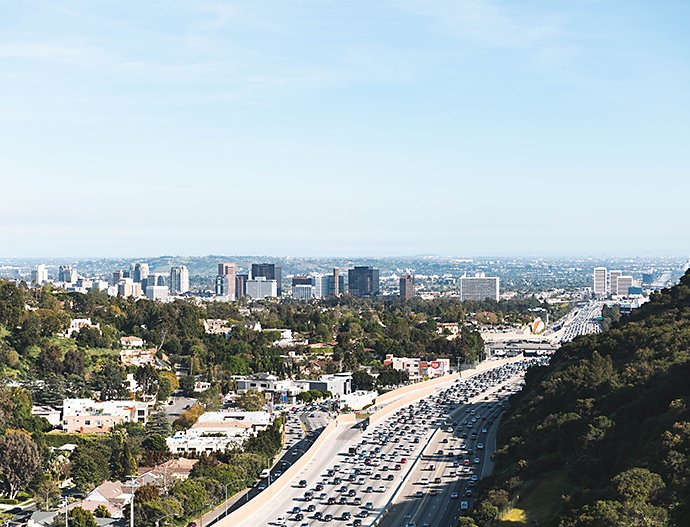
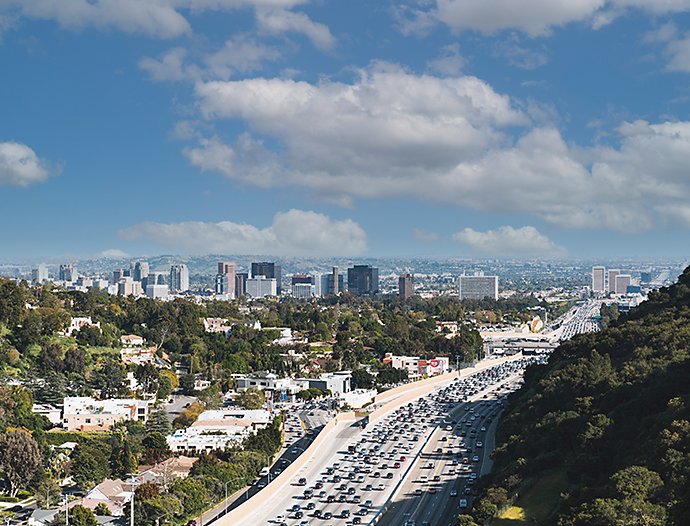
When you use Sky Replacement, you can control both the new sky (the background layer) and all the foreground elements (the original image). Finesse your new sky image with masking sliders, zoom and sky adjustments, then fine-tune your original image with foreground adjustments. Finally, perfect your new image as a whole by using a Colour Lookup adjustment layer.
Make edits to your photos first.
You might want to edit your photo prior to replacing your sky with Sky Replacement. It takes a few more steps to modify other elements of your original photo — like if you want to blur fruit on a background tree or amplify the scene’s colours.
1. Select and place key photo elements of your original photo on separate layers (like a tree, bench or bird) so you can edit them separately from your new sky.
2. In the menu, go to Edit and select the Sky tab.
3. Choose Edit › Sky Replacement.
4. Use the sky drop-down to select a new sky from one of the preset sky images.
5. Adjust the colours and intensity of the new sky as desired.
6. Use the Move tool to position the new sky image where you want it.
7. Output to new layers, not duplicate layers.
8. Adjust colour, gradient and sharpness as desired.
9. Turn your new photo into a smart object so the layers function as a single image.
Whether you’re just swapping the sky or modifying other elements in your photo, you’ll find the Sky Replacement tool makes larger photo manipulations like compositing simple. And you’ll end up with a dynamic, seamless image.
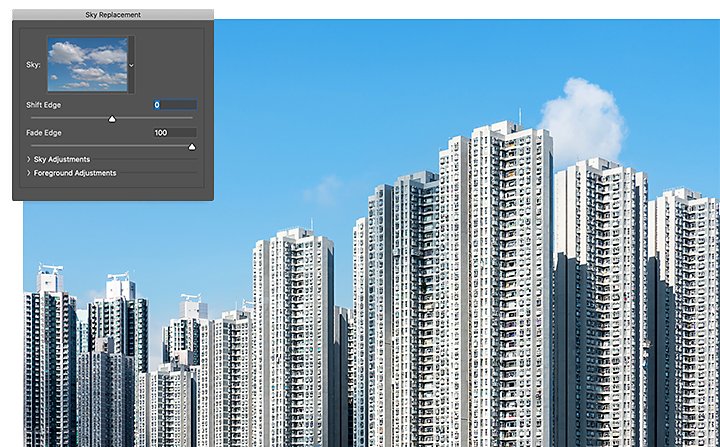
Masking sliders adjust the edges of the sky image.
Use the Shift Edge slider to create distance between the foreground image and the sky. Drag the slider to the right to zoom the layer in. Drag it to the left to extend the mask further away from the edge of the original image for a halo effect. You can make the sky sharp or blurry with the Fade Edge slider.
If the new sky doesn’t cover the background as well as you’d like or it bleeds over into the original image, just click Zoom and use the Brush tool to paint in (show more) or subtract from (hide) the new sky. You can also use the Move tool in the Sky Replacement window to control the position of the sky if it needs some realignment.
Set the mood with sky adjustments.
Make the sky brighter or darker with the Brightness slider. This becomes a brightness and contrast layer. To turn the sky warmer or cooler, use the Temperature slider. This becomes the colour balance adjustment layer.
The Scale slider lets you shrink or enlarge the sky image. You can also flip the sky horizontally to match the light direction of the foreground image. To do this, click the Flip tickbox.
Control your original image with foreground adjustments.
The Lighting mode drop-down is a regular pixelator that adjusts the brightness of the image. Select Multiply to darken and Screen to lighten. Use the Lighting adjustment slider to lighten or darken the background of the original image where it connects to the new sky so it blends with the new sky.
You can also create a curve adjustment layer to harmonise the colours with the Colour adjustment slider. It takes the colours from the new sky image and applies them to the original image in the foreground.
Whether your aim is a natural or surreal sky, Colour Lookup Adjustment will help you to match the sky to your image. “After replacing the sky, you can colour-grade your new image with a Colour Lookup adjustment layer,” says Ramirez. “This will help your foreground image look realistic with the sky look and feel you are going for.”
1. New Adjustment Layer › Colour Lookup.
2. Select 3DLUT in the file drop-down menu. To achieve a nighttime look, select either Moonlight.3DL or NightFromDay.CUBE.
3. Add a Hue and Saturation adjustment layer or use Curves to further refine your photo so you achieve the look you want.
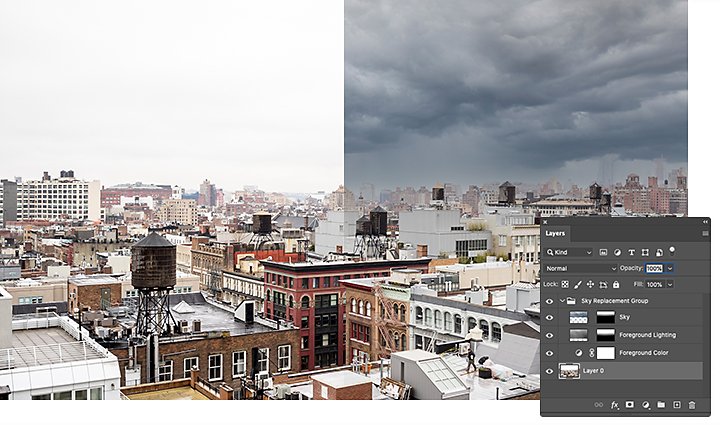
Save your image as New Layers.
When you’re satisfied with the changes you’ve made, it’s time to save your new image. Set your output to Output to New Layers to keep everything editable, then click OK. Photoshop will generate an adjustment layer for each of the adjustment options.
You can use Photoshop to replace the sky in video clips by transforming it into a smart object and then following the steps outlined above.
1. File › Open video.
2. From your Layers panel, right-click on your video and convert it into a Smart Object.
Your video will still play, but Photoshop won’t recognise it as a video layer — it recognises it as a photo layer. “For Sky Replacement to work with video,” Ramirez explains, “you need to have your video shot on a tripod because Photoshop can’t do motion tracking like Adobe After Effects or other applications.”
The sky’s the limit for creating a customised look and feel for your original images by photo editing with Sky Replacement. It’s an intuitive, easy and fun feature that gives you control over the weather that any photographer would love to have.
Create beautiful images with Photoshop brushes, Content-Aware Fill, Photo effects, Neural Filter, Sky replacement and the many tools photographers rely on.
Explore the Photoshop family of apps.
Take your photos anywhere in the world—without leaving home.
Explore the exciting world of storm and lightning photography.
Discover how to capture lightning strikes on camera and learn safety tips for photographing storms.
An introduction to portrait lighting.
Learn the basics of portrait lighting to bring your subject’s story to life.
Make your own photo filters with Adobe Photoshop Lightroom presets.
Discover how Presets give you all the options and style of photo filters and so much more.
NZ$ 19.32/mo incl GST
Get Lightroom, Lightroom Classic and Photoshop on desktop and iPad.
Learn more
Photography (20 GB)
Get Lightroom, Lightroom Classic and Photoshop on desktop and iPad. Learn more
NZ$ 19.32/mo incl GST
NZ$ 44.51/mo incl GST
Get Photoshop on desktop and iPad as part of Creative Cloud. Learn more
Adobe Photoshop Single App
Get Photoshop on desktop and iPad as part of Creative Cloud. Learn more
NZ$ 44.51/mo incl GST
NZ$ 112.36/mo incl GST
Get 20+ creative apps, including Photoshop on desktop and iPad.
See what's included | Learn more
All Apps
Get Photoshop on desktop and iPad, plus the entire collection of creative apps. Learn more
NZ$ 112.36/mo incl GST
Students and teachers
Save over 70% on the entire collection of Creative Cloud apps. Learn more
NZ$ 29.10/mo. incl. GST