Master Photoshop 2025: Exploring Features and Generative AI
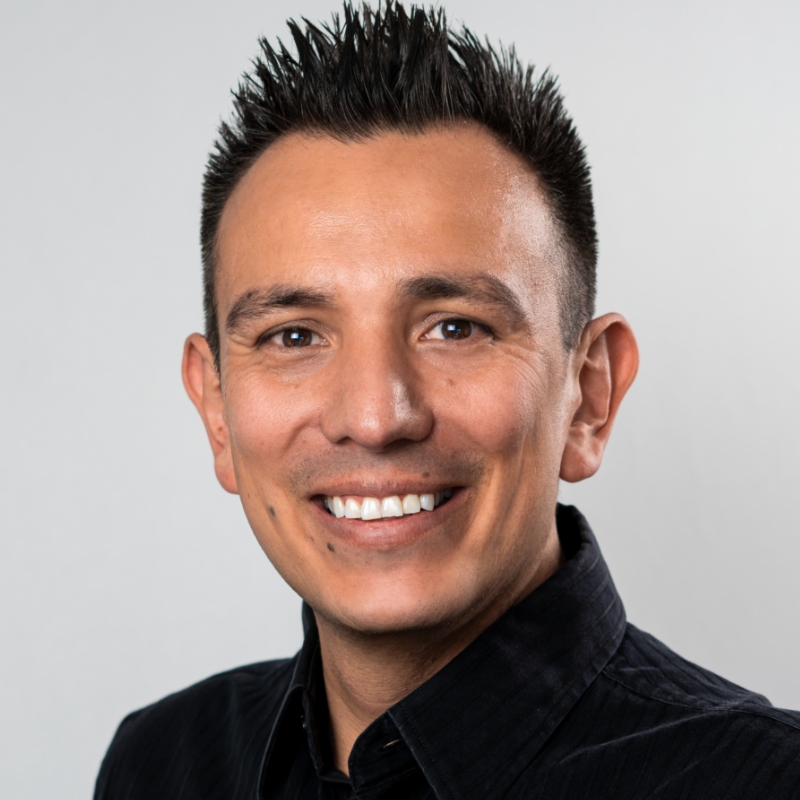
[Music] [Jesus Ramirez] Hey, everybody. Thank you so much for being here. This is Mastering Photoshop 2025 Exploring Features and Generative AI. Everybody in the right class? Awesome. And I've got to be careful not to fall off the stage. I didn't realize I didn't have that much room. My name is Jesus Ramirez. Thank you so much for being here with me.

I'm just going to quickly put up that slide while I'm talking so you can take a picture of it if you like. That QR code will get you to my website, social media accounts, email, and everything else. So if you have a question, you can always reach out through that QR code. I'm wondering, who here attended my session with my good friend Lisa Carney yesterday? Okay. A couple people. And then my session by myself right after that. Okay. Wow. Two classes. And then the one I just had like an hour ago. All right. Cool. So yeah. You guys should get a prize. I don't know what I could give you, but a handshake at least. That's amazing. Thank you so much for attending all my sessions. I'm very excited that you're here.

So yeah. So this session is all about-- The new feature's really about generative AI. And I just want to quickly show you guys what we're going to learn just because if you know those things, then this may not be the class for you. I'm not just going to talk specifically about the Remove Tool, Generative Fill, and Generative Workspace. What I'm going to do is I'm going to show you workflows with those tools. So I'll have several different examples of how those tools work. But mixed in there, there'll be a lot of techniques, workflows, keyboard shortcuts. For those of you that have seen me present before, you know that I'm going to be throwing out a lot of useful information, but that's primarily what we're going to talk about today.

I'm not going to spend too much talking about myself because of half the class already knows who I am and what I do. But just in case you don't, I've been a professional graphic artist for over 20 years. I've done design work for big companies like Adobe, Microsoft, Motorola, but most recently, I've been working in the Hollywood industry creating TV and movie posters. So those are the three latest ones that I've worked on.

So yeah. And I'm just going to quickly go through some of them, like I said, not that important. But I want you to realize that everything I'm going to show, you have-- I run it through the context of working in a professional environment like that, where my files need to be editable, everything needs to be modularized, and everything just needs to change if I need it to, which is why I always like to say AI is not replacing us. I use AI to help me in my workflow, not necessarily to replace it. I can't just tell AI, Firefly or whichever one give me a 'Hacks' movie poster or TV poster and generate it like that. Even if it did that good of a job, at the moment, it can't change certain things. For example, my client might want to change some-- Add a new shirt or change the positioning of her hand or maybe something much smaller, like remove the cable off that microphone that she's holding. AI at the moment can't really do that. I have to go in there manually instead of just typing a prompt. So I use AI to help me do the tasks that my clients require. So everything that I'm going to talk about today is in the context of that, but I'm also going to try to talk about all the new features and how they work. So I'm going to also spend some time talking about not just-- Here's the Remove Tool and you click and drag. It'll go through the options in the settings so that you guys understand what they're all about and how you can better utilize them in your workflows. So let's get started.

So yeah, the Remove Tool. I use it a lot in the movie posters that I work on. This is one of the ones that I was using, the old Remove Tool, not the Remove Tool that just came out yesterday. It actually has been in Beta for a couple months now. But the Remove Tool has some amazing, amazing features so I'm sure a lot of you guys have seen them on the show floor. So what I'm going to do now is come in here. And you guys saw me do this in the other session. For the ones that already have seen my other demos, I'm going to go through it quickly in case you haven't. But you can use the Remove Tool to remove distractions from images.

For example, I can click and drag. And if I wanted to remove that wrinkle off his jacket and it does a good job, if it doesn't do that good of a job, I can always use Generative Fill. I like to use the Remove Tool because it allows me to choose these different options here. We'll talk about finding distractions with a different image. But I have this option called Mode here on this drop down. It's auto by default. What that means is that Photoshop will decide if it's going to use generative AI or not. Why would you use generative AI? Well it gives you better results. Why wouldn't you use generative AI? Well that's because of two main reasons in my opinion at least. Number one is that if you leave generative AI off, you won't waste any generative credits. So every time you use a generative AI feature in Photoshop, you're wasting one, two, three, four depending on the feature, you're wasting those number of credits. So for example, if I were to generate...

I don't know, I did this in the last class, so that's why I have that prompt in my mind.

Oops. I actually did the wrong thing. I should have used the Selection Brush, also new in Photoshop by the way. In the last class, you guys saw me generate a parrot here and I'm only going to generate it to talk about generative AI and how it works, but I generated a green parrot. The generation really doesn't matter. What I want to talk about is generative credits. So at this moment...

Photoshop is going to give me three variations. So that's going to give me these three images. So I just used three generated credits from my monthly allowment. Where can you find your generative credits? Well, you can go to stock.adobe.com. You can click on your little picture there, and then you can see...

Whoops, it's not showing them. That is so weird. Well it was there just this morning, so I don't know if Adobe is changing something. I'll refresh the page just to be sure.

Yeah, it's free now. Yeah. I guess it's free now. Maybe they updated it and they just didn't tell us. But for those of you that were in my class with my friend Lisa Carney, we showed this and it showed up on there. So I'm not really sure why they're not showing up there now.

Maybe-- You know what? I don't want to spend all this time searching for it, but Adobe literally just changed that because it used to be under that section. So I'll do a search and then I'll post it publicly and let you guys know where they are. It may have moved to the accounts.adobe.com but that's not where they lived up until yesterday because we demoed this yesterday and it showed on there. But anyway, it doesn't matter. You get a certain number of generative credits. And if you want to know there-- Adobe actually has a page that shows you all the generative credits information if you want to find out exactly how much each of these features use in terms of every time you generate something. So the only reason I'm showing you all this is to let you know that you do have a limit. When you run out of those credits, Photoshop will still work and the other applications will still work. They're just going to run a little slower. So you can think of them as like the high speed credits. And when you run out, you'll just have to wait till the end of the month and then you'll get them again. But in the meantime, it'll generate a little slower. To be quite honest, I think my subscription plan has 1,000 because I have the Creative Cloud All Apps Plan, and I've never reached 1,000. Has anybody here ran out of credit credits using generative AI? Yeah. Exactly. So yeah. You do have a limited amount, but I've never ran out of them and I use it all the time. So 1,000 credits. Awesome. So that's why when we have this option here in the Remove Tool that says Generative AI on or off because you can decide to leave it off and then just use it to remove an imperfection. And if it doesn't do that good of a job, then you can use generative AI and save yourself some credits. Or you can just leave it on auto and Photoshop will try to determine what to use. The algorithm in the computer or generative AI? Well, it will upload the image to the cloud, do the generation, and bring it back. But then you'll spend, at the very least, three credits because you get three generations. One credit per generation.

But yeah. That's how that works. Let me open up another file to show you more about the-- Actually, that's not the one I wanted to open, so give me one second while I open up the file that I wanted to really open.

I think it's this one here. Yep, there it is. So let me show you another workflow with that tool.

This tool is super, super awesome.

It allows you to remove anything from a photo. Remove Tool is nested under the Spot Healing Brush Tool. If you just press the J key, it'll go to the top of the layer stack, J, right, the Spot Healing Brush Tool. But if you want to select the tools nested under, you hold the Shift key and then tap on the J key. And you see how I'm going through all the nested tools? So the Shift key allows you to shift through the nested tools. So for example, if you were maybe here, you can see that the letter L is for the Selection Brush. It used to be for the Lasso Tool, now it's for the Selection Brush. So if I hold Shift and L, I just cycle through all the tools. So that's a quick way of getting to the Remove Tool. So prior to today or yesterday...

You can basically think of the Remove Tool as using it with generative AI off. And it's really good. It allows you to simply click and drag over a distraction and it removes it really, really good at it. See how I'm doing that? And I can zoom in so you can see that even without generative AI, it does a really good job. So I'm going to zoom in. And I have the Remove Tool active, and I'm just going to click and drag, and it just removes all these distractions.

There you go. And I can do multiple at a time. I can just click and drag. And if I want to do multiple at a time, I can uncheck the Remove After Each Stroke option and I can just select multiple once. That checkbox is there in the options bar right out here, Remove After Each Stroke and then I can paint and when I'm ready to remove, I can hit Enter and Photoshop will automatically remove those objects really, really good. I didn't have to use any generative credits. So sometimes I will try this tool first and then I'll see if I need to then use generative AI. So Remove After Each Stroke is what I prefer so I usually have that checked. Obviously, if you want to work in a non-destructive workflow, you can enable sample all layers and then create a layer and then remove your pixels on top of that. I didn't do that earlier, but that's okay. We can start now. We can also remove things like, as you saw earlier, wrinkles on her skirt and things look amazing. Also if there's any blemishes on her skin, like on her knee there, there's something going on so I can just make a selection and Photoshop should remove it. And it didn't do that good of a job so I'll just hit Undo and maybe I'll zoom in closer and make a better selection. Reduce my brush size. I use the bracket keys, left and right bracket keys to reduce the brush size. The bracket keys are to the right of the letter P in North American keyboards and there you go.

Control+1 is 100%. Control+0 zooms out so you can see the entire canvas. That's the Command key on the Mac. Another super cool feature that is brand new with the Remove Tool is under the Find Distractions option. We have the one click removal. One click removal. What does it remove? Wires and cables. When you click on that, Photoshop will find the wires and cables in the image and remove them automatically. It's super, super good. I'm sure you guys saw this at the keynote. I think Anna McNaught was demoing something very similar.

And there we go. In this case-- Oh, you know what I did? I should have changed it back to auto so that it uses generative AI. For this one, it'll probably do a better job if it uses generative AI. So I forgot to twist it back to auto, so I just did. And when I do this, it'll do a really good job because now it'll probably use generative AI to give me a really, really good result. So we'll just give it a moment here. You guys have no idea how slow these things move when you're sitting on stage with people watching you. Like at home, I could grab a drink or go make myself a coffee, but here, I don't know why it's taking so long, but there we go, it's finally moving, and come on, Photoshop, you're there. Come on.

Man!

I think it's doing this on purpose. This should work much, much faster.

I don't know if it's because we're at MAX-- There we go. It removes it, it does a fantastic job. I did it all in one layer. Super, super cool. I can zoom in and just get a really quick look at that. It's amazing. It took a little bit, not even a minute, but it felt like an hour. And here I am. It looks fantastic. Another cool feature available-- Oh, by the way, something else I wanted to show you. So one of the things that this does is a one click removal, right? It does a one click to remove everything. But what if you don't want to do it in one click? Well, you can do the one click removal, but then you can hold Control and click and now I have a selection, right? So now I have those selected, right? And I can go into the Brush Tool and now it's just a selection, right? So now, maybe I can add this piece to it and maybe I can add this light and then remove that as well. Just not to waste time, I'm not going to do that again, but I wanted to show you that option. That if you have more cables and it didn't find anything, just use whatever it found, load it as a selection, and then switch over to the Selection Brush and continue painting. Again, I'll do that just in case you missed it. So I did it in a new layer. I made my selection in a new layer or my removal in a new layer. You can load the active pixels of a layer as a selection by holding the Control key on Windows, that's the Command key on the Mac, and click on the layer thumbnail. When you do that, those pixels become selected. By the way, if you're already on the Selection Brush, you'll just see the brush strokes. If you were on a different tool, you'll see the marching ants. It's really the same thing. But when you switch over to the Selection Brush, you'll see the brush strokes. And then, you can continue painting.

And I'll do it really quickly here. Continue painting and remove that light post. There it is. And then I would just remove it. But I'm not going to do that just because I don't want to spend the time waiting for it. But I just wanted to show you how you can add back to the selection. And of course, you would need to go back to the Remove Tool. But anyway, the other thing that that tool is really, really good at is finding and removing people. So again, Remove Tool, Find Distractions. This time we're looking at editable. See that? It's editable. That means I can change it. So when I click on People, it's going to find people, but it's not going to remove people. See that? See how it found a man standing here and selected the people walking back here? But it did not select the main subject. Photoshop was smart enough to know that that person shouldn't be selected. Obviously, if you wanted to remove her, you would need to then add to that selection just by painting over her. I'm not going to do that. In this case, I'm just going to undo that. And I'm just going to remove that area and hopefully it goes a little bit faster than it did earlier. And when I do that, boom, those people are gone. And at this point all I really need to do is work on any imperfections. For example, I haven't really gotten a close look but I can tell that this is looking a little weird. So I can come in there and use the Remove Tool to paint over this car just because it looks really weird, at least to my eye, painting over it. And I can press Enter just to make it disappear. And in this case, I know that it didn't use generative AI because it went so fast. You see how fast that was? That's how you know that it didn't use generative AI. So no credits wasted on that one. So there we go. We have that remove one. It looks fantastic.

Let me show you now the other example that I have here, Generative Fill to remove objects. Why would I use Generative Fill to remove objects as opposed to the Remove Tool? Well, for some jobs, it just makes things a lot easier. So for example, in this case, if I were to use the Remove Tool to try to remove the street sign here in the car in the background, I would need to paint over it quite frankly because the Find Distractions feature, it's not going to work. If I try to find wires and cables, Photoshop is going to try to spend some time. Nope. Couldn't find anything. There's nothing there, right? Because there is no distractions according to Photoshop. Editable, there's people. Well, I do have two main subjects, but Photoshop was probably going to disregard them. See couldn't find any people who are not the subject of the image, right? And of course, I can manually paint things in. I could come in here and change this to use generative AI, like leave it on, that's what I do. But the downside of doing this is that, it can be a positive for some people in some situations, but the downside in general is that I'm only going to get one variation, right? Whatever I paint over, that's what I get.

Oops, I actually let go too soon, so it's going to try to remove that area, but then the door of the car is still there.

Let's see what it does. I'm actually quite curious to see what it decides to do.

Let's see. It's probably going to generate another car is my assumption.

Wow. This is the slowest it's been. And there we go, generated another car.

Even if it's exactly what I wanted, the downside is that I don't have any variations to choose from, right? I just got stuck with that one result. So I'd rather get variations so I can make a decision of what works. In this particular case, the workflow would be to use the Selection Brush and paint over this area. By the way, you might know this keyboard shortcut but it's one that I use all the time. You click once, hold the Shift key and click again and Photoshop will draw a straight line between those two points. So I use that all the time. And then I can just paint in this area and paint over the car, over the balloons, and the side of the car like so. And when I come around, Photoshop will fill that in. Again, I'll show that because I think it's cool feature. When you click and drag and make a circle or selection around something, when you come back to the starting point and release, Photoshop fills in those areas. So it makes selecting pixels super, super easy. And here we are. I'm just going to click on Generative Fill, click on Generate, and it will remove the car and that street sign. But there's going to be one problem. And hopefully, it does a good job removing the car and the street sign. Otherwise, we'll have two problems. But we'll see what it does.

There we go. Not bad. Pretty good. And I can look through the variations. Now I have three options to choose which one is best. The first one worked for me. But we have a problem. It looks fantastic. But if we really look at the image, we have two huge problems. The mirror here changes shapes and I may not want that. I may not want the mirror to change shapes. Also we lost the balloon and the cars and I want to bring those in because I think it looks much better than this flat looking balloon here on this side. I don't think that looks very good. So I want to bring those back. What do I do? Well, remember, at the end of the day, this is just a layer. Oh, it's all it is. It's a layer with a layer mask. So we can work with the mask. I can reduce my brush size, tap the X key to make my foreground color black. The only reason it became black is because the background color was black. So tapping on the X key swaps the foreground and background color. See that next to the little banana? Everybody know what the banana is? No. We'll talk about that next. Don't let me forget because someone came up to me in my last session and said, "I couldn't stop looking at that banana and I don't know what it does." And I wish I would have talked about it. So I'll talk about the banana in a bit. But anyway, so you can paint with black on the layer mask. Notice the focus, the white outline is on the layer mask. And I'm just painting to make sure I bring back the original mirror, but I'm also bringing back, of course, the car that was there. So I'm going to see how much I can get away with. There we go. So we're going to work with this now. So there we go. That's what I'm going to work with. I'm going to create a new layer. And I'm just going to use traditional Photoshop tools, right? In this case, the Clone Stamp Tool. Hold Alt or Option on the Mac to click. Instead of sample source, I'm just going to paint pixels back in. I'm copying those pixels to that area there. Like so. And I'm going to be as careful as possible but I'm not going to be too precise. You guys get the idea. There we go. Fantastic. So now, I have the original mirror back. So I can put all this into a group, Control+G, Command+G on the Mac to create a group. And it looks like I got a reflection going on there and of course I can come back in here and paint with black to get rid of that. But the point is that I'm using generative AI to do the hard work and I'm just focusing on these little tiny little details to make sure that everything works and I keep the original mirror and it doesn't look like a different car. And of course, I'm not going to spend the time but I can do the same thing with the balloon. I can start painting with black to bring back the pixels...

That should be there. And in this case, it's going to be easier because once I bring those back, I can just tap X to paint with white and reveal the generated pixels once again. And obviously this is a very sloppy mask, but you get the idea. So when we're done, we have something that looks like that. And actually, I am going to work a little bit more on it just because I just thought of a tip that I really, really enjoy when doing this kind of projects. So...

If I'm painting over this image and I'm trying to get the image right and I'm trying to make sure that the edges are good, sometimes, you just saw me do it that's why I remembered. I zoom out. So then I zoom out. I'm like, okay. That looks good. And then I can come back in and then continue working. And then I zoom out. And I'm like, okay, now I see how it works. But there's actually a way of doing that without having to zoom in and out.

I'm going to close these other windows just so that they don't confuse you guys. I'm going to close all these windows.

Okay. So if you go into Window...

And go into Arrange and go to the very, very bottom, New Window 4 and the name of your open documents, in this case just one open document, so I'll click on that. I have the same document in two windows. Same document, two windows, right? This is not a duplicate, same document. Then I can go into Window, Arrange, and choose two up vertical. It puts them side by side. So now, I can zoom in really close on the balloons here and on this side I can decide between pressing Control+0 or Control+1. Control+1 is the 100% view, Control+0 is fit on screen. And in this case, maybe Control+1 and then pan over to see or maybe just zoom out a little bit. Not really a 100% view, but I can see what's going on. Or I can maybe make a little more room. It doesn't matter. So we'll call this the full image basically, right? So now, on my layer mask, here I am, layer mask selected. All I'm going to do is paint with white to reveal those pixels. But see how as I'm painting, it's also changing it on the larger version so I don't have to keep zooming in and out. I can just see what I'm doing in the close-up view with the details. And also I'm going to remove the white balloon so you can see. See that? See how the white balloon is disappearing? So I don't have to zoom in and out. I just work and I just look over. And this is what I do at home. I have two monitors and I have the big screen or the zoom in version on one side and then I have the full 100% view on the other. So I just look over. Okay. That looks good. And then continue working.

Good question. Yes. You can work from either screen. So if for whatever reason I wanted to work with the full version here, I can come in here and I can start bringing things back and you see how things start reappearing on both screens. Also you probably know this keyboard shortcut.

It's actually if you pan, hold the space bar, click and drag and you pan, you can also move both at the same time by holding the Shift key and the space bar, and you move both at the same time. So it's a really, really cool feature. I highly recommend that you use it if you're working with detail, especially you have to zoom in really close because I find it really tedious and annoying to zoom in all the way in and then zoom all the way out. Okay, that's good. Then I've got to come back in. So super, super cool. Also I don't know if you noticed it, but I closed that window and Photoshop didn't prompt me to save. Why? Because we still have the document open. It was just another version of the same document. And also you guys know what that little asterisk means there? You guys know that, right? The little asterisk? Yeah. It means that the document is not saved. So when I press Control+S to save, it saves that the asterisk is gone. And if I make another change to the file, it puts the asterisk there to let me know that something has changed. So if I see that, it freaks me out. So I'm constantly pressing Control+S or Command+S to save because I've lost work and I don't want to do that again.

Cool. Let's talk about another really cool new feature...

That I really, really like. By the way, who was in my last session just a minute ago with Magdiel Lopez? All right. Cool. I'm actually stealing this from Magdiel, but don't worry. I'm going to give him credit. Magdiel Lopez is a really good friend of mine. He's an artist out of Dallas. Follow him online, Magdiel Lopez. He's got an excellent Instagram, and he taught me this really, really cool technique.

He shared it at the last session, and I thought, oh, my god. It's going to be amazing. And he said, "Yeah, man. For sure, use it." So this is all Magdiel. So shout outs to Magdiel. Subscribe to him. Fantastic artist. Great human being. Love the guy. But anyway, so Magdiel showed a really cool way of utilizing the brand new Generative Workspace. So what is a Generative Workspace? The Generative Workspace allows you to generate, let me just go into the timeline view, allows you to generate a bunch of images just like Firefly or Photoshop, but it's all saved in this workspace. So these are images that some of you probably saw me generate in a previous class. And they're all there. I can come back to them, make changes, generate with different aspect ratios, whatever it is. But one of the cool things is that you can use all these different features to create really cool effects and you can probably guess what we're going to do. We're going to create that fire effect and we're going to apply it to this person. So Edit, Generative Workspace.

One of the things that Generative Workspace allows you to do is use a reference image and you can use a style reference to match the style of your own image or you can match the outline and depth of your image. Outline and depth of your image. What does that mean? It just basically means that it looks at the values in your image and it tries to find out what the outlines are and it tries to figure out the depth. If you've seen a depth map before, like on the lens blur filter, like on Camera Raw with lens blur as well, two different things, similar names. They use depth maps in Photoshop. When you shoot a photo with your phone, it captures depth information. That's basically what it's looking at here to try to generate those outlines.

Oops, I accidentally started generating again, but that's okay.

So we're going to use one of those outlines to influence our generation.

The example that I used earlier was rock with cracks...

And fire coming...

And fire coming out, 3D material, because I want to create-- You guys have seen the 3D materials, right? Where it's essentially a sphere and it just has texture and that's how you preview a 3D material.

For some reason, this feature works really well when you try to duplicate that effect so I always use a 3D material prompt. 3D material on a gray background, right? And then I'll click on generate. And it's going to generate four variations, not three. Photoshop will generate three if I use the feature right down here on the bottom right. It's basically the same thing, but just it'll generate three images and I can't generate more than one prompt at a time. This allows me to generate multiple prompts at a time. So this is basically my result, right? And when I click on this, I can open it, save it, download it. So I'm just going to download it. I'm going to click on download and I'm just going to save it. And it's a JPEG. There you go. It's saved. Cool. Now, I have this image here and we talked about depth information and we talked about outlines. And the way you need to think to think about this is just a black and white image. Just the values of the image. There's so many ways to desaturate layers. We need to desaturate it. You can duplicate the layer by pressing Control+J and then pressing Control+Shift+U to desaturate. You could also just create a hue and saturation adjustment layer and bring that back down to 0. Completely up to you. And then I'm going to export this.

It could be a JPEG or a PNG, it doesn't matter. I'm just going to go for a JPEG. I'm going to click on Export...

And I'm also going to save my reference image. There it is. Cool. So what do I want to do now? I want to go back into the Generative Workspace here.

And instead of generating this, I want to generate that face that's on fire, but in this style here, okay? And I'm working with a landscape photo, so I'll go with landscape here. And now I'm going to use the reference image. I want to match the outline and depth of my image, so I'm going to click on Upload Image. And I'm going to go for that black and white image I had earlier. There it is. The one that we created a moment ago. It will find it, and you can adjust the strength. In this case, I'm going to increase it to 75, and then I'm going to use that same prompt that we used a moment ago. And I'll click on Generate.

Did I not click on generate? There we go. It's generating. Oh, I'm going to go back into a timeline view. It's now generating twice because I accidentally, hit generate twice. But you can see that you can generate the same thing, or more than one thing at a time. But the cool thing now is that we have all these variations that match my subject pretty well because it used that same reference image. So it might not be 100%-pixel perfect match, but it's going to be really close enough that you can use traditional Photoshop tools to composite it in. See that? Super, super cool. Now we just got to pick the one we like the most. I don't know. That one seems pretty cool. So we can just add it to a new document or this will list all your open documents. Again, we only have one open document, so I can select that open document, but we could easily create a new one, and I can click on add. And then, Photoshop will add this to my image. There it is. And you can see that it's, oops, that was Magdiel. Let me go back and show you. So you can see it's a really close match.

It's not 100% in terms of alignment, but I can definitely align them. Let me just reduce the opacity, and there you go. Look at that. Pretty, pretty close, right? Super cool, right? And now I can use traditional Photoshop tools to blend that in. I can do so many things. I can use blending modes for example. I can do something like hard light and then maybe reduce the fill, not the opacity. Why? Hard light is one of the eight blending modes that reacts differently when you adjust fill compared to opacity and usually opacity looks better in those eight blending modes. It doesn't look as faded, but that completely depends on the look that you're going for. In this because I can just reduce it down a little bit just so that his original features come out. Then I can also create another layer, duplicate the layer, Control+J to duplicate, set it to normal, and then I can use a layer mask to continue blending things in. By the way, what I really wanted to do is hold the Alt on Windows, Option on the Mac, and click on the layer mask icon to create a black mask so it hides everything. And then I could just paint with white in areas where I want to bring in that full effect. So maybe I want the full rock effect, not that blend here, where the rock hasn't broken off yet. Something like that. And it looks fantastic. I can do a couple things now. I can maybe crop the image. I don't like how the side there is looking or I could do a gen fill and fill in the hair on that side. I think I'll keep the background gray, it looks super cool. I could also come in here and use the Selection Brush and just type in something like fire or something. Play with the opacity. The opacity here is interesting because it's not that it's going to create something with lower opacity, like a little less opaque. It's going to actually influence how the generation is created. So when you reduce the opacity, it's almost like how much of the image below should Photoshop take into account. The closer that number is to 0, that means that it's a lot. The closer it is to 100, it's not at all. That's why when you paint over something and you generate, you can remove a car. It doesn't add a new car in its position. But if you were to reduce the opacity, paint over a car, generate, don't put in a prompt, it'll generate another similar looking car. Anyway, so you can reduce the opacity to see what the difference is but in this case-- Actually, you know what? We'll do that. I'll reduce the opacity just a bit so it takes into account the background here and maybe I'll just use the prompt flames or something like that.

And click Generate.

And always look at the tips. They're really, really good tips. I've learned a couple new tricks just by reading as I'm waiting.

And there we go. We get a variation of the hair on fire. And see how it kept the basic shape of his hair, instead of just generating something completely different? And I think my prompt was simply flames. I think that's all I used. So I can do that again, set this to 100% and if I do a similar selection and I'll do flames, you can see the difference.

Flames.

And you can see the prompt that you use appears as the layer name.

And you see it's a completely different look. See this one because we reduced the intensity.

And this one, we didn't reduce the intensity. So this generation really wasn't influenced by the pixels underneath and this one was, right? Pretty cool stuff. So when you look at opacity in the Selection Brush in the context of Generative Fill, always think if it's 100%, it won't look at the pixels directly below it to influence the generation. The more I reduce it, the more the pixels below will influence the generation below. So here, let me give you another example. So here we are, and I'm going to reduce it a lot. I'm going to raise it maybe to 7% and then I'm just going to paint. It's going to be barely noticeable because I'm looking at that selection at 7%.

And when I click on Generative fill, I'm going to use the same prompt, Flames. I'll click on Generate and we should get something that looks very similar to the background below.

And there you go. See? We still got flames but notice how the generation barely changes. See that? Because we were so close to 0 which means look at exactly what's below. So in the context of Generative Fill, opacity, you can think about how much should the influence be. 100% means no influence and 0% basically means repeat what I have here. Like, it'll be a generation that looks basically the same as your original image. And again, I'll do one more example just to be super clear. I'm going to paint over his face at 100%.

And there we go. Paint over his face at 100%. And I'm just going to use Generative Fill. This time we'll go with no prompt so you can see. No prompt. We're just going to let Photoshop decide.

What we should get is another face that looks maybe realistic. I'm not sure. There we go.

Oh, wow. They don't look too bad. They look weird, but not too bad, right? But watch this. I'm going to bring the opacity way, way down to 1%, right? And I'm going to create a similar selection. And it's really hard to see what I'm selecting because I'm looking at 1% of that intensity there, but I'm just painting over and I think I got everything similar to what I had before, right? Generative Fill, leave the prompt blank, click on Generate. What Photoshop should do, cross my fingers, is generate another person with teeth, nose, and eyes that are very, very similar, similar position. Definitely no one's sticking out their tongue. But see that? Look at the generations.

They're basically identical to the original image. So that's what opacity means in the context of Generative Fill. The closer you are to 0, the closer the result will be influenced by what's below. If you're at 100%, it doesn't matter what's below. It'll be based on the prompt or what's around the selection, not necessarily over the selection. That's why when you remove a person, you make a selection over the person, Photoshop looks around the person, not in the selection. So if you want Photoshop to look in the selection, reduce the opacity so that the generation could be influenced by the contents of that selection. Does that make sense? That making sense? Cool. Awesome. Are you guys new-- Is that new to people? Awesome. Cool. Yeah. I'm hoping you guys are learning something new.

All right. Let's move on to the next example.

I'm going to show you guys a case study of a TV show that I worked on and I'm going to open up a couple files just to show you how I've been using generative AI. This is the TV show that-- I think I mentioned in this class. It's coming out this week. I still haven't seen it, but it's coming out this week. This is the last poster I worked on just a couple weeks ago before. I actually moved three weeks ago. I was living in the San Francisco Bay area. Now, I live in Kansas City, Missouri. So been so busy that I haven't been working on posters. But, this is the last one I made before moving to Kansas City. And what I don't think most people realize is that when you look at a poster, this is not exactly what I create. What I create is basically that. Why do I create that if the final poster is that? Well, because there's a lot of different solves that the client needs, right? They need something for social media, something for a billboard. So I got to create these giant, giant files to fulfill all their needs.

And I've been using a lot of generative AI for that. Oh, actually, I've got to call something else so you see it when we're actually doing it. So notice what the background is. The background is just the texture and it's a gradient and then there's these cut-outs of newspaper in the back. See that? That's what the background is. So very simple. Really not that difficult. Like everyone here could do that.

So there we go. What I just said. Background is just a gradient. Nothing fancy. Like I said, everyone here could create that gradient. And the texture is just an Adobe stock image. By the way, if you ever get a file from a designer, a co-worker, a client, whatever, and they happen to have an Adobe Stock image and the number is still there, I need to do this often. You can go into stock.adobe.com and just paste that number in there. And then that image will come up in case you need to redownload it. Or a lot of times you can find similar or then more from the same series. If it's something more specific, then you might be able to get a different angle. Or if it's like a car, and you can click on see more from the same series and you might get a different side of the car and then I can use the door that the client didn't provide or whatever. So that's something I use all the time. But anyway, so what could I do to create those newspaper pieces? Well, I can of course, go into Adobe Stock and I can start finding images of torn newspaper, but I already have that here and I'm going to just copy the prompt that I used just to make sure that I don't do something different. So you can click, I did that too fast. You can go right here, run underneath the Banana Tool you guys were supposed to remind me. I forgot. You can click way-way down here on the Generate Image button to bring up the generate image window, which is very similar to the Generative Workspace. It has a lot of the same options.

It has the reference image, but it doesn't have the same...

Like contour reference thing that generative, workspace did. But anyway, I'm going to paste that prompt there and I'm going to click on photo. That way my results are photo realistic. Then, I can click on generate and the prompt was torn pieces of newspaper on a black background. And Photoshop is now going to generate some assets for me so that I can use them in my projects. Here we are. The reason we can't see it is that the layer is underneath the group. Here's a keyboard shortcut, Control+] key to move the layer up in the layer stack. And now I have all these pieces that I can use for my composite. I don't have to go into Adobe Stock. I don't have to go anywhere else. I don't have to take a photo of torn paper. I can keep generating assets to use in my design. And at this point, it's just a matter of which one do I like best. Well, I can go into the Quick Selection Tool. This one looks like the one that I ended up using for the actual project. I'm just going to make a selection, Control+J to just jump those pixels to another layer, change the blending mode to multiply, and then adjust the opacity whatever opacity you want to use. And of course, using the Move Tool I can move this and place it into position, rotate it, do whatever I need to do to create my background. Again, that's exactly the same technique that I used to create the pieces of paper that you see there on the background. Super, super useful. So I guess what I'm trying to say in this example is just think of what assets you need that you can generate in Photoshop really, really quickly and apply them to your designs. So this is what I was talking about earlier. Firefly is not taking my job away. It's just making it easier now. I can quickly generate what I need instead of spending hours scrolling through Adobe Stock trying to find it. And then using the reference image feature that I showed earlier, you can probably find some stuff that you'll never be able to find in Adobe Stock and it'll match your design better like you saw on the example with the guy on fire on his face. So I highly recommend that you do that. Another workflow, by the way, could be to use that same prompt but do it in the Generative Workspace and just generate a whole bunch of different variations. So click on generate. It's doing that. And while I'm waiting, I can maybe try one with a white background. Why not? Click on Generate and so on and so forth. By the way, there's something called variables here.

We'll talk about that actually in a moment. Let me see how much time I have. Cool. I have enough time. But the point is that you can come into this tool and just see all the different variations that you can get for your designs and see what works for you.

Let me show you how you can create a super cool composite just from using this tool. So I'm going to go into...

This image here, right here. So imagine that I was trying to create that. That's exactly what we're going to create.

If I was creating an album called heart heartstrings, what would I need to do? Well, at first, I would need a background, right? How can we generate a background? We can go into Edit, we can go into Generative Workspace, and we can just use the prompt, grunge paper. Click on Generate. And while we're waiting, maybe I can think of something else like grunge paper with, I don't know, stains. And then click on generate. And I'm going to go into the timeline view and now I'm getting some results. That one's cool. This one's cool too. And just select the one that works best for my design. I'll wait for these. That one is probably more of what I had in mind, so that's the one I'm going to use. I'm just going to click on Add To. And I'm going to place this on my Heartstrings PSD folder, and I'm just going to add it. So really, really quickly, I was able to, generate an asset for this design. Super, super fast. And there it is. That's my background for my album, Heartstrings. Now I actually need the heart. In this case, I'm just going to use generated images to show you a different way of doing something, but it's really the same thing. So we can type in something like broken heart made out of yarn on a white background. Why white background? Because I want to be able to mask it easily. I don't want to make my life complicated. So on a white background.

I want to make this look photorealistic and maybe I can use an effect and I can look at the different materials. And I think there's some material in here called yarn, there it is, yarn. So I'm trying to replicate the look of yarn, so I'm using an effect to replicate that and I can click on Generate. So broken heart made out of yarn on a white background. That looks correct. So I'm going to click on Generate and wait for my assets.

I can't wait for this thing to get faster. Even 30 seconds feels like an eternity. So I can choose the one that looks the best. And I think this looks great. This is fantastic. So this is the one that we're going to pick. And at this point, I can use traditional Photoshop tools to remove the background. I can start by clicking on the three dot icon here and choosing remove background. The reason that it's not showing the remove background feature here is because Photoshop knows this is the generative layer. So the button's not appearing, so I have to click on the three dot icon and choose Remove Background. What happens now is that Photoshop duplicates that layer. Notice that it duplicated the layer and it placed the layer mask on there because it didn't want to apply the layer mask to the generative layer because you have different variations that may not necessarily have the same outline. So it just creates a new layer, matches the outline, creates the mask, and that's the result. Here's another cool thing. I wanted to keep the original shadows. I think the shadows look fantastic and I want to keep those. So how do I keep those shadows? Well, you can duplicate the layer, control J on Windows, command J on the Mac, select the layer below, change the blending mode to multiply.

Why is it not showing? Give me one oh, because the layer sorry. I need to delete the layer mask, and just keep the original layer. Choose the blending mode multiply. Multiply hides white. The background is white. Remember I made it white for a reason to make things easier for me? So now I get to keep the shadows that were generated, and I can keep the actual image. The reason that I wouldn't want to do this here is because notice now that the multiply blending mode is also affecting the heart. I don't want it to affect the heart. I want the heart to be the original colors, but I want to use the layer down here to control the shadows. I can now create a levels adjustment layer, clip it to the layer below so that this levels adjustment layer only affects those shadows. And now, I can control the intensity of the shadows. See that? Super cool. Super cool. All right. So I'm just going to put all my hearts in a group just to stay organized. I can click and drag this layer in there. And check this out, another tip. If you just drag a layer in, and I'll make it red so it's like obvious, or maybe magenta. Super obvious, right? So when I drag a layer into a group, it goes to the top of the group. If you want to place the layer at the bottom of the group like I want to do now, hold Shift, drag it into the group, and it just sends it to the very bottom. So in this case, I don't want it to be on top. I want it to be in the bottom just hidden. So Shift, dragging a layer into the group, sends it to the bottom. And Photoshop changed that about five years ago. It used to be the other way around. Why did they decide to make that change? I don't know. But about five years ago, it was the other way around.

Cool. Another thing I want to do is I want to create just a cool flower design around everything. And before I do that actually, I'm just going to reduce my heart here so that it fits better in my scene. By the way, the reason that I'm getting that outline is because I'm using multiply in that layer. What you would need to do is go into image, adjustment, levels, and just make sure that those almost white pixels are completely white, like so. And then just adjust it accordingly. I still have a seam there so then I would just create a layer mask with the Brush Tool. I can just paint that away using black. There we go. Actually a larger brush and make it softer. The keyboard shortcut to making a softer brush is Shift+[. And, still too much. There we go. Just trying to smooth it out. Fantastic. Cool. So what I'm going to do now is just create another graphic that could go on top of that. So I'm going to go back into my generate image feature here, and how about we do flowers...

In the shape...

Of a heart.

We want it artistic now, and we'll use a reference image. You can upload a reference image of your own, or you can use one of the ones from Photoshop that Adobe provides. And I'm just going to scroll down and find something that looks like line art. Let me see here. There we go. We'll use this one. This one's a tiger line art. Fantastic. Just what I want. I'm going to click on Generate. And Photoshop should give us flowers that are in the shape of a heart, but with that cool drawing style. So we'll see what it does. Perfect. Exactly what I wanted. So now I have three variations to choose from. They all look really, really good. It doesn't really matter which one I use. I think that one's probably my favorite. Now, I can change the blending mode to screen once again so that I can hide the white pixels, only keep the darker ones. And I can now continue working with this image just like I would with any other layer. In my mind, this is just another layer. I'm not even thinking about AI anymore. So I'm going to go into the hue and saturation adjustment layer, clip it to the layer below, and they move this button. This is to be in the bottom now it's on top. I'm going to click on colorize and now I can change the color of that ink. And we'll make it maybe reduce the saturation and I can also come into the actual heart now and reduce the opacity so that it's not so intense. Or I could also come down and adjust the lightness. Just make it lighter, darker, whatever it is that I need. But in this case, I think it's best if I just bring down the opacity. Now, I can go up and actually, it's down here. I can grab my heart, Control+Shift+] key will place everything on top of the layer stack, and now I can just play around with the scale and get my final results. So pretty, pretty cool. You can use generative AI to generate assets for you. That's what I do all the time in my professional workflow. I generate assets. I rarely have generative AI create an entire image for me and that's what I turn in. Actually, I've never done that. Probably never will. But the point is that, this is the way that I want you guys to think about all the AI features in Photoshop. It's just another way of getting your work done faster and better. And I would have probably never found an image like that on Adobe Stock. If I had to draw it, that would take me a really long time because I can't really draw. So this is the benefit of having generative AI. And another point is that once you have the image that you need, all your old Photoshop skills are still valid. Blending modes, you know blending modes, you know how to blend this. You know masking, you know how to mask this. So all that knowledge that you have is not lost. In my opinion, so now, it's enhanced because of generative AI. You guys like that? Was that a good demo? You guys-- Yeah? Awesome. Thank you.

Actually, Adobe liked this demo so much that they turned it into a video and it'll be on their website soon. So I don't know when it'll be on-- [Woman] Banana. [Jesus Ramirez] Oh, banana. Thank you. Thank you. And thank you so much for reminding me about the banana. See, it's always on there for me. So I don't even think about it. And people always ask me, so banana.

So this is the customized toolbar, right? And usually this is what you see, right? Everybody's Photoshop is probably like this. So Easter eggs. When you click on the three dot icon and go into edit toolbar, if you hold down the Shift key-- By the way, I don't know if this is just my computer, my installation of Photoshop, but notice how the buttons didn't come out? You see how it's grayed out on the side? Like right here on the side is gray? For some reason, I have to shake it so it comes back. I have to wake it up. I don't know why. It's been doing that with this new installation of Photoshop, so I don't know if it's my computer. I don't know if it's because it's the latest Beta. Who knows? Banana. So when you finally shake the window and reveal the buttons, you hold down the Shift key and you click on done and Photoshop should give you a banana. And of course, because I'm in a Beta, who knows, maybe it's not going to work. Let me try that again. Shift, done. There we go. Shift, done. It adds a banana to your toolbar. Pretty cool, right? Super cool. What does it do? It doesn't do anything. It's just so you look cool. I often tell people-- I mean, people ask me, but it's a conversation starter.

I often tell people that if you're at the office you might want to mess with your friend's computer or at school or wherever you are because it will trip them out. Since we're talking about Easter eggs, there's another one actually if you press Control+K, Command-K to bring up the Preferences panel and you go into the interface tab, you can see the different color themes, right? Color themes. Color themes. If you press Alt+Shift, Option+Shift, the color theme icons turn into toast spread. See that? Toast spread? Pretty cool. And that's not all. Control+Alt click turns them into coffee cups. Yeah. So those are the few Easter eggs that are available in Photoshop. As far as I know, those are the only ones that are there. There used to be more of them when they took them out. These are the only ones that I still know about. So you can actually win barbits by telling people that there are bananas, toast, and coffee inside of Photoshop, and clearly the engineers are hungry and overworked.

[Woman] Elon Musk... [Jesus Ramirez] Exactly. Right. Like an Elon Musk design. Yep. Cool. Anyway, so I know I have just like one more minute or two more minutes, but I just wanted to talk about, the Substance 3D Viewer. I've talked about this one in my other classes. I created that image for 'CSI Vegas' using 3D but Photoshop has now the ability to use 3D. So if you go into File, Place Embedded, and add an OBJ, which is a 3D object you can get 3D objects from Adobe Stock for free under the free label, Photoshop will create a smart object that is the 3D object. It went at the bottom, but I'm just going to drag it to the very top. And I can double click on it. This is only in the Photoshop Beta that just came out yesterday. You'll get this camera.

And now, it opens up the Substance 3D Viewer. This is new. New application. New application from Adobe. It's completely new. It came out yesterday and it allows you to control an object in 3D space and interact with your background. For example, if I were to go into the environment here and enable the ground plane, it will activate some shadows. I can rotate the lighting on the camera and you see how it affects the table. The cool thing about this is that it has a lot of generative AI features. I can come in here and I can generate a new look for my model. I can generate a completely new image based on the model. So for example, click on generate image, and I'll just type in camera...

On a beach, right? And I'll click on Generate. Oh, actually, I can also add a style. I'll add a style to make it cool. We'll go with an art style, and we'll go with concepts, and we'll do, I don't know, we'll do something futuristic. There we go. So futuristic camera on a beach, and I'll click on Generate. And this will use this 3D object as a reference to generate my prompt using the style that I generated it. It doesn't look too futuristic but there it is. It added the camera to that particular scene, super, super cool. And you can make anything you like. It's super, super cool. So notice one thing, it used the camera as a reference.

I guess what I'm trying to say is it generated something over the camera, made it look very similar as the example I showed earlier. The other thing that you can do is generate a composite. So it would use the actual camera, that camera, and then just generate something behind it. So that's the difference. You either generate something over the original model with your prompt or you generate something completely new but keep the prompt you had originally. And the other thing you can generate is a new look for your model. So maybe you want to change the model's materials to something else. So I can type something like old wood texture and actually, I'm going to remove my effects because I don't think they will be good. I want a photorealistic effect and that should be good.

Old wood texture, generate a new look for my model. That's essentially a material. I'm going to click on Generate and it'll generate a material that will go on to the camera that should look like old wood. We'll see what it does. And there you go. Camera that looks like old wood. Pretty cool, right? And then when you're done, you can just click on To Photoshop, successfully save the snapshot, and it should go up into Photoshop in just a second. Let me go check it out. And there it is. And I can...

Continue working on this image and composite it in and do anything I need to it. So yeah, so that is the new features inside of Photoshop. I hope you enjoyed this session. The last thing I'll mention is that to please, please survey the sessions. This is how we instructors come back by getting good reviews so if you enjoyed it, make sure that you just give me 5 stars and tell me what you liked on there. And if you didn't enjoy it, then my name is Aaron Nace from Phlearn. Thumbs down. Thank you so much. I'll be around for questions. Thank you.

[Music]

In-Person On-Demand Session

Master Photoshop 2025: Exploring Features and Generative AI - S6703

Sign in
ON DEMAND

Closed captions in English can be accessed in the video player.

Share this page

Speakers

  • Jesús Ramirez

    Jesús Ramirez

    Graphic Artist, Finisher, Educator, Adobe Community Expert, Photoshop Training Channel

Featured Products

Session Resources

No resources available for this session

About the Session

Join us for an informative session on Photoshop 2025 designed for creatives eager to leverage the latest features and generative AI tools. This course delves into cutting-edge techniques for compositing, masking, and enhancing images. Learn from a seasoned professional and discover pro tips and tricks that will elevate your digital artistry. Whether you’re looking to streamline your workflow or push the boundaries of your creativity, this class provides the insights and skills needed to stay ahead in the ever-evolving world of Photoshop.

Technical Level: Intermediate

Category: Generative AI

Track: Creativity and Design in Business, Education, Graphic Design and Illustration

Audience: Art/Creative Director, Educator, Graphic Designer, Illustrator

This content is copyrighted by Adobe Inc. Any recording and posting of this content is strictly prohibited.


By accessing resources linked on this page ("Session Resources"), you agree that 1. Resources are Sample Files per our Terms of Use and 2. you will use Session Resources solely as directed by the applicable speaker.

Not sure which apps are best for you?

Take a minute. We’ll help you figure it out.