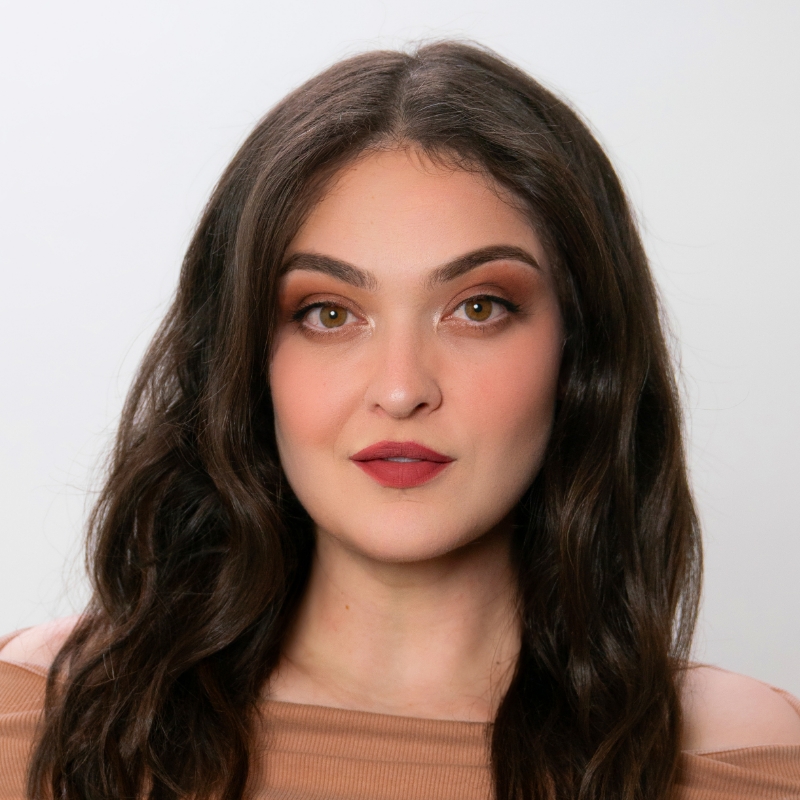
Shooting and Editing Interviews in Premiere Pro

[Music] [Valentina Vee] Hello, everyone. My name is Valentina Vee, and I am the Director of Motion Pictures at Nebula, which is a streaming service that you can find on your Rokus, Apple TVs, etcetera, etcetera. It's like if YouTube and Netflix had a baby. So a lot of content creators from YouTube will put their videos on Nebula in first window type of deal for a week or two weeks in advance, and then they'll put it on YouTube later. So it's a paid streaming service. And, basically, I'm in charge of the Originals division. So everything that's exclusive to Nebula, original to Nebula, that's what I oversee. And in my role as Director of Motion Pictures for Nebula, which is a really new role, by the way, I have been a freelance for my almost my entire career. So I'm very tired of meetings and bosses and not being in control of my own schedule. But in this capacity, basically, I have not been editing. I have been overseeing other editors. So what I'm going to show you today is a lot of footage that I have shot that other people have edited for reality shows on Nebula, for documentaries on Nebula, and I'm using it as demo footage. I've been given permission to use it as demo footage, but I'm not using other people's work. I'm starting from scratch and showing you how you would do it if you were doing it yourself. Does that make sense? Capiche? Okay. Great. So the first thing I'm going to show you is how to use the productions workflow. You can see right now, I'm actually in a productions workflow. How many people use productions or know what productions are? Raise your hands. Perfect. Perfect. Okay. I get to show you something new. So just like here's a clip. This is a clip that's on a timeline. We all know that. This is from my intro slides. Right? It's a clip on a timeline. Just like a clip can be on a timeline. Right? The timeline itself, if you right click reveal sequence and project, it can be in a project. And this project here is called 00, blah-dee-blah, working. Right? But this project itself is in a production. A production is made of many different projects. And the purpose of a production is multifold. Number one, it is to organize all of your things. So if you have, for example, a show that has multiple episodes, each episode is its own Premiere project. So you can put all of your episodes inside of the production. And then if you need to grab a click really quick from something else, you open it in the production, grab the clip, bring it over to a different project, and then close that original project. And easy. It no longer having to navigate a million things. It just copies the clip over and you're good to go. So right now, I'm in a production, but I'm going to actually completely close out of this production to show you how to set one up yourself. So I'm going to go File, Close Production. And here I am in Premiere Pro.

I mean, here not I am. This is some other girl, but I was here for two years. If you saw the little girl with the little girl, oh my god. The woman with the blue hair, that was me. Okay? I was the face. I was the clippy. Now I am no longer. That is all right. So, anyway, File, New, Production. So it's going to ask you where do you want this production to live just like if you're used to Premiere Pro, where do you want your project to live. So I have made this folder. It's called productions. It's in my Miami hard drive and Adobe MAX 2024 folder. So I'm going to say choose, and then I'm going to call this what is this called? S6609, shooting interviews, and I'm going to say create.

Wait, wait. It says it's within another production. Yeah. No. I want it here. Productions. S6609, shooting interviews. I'm going to say shooting interviews demo, so I don't get lost. Create. So what has it done? Well, it has created an empty project for me because it needs something. Right? So it has an empty project called untitled and then nothing else here. Now, I can bring in other projects that I have already made. So you don't have to create all of your projects from scratch when you're in a production. So right click, add project to production. I'm going to find the first project that I have here, which is the Getaway, which is a reality show that I shot. And Premiere, here we have the Getaway, Premiere project, and open. And it says a copy of the chosen project will be added to the folder. So that means I'm editing nondestructively. Right? The changes that I'm making to the project that's inside this production are going to not affect that original project.

Let's see. Why did it not do it? I love how things don't work the second you...

Okay. There it is. So the Getaway. Let's try another one. So add project to production, and I'm going to go to a different hard drive, Boomers, which is a documentary, feature documentary that I shot, and we're going to put in Boomers...

Into here. So you can see here the untitled one is the one that's open. These are closed because they don't have the little page enabled. And then if I wanted to add the project, the behind the scenes of this decks, which is Dracula's Ex-Girlfriend's a film that I shot, you can see here there's nothing in the Premiere folder because I never started working on the behind the scenes yet. So I'm going to create a new one instead of dragging it in. So I'm going to go to new project. So meaning new Premiere project. Dex BTS demo. Okay. And so now I have Dex BTS demo open here, and I have untitled open here. I don't really need untitled, so I'm going to get rid of it. Now, it's not fully gotten rid of. It's in the trash. So now I can open everything. I'll open the Getaway.

Okay. And I'll open Boomers.

Here we go. Let me just close that up to not get confusing. All right. So there's Boomers, and I have footage, audio, graphic sequences, and exports. The footage is labeled by the day, underscore by the location, and sometimes even what specifically about that location was interesting. The Getaway, we also have footage. We have audio labeled by the day. And then we have decks, which has nothing in it because it's empty. So this is where my organization comes in. So you can see every single one of my projects has the same type of organization. So if I go to Dex BTS, it says footage, audio, graphics, music, and everything has a number in front of it because when you organize it alphabetically, there you go. So it's not like audio first and then randomly documents. And every time I make a new project, I go ahead and I just copy paste this little demo folder and then rename it. And this is just a demo folder with empty folders inside of it so that every time I do a project, my organization stays exactly the same. So for the behind the scenes project here, I'm going to take the footage folder and I'm just going to drag it in.

Click Okay. So there's the footage folder, and then I can make other folders like 02 audio, etcetera, etcetera. So I have these three projects, Boomers, Dracula's Ex-Girlfriend behind the scenes, and the Getaway.

Now, let's get into some tips on how to shoot. So Boomers, for example, let's take a look at the footage that we got from Maryland. We have A cam and B cam. So A cam footage, we have this footage of the two of them sitting on a bench, and we only had two cameras for this shoot. So when you go to the B cam footage, who do we choose? Well, we chose to focus on the guy that was giving the answers, not the guy asking the questions. Because the guy asking the questions mostly just sat there and nodded. Right? So tip number one, if you're recording interviews and you need three angles and you really don't have three angles, record a noddy's take. So this is our noddy's take. We just took B cam, moved it to the other side, made the other guy talk about what he had for breakfast, and had this guy just nod along. So having a noddy's take just introduces a third angle where you never had one in the first place. Now, if I wanted to synchronize this and make it a multicam sequence, it's very easy. I just select both of them, and the audio is embedded into the clip. I did not record separate audio for this. Right click. Go to Create multi-camera source sequence. Make sure to give it a name. So I'm going to call this 01 Maryland Sync. And then I'm going to synchronize it by audio. Now it really should have like a more of a space between the word audio and the word track channel, but basically this means I'm not syncing my time code. I'm not syncing by anything else. I'm syncing by the audio that's in the clip. And I could select move source clips to process clip spin, but that doesn't matter because I know that this clip matches this clip. I know that for a fact, so I don't really need to move anything. I'm just going to click okay. It's going to process it, and it's going to read that creating a multi-camera source sequence. So if I double click on it, it pulls up here in my source window and you can see both cameras.

And I can go two to go to camera two, one to go to camera one, and flip between them. By default, it has created a project that or it has created a sequence that is the size of the larger camera. So this was slightly larger and this was slightly smaller. Therefore, they're different sizes. So how do I put this into a sequence? Because right now it's not in a sequence. Right now it's just a clip. More specifically, it's a multicam clip. So I'm going to go over here to sequences, and I'm going to select that bin. I'm going to go to new item sequence, and I'm going to select my choice here. So I actually want it to be 1920x1080. So I'm going to choose the 1080 preset over here, so 1920x1080. And here under Tracks, I want to name these tracks. So I know that each of these men I recorded with a lavalier. So each of them had two lavalier microphones.

Each lavalier microphone, let's say, A cam's lavalier, went to A cam, and then B cam's lavalier went to B cam. So we recorded backup, a backup lavalier. That's why they were double mic'd. So here on under track names, what I'd like to do is do A cam.

Actually, we'll do host, LAV1.

No. A cam LAV1...

A cam LAV2, and then we'll do B cam LAV1, and B cam LAV2. That way, if I hand this off to someone, they know what the heck is in there. And I'm going to save this as a preset...

And name it Boomers, two cam interview, 1080. And okay. So instead of just using one of these, now I have a preset for it. So I'm going to say 01 Boomers, which is what this is called. Boomers, the rise of the gerontocracy coming to Nebula this month. Boomers, Maryland Interview Sync, and press Okay. So now I have an empty sequence, and then I can go ahead and drag my-- Hello.

It should be able to. I love it when things don't work. Here it is. Of course, I was dragging the sequence onto itself, the multicam. And then I'm going to say keep existing settings.

So there we go. It's just the one angle. So how do I make it so that it's not just the one angle? Well, I can go ahead and enable the toggle multi-camera view button down here. So it shows me which one is on top or which one is active, and then I think there's either World War III or a truck next door.

One of the two things.

Ignore them. Ignore them. We're better than them. We ignore. We ignore the haters. All right. So, if you don't know that this button exists, don't worry. A lot of people don't. So it's just here in the button editor. There's a lot of buttons hiding behind the button editor. So you just click on it, and you find the toggle multi-camera view, and you just drag it to your handy dandy toolbar, as well as this one, which is record multi-camera. You need that one here too. So as we're playing through, we can just go, we can listen to it.

And one of the things that I wanted to actually point out is you see how I brought in the multi-camera sequence and it was all nested inside. Right? Not only is that kind of going to be difficult because I'm going to be jumping from a big screen to a small screen, from a big screen to a small screen, but also I know for a fact that the two channels, the left and right channel on each of these lavaliers was assigned to a different person. So one person's on the left channel consistently, one person's on the right channel consistently. And I also know by pressing Shift plus that I renamed all of these layers, and I want to make use of them. So instead of doing that, what I'm going to do is deselect this, which says insert and override sequences as nest or individual clips. I wish there was an easier way to say that, but I'm going to deselect it. And now when I bring this in, it's...

It is now split up exactly how you would if you were using, for example, back in the day, we were using pluralize to sync things. This is kind of the same. Right? And you can see here in these tracks the difference. The left track and the right track have different waveforms, meaning that one person was definitely speaking and all of his audio was on the left channel, and the other person's audio was entirely on the right channel. So instead of just keeping it this way, what I'm going to do is I'm going to duplicate the bottom one. So I'm going to press Option select to just select the audio without selecting both the audio and video because they're linked, or I can turn off linked selection. So I only select that. I'm going to Option drag to duplicate it. Select both of them and just drag them down, holding down Shift so that I don't mess up the alignment. And then the same thing with here. I'm going to Option drag it down. Now I have duplicated them, but that doesn't mean that one is entirely one person talking and the other is the other person talking. So I'm going to right click on the first one, go to audio channels, and make sure both of the left and right channels for clip one are mapped to the left.

So now it's just that one track. So if we solo it...

We can hear it. I'm still playing music in the background. Hold on. Okay. There we go. Butter by BTS. You don't want to hear that. All right. Here we go.

So this is the host's audio? [Man 1] Yeah. That's good. Thank you. [Man 2] This is good. We're learning, on the college campus, we're doing live-- And then if I solo this, it's still the both of them. Right? I said it. I said it. [Woman] But if there's a wooden box... - But if I have a speaker-- - Yeah. That's it. Awesome. So then this one, I want just the person who he's interviewing. So I'm going to go to Audio Channels and make sure that they're both on the right. And the same thing for the backup audio. Now why am I keeping all this audio? Because I'm not actually editing the audio. Right? Because me in my job, I'm going to be sending this audio out to someone else to edit, so I want them to have all of the available channels. And also, it's kind of annoying, and I want everything to be correct. So there we go. So I have LAV1, LAV2. This is B cam. This is A cam. It's all organized exactly how I wanted it to be organized.

All righty. So, I could go ahead and listen through to this and insert my cuts, but that would-- Even doing JKL, which is listening to it faster. Their regular bread and butter report nowadays, don't use generational labels and, you know, I think that's positive. It didn't really work in the culture, everybody still does it. It's too appealing. Are you falling asleep? I'm falling asleep. I don't want to listen to this. They're talking about generational labels.

I don't want to listen to that. So instead I'm going to go to the text window which is already open over here, and I'm going to go to transcript. And usually there's a button for transcript, but because I've already clicked it, there's the transcript. So you can go ahead and instead of listening to what they're saying, you can just read what they're saying. And let me make this text a little bit bigger. There we go.

Yeah, you can just start editing right away by just copy pasting the actual words. If you don't want to do that, if you want to send this out to a producer or somebody is really particular and they want all the interviews transcribed, and then they want all that information, you can go over here and you can do Export Transcript and put it somewhere. So I'm going to put it in Boomers documents. Save here. Right? And then when you pull it up...

Or you could send it to your producer.

There it is. So they know exactly the timestamp. They know exactly what was said. They can search for something, search for keywords, etcetera. But let's say that you aren't sending it to a producer. You're just doing it yourself. So here Tom is asking. "So, Philip, you wrote an open letter to the organization called the Pew Research Center. What do you think that was about?" So I don't need anything-- Right. He says "in" twice. I don't need anything there, so I'm just going to delete that.

"What did you ask?" And then I'm going to get rid of "What did you ask?" And I'm going to get rid of the word "well." So I insert a cut. You see every time I delete something from the transcript, it inserts a cut. This is revolutionary, people. This is crazy, and you've probably already seen it which is why you're not like oohing and aahing, but I'm just saying it's really crazy. It's really revolutionary. "Pew was the epicenter of it." I don't care. I don't care. I don't care about that.

Let's see. I feel more like...

Yeah. Right there, etcetera, etcetera. So you can cut up the entire interview, and then you have the whole interview to go off of. So let me actually pull up the finished cut here.

There we go. So I've cut up the interview based on the transcript, and then I can go ahead and select the clips that I want by holding down Shift and then doing Shift E to enable those clips and bring them out back and forth, back and forth.

Something like that.

All right. We talked about the fake camera. Now we synced this via audio. Right? But it's even easier if you have something to sync via timecode. So here on the Getaway project, we have some footage on day five, A cam and B cam. And I believe that we also have that footage-- Where is it? The audio. I think I marked which one it was, but I don't remember.

I thought I did, but I didn't. So we have the audio from-- We have this camera. This was a cinema camera. So as such, it was also-- We recorded time code.

And then this was B cam. And then okay. Well, it doesn't matter. Let's say I don't know which of these days this audio is on. I have all of these audio layers and all of these audio files, and I don't actually know which one matches to these two camera angles. And that's okay. I can just do the whole thing as a multicam clip, and it'll just do it for me and figure it out. And I don't have to be the one to decide. So I'm going to select these two clips, and then I'm going to just make sure that I'm not selecting anything that is a bin.

And just the ones that don't match just won't match. So that's okay. I'm unsure, and I don't have to know exactly. So I'm going to go to create multicam source sequence. I'm going to call this 01 Foreign, which is this guy's name, Foreign and bus. And I'm going to use timecode instead. So I'm going to enumerate the cameras, Create single multicam source sequence, track assignments, Camera Angle, and I'm going to press Okay.

There it is. Let's see. Let's see.

Sequences.

Let me create a new one. New sequence.

Since this is different, I'm just going to go here to the default, 01, the Getaway, Foreign, and bus. And let's see what that looks like.

Bringing that in.

Existing settings. There it is.

So it found that exact section where it matched. Right? So I can just only pull that and then get rid of everything else. How fast that was? I did that live. That was crazy how fast that was. So I'm going to do Shift A to select everything before and then my shortcut for ripple delete which is Option D.

And then I'm going to place a cut, Shift Command K here, A to get it rid of everything after, and then delete. So now we have-- [Woman] Begin by your name.

It doesn't match at all. Great. Super. I thought it would, but it doesn't. It's okay. I have a version of this where it does match, so let me pull that up. I was like, "Oh, my God, it's going to work perfectly the first time." Amateur. Let me pull it up.

The Getaway.

Was it...

Was it here? Let's see.

The thing about it is that I've been doing so many of these...

I've been doing so much of this that I'm just like so lost in all of the different presentations that I'm doing and all the different things I'm talking about. So sometimes it gets a little lost.

Okay. I'm going to save that for now. I'm going to-- I think it was in a different production that I linked it. But it should-- Let's just say it worked. Let's just say it did because it should.

And sometimes it doesn't.

Where was this anyway? Let's see. Reveal and project was here. This might have-- No.

It was also-- There were seven contestants and they were all mic'd. So that's why you have all of these channels as well. So it's not just him talking, it's everyone talking. But usually if you can find the exact footage or it should work, and lining it up by timecode should work. So let's just move on to proxies. Let's go back to the Boomers demo, and let's go over here to this bin that has London footage in it.

Let's actually go to this one. Yeah. So this one was our friend Tom, who is the host of this documentary...

Boomers, and he went to interview the best boomer he knows, his mom.

And it was also a two-camera shoot. So to do the same thing, instead of looking at exactly where these clips are, because these clips, they're not the only ones. We also have this footage of him driving at the beginning, and then we have a bunch of B-roll at the end. I just color coded it. You can color code it differently. So we're going to color code these where he's talking to his mom. Right click, label, dark pink, let's say. So they're a little bit different. And then we go into B cam, and we find the B cam footage of him talking to his mom. Let's actually organize this by name so that it's nice and organized.

There we go. Label.

Let's do dark pink. So it's a little bit different.

Just make sure that we don't have something random selected here. No. Okay. Good. All righty. So then we go back, and we pull up both A cam and B cam.

Label, select label group. So everything that was dark pink is selected across A cam and B cam. Right click Create multi-camera source sequence. We're going to call this Tom And Mum.

Use the audio track channels and enumerate the cameras. Okay.

It's going to take forever. Let's try a different example.

I wanted to try something new because I showed a different one in a different class and I know people are taking multiple classes, but I'll show the one that I did. So this is very similar. It's Tom, but he's doing on the street interviews in Carnaby Street. So Carnaby Street is like a popular shopping destination in London, and he's going around and interviewing people on the street. So we have the same thing as him and his mom, just in A cam that is both of them, and then B cam which is closeups.

A cam...

Which is him talking to people...

And then B cam, which is closeups of him talking to people. So we'll mark this B cam, the same color as A cam. So A cam was label dark red, red flags, I called it. Okay.

And then the B cam right now, let's label red flags. Then let's go ahead and select that.

Go to Label, select Label Group so that all the reds are selected. Right click, Create multi-camera source sequence. Make sure that the audio track channel is selected. Enumerate camera is okay. And then eventually, that should give you because I've already done this one.

Oh, yeah. By the way, I do the 01, 02, 03. Right? But when I want to put something at the end, I do ZZ underscore. So that takes it to the very bottom. So here in sequences, for example, I have a Carnaby Street sequence, I have Maryland, and I have the multicams here, which is really nice. So each of these has created a multicam for each of the interviews. It's created a little multi-camera source sequence. So what I can do to put them all together is I'll go ahead on Carnaby Street. I'll make a new sequence, and I'll use our little-- I'll use a different preset that I made. So custom boomers, split tracks, and you can see it's a little bit more involved. I have A cam LAV. I have a handheld. I have a scratch for one of the cameras. I have the lav from the B cam. I have the music and the sound effects tracks. So this is like a different preset that I made using that same preset workflow, and I'm going to call it 01 Carnaby. Okay. And then I'm going to take these multicams and drag them in.

So I can either drag them in like this.

This has created...

Almost like nested sequences. And if I wanted to cut them, this is what I was showing you earlier. If I wanted to listen and to cut them as I go along, what I can do...

Making sure you enable toggle multi-camera view, is press this record button, record multi-camera. So as I'm playing, my hands are on the one and two buttons. So I'm playing through and it's going to insert the cut.

Sorry, an error occurred.

Oh, no. It happens. It happens.

Let's go to file, open recent, and I'm going to open that production. Open production. Open.

And we got Boomers demo.

It's fine, you guys. It's fine.

We'll just go right back to where we were.

I know it quit. Sometimes it quits. Sometimes it'd be like that, you know? All right. So we have our multicams here. We have Carnaby Street. We create a new one sequence, 01 Carnaby Multicam. We go to Tracks, or we go to Presets. We find our custom preset here.

It's the one that we want. Okay. There it is. And you can see all of these audio tracks are labeled, and then we bring in the multicams, bring them in. Keep existing settings. There we go.

There they are. And if we want to cut along as we listen, we can do so by enabling multicam view.

Hold on. Let's bring them in like this. Yeah. There we go. Enabling multicam view and then pressing record. So I'm going to press record and press the spacebar and keep my fingers on the one and two. [Woman] Put into savings, I think, or I'm starting my own solo music career, so I spend it on that 100%. [Man] Cool. What kind of music do you make? Well, I was actually in a girl band before. Cool. I've just kind of recently come out of it. So I'm just testing the waters of what I want to do, but I think naturally it'll probably go into pop. Pop is quite a wide genre now, isn't it? Okay. And I'm going to press the spacebar to stop. And you can see all of those cuts have been put in. As I was doing one and two and one and two, it was switching the cameras and it put the cuts in. I can keep going if I want to, so I'm going to go back to this record, and then you can see it keeps switching every time I go to one and two. So I don't know. It would be a mix of like pop, bit of R&B vocals, whatever. I don't know. Maybe make it a bit funky. - Two. - Nice. - One. - I'm not sure yet. And what would this go on? Like studio time, kids? Yes. Kids definitely actually because I don't have any. Two. And now let's say that this is good. I like these. I'm going to select them.

Right click, multi-camera, flatten. And now it shows my original A cam and B cam again. And there were a few things that I wanted to change. For example, in this wide, I'm going to turn that off. In this wide, it went blurry. So I want the other one instead. So I'm just going to press N to just nudge that edit over so that it doesn't change the timing, but it changes where the edit is. Over here, it went a little bit too quick, so I'm going to nudge this one over and nudge this one over.

I'm going to refine it a little bit this way.

In solo music career, so I'd spend it on that 100%. Okay. So let's say that we've done that, and we have something that looks like this.

So here, here, here.

All righty. So I can hold down Shift to checkerboard this part.

And then let's say that we are going to maybe put some color correction on it. One way that I can just put a temp color correction on it instead of going to every single clip and doing that is simply going over here to graphics. I'm going to select my little Graphics folder, new Adjustment layer, drag that over everything...

Go to Lumetri Color, and slap a LUT on it like that. And that way before I send it to client, at least there's something there. Right? But even then, it looks like this B cam is a lot warmer than A cam. So how do I fix that? How do I account for that? Well, which one do I like more? I like A cam more, I think, and I want B cam to match A cam a little bit better. So what I'll do is I will go into comparison view, which is another button here, and what I want is this left side is going to be my ideal, and the right side is going to be what's selected. So what I want selected is the B cam footage, and my ideal is this one. Then I can go over here to...

Color Wheels and Match, click Apply Match, and it's worse. Well, it's close. I can just adjust it a little bit to be able to match it a little bit better. And then I can take this color correction, go over to Effect Controls...

Because instead of taking Lumetri Color here under Effect Controls, going Command C, and then going doing this because imagine if it's a lot of clips having to select each one. I did color code them prior. Right? So I can right click, Label, select Label Group, deselect the one that already has the color correction applied, and then paste like that. And then before I send it to client, I also want to make sure that there are no clicks or pops in this audio. So I'm going to get out of comparison view.

I'm going to select all of the transitions or yeah. All of the transitions.

All of the in-betweens by holding down command and drawing a box, and then I'm going to go Shift D, and that's going to put the default transition in between them.

Tiny little two-frame fade. How did I make that the default transition, and how did I add the default transition? It's pretty easy. So if you go into effects, right here under Audio Transitions, Crossfade, you can see this little blue box around Constant Power that tells the program that this is my default transition. If I want to change it, I can go to a different one, set that one as default transition. And then if I go into Settings, Timeline Preferences, I can change the default audio transition duration to two frames. So that means that whenever I put a default audio transition, it'll just be a little quick two framer. So let's just say that I like that, and I'm-- That is very bright. Let me just adjust that because I know my client will be mad if I leave it that bright. Right? There we go. So I'm going to send this to client. So I'm just going to go to Window, Review with Frame.io. Here are all my previous cuts, and I'm going to just go Upload, Active Sequence. Going to rename it, 02 Carnaby Street interviews...

And click Upload.

It'll take it to Media Encoder, so I can continue working in Premiere Pro while this renders.

I can do other things and then it'll start uploading it on the back end. This is very helpful for if you're doing multiple sequences and multiple projects, it's going to just start a queue of all of them and then upload them all to Frame.io, and you can just send the link to the entire folder to your client later on. Or actually, are these all zoomed in? No. They're not. Or you can send the link to the folder to your client beforehand and then just wait and tell them, "Hey, it's going to be X amount of hours until the cuts are up on the Internet." So let's just say, let me actually see if I can do this live. If I can, incredible. If I can't, I have already faked it, but we'll see.

How many people went to the Tippin concert last night? Show of hands. Me too. And I'm really feeling it today. You know what I mean? Okay. So this is the cut that we just made literally, and let's just say that I'm the client. Right? And I'm listening to it. [Man] Okay. If this was a-- Messy audio.

Real 10,000 pounds and I wish to give this to you, how-- What do you think you're curious to spend it on? [Woman] I wouldn't spend it. I feel I might put it into savings, I think. To an extent, I think any sort of lump sum of money is going to come handy whether that's, obviously to, I guess, we get some property or I think...

Cut out. I don't know. [Woman] I think well, yeah. There's a little blip at the end.

Yeah. Cut out. Cut out blip.

Okay. So let's say I left those three comments, and I'm the client on the Internet, and I'm back here. So now I want to implement those comments. Right? So I'm going to open up...

That video, and you can see my playhead has jumped to the beginning, and the playhead here is at the beginning. And the playheads are linked because this link playheads is active. So I know that when I go to the comment, my playhead here is going to jump to that comment. But even better than that, I can actually see the comments on my timeline itself. So if I go over here to show comments, I can download them, I can import them, and they show up as markers, as markers on my timeline.

Let me see if I add another one.

Bad audio.

Cut out. What would I do then? Okay. Then I come back. Now, obviously, the markers aren't there, but now I can import those comments and add those other markers. So I can continue importing comments even afterward. So here, by default, Ripple Sequence Markers isn't selected. So I'm just going to lock the adjustment layer so that I can start cutting and editing. So here, the comment was-- What was it? I can just hover over it. Cut out, I don't know.

I think, yeah, I'm not going to say no.

I don't know if it links. Let me try again.

I'll go over to it. I'll link the playheads at the beginning, then I'll go into Show Comments, Import Comments. Great. So if I wanted to cut something out, like if I wanted to cut this beginning part out from here to here, I can just do Q and cut it. Right? Looks like I've implemented the note. But the thing is now all the other trailing notes are off because my markers didn't ripple. So now none of these line up to where my client was telling me that those things are. So see, I'll try that I'll show you that again.

Man, tipping messed me up last night. Let me tell you. All right. Here we go. So I press Q, and you see the markers don't ripple. So if you go to Markers, Ripple Sequence Markers, and now I want to get rid of that section, Q, now the markers ripple. So make sure you have ripple sequence markers constantly enabled, and then they will ripple for you. So let's just say that we love it. It's so great, and our client told us to get rid of everything before this.

So delete that, and then we're just soloing that one track that sounds good. But how does it cost 600k? We'll add some more cuts. Let's just pretend like this is after we've heard back from our client. Bunch. Checkerboard.

This, by the way, I should not be doing this on the same one. I should go right click, reveal sequence in project, duplicate this by holding out Command and dragging down. Call it 3, Carnaby Street interviews, cut, and that's what I'm working on. So every time the client comes back with notes, I should just make a new sequence so that I don't edit destructively. Right? And then trim that down. Turn on snapping by pressing S so that it snaps. Okay. Great. Now I have my text that I have transcribed, but I want to create captions for this. So I'm just going to click the CC button to create some captions that are burned into the text. Let's say that this has been approved. I go to single. I make sure the maximum length in characters is not too long. The minimum duration is not too long. And then there's no gap between frames, and I go to create captions. So there are the captions. 600k for two beds. Do you know what I mean? So it's like I can't even pay the-- She said, "do you know what I mean?" But it says "tonight," so I can just come in here and type that in.

There we go. So let's say that I have completely gone through, edited these captions, made sure because they're auto generated, which is already cool. And if you've ever worked with auto generated captions before, it's really hard to know where a sentence ends and another begins. And I think Premiere Pro actually does a really good job of this because it kind of can recognize where the pauses are. It puts a period there and it starts the next sentence with a capital letter.

I don't know if you know that that's pretty crazy. Okay? That thing alone saves me so much time because I used to have to do just that part of it. It used to be able to only transcribe things, but not actually contextually understand what's going on. So I have these captions. They look horrible. So I'm going to just edit them just a little bit. So here in Essential Graphics, I'm going to go-- And also I got to make sure that I am not running late. Am I running late? When did this start? 12:30? It's 1:32? We're very close. We're very close to the end. So I'm going to go to edit. I'm going to type in something like lato, bold, and change the color. Something like that. And change the background. No. It was 45. Right? - Forty five. - Yes. Thank you. Thank you for keeping me honest. I remembered now. Okay. So it's changed it to this one caption, but not the next one. So I'm just going to press this button called Redefine Style, and it says, do you want to change all the captions on the track? Yes. Okay. So now all the captions are changed, and I can even create this as a preset by clicking this plus button. So create style, and the style is going to be boxy, lato, yellow. There we go.

And now I have burned in captions. Now let's say the client's like, great. Now make a vertical one. Okay. Okay, client. Yes. I can do that very simply. So I just go to Sequence, Auto Reframe Sequence, and I choose Vertical. And I'm going to leave it at this, don't nest clips. I'm going to click create.

And see how it's moved, and it's chosen the person who's speaking? Kind of amazing. Right? Give her a side hustle to work on. - I think-- - Pretty cool. For two beds. Do you know what I mean? So it's like I can't even pay the deposit.

- I hope not. - I like this. Okay. And sometimes it might be a little bit off, and that's fine because you can always adjust it if you go into Effect Controls. You can always deselect that and do a manual adjustment should you need to.

There we go. Sorry. It was a little zoomed in, so you were probably like why is it cutting off everyone's head? It's not. It's not cutting off everyone's heads. And then you can adjust it here too, because, let's say, it's for Instagram. Everyone knows there's also sorts of crap at the bottom here. Right? So instead we can just adjust this, select all of them, and move them up.

Hello? There we go.

It's maybe a little too far, but there we go.

So now we're ready for Instagram. We go to the Frame.io. We go out here. We upload it. We call it Carnaby Street interviews for Instagram...

And we click Upload, and there they go. There they're off. There they're off. Oh, my God. So let's say your client comes back and they're like where's the B-roll? Well, yeah, obviously, where is the B-roll? You did shoot B-roll, right? So right click, go to revealing project. So we see where they are, and this is A cam. Let's go to A cam, and we did shoot B-roll. So let's see where the B-roll is.

Did we shoot B-roll? We should have. Let's see.

We might have shot B-roll on B cam. Yeah, we did. So here's a bunch of B-roll. This is B-roll of the Carnaby Street sign, for example. All that kind of stuff. And if you look at the information about it, which personally I like to have all of my relevant information right up front. So if video info like the size of the frame is relevant, I'm just going to have it be like right here. So you can always change because when it's in that little window it's just hidden in the bottom. Right? So you can just change what the first three columns say. And if you want to make any of these bigger by the way, all I've been doing is pressing the tilde key, which is the squiggly line on the top left to make it bigger. I'm assuming people already know this, but maybe people don't. So over here I have B-roll, and my client's like, "Definitely add B-roll." Okay. "Yes. Will do." So I'm going to just move the adjustment layer up one by option, so selecting option up, so that I have this track open for B-roll. And I'm going to make sure that...

Whenever I put B-roll in, it's just going to pop right in there by deselecting all of the source patching and track targeting, so it's only going to come into v3 over here. And the B-roll, let's take a look at it. We have some Carnaby Street B-roll. We have this flag. That's great. Look at this flag waving. And you bought a flag? Yes.

That's the B camera operator being very happy that there's wind. So if I take this portion of it with an I and an O, and then I can either drag the whole thing in, right, like that, or I can drag just the video in like that. That's a fun little button. Or I can just press comma that inserts it, and then or period that overwrites it. So that's a really easy way to just keep pressing period. So going through all of your B-roll and just going like IO period. Right? Going to do another section. IO period. Instead of having to drag it every single time, IO period. IO period. So it's in here, except when I put it in. It was recorded in 60 frames per second, which I recommend for slow motion, but it's not slow. If I was to give you this right now. - Yeah. - I'm afraid. Let me just mute everything for now. It's not slow. It's not-- It's waving, with a regular wind speed and not a slow wind speed. So if we wanted to make it slow, I mean, usually what people do is they would move this away, change this to the rate stretch tool by pressing R, rate stretch that. Okay. Well, now it's in slow motion.

But at what cost? So instead of doing all of that, just do it beforehand. If you know that all of your 59.94 clips are in slow motion and they are B-roll, just select all of them. So select the first one, hold down Shift, go all the way to the last one, select that. By the way, I'm going to change their label because I love labels. I'm going to make it purple. And then I'm going to right click, go to Modify Interpret Footage and then interpret it to the frame rate of the sequence which is 23.976.

There we go. And now they are already in slow motion. So when I'm doing my little IO period, I can now bring them in, and they're already in slow motion, except they take a bajillion years to load for some reason. I think my computer hates me, you guys. I think, it's like, "You were loyal to PCs for 10 years and you just decided to switch to a Mac just a few months before you have to give a presentation, well, we hate you." All right. So IO period. If you don't want to do that, you can even do it within the bins themselves. So here for example, I can go ahead and do and find IO and then period, and I did it from the bin instead of having to pull everything out.

Pretty cool.

You know? Pretty cool. Pretty cool. So you can like add B-roll that way. So a couple of takeaways from this is number one, make sure that if you are finishing in something smaller like you're finishing in 1080, shoot wider because something like this will happen where you have a wide shot, but you want to focus on this guy. So you can always zoom in without losing any resolution. So try to shoot wider than your final format is number one. Number two, if you have the opportunity to record a fake third camera, just do it. Explain to the people what why you're doing this and record some noddies. Okay? Making sure that you have enough to cover the whole thing, so that way it looks like you have a third camera.

Number two, or number three, if you're shooting B-roll, try to shoot it in slow motion so that you have more B-roll to go off of. So shoot in a higher frame rate than your frame rate that you're doing for your interviews. Number four, when you are sending number four, number five. Exactly. That's what I mean. When you are sending these versions to your clients, make sure you number them, you version them because I don't do a underscore final ever because it's never underscore final. So I'm always sending underscore v1, underscore v2 and until the end. Sometimes it goes into v37. So make sure that you are versioning every single time someone sends you feedback.

Number three, number five, number six, whatever. Make sure that-- Make use of the Auto Captioning tool here because it's going to save you a ton of time both in generating transcripts and also generating subtitles. Also make use of the tool that helps you reframe the auto reframe.

It's just really, really helpful for making a social cut of something.

When you are putting in B-roll, make sure that you can just have that layer enabled on the source patching and track targeting so that every single time you have a B-roll clip, you don't have to drag it in losing time every single time. And I think let's see. I think that's it. I think I folded somehow into the hour. So my next session is a much-- My next session is the opposite of this one, meaning it's going to be crazy. I'm going to be trying to run through as many advanced editing tips as I can in one hour. So that's coming up. I have to actually literally start running across the entire convention hall in Lincoln room G. So if you want to come say hi or if you have any questions about this session, then walk with me. That way we don't lose the time. Thank you so much for coming, and I hope you learned at least one new thing today.

Thank you.

[Music]

In-Person On-Demand Session

Shooting and Editing Interviews in Premiere Pro - S6609

Sign in
ON DEMAND

Closed captions in English can be accessed in the video player.

Share this page

Speakers

  • Valentina Vee

    Valentina Vee

    Director of Motion Pictures, Adobe Community Expert, Nebula Motion Pictures

Featured Products

Session Resources

No resources available for this session

About the Session

Learn the best tips and techniques for how to edit your corporate interviews using the powerful — and very effective — tools in Adobe Premiere Pro and Frame.io. From Camera-to-Cloud to jaw-dropping, timesaving AI, you’ll experience the best way to capture and edit interviews with ease.

Join director Valentina Vee as she teaches you how to:

  • Generate and edit a transcript that’ll cut your editing time in half with Text-Based Editing
  • Organize your interview footage for the most efficient editing workflow
  • Harness the power of shortcuts to save editing time
  • Upload and revise your edits for quick client and stakeholder review
  • Create burned-in captions and SRTs for a better viewing experience.

Technical Level: Intermediate

Category: How To

Track: Video, Audio, and Motion

Audience: Post-Production Professional

This content is copyrighted by Adobe Inc. Any recording and posting of this content is strictly prohibited.


By accessing resources linked on this page ("Session Resources"), you agree that 1. Resources are Sample Files per our Terms of Use and 2. you will use Session Resources solely as directed by the applicable speaker.

Not sure which apps are best for you?

Take a minute. We’ll help you figure it out.