Create animated YouTube videos.
Explore the process, tools, and tutorials that can help you make high-quality animated videos and share them online.

Attract attention to your YouTube channel.
Animation isn’t just for kids. People of all ages are drawn to it, so it can work for any type of online video. Use it to tell a story or sell a product. Make explainer videos and tutorials easier to understand, or raise awareness with marketing or professional videos. Even a slideshow is more engaging if you animate the photos as they come in and out of frame.
Begin with a script and a storyboard.
No matter the type or purpose of your project, begin by writing an outline or drafting a script — the best videos start with planning. If your goal is to explain a complex concept or process, start writing the rough draft of your voiceover narration. Note any ideas for illustration or motion that come to you as you work.
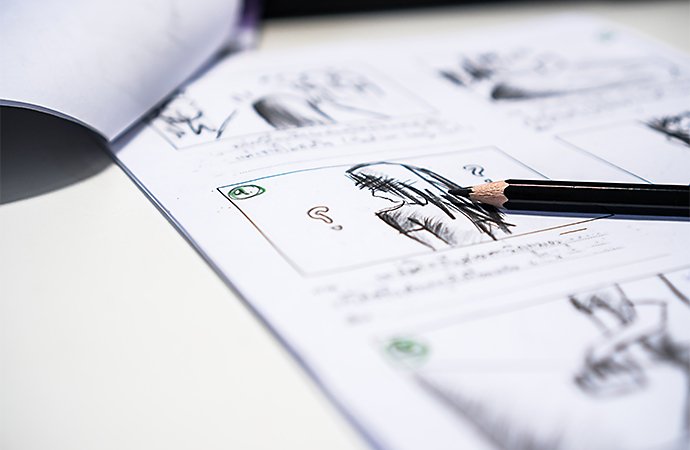
Once you have a solid sense of your video’s structure, begin storyboarding, or creating a series of drawings that will help you visualize the action. Break down each scene shot by shot.


Your drawings don’t have to be extremely detailed, but the more specific your storyboards are, the better they’ll serve you as the building blocks for your animation. And if you find you’ve written something that will be too difficult or time-consuming to achieve, try rewriting the scene to make it easier to animate.
Though you won’t be shooting live action, the techniques of live-action storytelling can still help you consider how to tell your story. As you craft your storyboard, consider the camera angles and shot types that will work best with your story and help keep your audience engaged.
Before they start animating, professional animated video makers often create an animatic, which is a rough animation of the storyboards. With placeholder audio, also known as a scratch track, you can get a sense of how the video and sound will work together. You might find you need to adjust the timing of the voiceovers and background music, and it’s much easier and faster to make these changes before every frame of the video has been animated.
Choose your tools and start video production.
The animation software that best fits your YouTube video depends on the type of video creation you have in mind.
Animate photographs.
Spice up a slideshow with motion. Animate photos to slide in and out of frame, pan across them, and zoom in. With Adobe Premiere Rush, it’s easy to do it quickly right on your phone. Order clips exactly the way you want, choose how long each photo stays in frame, resize images, and customize the panning and zooming effects. For even more customization of transitions and total control of the motion and visual adjustments of each photo, use Adobe Premiere Pro.
Create vector animations.
Turn any sketch or ink drawing into an animated cartoon. Once you have your drawing, take a photo of it and turn it into a vector shape with your mobile device and Adobe Capture. (Vector shapes stay sharp at any size, so you can blow up your drawing for large screens.) Once you’ve turned it into a vector shape, refine it, add color, and animate the drawing in Adobe Animate.
Make a whiteboard video.
If you want to explain a complex issue or process and you find narration less than riveting, try a whiteboard video. Motion can keep your viewers tuned in and help them follow you, even without words or sound.
All you need is a dry-erase board or white paper, a well-placed camera, and lighting that avoids making shadows on the board as you draw. Then just use a marker to turn everything from a math problem to a complicated infographic into a compelling whiteboard video.
You can also create your entire whiteboard animation digitally. With Adobe Animate, start with your completed text or drawing and work backward. Paint over your lines with a white brush, adding keyframes as you go. Then select Modify › Timeline › Reverse Frames. When you play the animation, your lines will appear as if you’re drawing them live.
Create and animate original characters.
A good character goes a long way toward keeping viewers engaged. You might find your marketing video much improved if a cow or chicken does the selling instead of your most dramatic marketer.
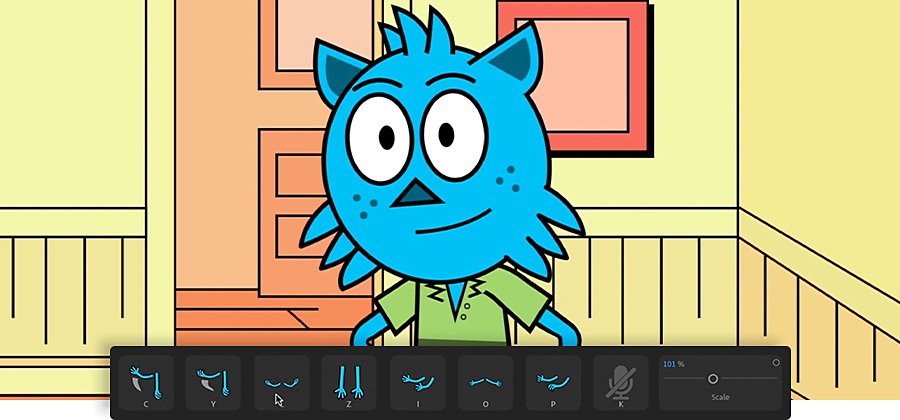
With Adobe Character Animator, create a character, or puppet, and control it with your own movements using your video camera. Then lip sync with that puppet in Animate, or upload prerecorded audio and sync it with your puppet. Then add movement.
Animate with keyframes.
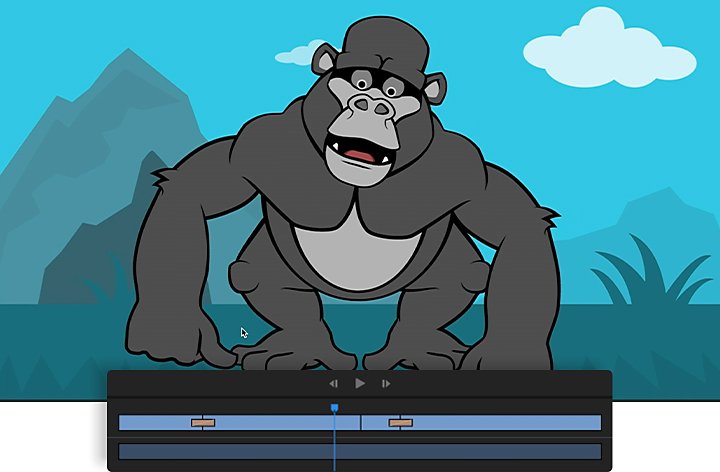
Keyframes are the key to modern animation. These are markers that define the beginning and end points for changes in onscreen elements that give the impression of movement. Adobe After Effects, Animate, and Character Animator all use keyframes to identify different elements of a graphic and determine how those elements move or change over time.
If you want to do something straightforward, like show a car driving from one point in the frame to another, make it happen with keyframes. Set the first keyframe on your animation timeline where you want the car to start and a new keyframe further along the timeline where you’d like it to end.
Location is only one parameter you can change. Add a keyframe to make the car grow or shrink in the frame, rotate, or gradually disappear and turn into a ghost car. And the ghost car doesn’t have to move at a set rate or in a straight line. In After Effects, use the Graph Editor to adjust the rate of movement. To send the car down a winding road, just create a path for it.
If you’re short on time — or you’re not an artist — you don’t have to draw the car, or any other object, from scratch. Search Adobe Stock for vector images for most things you might want to animate. Explore different backgrounds, including stock footage, to make your video content even more dynamic.
Add a third dimension.
You can tell a great story or make a compelling argument with 2D animation. But if you want to add some additional wow factor to your video, learn how to animate in 3D. In After Effects, enable the Cinema 4D Renderer to create compositions with layers that have true 3D geometry and depth.
Create depth by rotating 2D Illustrator layers in 3D space, turning Text and Shape layers into 3D objects. Add lights to create shadows, and fly through a scene with a camera. Watch a few tutorials to learn more.

Edit the video.
Whether you’ve shot stop-motion animation, created a composite in After Effects, or used motion capture with Character Animator, you can do your video editing in Premiere Pro, the industry standard for professional video editors.
Add sound.
Record voiceover narration right in Premiere Pro, add sound effects and music tracks. (Check out Adobe Stock for royalty-free music.) In the Essential Sound panel, classify your audio clips as Dialogue, Music, SFX, or Ambience. Create and apply presets to the same types of clips, unify the loudness of your clips, and add clarity to dialogue.
Add an animated intro.
Even if your video is purely instructional, introduce it in a fun way that makes viewers want to keep watching. In Premiere Pro, find animated templates in the Essential Graphics panel. Created in After Effects, these templates are easy to add to your timeline and customize with your own text. Try a free motion graphics template or browse templates available from Adobe Stock and create title sequences without starting from scratch.
Pick the best video format for YouTube.
For the best playback, shoot, edit, and export your video at the same frame rate and resolution. YouTube supports several different video file formats, but for video that looks good on everything from phones to widescreen TVs, shoot in 16:9 or another wide format and render with the H.264 codec to create an MP4.
If you expect people to watch your video on their phones only, export to YouTube at 480-pixel SD Wide or 480p SD. A good default is the standard 720p HD. For videos that are complex or heavy on visuals, choose 1080p Full HD, but that’s usually unnecessary otherwise.
Once you find your animation style, you’ll be able to make videos that get likes and subscribes. With so many animation tools drawing power from Adobe Sensei AI technology, you can accomplish more than you think, faster than ever. Get started and get things moving.
Allez plus loin avec Adobe Premiere Pro.
Réalisez des vidéos impressionnantes pour la quasi-totalité des supports : le cinéma, la télévision et le web.
You might also be interested in…

Une liste de plans est comme un gilet de sauvetage en studio.
Apprenez à créer une liste de plans qui guide l’équipe pour préparer les différentes configurations nécessaires au fil de la journée.

Introduction aux types de prises de vue
Découvrez les prises de vues les plus courantes, et apprenez quand et comment les utiliser pour obtenir les meilleurs effets.

Introduction au montage vidéo
Apprenez les principes du montage vidéo et des conseils pratiques pour le grand et le petit écran.
Téléchargez Adobe Premiere Pro.
Montez et produisez des vidéos pour le cinéma, la télévision et le web, avec l’une des meilleures applications de montage vidéo du secteur.
Gratuit 7 jours, puis CHF 25.95 par mois.