40 Fall craft ideas for a cozy and creative season.

Find fall craft ideas worth making, displaying, and sharing with everyone.

Design with your idea

Easy all-in-one editor
One-click edits from any device
Fast creation with generative AI
Thousands of professionally-designed templates
toc-title
Table of contents:
toc-aria-label
table of contents links
content-1
Where to find fall craft ideas for every age and skill level.
content-1-short
content-2
Fall craft ideas that bring the season indoors.
content-2-short
content-3
Fall craft ideas for kids that leave room for imagination.
content-3-short
content-4
How to use Adobe Express to bring your fall craft ideas to life.
content-4-short
content-5
Fall craft ideas for adults that are worth displaying.
content-5-short
content-6
Fall paper craft ideas that bring simple supplies to life.
content-6-short
content-7
How to give handmade fall crafts a more complete look.
content-7-short

Where to find fall craft ideas for every age and skill level.

Fall has a way of making ordinary materials feel full of possibility, from leaves collected on a walk to paper, twine, pinecones, and small pumpkins waiting to be transformed. These fall craft ideas include quick projects for kids, more detailed options for adults, and paper crafts you can make with supplies you may already have at home. Whether you want a quiet weekend activity or handmade decor for the season, you’ll find plenty of ways to start creating with Adobe Express.

Fall craft ideas that bring the season indoors.

Fall craft ideas often start with materials that already have plenty of character, from bright leaves and rough pinecones to dried wheat and small pumpkins. These projects turn those seasonal finds into decorations you can hang, display, give away, or bring out again next year.

Press and frame colorful fall leaves.
Collect leaves in a mix of shapes and colors, then press them inside a heavy book until they are completely flat. Arrange them in a glass frame as a grid, loose wreath, or overlapping cluster, and add a small label with the date or place where you found them.
Make a mason jar lantern with autumn-toned tissue paper.
Layer torn pieces of orange, amber, red, and gold tissue paper around a clean mason jar using decoupage glue. Once it dries, place a battery-operated candle inside and finish the rim with twine, ribbon, or a small handmade tag.
Create a pinecone garland for the mantel.
Tie pinecones onto a length of sturdy twine using floral wire, leaving enough space for each one to hang naturally. Dried orange slices, wooden beads, or scraps of plaid ribbon can break up the brown and give the garland more texture.
Build a fall-themed wreath using dried materials.
Attach dried leaves, seed pods, wheat stalks, pinecones, and preserved flowers to a grapevine wreath base. Leaving some of the vine exposed keeps it from looking too crowded, while a small seasonal card can add a welcome message near the center.
Paint small pumpkins instead of carving them.
Use acrylic paint to cover small pumpkins with gingham patterns, tiny flowers, simple faces, or solid blocks of color. Painting the stems in a metallic shade or grouping several pumpkins in one palette can make the display look more pulled together.
Make a DIY acorn and twig centerpiece.
Fill a shallow bowl with acorns, short twigs, dried leaves, and a few battery-operated candles in glass holders. For more height, stand the twigs upright in a vase and hang tiny paper leaves or handwritten tags from the branches.
Create a fall-scented candle using essential oils.
Mix soy wax with scents such as cinnamon, cedarwood, orange, clove, or vanilla, then pour it into a heat-safe jar with a centered wick. Add a custom label with the scent name and pouring date, especially if you plan to make several candles as gifts.
Build a leaf-stamped tote bag.
Brush fabric paint onto the veined side of a leaf and press it firmly onto a cotton tote. You can scatter several leaf shapes across the fabric or repeat one design in neat rows for a cleaner pattern.
Make a woven wheat or wheat-stalk bundle decoration.
Gather dried wheat into small bundles, then wrap the stems tightly with twine or narrow ribbon. Leave them simple, braid a few stalks together, or fan the tops outward before displaying them in a ceramic jug or along a mantel.
Create a fall foliage-inspired wall hanging.
Tie yarn, ribbon, dried grass, and pressed leaves to a branch or wooden dowel, keeping the lengths uneven for a looser shape. You can also add small photographs or printed words from an Adobe Express photo collage to make the piece feel more personal.

Crooked twigs, uneven leaves, and natural differences in color are often what make a handmade fall decoration feel cozy and on theme with the season.

Fall craft ideas for kids that leave room for imagination.

Fall craft ideas for kids work best when the materials are simple and the finished project does not depend on everything landing in exactly the right place. Paper, crayons, washable paint, felt, and a few objects collected outside are enough to fill an afternoon without turning the table into a complicated supply station.

Make handprint turkey art.
Cover a child’s palm and fingers with washable paint, then press the hand onto thick paper to create the turkey’s body and feathers. Once it dries, add eyes, feet, a beak, and the child’s name and age to turn it into a seasonal keepsake.
Create leaf rubbing art using crayons and paper.
Place fresh leaves vein-side up underneath plain paper, then rub the side of an unwrapped crayon across the surface. Children can overlap different shapes and colors, cut out the finished leaves, or use them to decorate a card or garland.
Build a paper plate pumpkin craft.
Paint a paper plate orange, then add a brown stem, green leaf, and curved pumpkin lines once it dries. Children can also give the pumpkin a face, glasses, or patterned paper patches instead of making every one look the same.
Make acorn characters using felt and googly eyes.
Glue small felt hats, scarves, capes, and googly eyes onto clean, dry acorns. Add tiny expressions with a marker, then turn the finished characters into a woodland family, group of explorers, or pieces for pretend play.
Create a fall tree using fingerprints for leaves.
Draw a bare tree trunk on heavy paper and let children stamp red, yellow, orange, and brown fingerprints around the branches. A few prints beneath the tree can become a pile of fallen leaves, while fingerprints in unexpected colors make every picture look different.
Build a pinecone owl craft.
Add felt wings, large paper eyes, and a small triangle beak to an upright pinecone. Children can stick with natural woodland colors in a custom color palette or use bright felt and mismatched eyes to give each owl its own personality.
Make a paper bag scarecrow.
Use the flat bottom of a paper lunch bag as the scarecrow’s face, then add yarn hair, paper patches, a folded hat, and a wide smile. Once it is finished, the bag can become a puppet or be lightly stuffed with paper and displayed upright.
Create a fall-themed sensory bin with leaves and seeds.
Fill a shallow container with clean dried leaves, pinecones, large seeds, smooth stones, scoops, and small cups. Hiding paper shapes or wooden letters among the materials gives children something to search for while they sort, pour, and explore.
Build a popsicle stick pumpkin patch.
Glue popsicle sticks side by side, paint them orange, and add a paper stem and curled pipe-cleaner vine. Children can make several pumpkins in different sizes, name them, and arrange them across a strip of cardboard to create a full patch.
Make a leaf crown for outdoor play.
Cut a sturdy paper band to fit around the child’s head, then attach flexible leaves around the outside with tape or glue. Add paper berries, acorns, or small drawings before wearing the crown on a walk, during pretend play, or for a seasonal group photo.


The fun part of these projects is seeing where children take them. A scarecrow may end up wearing a superhero cape, a turkey may have blue feathers, and a leaf crown may grow large enough to become a full costume.

How to use Adobe Express to bring your fall craft ideas to life.

Picture, Picture
Choose a project.
Pick one project that matches your time, skill level, and available supplies.
Gather your materials.
Collect paper, paint, glue, natural materials, and any tools you need.
Use Adobe Express to design.
Use any of the available templates on Adobe Express, and adjust colors, patterns, and details.
Apply finishing touches.
Let paint or glue dry completely before handling, then add in any detail work.
Display and share.
Add a creative label, frame, or ribbon for a more put-together look for your fall craft ideas.

Fall craft ideas for adults that are worth displaying.

Fall craft ideas for adults can take a little more time, but the finished pieces should still feel enjoyable to make rather than overly technical. These projects focus on texture, color, and seasonal materials, with results that can become home decor, thoughtful gifts, or something useful once the weather cools down.

Build a dried floral and wheat centerpiece.
Arrange dried wheat, hydrangeas, eucalyptus, seed pods, and muted flowers in a low ceramic bowl or wide vase. Start with the tallest stems in the center, then let a few smaller pieces spill outward so the arrangement looks loose rather than perfectly symmetrical.
Create a hand-lettered fall quote print.
Choose a short line that suits the season, then sketch the lettering lightly in pencil before going over it with a brush pen or paint marker. Add small leaves, acorns, or simple border details, or create the layout digitally with an Adobe Express poster template before printing and framing it.
Make a macramé pumpkin using rope and twine.
Wrap cotton rope around a circular form, then knot or secure the sections so they curve into a rounded pumpkin shape. A short stick makes an easy stem, while jute twine, wooden beads, or a small fabric leaf can keep the finished piece from looking too plain.
Build a layered candle with fall-scented wax.
Pour wax in two or three stages, allowing each layer to firm up before adding the next one. Use slightly different colors or complementary scents, such as vanilla and cedarwood or apple and cinnamon, so the layers are visible without turning the candle into a rainbow.
Create a watercolor painting of fall foliage.
Start with a light pencil sketch of a branch, tree line, or cluster of leaves, then build the color gradually with thin washes of yellow, rust, red, and brown. Leaving a few pale areas untouched gives the painting more light and keeps the colors from becoming muddy.
Make a knit or crochet fall-themed scarf.
Choose a simple stitch and work with yarn in ochre, moss green, burgundy, cream, or warm brown. A wide stripe pattern, textured border, or small fringe detail can make the scarf feel seasonal without covering it in obvious leaf motifs.
Build a wood-burned pumpkin design.
Sketch a simple pumpkin, leaf border, or vine pattern onto an unfinished wooden plaque before tracing it carefully with a wood-burning tool. Work in a ventilated area, test the tool on scrap wood first, and vary the pressure slightly to create darker outlines and lighter interior details.
Create a fall-inspired embroidery hoop piece.
Stretch linen or cotton fabric inside an embroidery hoop, then stitch a small arrangement of leaves, mushrooms, acorns, or wildflowers. Using only three or four thread colors keeps the design cohesive and makes it easier to finish without the project sitting half-done until winter.
Make a beeswax candle with cinnamon stick accents.
Roll sheets of beeswax tightly around a cotton wick, pressing the final edge down firmly to keep the candle closed. Tie two or three cinnamon sticks around the outside with twine for decoration, but remove them before lighting the candle to keep the flame area clear.
Build a vintage-style fall postcard collage.
Layer scanned postcards, old book pages, botanical images, stamps, and faded autumn photographs into a scrapbook-style composition. An Adobe Express photo collage can help you crop, overlap, and adjust the pieces before printing the final design as wall art or a seasonal card.

These projects are a good excuse to slow down and spend more than twenty minutes making something. The little imperfections, from uneven stitches to brush marks and irregular dried stems, usually give the finished piece more character than a perfectly polished version would have.

Fall paper craft ideas that bring simple supplies to life.

Paper is one of the easiest materials to adapt for fall because color, shape, and layering can do most of the work. A few sheets of cardstock, patterned paper, glue, and basic cutting tools can become garlands, table decorations, wall art, or lightweight pieces that are easy to store for another season.

Make a paper leaf garland in ombre fall tones.
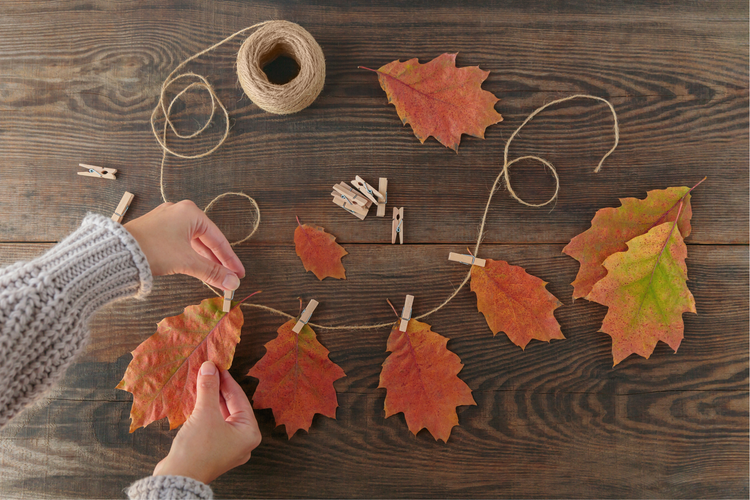
Cut the same leaf shape from cardstock in shades that move from pale yellow through orange, rust, and deep red. Fold each leaf gently down the center for dimension, then attach them to twine in color order so the gradual shift is easy to see once the garland is hung.
Create a layered paper pumpkin centerpiece.
Cut several identical pumpkin shapes from thick paper, fold each one down the middle, and glue the folded halves together to create a rounded form. Use two or three coordinating colors, then add a rolled paper stem and curled strip of green paper for the vine.
Build an origami fall leaf set.
Fold square sheets of lightweight paper into maple, oak, or simple pointed leaf shapes. Make several in different sizes and arrange them in a shallow bowl, attach them to gift tags, or scatter them along a banner for a decoration that does not require real leaves.
Make a paper rosette wreath in autumn colors.
Create accordion-folded paper rosettes in several sizes using patterned and solid paper. Glue them onto a cardboard wreath base with the larger rosettes first, then use smaller ones to fill the gaps and hide any exposed backing.
Create a paper-quilled fall foliage design.
Roll narrow paper strips into coils, teardrops, and curved shapes, then arrange them into leaves, branches, or a small autumn tree. Tweezers and a fine-tip glue bottle make the process much easier, especially when placing the smaller pieces close together.
Build a 3D paper pumpkin lantern.
Cut matching pumpkin panels from sturdy paper and join them along the sides, leaving enough space inside for a battery-operated tea light. Cut small stars, leaves, or curved lines into the panels before assembling them so the light can shine through the openings.
Make a paper fan fall-themed wall decoration.
Accordion-fold rectangular sheets of paper, join the ends, and open each one into a circular fan. Layer several sizes in mustard, rust, cream, and brown, then add paper leaves or a printed message in the center to create a fuller wall display.
Create a paper cutout silhouette of a fall scene.
Cut a dark tree line, woodland animals, or a row of rooftops from black or deep brown cardstock. Mount the silhouette over a background of layered orange, red, and yellow paper to create the look of a glowing fall sunset.
Build a paper accordion turkey craft.
Fold strips of colored paper into accordion shapes, then fan them out behind a simple paper turkey body. Using different colors and widths for the tail feathers makes the finished turkey look more dimensional and gives children or adults room to play with the design.
Make a layered paper tree with falling leaves.
Cut a trunk and branches from brown paper, then build the canopy with overlapping leaves in several autumn shades. Add a trail of smaller leaves falling toward the bottom of the page, and leave a few scattered around the base so the scene does not look too tidy.

Fall paper crafts are especially useful when you want seasonal decor without keeping boxes of bulky materials afterward. Most of these pieces can be flattened, recycled, or tucked into a folder once the season ends, then recreated in a completely different palette the following year.

How to give handmade fall crafts a more complete look.

The difference between a craft that looks thoughtfully handmade and one that looks unfinished often comes down to a few small decisions. You don't need expensive materials, but it helps to choose a clear palette, repeat a few details, and know when the project has enough going on.

Start with three or four colors rather than using every autumn shade at once. Rust, cream, olive, and brown create a softer look, while orange, mustard, burgundy, and dark green feel richer and more traditional. Repeating the same colors across paper, ribbon, paint, or labels can make separate pieces feel like part of one collection.

Texture matters too. Smooth cardstock looks more interesting next to twine, dried wheat, felt, rough bark, or pressed leaves. When a project already contains several natural materials, keep printed elements and lettering simple so they don't compete for attention.

A clean edge or thoughtful finishing detail can also change the whole result. Trim loose threads, erase visible pencil marks, remove dried glue, and give painted pieces enough time to dry fully. For gifts, add a small tag explaining what the piece is made from or when it was created.

Bring your fall craft ideas to life with Adobe Express.

Adobe Express can help with the parts of a craft project that are easier to design digitally than by hand. Before printing, you can test colors, typefaces, layouts, and image placement without using up your paper or starting the lettering over each time.

Create a seasonal poster for a hand-lettered quote, botanical print, or illustrated fall scene. You can choose a type style that fits the project, add a simple border, and resize the finished design to suit a frame you already own.

If you’re hosting a craft afternoon, make a flyer that includes the date, time, project, and supplies guests should bring. For a school, community center, or larger gathering, a matching banner can help mark the crafting area and carry the same colors or imagery across the event.

You can also turn a finished craft into something meaningful beyond the season. Write a short letter to include with a handmade gift, explaining the meaning behind the materials or the memory that inspired it. That small note often becomes as valuable as the craft itself.

You might also like...

View all