


Design
How do you design stickers and sticker sheets for print?

Adobe Express
11/13/2026
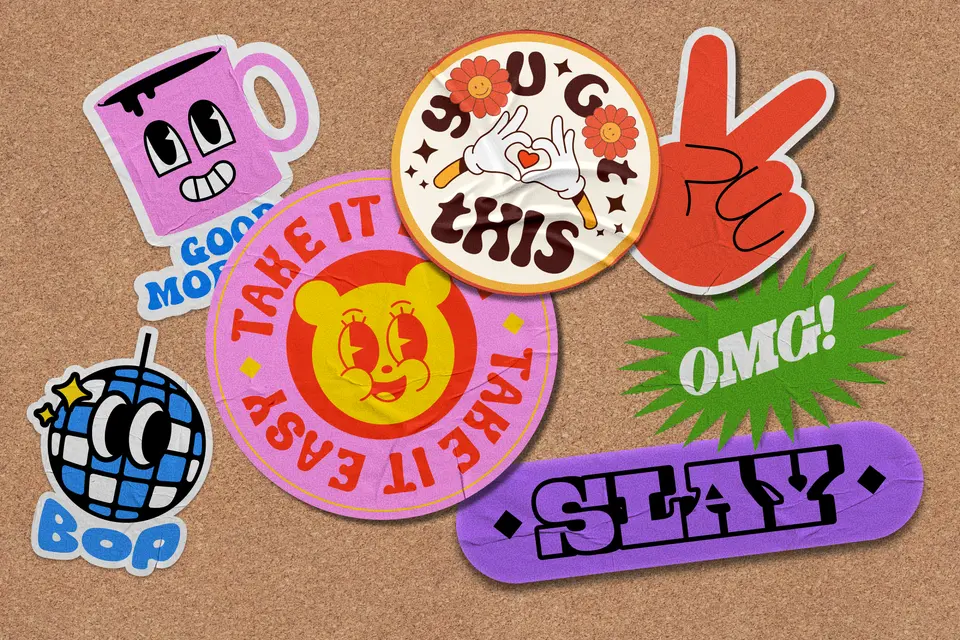
A sticker needs artwork people can recognize and a shape they can peel and use. Whether you're making shop giveaways, classroom rewards, or illustrated sticker sheets, start with the printer's requirements. The finished size, cutting method, bleed, and material all influence how your design looks when it arrives.
Adobe Express sticker templates help you develop the artwork, then prepare it for your chosen printing process. Plan for readable lettering, clean edges, and a consistent style across the set.
Key takeaways
- Die-cut stickers are cut through their backing; kiss-cut stickers leave the backing intact.
- A visible border, a cutting path, bleed, and a safe area each serve a different purpose.
- Use your printer's requirements for the selected product. Bleed and sheet-spacing measurements vary.
- Prepare each sticker on a sheet with its own cutting boundary and enough room for bleed.
- Check the exported file and the printer's proof at the intended size before approving production.
What are stickers and sticker sheets?
Stickers are adhesive designs supplied on a backing that you remove before applying them. A sticker sheet holds several peelable designs on a shared backing, which can also carry a title, logo, or decorative background.
The purpose of your custom stickers determines the layout. A giveaway might feature a single illustration, while a product label needs a clear information hierarchy. If your sticker identifies or describes something you sell, use these product label design principles to decide what deserves space.
Why should small businesses and creators care about sticker design?
Careful sticker design supports several practical goals for a small business or creative project:
- Create a consistent presentation. A matching logo sticker can bring a simple bag, envelope, or wrapped order into your brand's visual style. Consider its role in the overall packaging experience.
- Give artwork another format. A coordinated sticker collection offers another way to turn designs into printed products, whether you sell a themed sheet or include a small extra with an order.
- Catch problems before ordering. Checking the smallest text, cutting boundaries, and material choice gives you time to revise a file before paying for a full run.
What is the difference between die-cut stickers and kiss-cut stickers?
The difference between die-cut and kiss-cut stickers is how deeply the cutter cuts. Either format can produce the same peeled shape.
- Die-cut stickers: The cut passes through both the sticker and its backing. The individual piece follows the design's outline, making it useful for standalone giveaways.
- Kiss-cut stickers: The cut passes through the sticker layer while leaving the backing intact. The larger backing provides space around the peelable design.
- Sticker sheets: Several kiss-cut designs share one backing. Each sticker needs its own cutting boundary, even when the collection looks like one composition.
A die-cut sticker can still have a white border. Cutting method and border appearance are separate choices.
How much bleed does a sticker need?
Use the bleed specified for your printer and product. Before choosing a number, separate the four boundaries that affect the finished result:
- Cut line: The path defining the sticker's final shape.
- Bleed: Background color or artwork extending beyond that path to allow for small cutting shifts.
- Safe area: Space inside the cut line where important text and graphics stay protected.
- Border: A visible band around the artwork that remains on the finished sticker.
Adobe's bleed guidance recommends matching bleed settings to the print shop's specifications. Confirm the required bleed around the cut line and whether the selected sticker or label qualifies for full-bleed printing.
Ask your printer how far important content should sit inside the cut line. If you include a border, confirm its minimum width for the selected product.
Follow the selected supplier's template rather than carrying settings across from another order. Extending a background into bleed shouldn't mean enlarging the entire design and pushing its lettering toward the edge.
How do you design stickers and sticker sheets?
Here are 7 essential steps
Imagine a small shop creating a logo sticker and a matching sheet of illustrated products. The designs can share a style while needing different sizes and cutting arrangements.
Step 1: Choose the format, size, and printing route
Decide whether you need individual stickers, a sheet, or artwork for a home cutting machine. Ask the supplier for the current template, available materials, finished dimensions, and accepted file types. Confirm whether its team creates the cutting path or expects you to provide one.
Choose the size against the actual surface. Cut a paper mockup and place it on the bag, notebook, or container. A shape that looks balanced on a monitor may crowd a small lid or wrap awkwardly around a curved bottle.
Set the canvas to the required size and units. Distinguish the finished sticker dimensions from the larger artwork area that includes bleed. For sheets, confirm both the overall sheet size and the size of each peelable design.
Step 2: Build clear artwork and a consistent set
Give each sticker one main subject or message. Keep the illustration recognizable when reduced, and test lettering at its actual printed size. A short shop name may work better than a logo accompanied by a tagline, website, and social handles.
In Adobe Express, a brand kit can keep your logo, colors, and type choices consistent across the set. Change the illustration or product name while retaining the same visual hierarchy. For a product range, these beer label design examples show how related designs can remain recognizable without looking identical.
Use source artwork with enough detail for the chosen size. Adobe recommends 300 PPI for print unless your printer requires a different value. At that resolution, a 2-inch-wide image needs 600 pixels across before adding bleed; increasing an export setting cannot restore missing detail.
For a photographic sticker, remove the image background, then inspect fine edges and restore anything important that was removed.
Step 3: Prepare the cutting shape
A decorative outline doesn’t automatically tell a printer where to cut. Confirm who will create the production path before drawing a colored line around your artwork.
Printer requirements differ. If you supply a cut line, confirm the required stroke, color, and naming with the printer. Adobe's guides explain how to createclosed paths andspot-color swatches when needed.
If that technical setup is required, prepare it in Illustrator using the supplier's instructions, or ask the printer to create it. Keep the path editable and distinct from the printed artwork.
Simplify the silhouette where possible. For a detailed flower illustration, try a smooth outer shape that leaves the small petal details inside the cutting boundary.
Step 4: Arrange the sticker sheet with space to cut
Start with the printer's sheet dimensions, then place the largest designs first. Add smaller companions while keeping the collection visually balanced. Leave room for any title or branding that should stay on the backing.
Use the printer's sheet-layout requirements for spacing between cut lines and between a cut line and the sheet edge, plus bleed around each sticker. Confirm its minimum sticker size. Every sticker needs a separate closed path, and paths must not overlap.
Check how the bleed areas meet, too. Add space wherever neighboring colors could intrude into another sticker and ask the printer to review a tight layout.
Use Adobe Express rulers and guides to position designs consistently. Page-edge bleed serves the sheet boundary; you still need to prepare bleed around each individual sticker.
Step 5: Match the material and color treatment to the job
Choose the material for the intended surface and handling. Ask about adhesive strength, removability, moisture exposure, and any care instructions. A sticker for a dry gift bag has different requirements from one intended for a frequently washed bottle.
Clear and holographic materials need another decision: Where should the material show through? This guide to white-ink printing describes how a white layer beneath colored ink increases opacity. On holographic stock, that layer also hides the shimmer beneath the selected area.
Mark which areas should be opaque, translucent, or unprinted, and confirm how the supplier wants those instructions delivered. A transparent PNG alone doesn’t communicate every white-ink decision. For color and resolution basics, see designing for print versus screen.
Step 6: Export for the selected printing process
If the printer requires vector cutting paths or named spot colors, finish and export that production file in Illustrator or its specified workflow. For artwork PDFs the supplier accepts, Adobe Express offers PDF Print export: choose Download, then PDF Print (Best for printing). CMYK is the default; select RGB if the printer requests it.
Match the bleed and crop-mark options to the supplier's instructions. Confirm whether crop marks and printer's marks should be included or removed. Page crop marks identify a page boundary, not the separate cutting shapes on a sticker sheet.
For a supplier or cutting workflow that requests transparent PNG artwork, set Background to No fill and choose Transparent PNG when downloading. Check the exported pixel dimensions and transparency, then complete any cutting-path setup separately.
Reopen the downloaded file and confirm that the size, artwork, and required production information survived the export.
Step 7: Review the proof before approving the order
Treat the proof as the proposed finished product. Inspect the cut shape, border width, spelling, smallest text, sheet arrangement, and any clear or white-ink areas. Compare it with your paper mockup and the selected product specifications.
Check the final cutting path carefully, since a printer may adjust it while preparing your artwork.
A screen proof can't show how the adhesive behaves on your container or exactly how a specialty finish catches light. Ask about a sample or small test order when those qualities matter. Confirm how proof revisions affect the production schedule and save the approved proof alongside the final artwork for reorders.
Sticker design best practices
- Keep an editable master and save separate production versions for each printer, size, and material.
- Use a consistent palette, type style, and border treatment across your sticker design and sticker templates.
- Review designs in their intended sticker sizes and shapes, both enlarged for defects and at actual size for readability.
- Use wider, simpler shapes where a delicate silhouette would make peeling awkward.
- Test a sample on the intended surface before ordering a larger quantity.
- Keep the approved proof, material name, finished dimensions, and order notes together so a reorder is easier to reproduce.
Quick sticker printing checklist
✅ Finished sticker and sheet dimensions match the order.
✅ Each peelable sticker has the intended cutting boundary.
✅ Sticker bleed and cut lines, along with safe areas, meet the selected printer's requirements.
✅ Sheet spacing prevents overlapping cuts or neighboring color intrusion.
✅ Text, thin lines, and images hold up at the final size.
✅ Material, adhesive, finish, and white-ink choices are confirmed.
✅ Export format, color mode, transparency, and marks match the required workflow.
✅ The final proof has been checked and approved.
Good sticker design brings together clear artwork, suitable materials, and files prepared for the printer’s requirements. Review the proof carefully and, when possible, test a small printed set to check readability, finish, and adhesion on the intended surface. Once those details are confirmed, keep the approved artwork and production notes with your editable master so you can create matching designs, build seasonal collections, and make repeat orders easier to reproduce.


