


Design
How do you design packaging for boxes, mailers, and pouches?

Adobe Express
11/17/2026
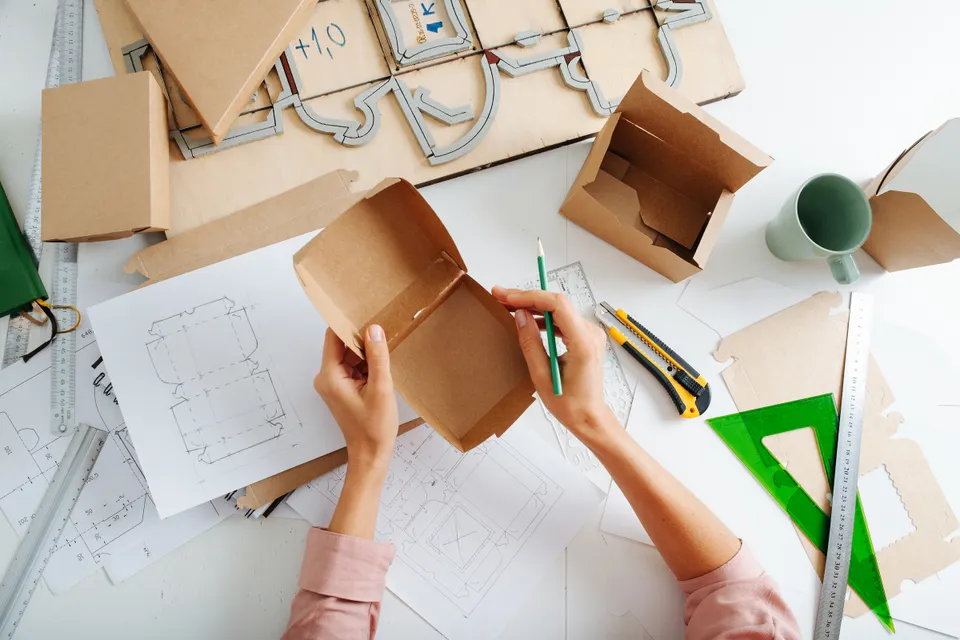
Packaging introduces your product and reflects your brand. A clear label tells customers what’s inside, while an insert can offer useful instructions or a personal note. For a small business, these details help make each order feel thoughtful and recognizably yours.
You can create the labels, inserts, and other graphics, while your manufacturer handles the package’s structure and material specifications. Adobe’s research on packaging and brand perception reveals that packaging is an often overlooked growth lever. This guide shows you how to plan the graphics and prepare them for your manufacturer, so your packaging can bring your brand to life.
Key takeaways
- You can create labels, inserts, sleeve artwork, and a shared brand style while your manufacturer handles the package’s structure.
- Request the current dieline template for the exact package and material before you decide where the artwork belongs.
- Establish your logo, colors, and type styles once, then reuse them across the package and your other marketing materials.
- Confirm the printable area, bleed, color instructions, and accepted file format with the manufacturer before preparing the final artwork.
- Check the evidence behind environmental statements, including any conditions that affect how customers can dispose of the finished package.
- Review artwork in context, then use physical samples to assess the package’s fit, opening, and finished appearance.
- Adobe Express label templates and brand kits help you create coordinated graphics without rebuilding each layout or reselecting every brand element.
What parts of packaging can you design yourself?
Several aspects of packaging design are DIY-friendly, especially with the right tools. Generally, you can design most of your packaging within the parameters set by your packaging manufacturer. You can design the label, printed insert, closure sticker, sleeve artwork, and shared visual style, while your packaging manufacturer supplies the dieline, structural engineering, and material specifications.
Your graphics introduce the business and explain what customers need to know about the product. A label might identify a notebook collection, while an insert tells the maker’s story or explains what comes in the set. Start with the information people need, then choose the few pieces that communicate it clearly; a small order may only need one well-designed label.
Your manufacturer supplies the structure and suitable material options. Expect them to share the dieline template, which is a flat drawing that shows how the package will be cut and assembled, including its cut lines, fold lines, and glue areas. These manufacturing instructions should be referenced when adding your graphics.
Adobe Certified Professional’s packaging design overview explains how visual design and construction work together. For custom packaging design, agree on the structure first, then develop your artwork inside the confirmed printable areas rather than trying to invent the package’s construction yourself.
Why should small businesses care about packaging design?
Packaging helps customers understand what they've bought and recognize the business behind it. In Adobe’s 2026 survey of 703 online consumers, 41% said packaging affects their trust in a brand. This describes respondents’ perceptions, not a guaranteed increase in sales. Consider the package as carefully as the product photographs and description.
- A clear first impression: A readable product name and a sensible order of information help someone understand the package quickly. Put the main message where it'll be visible on a shelf, in a delivery box, or in a product photograph.
- A recognizable business: Repeating your logo, colors, and type styles helps different products feel connected. A customer should be able to recognize the relationship between your online store, the outer package, and the insert inside without studying every detail.
- Protection that suits the product: Graphics and structure need to work together. Ask your manufacturer how the product will sit inside the package, what keeps it in place, and whether the proposed opening makes it straightforward to remove.
- Fewer avoidable questions: Accurate names, quantities, and instructions help customers check what they received. Before adding decorative copy, make sure the package identifies the correct version and explains any information someone needs before using the product.
- A more useful unboxing: An insert can offer care instructions, a setup tip, or a brief introduction to your business. Give it a clear purpose and place it where someone will find it at the right moment.
- More reliable repeat orders: Keeping the approved artwork, proof, and package details together gives you a reference for the next run. You can update a product name or seasonal illustration while checking that the underlying layout and construction still match.
If others help, use your plan’s access controls for a small group of editors and other people who view and reuse assets, organized by brand, business unit, or team. For larger organizations, Enterprise offers unlimited Brands and Libraries with Admin Console controls; Adobe documents deleted-asset recovery for up to 30 days.
What are the components of a packaging design?
A consistent look helps customers recognize your brand wherever they encounter it. Choose the components that serve your product, then give each a specific job:
- Label: Identifies the product and carries its essential information. Use the product label design guide for typography and composition; this guide focuses on where that label fits within the package.
- Insert: Adds a useful message inside, such as instructions, product details, or a thank-you note. Keep its tone and visual identity consistent with the outside.
- Seal or sticker: Closes tissue or identifies an enclosed item, using the same logo or color choices as the label.
- Sleeve: Wraps around a confirmed structure and provides another surface for product information. Use the manufacturer’s template so folds and joins fall in the correct places.
- Brand system: Keep a consistent look with Adobe Express brand kits, included in Premium, which hold logos, palettes, fonts, and graphics. Brands, in the Brands panel, support manual or image-upload setup, palette recoloring, and AI results based on your brand. Libraries, under Your stuff, store reusable swatches, palettes, fonts, and graphics through manual setup, independently of a specific brand.
How do you design your packaging?
Here are 7 essential steps
Step 1: Decide what you're designing and what the manufacturer supplies.
List the graphics you need, such as a label, sleeve, or insert, and ask your manufacturer which structure and material will protect the product. For a small run, compare ready-made boxes, mailers, or pouches with applied labels against printing directly on the package. Adobe’s guide to monetizing designs with print explores related approaches. Sketch the overall arrangement and confirm who will prepare the structural production file before refining the individual graphics.
Step 2: Ask your manufacturer for their template and specifications.
Request the current dieline template, printable areas, accepted file format, required bleed (background artwork extending beyond the trimming edge), and color instructions for the selected package. Adobe gives at least 18 points (0.25 inch) for press bleed at a printed sheet’s edge and a typical 0.125 inch (about 3 mm) for document bleed, with both directing you to the print provider. Its advice is the important part: “Your print shop can advise you on the size of the bleed necessary for your particular job.”
Step 3: Build the brand system before the package.
Choose a logo, a small color palette, and readable heading and body fonts that work across the collection; the beer label design guide shows how related products can share a recognizable identity. Adobe Express’s Extract brand from upload (beta) can suggest colors, fonts, and logos from a JPG or PNG image. Review those results, save the approved assets, and apply your brand choices consistently as you create each packaging piece.
Step 4: Design the label to the size the manufacturer gave you.
Start with an editable layout in the Adobe Express label maker, then set up the design for the printable area your manufacturer confirmed. Replace the sample copy and imagery, check margin and bleed guides, and keep essential information clear of folds, seams, and openings. Review the lettering at the finished size and ask the manufacturer whether the smallest text and finest details will reproduce clearly on the chosen material before extending the layout to other products.
Step 5: Keep your sustainability claims accurate.
Ask whether the package can use less space or fewer components while preserving protection, following the EPA’s emphasis on preventing waste at its source. Discuss coatings, separable components, ink choices, and the evidence behind any supplier certification before settling on a description. Check local recycling arrangements and the FTC’s guidance on environmental claims before using terms such as “recyclable packaging,” because the finished construction and relevant qualifications matter.
Step 6: Mock it up before you commit.
Review a flat proof at its intended size, then compare the artwork with a manufacturer-supplied sample to see where information lands once the package is assembled. Check the front, back, sides, and opening, including any information that wraps around an edge or disappears beneath a flap. Adobe’s packaging design overview includes physical prototypes in functional testing, so use the sample to assess fit and handling as well as the visual arrangement before approving a larger run.
Step 7: Hand off the files your manufacturer asked for.
Send the approved packaging artwork in the requested format, along with product and order details, placement references, and any supporting assets the manufacturer needs. Confirm the color workflow and proofing requirements with your manufacturer, and ask whether they need a production dieline. Dielines are vector files, so a production specialist can prepare one in Illustrator. Ask the manufacturer to confirm the files are complete, and resolve any questions before you approve the proof. Finally, save the final artwork with its proof and specifications so a reorder has a dependable starting point.
Packaging design best practices
- Give every component a purpose. Keep information useful and remove unnecessary repetition.
- Check the assembled view. Make sure folds and openings leave important details visible.
- Keep product variations clear. Use consistent names, positions, and units across the range.
- Review a real sample. Check how it opens, closes, and holds the product.
- Preserve approved files. Record changes when the product, material, or manufacturer changes.
- Reuse your brand choices. Adobe Express brand kits keep logos, fonts, and colors available for your next layout.
Quick packaging design checklist
✅ Agree which packaging graphics you'll create and which structural, material, and production decisions the manufacturer will handle.
✅ Obtain the current dieline template and confirm that it matches the selected package, material, finished size, and intended use.
✅ Confirm the manufacturer’s bleed, safe-area, color, and file requirements, then resolve any conflicting instructions before completing the artwork.
✅ Save the approved logo, colors, fonts, and graphics together, and check that every packaging component uses the intended versions.
✅ Size the label to the stated printable area and check important text against the package’s seams, folds, and opening.
✅ Verify supporting evidence and necessary qualifications for environmental statements, including any claim about the finished package’s disposal options.
✅ Review the proof and required physical sample for readable information, correct placement, product fit, and the intended opening experience.
✅ Deliver the requested files with clear version names, confirm receipt, and keep the approved proof and specifications for future orders.
Good packaging brings your product information, visual identity, and chosen structure together. Start with the pieces your customer needs, decide how they should look as a set, and build the graphics around the manufacturer’s confirmed template. Check the label in context, keep environmental statements supported, and review a physical sample before committing to more units. Once the design works, save the approved artwork and production details together. That gives your next product, seasonal variation, or repeat order a familiar starting point while leaving room to update the design when the product changes.


